Control - Hartman boss strategy: How to defeat Hartman explained
The final showdown with Hartman.

After you've got the power back on in the Bright Falls AWE, the battle with Hartman will begin in the Control AWE DLC. If you want to defeat Hartman, then you'll need to use both Jessie's abilities and the Service Weapon to your advantage.
To reach the Bright Falls AWE, you'll need to have driven Hartman out of the Fra Mauro AWE and Eagle Limited AWE area. It's also a good idea to spend any spare Ability Points you have and ensure your best Personal and Weapon Mods are equipped.
For more information on Control, including the AWE DLC, visit our Control walkthrough and don't forget to ensure you know how to download and start the DLC first.
On this page:

Hartman boss battle in Control explained
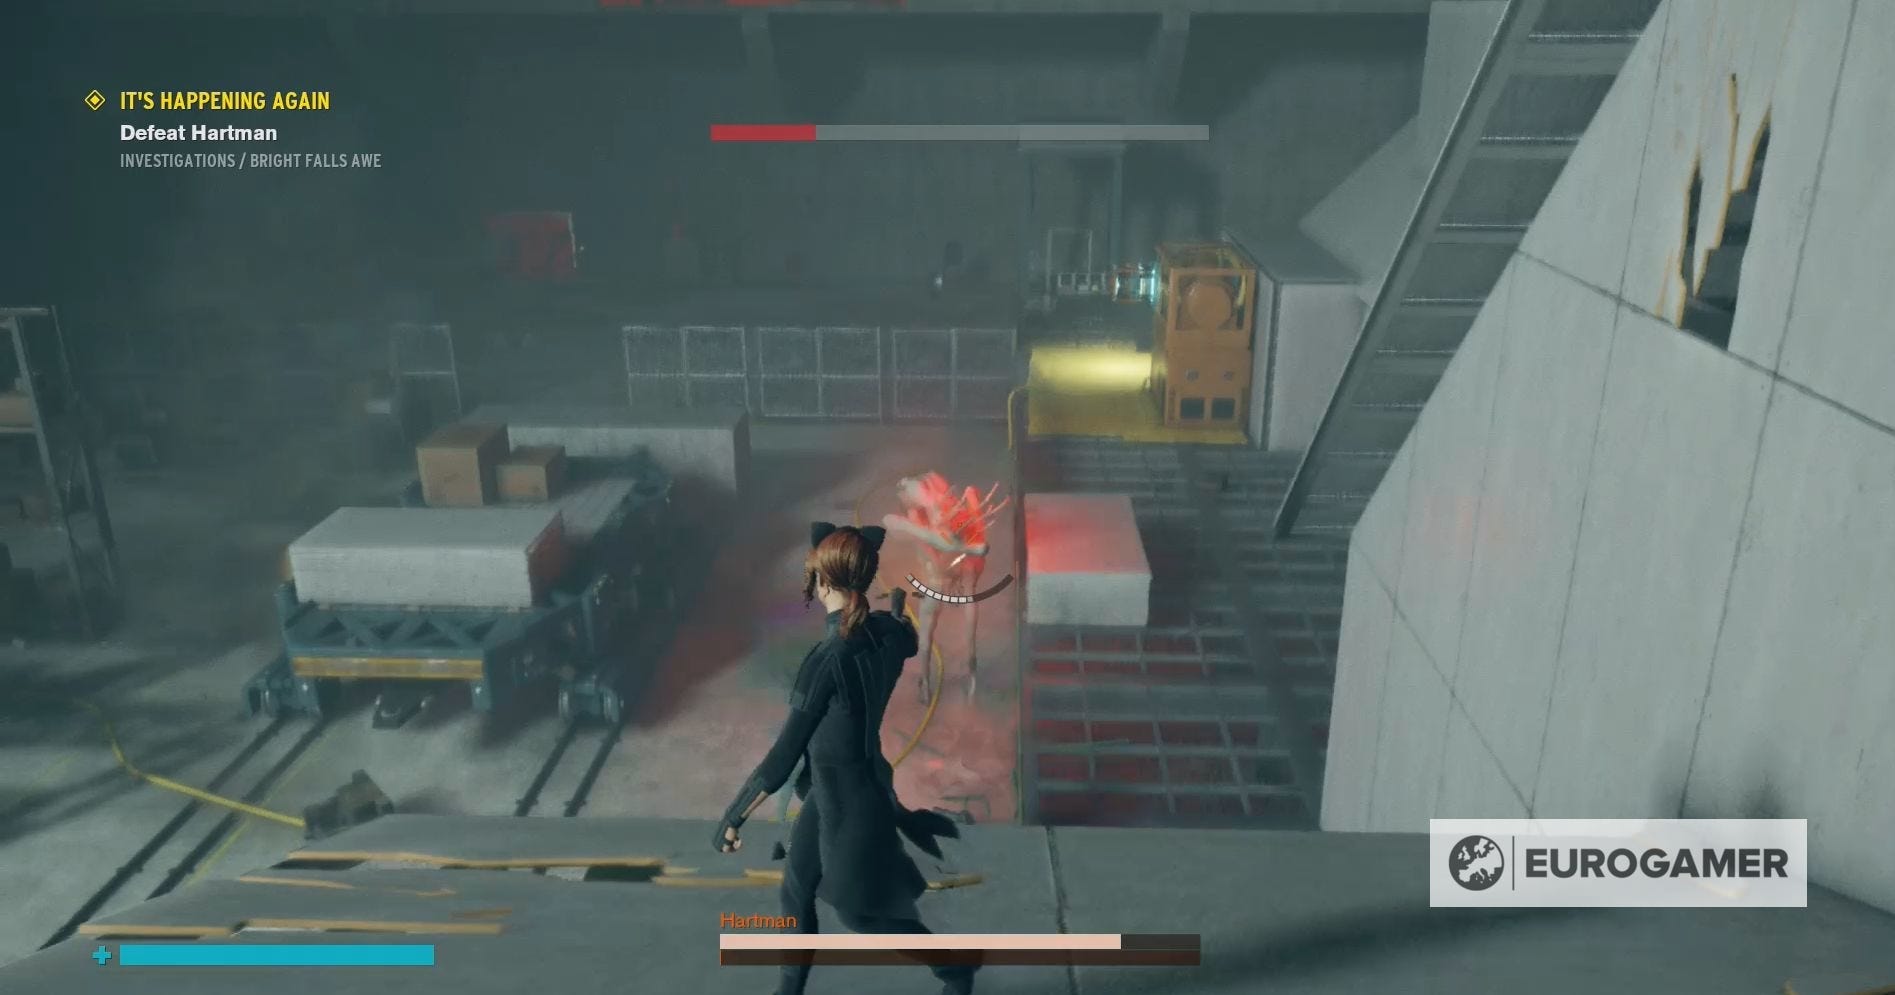
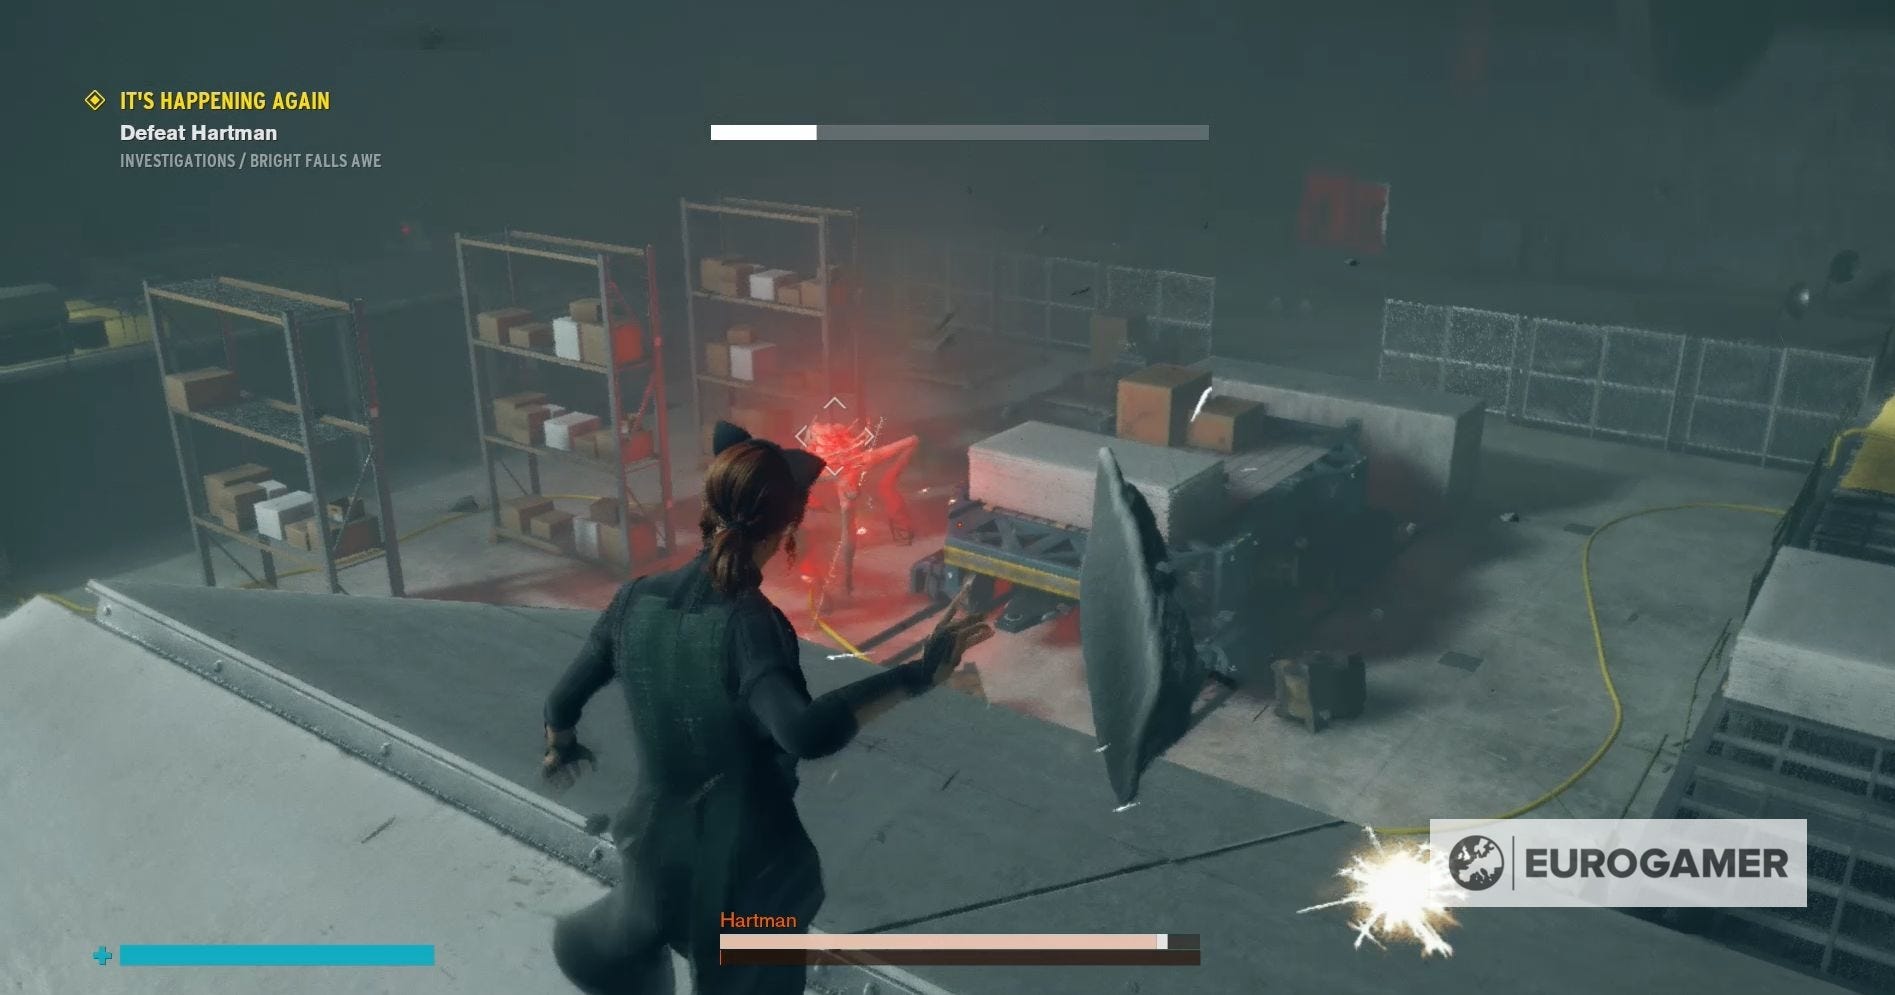
The battle against Hartman in the Control AWE DLC is divided up into three main stages.
Stage One
During this stage Hartman will only have one health bar which you need to whittle down.
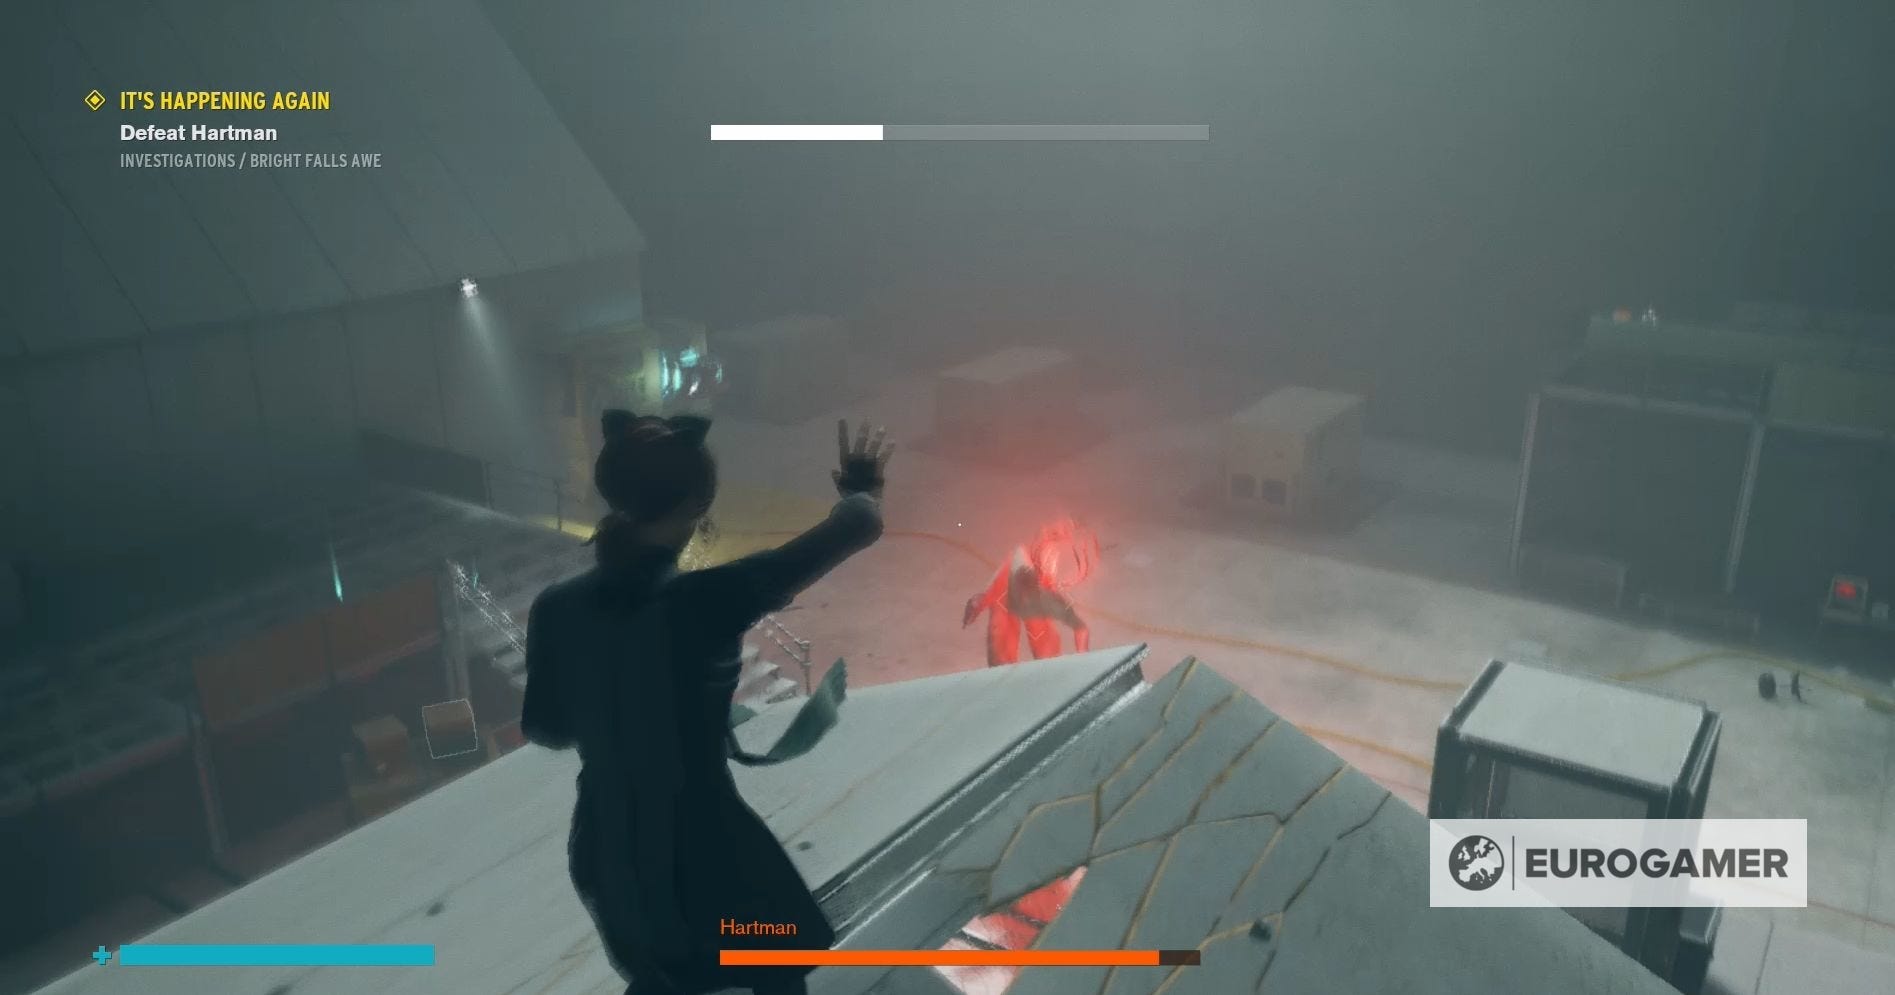
He will spend the majority of this stage either walking or teleporting about the map; waiting for you to make the mistake of coming too close, so he can steal your health. This means that not only are these attacks highly damaging to you, but they will cause Hartman to regain some of his health.
Hartman might also start healing if he is simply close to you, so always make sure that there's a good amount of distance between you and him.
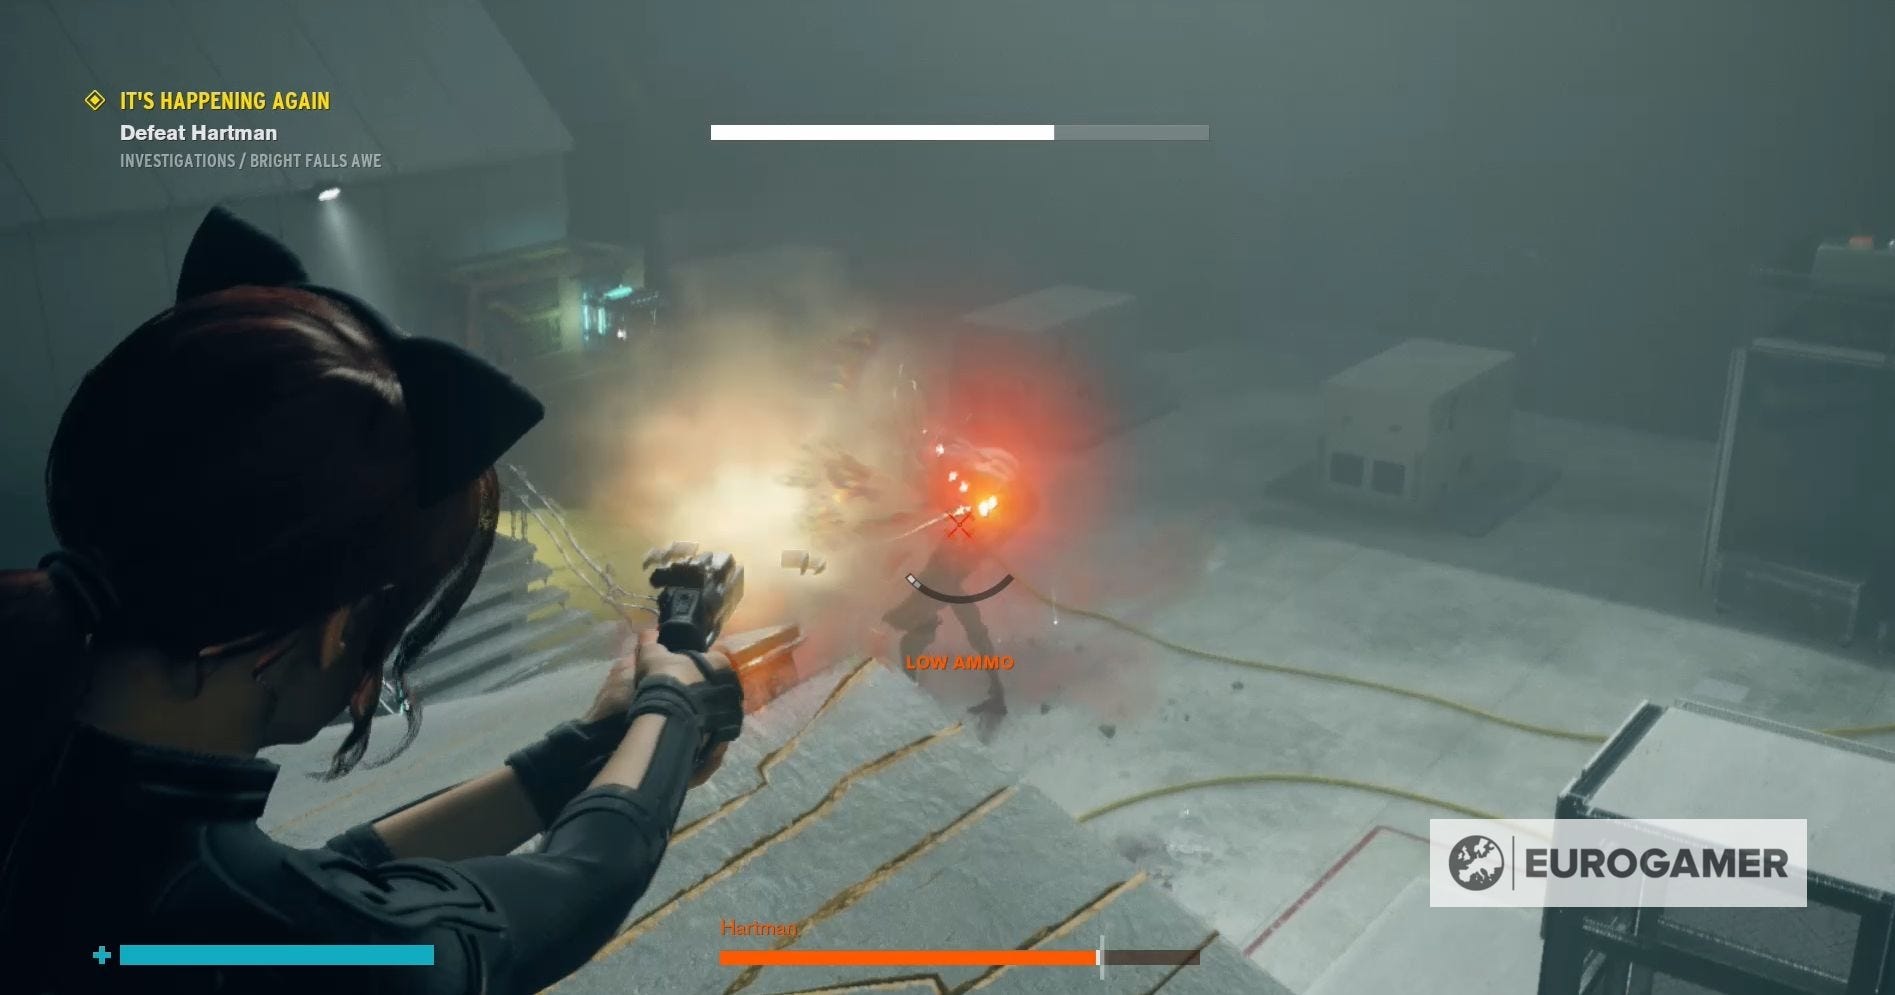
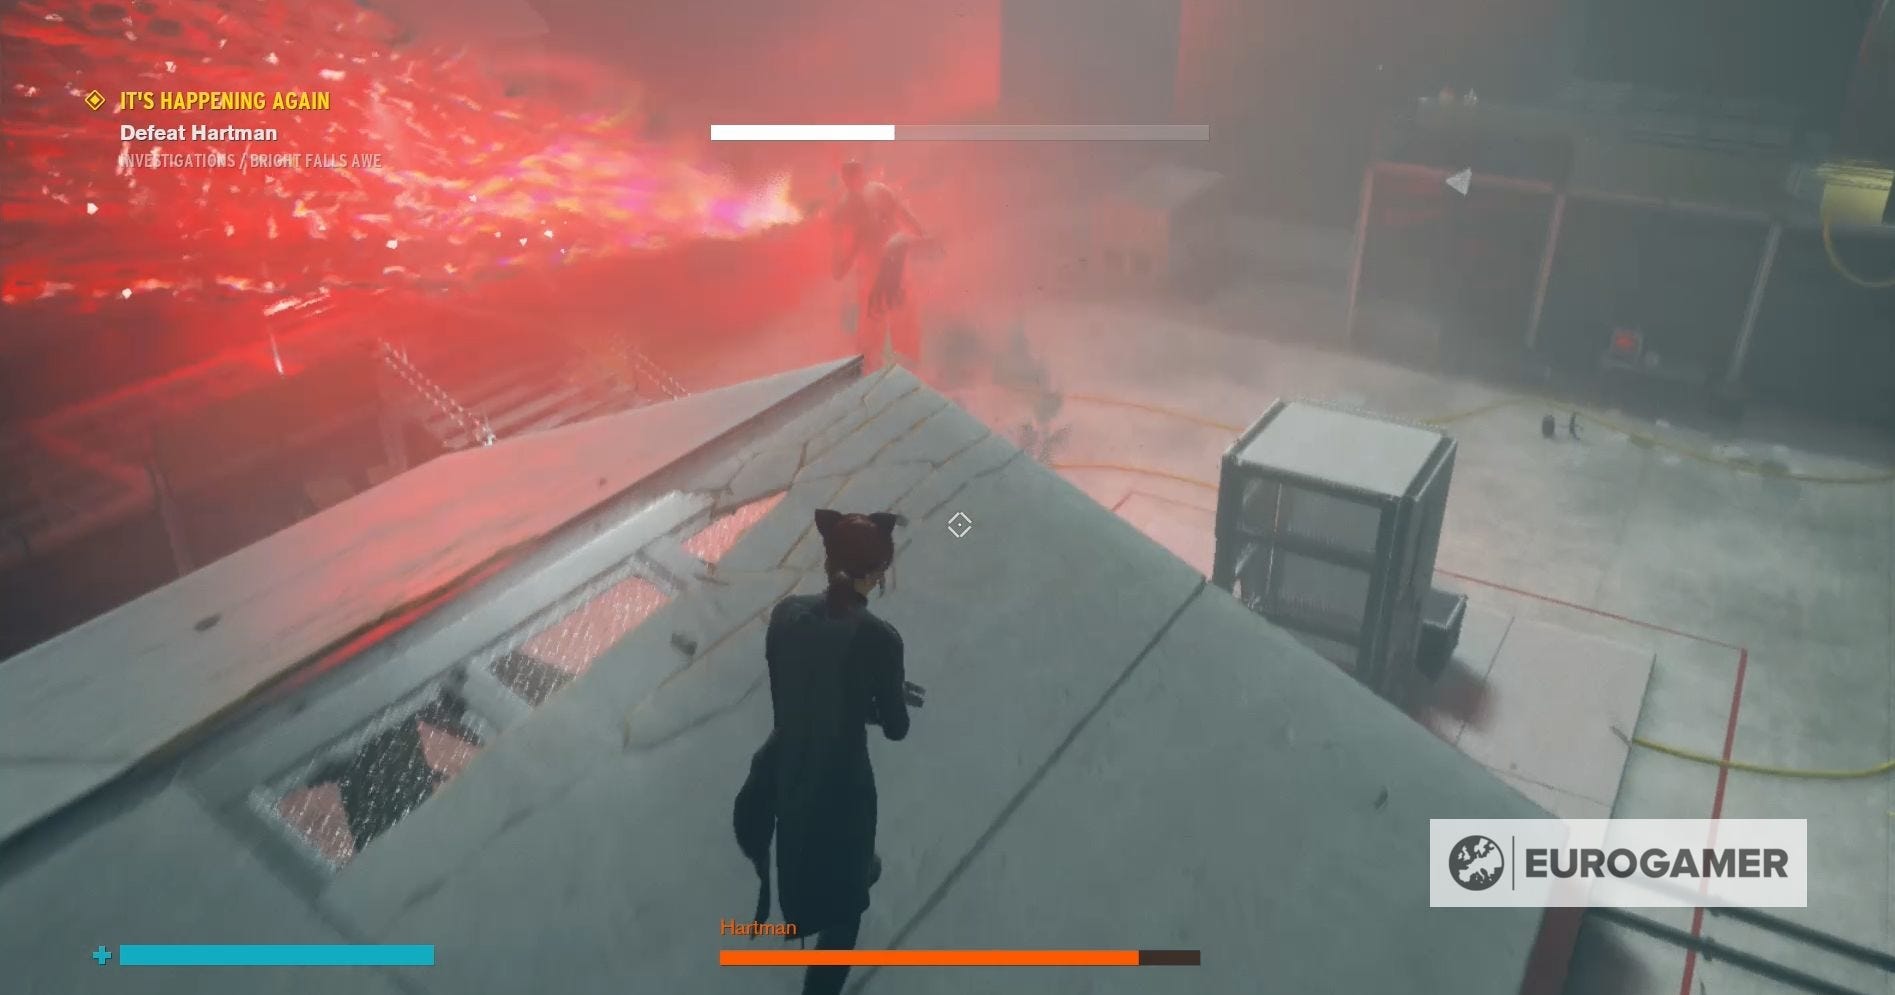
Aside from the healing sucking attack, Hartman also has a missile move, which will send one projectile towards you, and a blast attack, which has a wide radius. Dodging this blast attack is a must, due to the amount of damage it causes, and being hit by two in a row could see you easily killed.
Thankfully Hartman telegraphs both of these attacks by glowing red, which means you can easily escape to another part of the map.
Stage Two
The second stage of the Hartman boss battle begins when you successfully knock Hartman down to one last hitpoint.

When this occurs, Hartman will turn off the lights by knocking all of the Power Cores from their sockets. If you want to defeat Hartman, you'll need to, as quickly as possible, return the Power Cores to their electrical sockets.
Not every Power Core, however, will be knocked free, so take a second to figure out which ones you need to visit.
You should be able to easily see the locations of each Power Core, as they glow in the dark, but, if you're having trouble finding them, visit our guide on getting the power on in the Bright Falls AWE area.
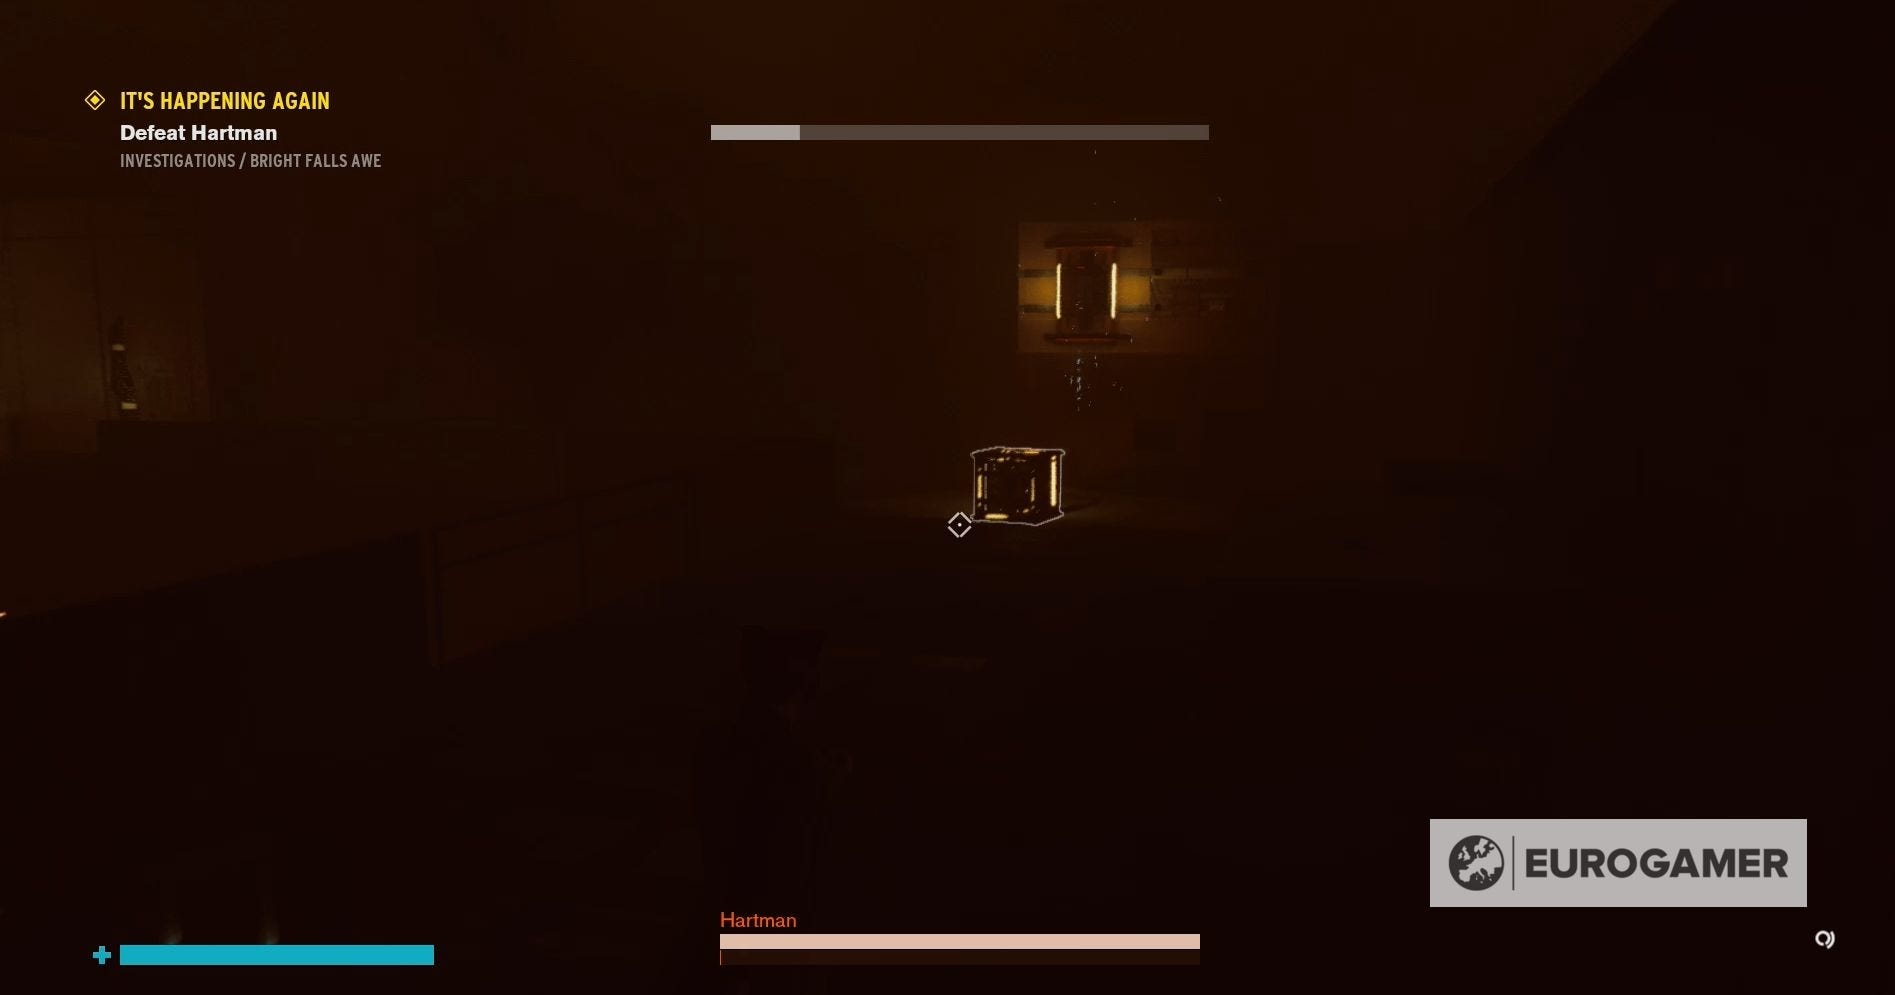
Don't waste your time attacking Hartman during this stage - not only he will gain a shield, but the darkness will allow this shield to regenerate. Instead, focus on turning the lights back on and killing the enemy Hiss that appear.
Remember - Hartman can easily attack you in the dark, so make sure he's not nearby when you leave your patch of light.
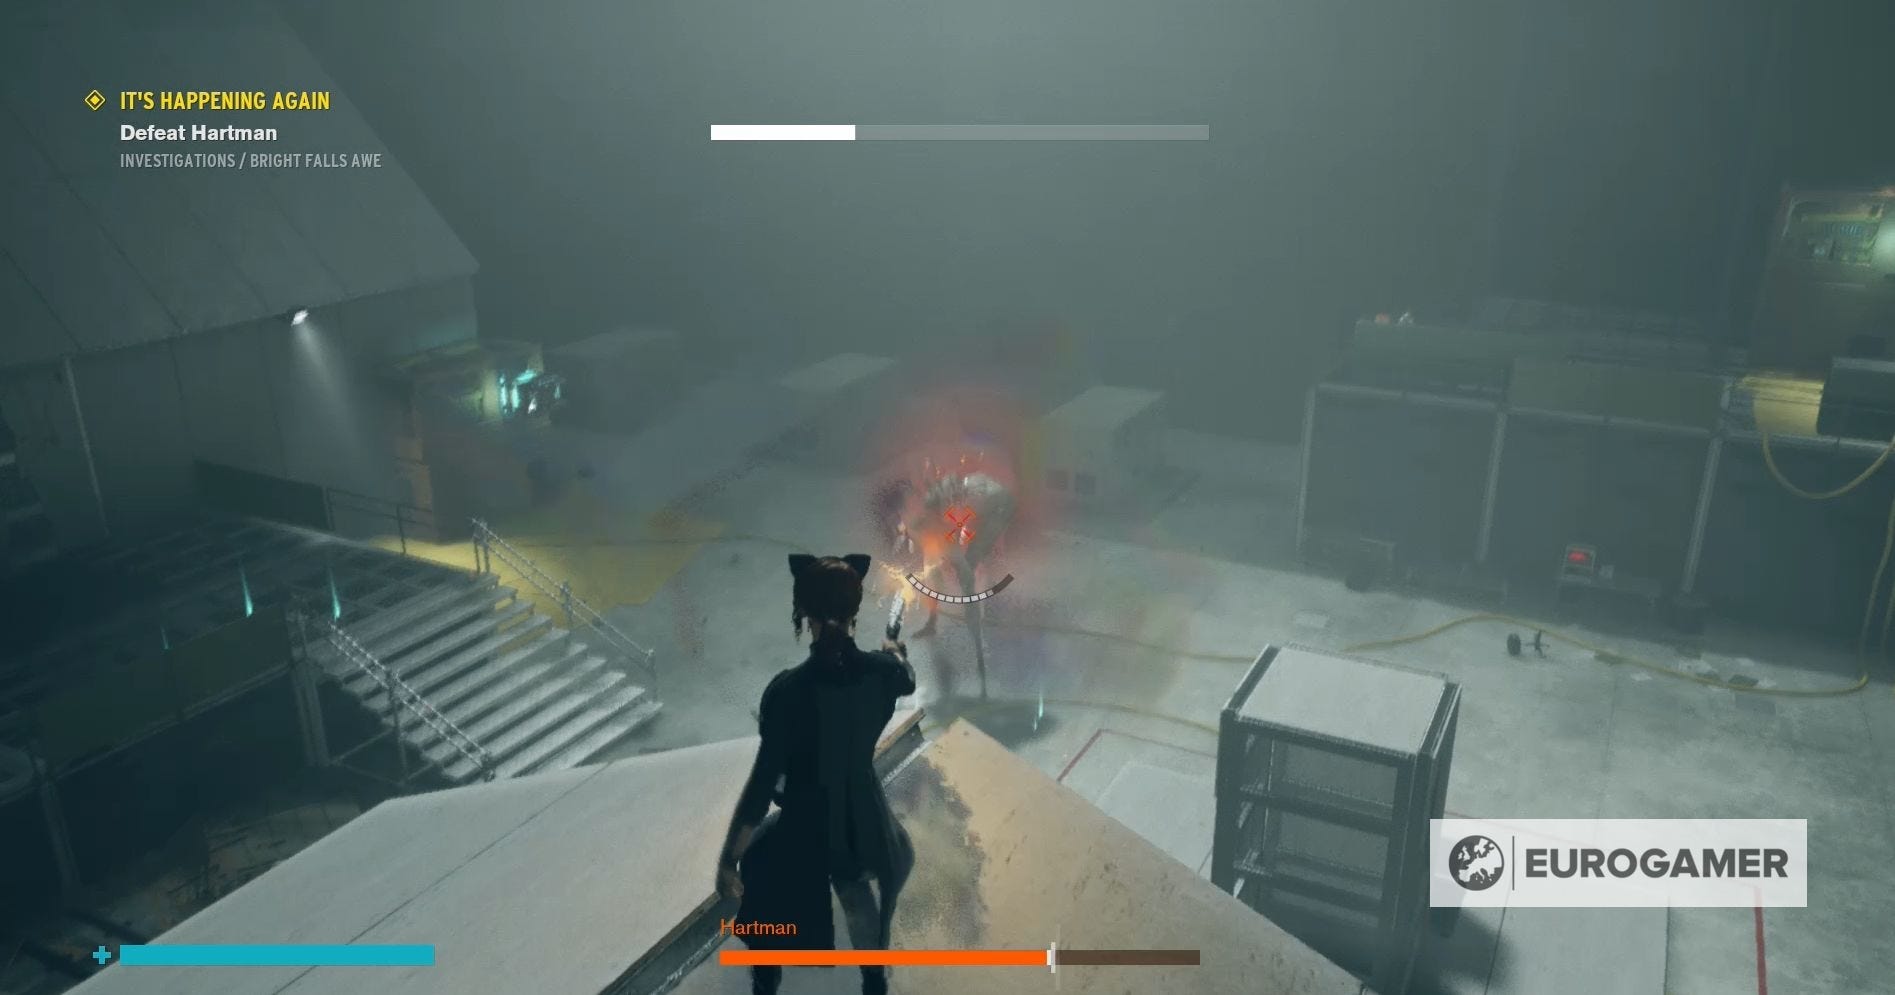
Stage Three
Stage three is basically the same as the first stage of the Hartman boss battle, except there may be some Hiss running about if you didn't kill them during stage two.
To defeat Hartman you need to whittle down his shield, so you can destroy that last remaining hit point. We did note that Hartman appears to attack more frequently during this stage, so remember to watch for his glowing red back and keep attacking.
It’s time to journey into the mysterious Federal Bureau of Control. Our Control walkthrough can help you through the storyline missions, including Welcome to the Oldest House, Unknown Caller, Directorial Override, Old Boy’s Club, Threshold, My Brother's Keeper, The Face of the Enemy, Finnish Tango, Polaris and Take Control. You can also learn new supernatural powers by completing A Merry Chase, A Good Defence and A Captive Audience. We also have guides on upgrading the Service Weapon, your Abilities, how to use Weapon and Personal Mods, how to unlock every outfit and the solution to the Roulette Wheel puzzle.
How to defeat Hartman in Control
Though it may take you a couple of attempts to defeat him, Hartman is actually one of the easier bosses in Control.
Before the battle begins, remember to summon the Deployed Ranger for some extra firepower and select your strongest Weapon and Personal Mods for Jessie. If you do find Hartman difficult, remember that you can now use the Assist Mode to increase the amount of damage you deal or even make Jessie immortal.
The trick to defeating him is to make sure you're above him at all times, so that you can easily tell when Hartman is planning to attack you. This can be done by levitating or standing on parts of the scenery - the best place we found was on the porch roof of the fake building.
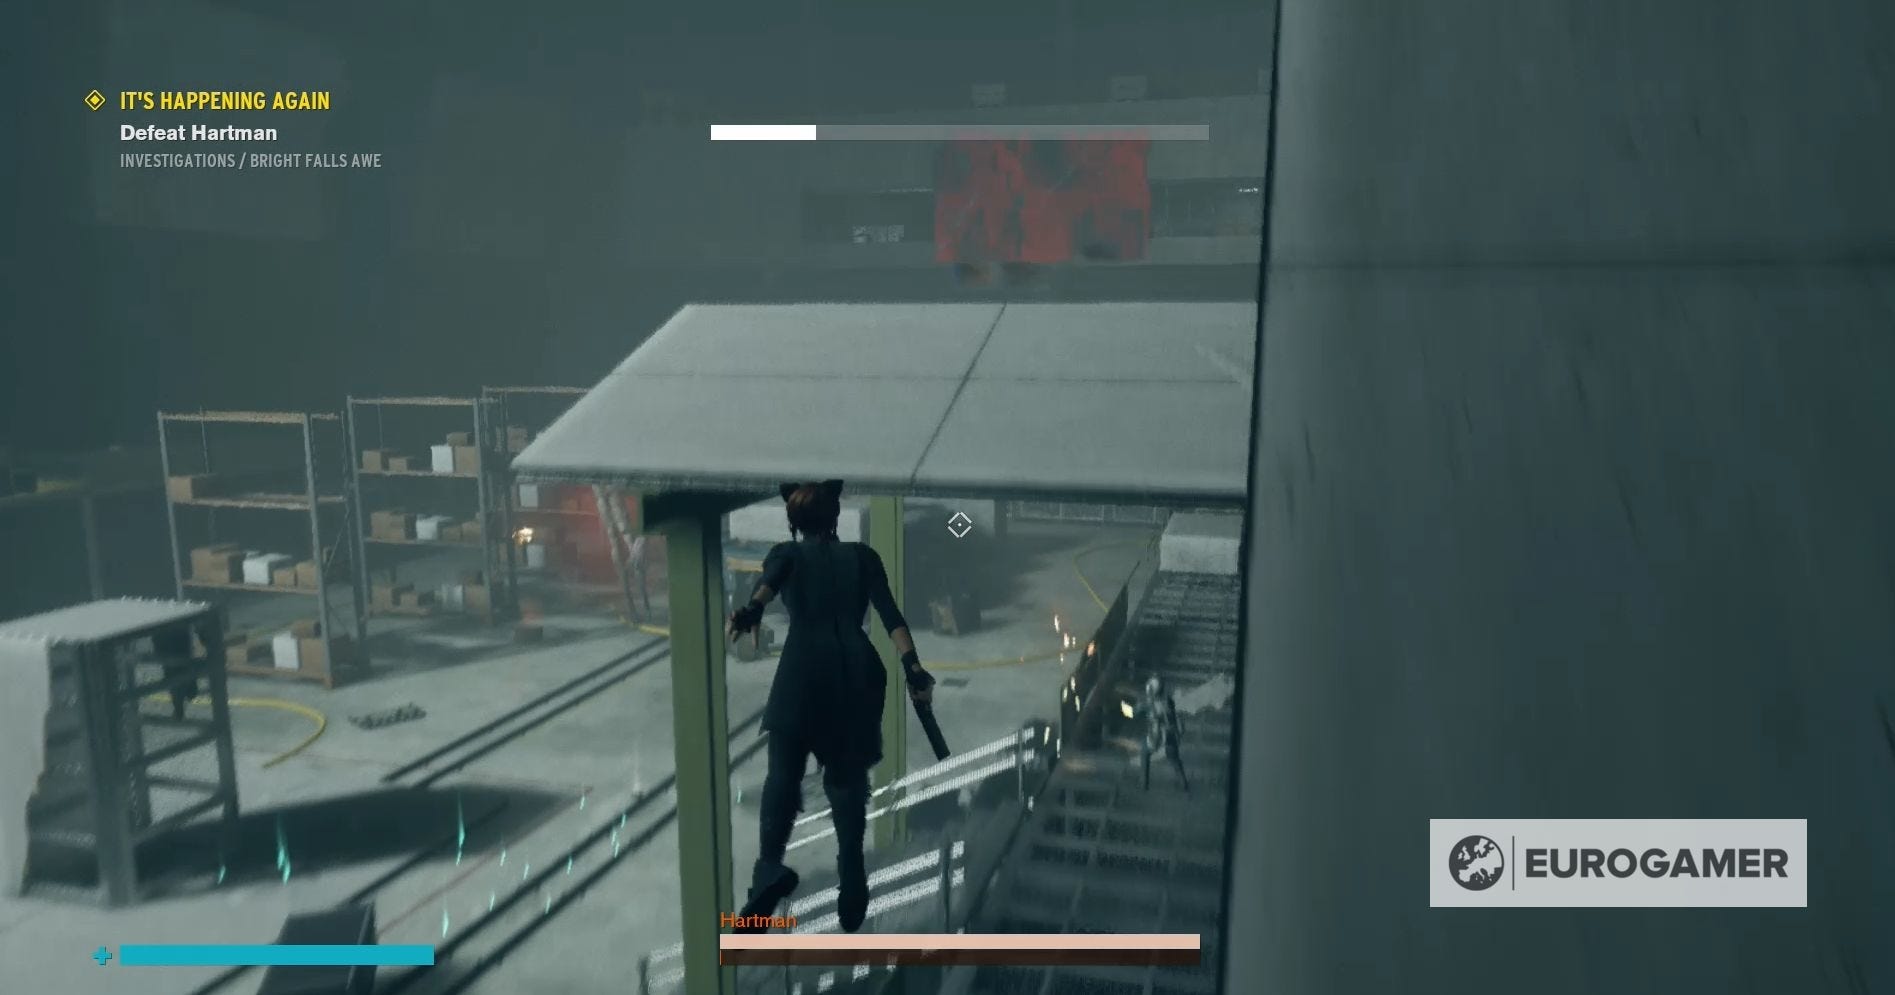
Standing atop this porch will give you the height needed to both attack and observe Hartman. When you see an oncoming attack, you can quickly levitate around the side of the building to avoid it, before returning back to your spot on the porch.
You can also use levitate to fly Jessie even higher, again making you hard to attack. This height is also useful during stage two, because you'll be able to quickly tell which Power Cores have been knocked from their sockets.
Revisiting this location should also create a pool of health points, rather than spreading them out across the area, making it easier for you to regain health if needed.
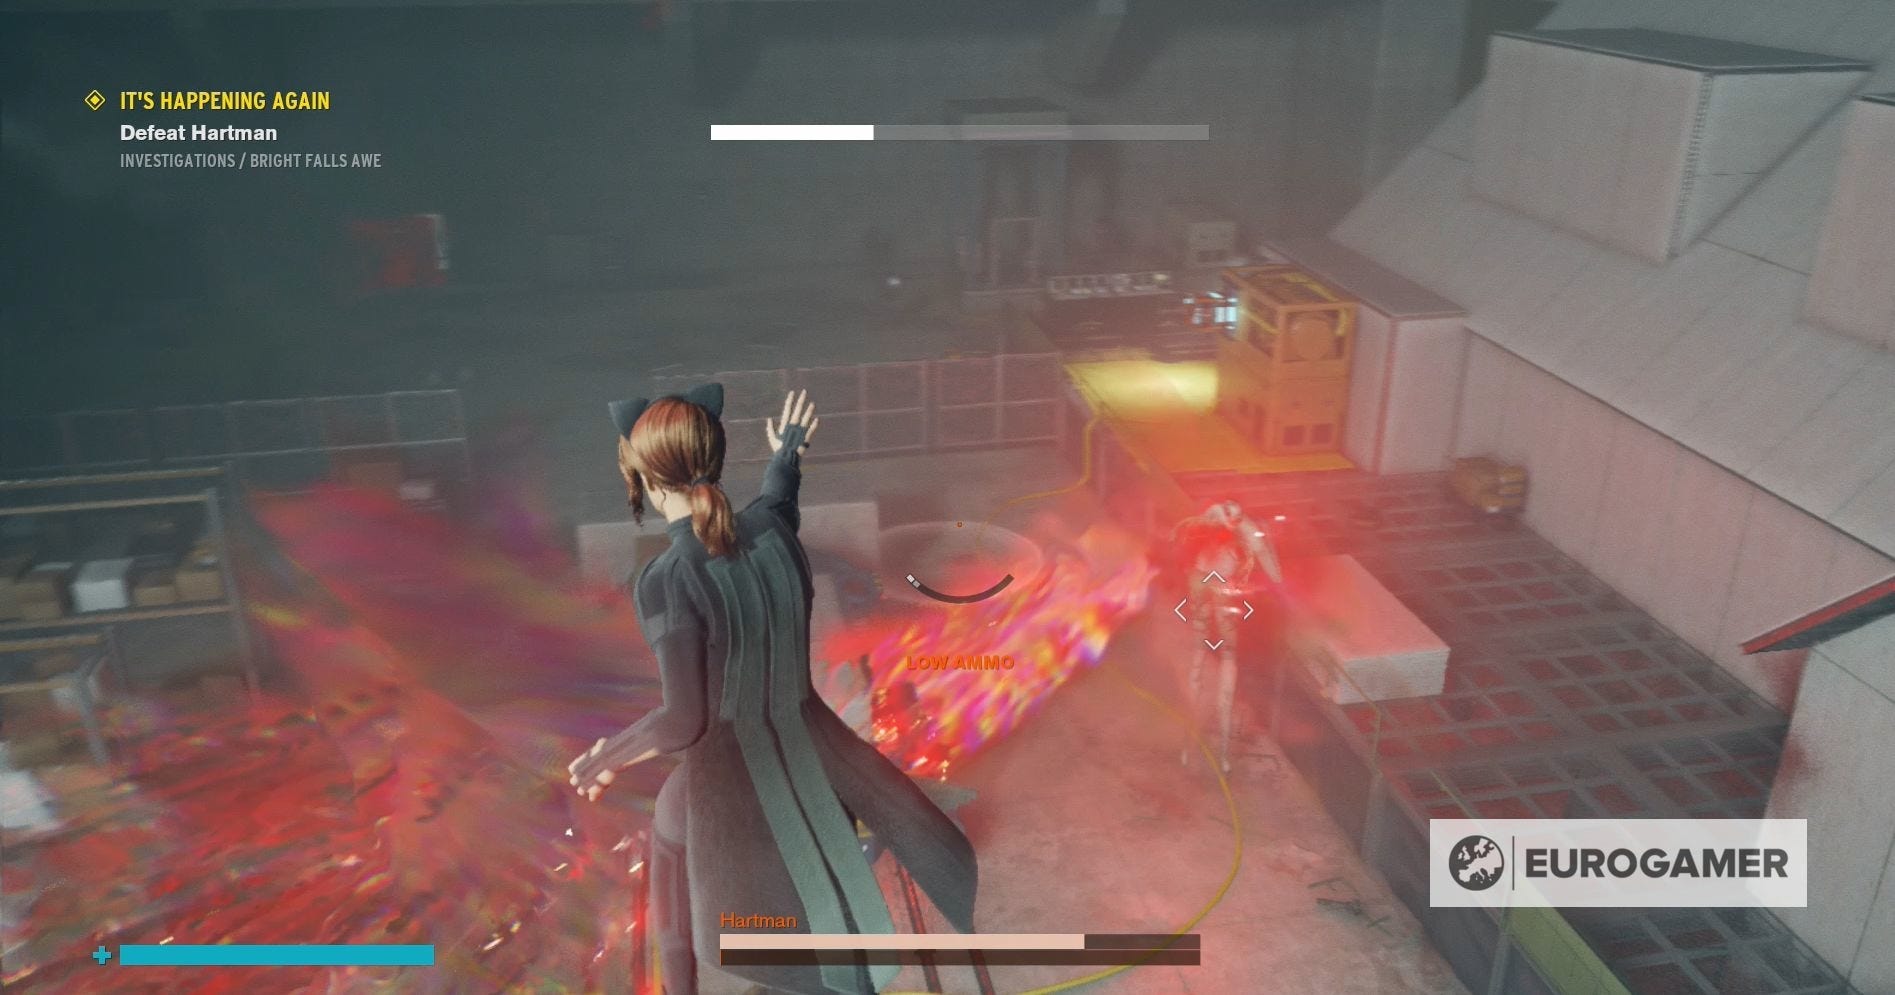
When it comes to attacking Hartman, you'll want to use a combination of launch and the Service Weapon, because you can't risk getting close to him. Always start your attacks with the Service Weapon, so you have enough energy to raise your shield if needed, and, for the same reason, make sure you don't use up all your energy when using launch.
During the second stage, you'll want to clearly reach the pool of light, so that you can safely kill the Hiss, before turning the lights back on.
Remember - you need to attack Hartman, while keeping a good amount of distance between the two of you and always make sure to take some form of cover when his back begins to cool red.
After defeating Hartman, you'll receive:
- 1 Ability Point
- 1 Material
- 1 Personal Mod
You'll also be able to find the following collectables:
- Multimedia - FBC Recordings - Dr. Hartman's Notes: Next Steps
- (On the computer bank near the southerly electrical socket in the Bright Falls AWE area.)
- Case Files - Altered World Events - Bright Falls (1976) Supplement
- (On the floor behind the computer bank where Dr Hartman's Notes: Next Steps can be found.)
- Case Files - Altered World Events - Bright Falls (1976) Summary
- (Near the light switch on the high platform in the Bright Falls AWE area.)
- Research & Records - Research - Wake Photograph
- (Found the right side of the small office area in the main part of the Bright Falls AWE.)

- Research & Records - Reports - Wake Evidence
- (Found on the left side of the small office area in the main part of the Bright Falls AWE area.)
- Research & Records - Research - Night Springs Screenplay Pg. 4
- (At the bottom of the elevator shaft in the Bright Falls AWE area.)
- Research & Records - Reports - Alice Wake Interview
- (On the floor in the top office in the Bright Falls AWE area.)
Congratulations! You've completed the AWE DLC for Control!
If you haven't found them already, there are a number of other secrets hidden away in the Investigations Sector, including three side missions and a list of trophies to earn.
If you want to continue your adventure in Control, then visit our Control walkthrough for more information, including a guide for The Foundation DLC.
Good luck exploring the Investigations Sector!