Castlevania: Lords of Shadow 2 - Next Stop: Castlevania walkthrough, kill Satan's Soldier, QTE guide, Zobok's Lieutenant
This comparatively brief chapter in Lords of Shadows 2 still requires some nimble footwork. We'll make sure you make it to the end unscathed.

This relatively brief section of the game shouldn't give you too much of a headache, but you'll have to perform some delicate acrobatics to avoid being smashed into a pulp by the scenery. Make sure you read ahead a little if you want to avoid the worst of the dangers in this next chapter of Lords of Shadow 2.
Next Stop: Castlevania walkthrough
Open up the gate in front of you, then go back through the opposite gate until you're in a shadowy section up ahead and to the left. Shapeshift into your rat form here, then go back through the first gate and head down the ramp over on the left-hand side.
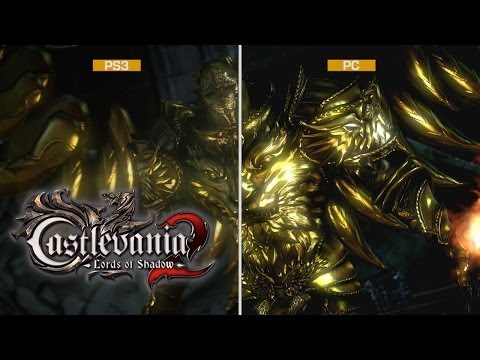
Now go into the vent and head to the left to find another patch of shadow. Switch back out to your regular form here, watch the cut-scene that plays out, and then get stuck into a brisk battle against Satan's Soldier.
Once you've defeated the enemy you'll be treated to another cut-scene. After that, use the window that's to your right and move quickly along across the rear of the train. Now get back on top of the train for another cut-scene, before you face what looks like another fight against Satan's Soldier. Ignore the fight, and instead run past him.
See that guard up ahead? Fire one of your Bat Swarms at him to cause a distraction. This'll trigger another cut-scene which leaves you clinging on for dear un-life outside the train.
Riding the train safely
"Be ready to dodge left or right when the train rushes through the sets of lights in this section."
There's a ladder to your right which you need to quickly shuffle towards. Climb up it to get on top of the train, then leap forward to the next car along. You need to get onto this new section before the train gets to the tunnel up ahead, so don't dilly-dally here. You'll have to watch yet another cut-scene next, after which you need to get to the ladder on the left, and then head down it to get on the side of the train once again. Fail to do this quickly enough and Dracula will come to a sticky end when he face-plants into the structure he's racing towards.
Once you've passed through, dart back inside the train quickly and wait until a guard approaches you. When this happens, begin walking in the opposite direction, then use Vampiric Possession as soon as you've snuck up behind him. Use him to open the door at the very end, then get ready for another fight with Satan's Soldier. As soon as the guard appears, stop fighting and run towards the train car.
Climb your way along the train's exterior, so you're heading in the direction of the front of the train. As soon as you come to a ladder, climb up it until you're at the very top. Be ready to dodge left or right when the train rushes through the sets of lights in this section. There's a dark patch within each cluster, signifying a gap, and you must dart Dracula left or right to fit in line with this gap. You can probably guess what happens if you don't...
Completing this section initiates a cut-scene, after which you need to race on ahead and start the fight against Satan's Soldier once again. You'll be presented with a QTE which you need to complete successfully in order to beat your opponent, and receive another cut-scene as a reward.
Zobek's Lieutenant puzzles
As soon as the movie's finished, make your way down to the platform and follow Zobek's Lieutenant up the wall and into the opening that's just above you. Once you've made it there, drop down into the area beneath you and interact with the lever to switch the power on, activating the door over on the right.
Go through this door, jump down to the area below you, and then clear the area of all enemies. Once you've taken out the trash, interact with the switch in the corner to switch the power back off. Get the Lieutenant to hold this switch down so that you can make your way through the doorway, and get close to the yellow cable that's glowing over on the wall ahead of you.
"Get the Lieutenant to hold this switch down so that you can make your way through the doorway."
Complete the QTE that begins so the Lieutenant can come and catch up with you. If you've got any spare Dungeon Keys on you, now's a great time to go left, then round the corner, and then down a level. You'll find one of those locked-up alcoves there which can be unlocked with your key. Grab the goodies inside.
Get back to where you were with the wires, then go back in the opposite direction and jump down to have a rumble with the monster below. After you've beaten the behemoth, the corpse will detonate with a massive shock-wave. Make sure you are standing well away from this area when the enemy indicates it's about to explode.
You're very close to the end of this section now. Look at where the bats are swarming, and climb the walls over on that side of the room. Get the Lieutenant to grab hold of your hand so you can pull him up the wall and get the gate open.
Go through that open gate and head to the right, then make your way up the column in the centre of the room until you're standing on the big metal girders. Run all the way around until you're at the Pile of Sacrifice, and interact with it to get your hands on another Kleidos.
Now make your way back up the ladder on the wall, head over to the left, then go up and over in order to access another handy Pain Box. There's a Chaos Gem inside. Once you've collected it, go back over to the edge by the girder and drop down to get another Pain Box - it holds a second Chaos Gem.
Don't forget to take a look at our Stone Golem tactics if you need some help taking the giant down.