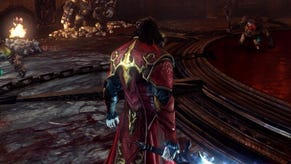
Castlevania: Lords of Shadow 2 - Three Gorgons walkthrough, Chupacabras cage guide, platform positions, Gorgon guide
Whether you're struggling to free the Chupacabras, or you just can't topple the Gorgon, our Lords of Shadow 2 walkthrough has all the answers.
The fourth section of Lords of Shadow 2 is the biggest yet, and includes a handful of enemies who are much tougher than the opponents you've faced so far. We've got a guide to surviving this tricky section of this game, as well as beating the mighty Gorgon boss who awaits you at the end of it.
The Three Gorgons walkthrough
With the boss of the last area defeated, make your way down the hallway and then head up the stairs until you trigger a cut-scene. Once that's over with, smash up all of the nearby objects, and collect another Soldier's Diary from the fallen knight just up ahead. Turn right into the room towards the end of the hallway, and then pull the level on the door towards the left of the room to get the lift working.
Now go through the door until another cut-scene begins. If you look towards your left, you should see a Pain Box. Open it up to get another Void Gem that should give Dracula a Void Magic boost. Jump up and make your way up the stairs ahead of you.
Get ready for a pretty meaty fight against a Dungeon Jailer who's got back-up courtesy of some rabbling dungeon minions. We actually recommend getting rid of this trash first, simply because you can't actually inflict a lot of damage against the Jailer to begin with. While you're dealing with them, make sure your camera remains facing the Jailer himself, because you're going to want to dart out of the way pretty sharpish when he charges at you.
As soon as he smashes into the wall, ignore the petty minions, run towards the Jailer, and get some damage in while he's stuck in place. The only other time you can deliver a decent dollop of damage against him is when he's tired. When this happens, he'll put his weapon down on the ground, so get ready to let loose all hell when he does so.
Any minions left running around will die alongside the Jailer, and you'll then get your hands on a very special item: the Dungeon Key. Once you've looted it, make your way over to the mechanical device and examine it. Interact with it once more to get the machine in motion, and then complete the QTE associated with the contraption.
Over on the other side of the room is a red glowing object on the floor. If you interact with it, the nearby door will open - head on through and check to the right to find a soldier on the floor. Interacting with the body will grant you another Soldier's Diary. Once you've collected it, do a 180, then head to the left to pass through the other door.
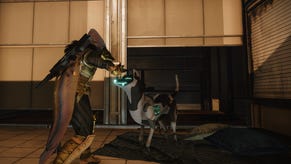
Keep heading along the path to the right. If you fancy stocking up on Void Power, you can make a detour here. Cross the beam that's just to the left of the big pillar, then leap over to the other side. Make your way up the rocks, and then call down the wolf from within the yellow circle. If you then climb the beam just ahead of you, you should be able to make your way towards the wolf. Follow it.
When you get back to where you started off, keep to the right of the beam you just crossed and jump over to the other platform. You should be able to see a bit of metal sticking out from the platform edge. You need to make your way onto it, and then prepare to do some leaping between the chains. Just be aware that these chains start moving downwards as soon as Dracula grabs hold of them.
Use the first chain to make it to the highest rivet of the left-hand pillar, jumping back down to lower rivets if the chain's moving too quickly for you to keep up. Now head to the left and leap over to the next chain in line. Get off it when you can see the left-hand lower pillar, then keep heading to the left until you reach a rocky platform. Keep moving over the platform until you reach another bit of metal that sticks out towards the lava-shooting pipes.
"If you're struggling to stay on top of this platforming challenge, simply wait until three lava shots have been fired in a row, then move to the nearest pipe."
We probably don't need to tell you at this point that you need to make your way over these pipes rather carefully, and without getting burned to a crisp, so watch your timing. If you're struggling to stay on top of this platforming challenge, simply wait until three lava shots have been fired in a row, then move to the nearest pipe. Keep jumping your way forward until you reach the rocky platform up ahead - you'll trigger a cut-scene when you're done.
Now head all the way down the corridor. You should be able to see a Pain Box with a Void Gem in it, just over to the left. Jump to the ledge, then drop down and get ready to fight off a pack of minions. Some of these annoying characters adopt a defensive position which blocks your attacks - just switch over to a different target temporarily when this happens. You'll also find your Sustained Whip makes for a meaty attack against these defensive creatures.
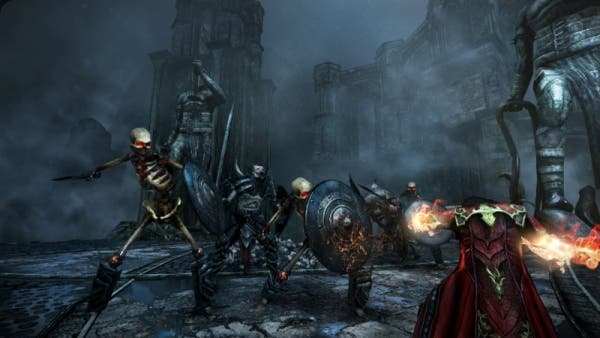
Once you've dealt with the pack of enemies, climb your way up the wall ahead and keep walking down the hallway. You'll find another body here with a Soldier's Diary entry on it. Now interact with the device nearby to extend the platform forward three times. Once it's all locked into position, cross over to the next platform to start a cut-scene.
How to free the Chupacabras
Your job now is to free the Chupacabras. First, go downstairs and find the device near the bottom. You'll once again have to extend a platform three times to lock it in position. Now go across to the next junction and interact with the device again. The platforms need to move once to the left, then forward once, before you cross to the next junction point.
To your right, you should be able to see another device. Interact with it to bring down the cage containing the Chupacabras. Now make your way across the platforms and interact with the device to move them forward once, then once to the right, then forward again. Make your way across the platforms, then interact with the device to move the platforms once to the left, then back twice. Grab the Pain Box over at the junction to get your hands on yet another Void Gem.
Go back to the device and make the platform extend left three times until it's underneath the cage. Now move the platform forward two times, then once to the right. There's one more fiddly bit of platforming to do, then you're done. Run over and use the device to move the cage once to the left, then back once to free the Chupacabras. Thank. God.
"You need to keep moving as this path comes to life, otherwise it'll vanish before you can make it all the way over."
The door that was sealed earlier should now be open, so make your way through it and then offer blood at the end of the platform. You need to keep moving as this path comes to life, otherwise it'll vanish before you can make it all the way across. If you head up the stairs to the left you'll be treated to a cut-scene, but be ready to take part in a QTE to avoid being attacked by a Harpy.
After you've defeated the handful of Harpies who appear, make your way through the opening to the left of your position, as you stand on the bridge. Leap towards the next pillar, then keep climbing until you reach the top of the next platform just ahead. If you head towards the mechanism that's just over to the left, you'll trigger a fight with two Jailers.
There's one new trick you need to be aware of after your fight against the first Jailer. These two new enemies will actually use the fire all around to set fire to their weapons, adding a spicy kick to combat. They don't stay lit for the entirety of the fight, but you must take extra care not to be attacked while they're engulfed in flames.
Watch out for their whipping circular attacks too, as well as the streaks of fire that come racing towards you. It won't come as a surprise to learn that we recommend using your Sustained Whip to dole out all of your damage from a distance.
Once you've killed these two enemies, you'll be able to collect a pair of Dungeon Keys. Go and access the device in the corner of the room to open up the gate. Make your way upstairs, then interact with the altar to open up new stairways around the edge of the room. If you follow the stairs down, you can get your hands on another Soldier's Diary entry.
Jump down the little opening that's to the left of the knight's body, and use your Dungeon Key on the alcove here. A new altar will appear, and offering Dracula's blood to it will grant you a 2,000 experience reward. Once you're done, go back to where you started, then make your way down the hallway to trigger the cut-scene that precedes the fight with the dreaded Gorgon.
How to kill the Gorgon
"The trick to defeating the Gorgon is to concentrate your attacks on one head at a time, and use your Guillotine and Aerial Whip attacks "
The trick to defeating the Gorgon is to concentrate your attacks on one head at a time, and use your Guillotine and Aerial Whip attacks until the creature slams its hand to the left or right of the area you're in. When this happens, dash as quickly as you can towards the tentacles in order to avoid the rushing hand attack that's on its way.
You also need to watch out for a rapid slam attack, not to mention the creature's fire-spitting ability. Stay airborne as much as possible to avoid the worst of these attacks, but don't be afraid to quickly dodge out of the way either.
After you've dealt a certain amount of damage, you'll trigger a QTE. If you're successful, quickly switch over to your Void Sword and plant a Void Projection against the vulnerable spot on the top of the Gorgon's hand. As soon as you do this, the Gorgon will gain armour on the wrist of its now-frozen hand. Immediately change over to your Chaos Claws, smash your way through the armour you've created, then climb up the arm towards her face. Keep an eye out for the claw attacks as you make your way up, then use a QTE to destroy another head.
You may find yourself running out of Void Magic during the fight. If this happens, thrash away at some of the tentacles so you can top yourself up with the bloody orbs that drop from each tentacle. Watch out for the fire the Gorgon spits out though - a quick, well-timed dodge should be enough to save you from danger.
You'll have to repeat this combat process until a head has been destroyed. Once that happens, keep following the same tactics, but watch out for any green circles moving along the ground. When a circle locks into position, you must ensure you're well away from it.
After the second head has been destroyed, you'll have to contend with yet another special attack - a flame assault that spreads across half the area you're fighting in. The Gorgon will stand up and shoot fire into the air to signify the imminent arrival of this deadly attack. Watch out for racing lines of fire too, and dodge any that come near you. Eventually, you'll trigger another QTE which results in the very welcome and overdue destruction of the beast.
When you're done, pick up the Primordial Chaos Gem, activate your Chaos Claws, then use a Chaos Bomb on the orb above you. Make your way all the way up the Gorgon's arm to get to the hallway above you. Head all the way down this passage - ignoring the small hallway to the left which you can't access yet - then turn into the left-hand opening. If you look to the left, you'll be able to open up another Pain Box and loot the Chaos Gem inside.
Now make your way back into the main hallway and top up your Chaos and Void magic. Once you're at the end of the hallway, climb up the left-hand side to get up top. Go through the doorway, then head downstairs before interacting with the gold statue in the centre. You'll be taken down to a lower level. Walk down this path and you'll eventually find yourself engaging the Jailer and friends once more.
You don't have to worry too much about their defensive stance this time around - just switch out to your Chaos Claws when you need to shred away at their armour, then change back to Shadow Whip to carry on giving them a good thrashing. Do keep an eye out for the lines of fire that appear during the fight though - you can dodge them easily enough, but they can soon fill up the area.
Once they're all dead, make sure you grab the Dungeon Key from the Jailer, then use it on the altar to open up the door on the left. Offer Dracula's blood once again to create a pathway up ahead, and get moving along it before it's fully extended - otherwise you'll take a tumble into the lethal lava below.
"You'll find yourself backtracking a good deal less if you have a couple of [Dungeon Keys] in your back pocket."
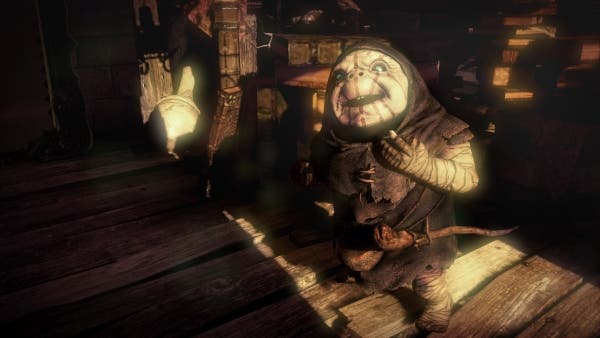
When you reach the next room, you'll trigger a new cut-scene. Now take the lift into Chupacabras' Shop and purchase any items you fancy. You certainly can't go wrong by stocking up on some of the rarer items like Dungeon Keys, and you'll find yourself backtracking a good deal less if you have a couple of these in your back pocket. You'll be granted the Talisman of Dragon relic when you leave too, which rather handily allows you to transform Dracula into a powerful dragon.
Use the lever in the lift, then keep heading towards the right to get hold of a Soldier's Diary entry. Now go to the other side of the lift to find a Pile of Sacrifice. If you interact with it, you'll be granted a Kleidos relic which will allow you to use the mirror back in the shop (although note that you can't actually participate in the Kleidos' challenges at this stage).
If you look to your right now, you should see a yellow wolf-summoning circle, but before you activate it, go up the stairs that are just to the right and enter the uppermost room. This Map Room grants Dracula the ability to travel instantly between locations. While you don't really need to use it right now, you should certainly activate it so you can make use of it later on. Go back downstairs and summon the wolf to end this lengthy section of the game.
If you need help killing Carmilla, or any other boss in Lords of Shadow 2, head back to the first page of our guide.


