Castlevania: Lords of Shadow 2 - Awakening walkthrough, Stone Golem guide, possessing guards
We've got a must-read walkthrough for the Awakening section of Lords of Shadow 2, including tactics for the tricky Stone Golem fight.

Once you've polished off the opening prologue of Lords of Shadow 2, you'll be given something a little meatier to sink your teeth into. From possessing enemies to taking on the might of the tyrannical Stone Golem, we'll help you breeze through the second chapter of the game, and pick up all the collectibles available along the way.
Awakening walkthrough
After you've finished watching the long cinematic, head forward until you've passed through the gate, then keep following the child. After stumbling into a fight against a rather grim-looking creature, just keep blocking until you've triggered another cut-scene. Now you'll have to slowly shuffle your way towards the family, and pick them off one by one.
Once that's done, you'll get your powers back and be ready to go out on the prowl. First thing first, smash up all of the objects in the vicinity of you and the green van in order to get hold of the artwork. Now head up the left-hand ramp and obliterate all of the green containers you can see. Get up close and examine the Memorial to get the City Memorial: Chronicles of the Ancient Light.
Now make your way round the corner and open the garage door by getting up close and interacting with it. Move up the ramp quickly and make use of the Shadow Daggers to gain access to the next door. Follow the on-screen prompts to take on the form of a rat, and then slip between the guard's legs and get in the safety of the shadows. Pop back into human form when you're suitably obscured from view.
Sneak your way into position behind the guard, and then interact with him to take possession of his body. Now quickly activate the panel and exit through the door that opens - you must do this quickly, as the body you've possessed won't stay alive for long. Move forward into the next room, and then activate the lever you find here to open up the path ahead.
A little distraction work is called for here, so fling your bat swarm in the general direction of the first guard to have him go wandering off to inspect the disturbance. Now make your way up the ladder and sling your way over the rails to get into the next room. Keep following the path ahead, climbing up ladders, and then heading upstairs until you trigger a new cut-scene. Don't worry too much about the area that's highlighted after this - you're not ready to access this part of the environment just yet.
At this stage you'll have to start tracking the young boy again, but first make sure you interact with the dead soldier to your right so that you pick up the Soldier's Diary. Smash up all of the objects you can in this room as well. If you need to top up your health at this point, make your way down the hall, bear right, and examine the statue for a pick-me-up.
Keep travelling up the stairs, and then make a diversion over towards the Pain Box to pick up a Lfie Gem. If you keep moving on forward and get over the broken stairway, you'll be able to find another Life Gem. You should now get back down a level, head a little way further up the stairs, and then get on the wooden scaffold that's above you. Move a little bit further on and you should trigger another cut-scene.
Now make your way back into the corridor, smashing up everything you can to get your hands on any collectible items. If you head back along the path in the other direction, you should eventually come across a lever. Interact with it, then use your Shadow Daggers to clear the icky blood that's clogging up the machinery. Go through the door you've just opened, leap down to the floor below, and then run towards the Pain Box to get hold of yet another gem.
Head up the stairs and leap over to the left-hand column so that you can make your way up onto the balcony. Now jump to get up on the first chandelier, wiggle to get the thing moving, and make a leap when you're within close range of the next chandelier along. Keep doing this until you've reached the platform at the first right.
If you leap from here to the next platform, you'll be able to get your hands on another Life Gem. Once you've grabbed it, swing your way back to the central chandelier, and then make your way to the remaining platform. Run all around the balcony to your left until you're out on a wooden beam, then leap over to the new structure in front of you.
Bear right, then keep moving on up until you come across some crumpled stairs. If you interact with the corpse of the soldier here, you'll be able to get your hands on another page of the Soldier's Diary. Don't worry too much about that area you can see ahead - you don't yet have the powers needed to pick up the items over there.
Make your way back up the stairs and then travel down the corridor ahead of you until a cut-scene begins. Immediately afterwards, you'll need to dart from platform to platform at lightning speed to stay one step ahead of the crumbling masonry. If you're really struggling to nail this section, here are the movements you'll need to make, in order:
- Jump left
- Forward
- Climb
- Jump right
- Wait until column drops a little
- Jump left
- Jump left
- Jump right
- Forward
- Climb
Right after you've negotiated this platforming section, you'll be thrown straight into a boss fight, so be ready for a brisk battle!
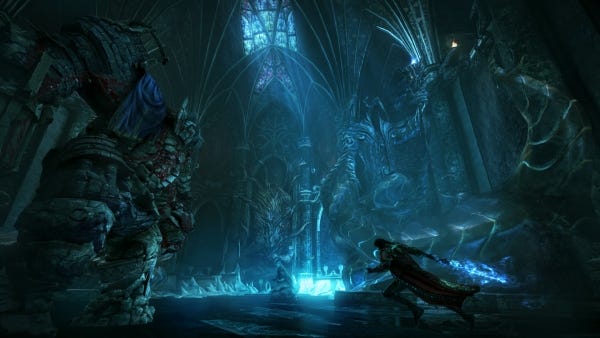
How to kill the Stone Golem
There are a handful of phases to deal with during the fight against the Stone Golem, so we'll take you through them one by one.
"Watch out for when the Stone Golem starts smashing up the ground, as this attack initiates a deadly wave of blood."
In the first phase, it's imperative that you fight dirty and attack only the lower half of the creature. Apart from that, smash up all of the nearby statues to give yourself a little more evasion space when it comes to handling the enemy's own attacks. You should also stay as far away as possible from the Golem, but close enough that you can use your whip. If you must top up your health, switch over to the Void Sword quickly and dart in for a few melee attacks.
Watch out for when the Stone Golem starts smashing up the ground, as this attack initiates a deadly wave of blood. It'll go rushing straight back towards him as well, so be ready to leap into the air a second time to avoid its crashing rebound.
You'll know it's time to initiate the second phase of the fight when the Stone Golem starts glowing yellow. Run towards it as quickly as possible to start a new cut-scene, then focus your attacks on the upper part of the enemy. Again, using your whip at maximum range is advisable here, and keep watching out for that nasty rush of blood.
There's a new attack to watch out for in this second phase too. Periodically, you'll notice a red circle starts to glow on the Golem's arm. When this happens, you'll have to dodge a furious whip attack several times, so don't get caught out by it.
Another slam attack occurs soon, one which sends a torrent of blood homing in at you. Wait until it's got pretty close - but not too close - and then leap into the air and dodge left or right to avoid the impact. You'll also have to deal with a laser-like attack, but this blue beam that comes from your opponent's eyes is pretty easy to dodge with one canny leap. Just make sure you don't tread in the icy patch it temporarily creates on the ground.
Throw enough of your own damage about and the Golem will eventually glow yellow once again. Rush forward into melee range to trigger the cut-scene, and enjoy the sight of Dracula himself plunging the Void Sword into the creature's body. Just be aware that you'll have to complete a QTE for this killing blow. If for some reason you fumble your timing here, the boss will get a bit more health back and you'll have to beat him down into submission again.
You can find the rest of our Lords of Shadow 2 guide content from the first page of this article.