Castlevania: Lords of Shadow 2 - Find The Second Acolyte walkthrough, use Demonic Wings, kill the Riders of the Storm
We'll show you how to make it through the laser beam section in the next chapter of Lords of Shadow 2, and finish the Riders of the Storm fight.

Hopefully you've got some practise in with Dracula's Demonic Wings skill by now, as you'll need it to carefully make your way through a tricky laser beam section in the next chapter. We'll show you how to make it through safely, and give you some essential tips for tackling the Riders of the Storm fight.
Find The Second Acolyte walkthrough
Once the boss battle's over, make your way across the plaza and use your newfangled Demonic Wings skill to fly up through the gap and all the way over to the other side of the wall in front of you. Now make your way over to the far left-hand section of this new area to get a Life Gem from the Pain Box. Now make use of the hatch that's nearby.
Make your way down this corridor, then go through the door on your right as soon as you come to the first room along. Go down the new corridor, then activate your Mist Power ability to slip into the room above you.
Distract one of the guards with your Bat Swarm ability, then immediately run to the opposite side of the room as soon as his friend turns up to help. When you're about halfway there, use your Mist Power to make absolutely sure you aren't spotted.
Use your Mist Power ability again to get through the grate that's to your left. Interact with the Memorial in this new room, then shift into rat form using the patch of darkness close to where you fell. Go through the little tunnel to hoover up all of the bonus experience points, then change back into your regular form as soon as you come to the next room. If you've got a spare Dungeon Key about you, you can use it in the corner of this room to get another 2,000 experience points.
Once you've gathered everything up, go back towards the first room and then use your Mist Power to float back up to the room above you. Make your way towards the corner on your right. Hide behind the divider here, but stay near to the end of the room where the guard is covering a gate.
"The challenge here is to make use of your Demonic Wings to move Dracula over all of these beams."
You need to make very careful use of your Mist Power at this point. If you head off too early, it'll run out before you reach the gate. Use it too late and you'll be spotted by the guard. Wait until the nearest guard is just about to head away, then fire off a Bat Swarm to distract the guard standing by the gate. Run like blazes towards the stairs, then turn on your Mist Power to float both through the guard, and the gate he's standing in front of.
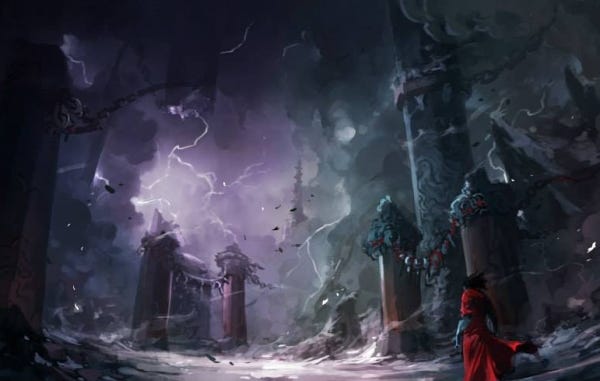
The next area you have to deal with is packed full of laser beams. One set runs from the left to the right, while another set flows from the rear of the room towards your starting position. The challenge here is to make use of your Demonic Wings to move Dracula over all of these beams. If you touch any of them along the way, you'll lose some health and be sent back to the beginning.
Don't stay standing on any given tile for too long either, as that will have exactly the same effect. When you're standing on one of them, a circle will begin forming, and when it's complete it'll trigger the alarm and plonk you right back at the start. As soon as you get to the target tile to the rear of the room and on the left, use your Mist Power to float up to the next floor.
Wait for the laser that travels left to right to pass, then head towards the rear of the room. Now jump and use your Demonic Wings power to dodge the lasers as you head towards that tile. If you need to avoid the double-stacked lasers, just jump a little bit earlier and then make use of Demonic Wings.
Once you're up on the next floor, top up your health and magic, then go into the lift that's on your right. When the lift stops moving, leave it and walk ahead to trigger a cut-scene. Ignore Trevor for the time being - otherwise you'll be led towards a pack of demons.
Instead go down the hallway to where Trevor was standing. You'll be followed by the demon Nergal Meslamstea, and you need to make sure you stay one step ahead of him until a new cut-scene begins. Once the cinematic's over, it's time to fight yet another of the game's bosses.
How to kill the Riders of the Storm
The good news about this fight is that all three of the enemies here share a single health bar - they also die in a very specific order, so it doesn't matter which one you focus on. What that means in practise is that you should always concentrate on attacking whichever one is closest to you, and try to avoid the others as much as possible. Use your camera to keep on eye on what they're up to though. Each one of them can come at you with a long-range attack, but you should have no trouble dodging out of the way.
"The good news about this fight is that all three of the enemies here share a single health bar."
Do keep a very close eye out for the tornado attack though - it'll come from the lance-wielding Rider. The regular version of it can be evaded pretty easily by dodging left or right until it vanishes. The Rider remains stationary for the projectile version of this attack though, and so you'll have to dodge left or right in the general direction of the assailant, so you can get behind him nice and easily.
As soon as the first Rider has been killed, you'll be left with the lance-wielding one and the other Rider who's holding a massive log. Prioritise taking down the lancer, and watch out for the lightning attacks he throws your way too.
If he gets up close, he'll make use of a sweeping attack that you'll need to leap over - fortunately, it's pretty easy to spot when it's coming. You should be able to do quite a bit of damage at range using your whip, but be ready to dodge left or right to avoid the worst of the vertical slicing attacks.
If he starts charging up his lightning attack, dodge forward towards him to get out of the way of the lightning tornado being summoned. It can be tricky avoiding this if you don't dodge directly towards your opponent, and then dodge left or right constantly until it disappears. That initial forward dodge makes it much easier to pull off though.
While all this is going on, don't forget to keep one eye on the log-wielding Rider. If you see him slam it into the ground, get ready to leap up in the air to avoid the shock-wave. If you find yourself having to fight him at any point, consider using your upgraded Guillotine skill. He can block this for a little while, but he won't be able to block long enough to avoid the charged-up portion of your assault.
Eventually, the Rider with the lance will drop to the ground, leaving you with just the third and final Rider to kill. Watch out for the sweeping attacks he uses when he's up-close. If you stick to using your whip from range, you'll limit him to using just a pair of attacks. The first one is a lightning attack that's telegraphed by him swinging his log around. The other one is his regular slamming attack - just jump up into the air to avoid the shock-wave.
After you've dished out a certain amount of damage, this last Rider will surround himself with a tornado that blocks all attacks. Make your way towards your opponent, then dodge to the left or the right the moment you see the enemy flinch. Shortly after he does so, you can expect a lightning attack.
When you're close enough to the Rider, you'll trigger a cut-scene. Complete the relatively simple QTE to finish this fight off once and for all.
Head back to the first page of this walkthrough for the rest of our Lords of Shadow 2 boss fight guides.