Bloodborne - Fishing Hamlet, village well, shark attack, shortcut
How to survive the Fishing Hamlet in Bloodborne's DLC.
This article explains how to survive the Fishing Hamlet in Bloodborne: The New Hunters.
If you're interested in more advice, our complete Bloodborne walkthrough and for the DLC our The Old Hunters guide and walkthrough can help.
Once you emerge on the other side of the clock face, you'll find yourself overlooking a dank, squalid coastal town. Drop off the ledge and wind your way along the narrow, watery path. As you proceed, you'll discover Lead Elixir on the corpse to the right (try not to tumble into the watery depths beyond) and some Madman's Knowledge on the body a little further ahead.
Push onward and you'll spot a shrouded man wandering through the shallow water, mumbling as he goes. Despite his unnerving appearance, he won't attack - so leave him be for now. Instead, continue forward between the dilapidated shacks to enter the Fishing Hamlet proper. A little way on, just beneath the hanging corpse, you'll find another lamp. Light it to add the Fishing Hamlet to the headstone back in the Hunter's Dream.
From the lamp, look right and locate the narrow passage ahead. Make your way along it, ignoring the large creature that passes by the window on the corner. Continue along the alley as it bends to the right and be ready for the fish-man that rises from the water. Sidestep his spear lunge and immediately retaliate. These creatures are weak and will usually fall in a few strikes.
Kill the fish-men!
Grab the Blood Vial from the body ahead then continue along the alley as it turns left. Once you reach the junction ahead, step out carefully. Deal with the fish-man waiting to the right, then locate the group of spear-wielding creatures patrolling the path to the left. As you make your way toward them, another fish creature will burst from an alcove to the right, alerting the others to your position. Take them all out and continue forward.
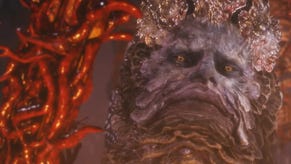
Once you emerge from beneath the canopy, come to a stop. Up ahead, you'll see more spear-carrying fish-men patrolling a large open square with a well in its centre. It's hard to see, but a hooded figure sits in front of the well. This new enemy is capable of conjuring magical skulls that pursue you relentlessly - and can prove particularly annoying.
Before you begin your approach, glance right and locate the wall jutting out slightly nearby. Remember its position then move toward the well. As soon as the skulls appear, run back and take cover behind the wall, squeezing into the corner to avoid being hit. Your little escapade should also have drawn the patrolling fish-men toward you, so deal with them quickly.
Once the creatures are down, sprint toward the well again. This time, as the skulls appear, continue forward, eliminating the hooded figure with a few slashes of your weapon. Once it's dead, the skulls with vanish, leaving you free to explore the square in relative safety. Grab the Lead Elixir perched on the edge of the well then peer into its depth. You'll note a ladder leading downward. The enemies at the bottom of the well are incredibly tough, however, so we'll leave them be for now.
Next, look left and locate the fish-man patrolling the corner of the square, just in front of the large alcove to the left. Approach it carefully, and be ready to dodge backward as the enormous creature you glimpsed earlier launches out of the alcove.
This giant, humanoid shark-beast is extremely powerful and can easily crush you in a couple of hits. Dodge his arm swipes and ground pounds and be particularly wary of his forward-grab attack. If you're caught, the creature will begin munching on your head, causing serious damage. Equally deadly is the shark-beast's forward rush move, which begins as soon as it drops to all fours. Leap aside quickly as it scurries forward to avoid its devastating impact.
Although the creature's high health makes it a resilient foe, it's not all that difficult to beat - just circle around it gingerly (making ample use of the wide, open square) and strike hard when an opportunity arises. Once the creature goes down, eliminate the remaining fish-men in the area, then enter the alcove where the shark emerged from earlier.
Collect the Kin Coldblood (10) from the corpse ahead, then defeat the fish-man lurking along the passage to the right. As you turn around, another fish-man will rise from the water, so deal with it too. Leave the alcove and return to the square, this time approaching the glowing item resting near the boat directly ahead. As you near the object, four more fish-men will appear in the area, with a fifth materialising on the upper level of the building to the right.
This fifth creature will immediately begin lobbing firebombs at you, so quickly leap backward out of range then take care of the fish-men on your level. Next, run over to the glowing object and grab it to receive the Oil Urn. When you're ready to continue, enter the building to the right, via the ramp directly below the fish-man. You'll immediately be ambushed by two more creatures either side of the door, plus another urn-tossing fish-man to the right.
Take them all out then make your way up the ramp in the far-right-hand corner of the room. At the top, eliminate the two remaining fish-men. Next, follow the wooden walkway anti-clockwise around the room and grab the Odd Fire Damp Blood Gem (5) at the end.
Drop back down to the ground and locate the doorway nearby, just below the previous item's resting place. Turn right outside and make your way toward the well again. Continue passed the well (keeping it to your left) and, once you reach the rocks ahead, turn right. Stop at the lantern to the left and locate the small path leading up the rocky incline nearby. Climb the path and follow it along until you reach the rooftop at the end.
Collect the Great One's Wisdom from the corpse to the right then move toward the raised wooden roof ahead. Walk clockwise around it and approach the ladder hanging over the side of the building. Finally, kick down the ladder to form a shortcut leading back to the Fishing Hamlet lamp. Incidentally, when using this shortcut from the lamp side, always follow the path to the end of the square. Dropping into the water will almost certainly aggro the re-spawned giant shark in the area.
- Keep reading for our guide to unlocking Bloodborne's Harrowed set.
- Head back to the first page for the rest of our Bloodborne: The Old Hunters guide.


.png?width=291&height=164&fit=crop&quality=80&format=jpg&auto=webp)


