Diablo 2 - Horadric Cube location: How to use the Horadric Cube and recipes list explained
You solved the box, we came.

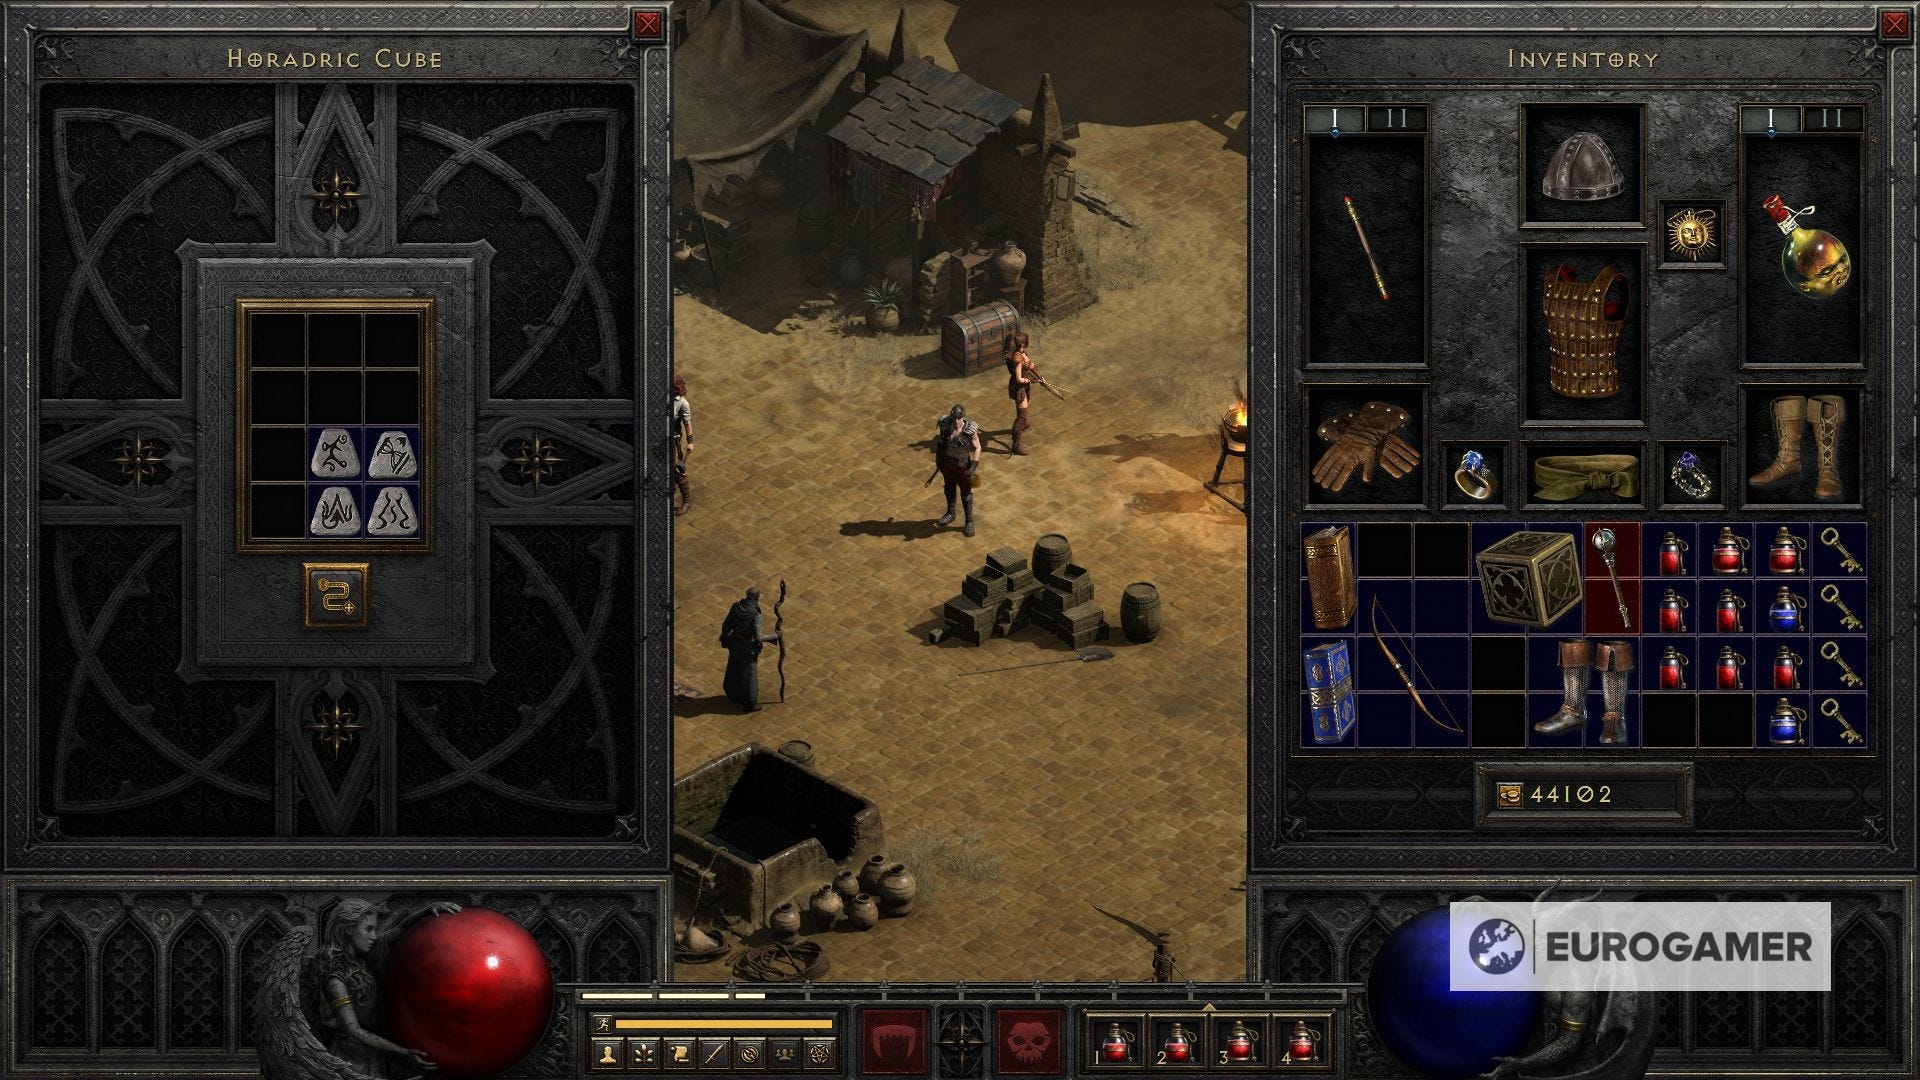
The Horadric Cube is one of the key items you'll find in Diablo 2.
As part of the quest The Horadric Staff in Act II, the Horadric Cube is part of the items you need to collect, alongside the Shaft and the Headpiece. Unlocking it is a mere step towards understanding how it works, but thankfully, we can help.
This page explains how to use the Horadric Cube in Diablo 2 as well as the Horadric Cube recipes so you can start planning beforehand.
The Horadric Cube is also required to access one of the game's biggest secrets - the infamous Cow Level.
On this page:

How to unlock the Horadric Cube in Diablo 2
The Horadric Cube can be unlocked in Act II, so don't worry about having to rush things in Act I while you're out there looking for the Underground Passage or Monastery Locations.
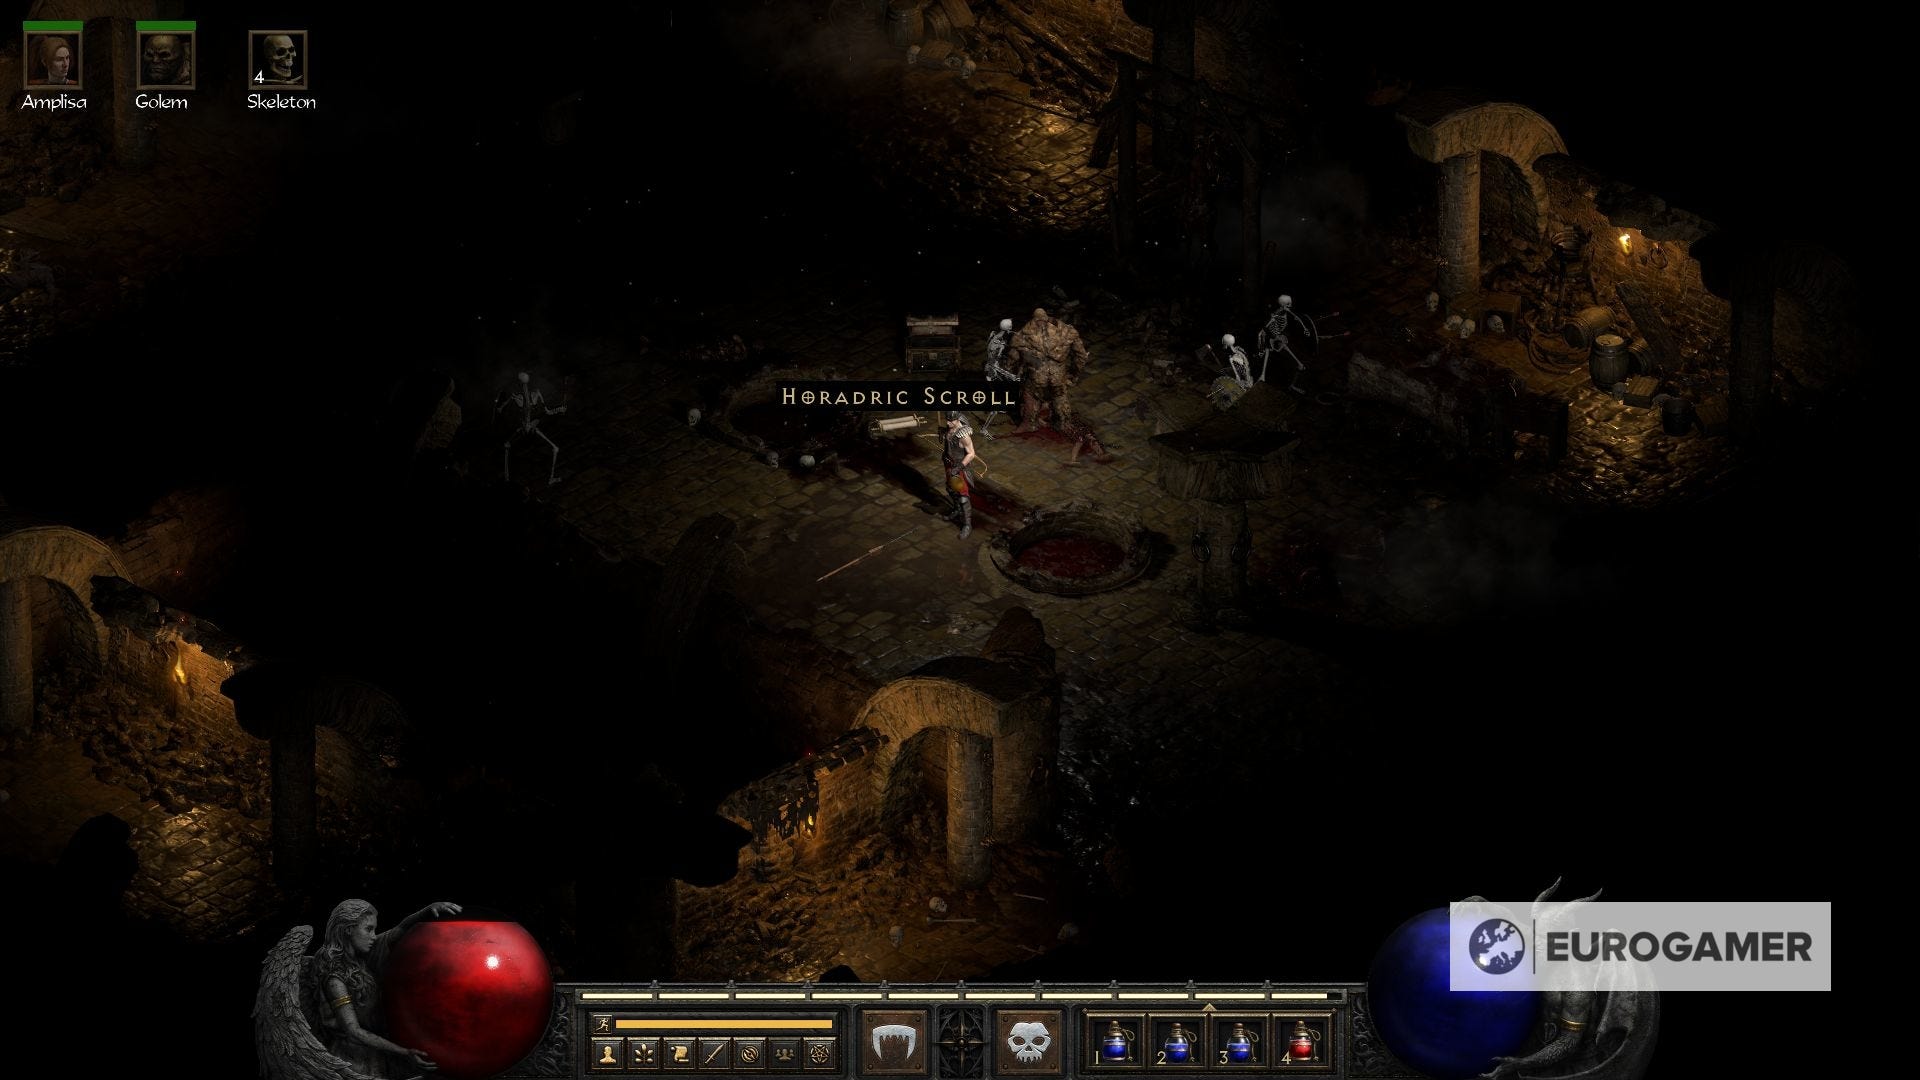
For this, you first need to get to the bottom of the sewers beneath the city. On the last floor you'll find the Horadric Scroll inside a chest. Picking it up unlocks the quest The Horadric Staff. Deckard Cain will be delighted to let you know more about it.
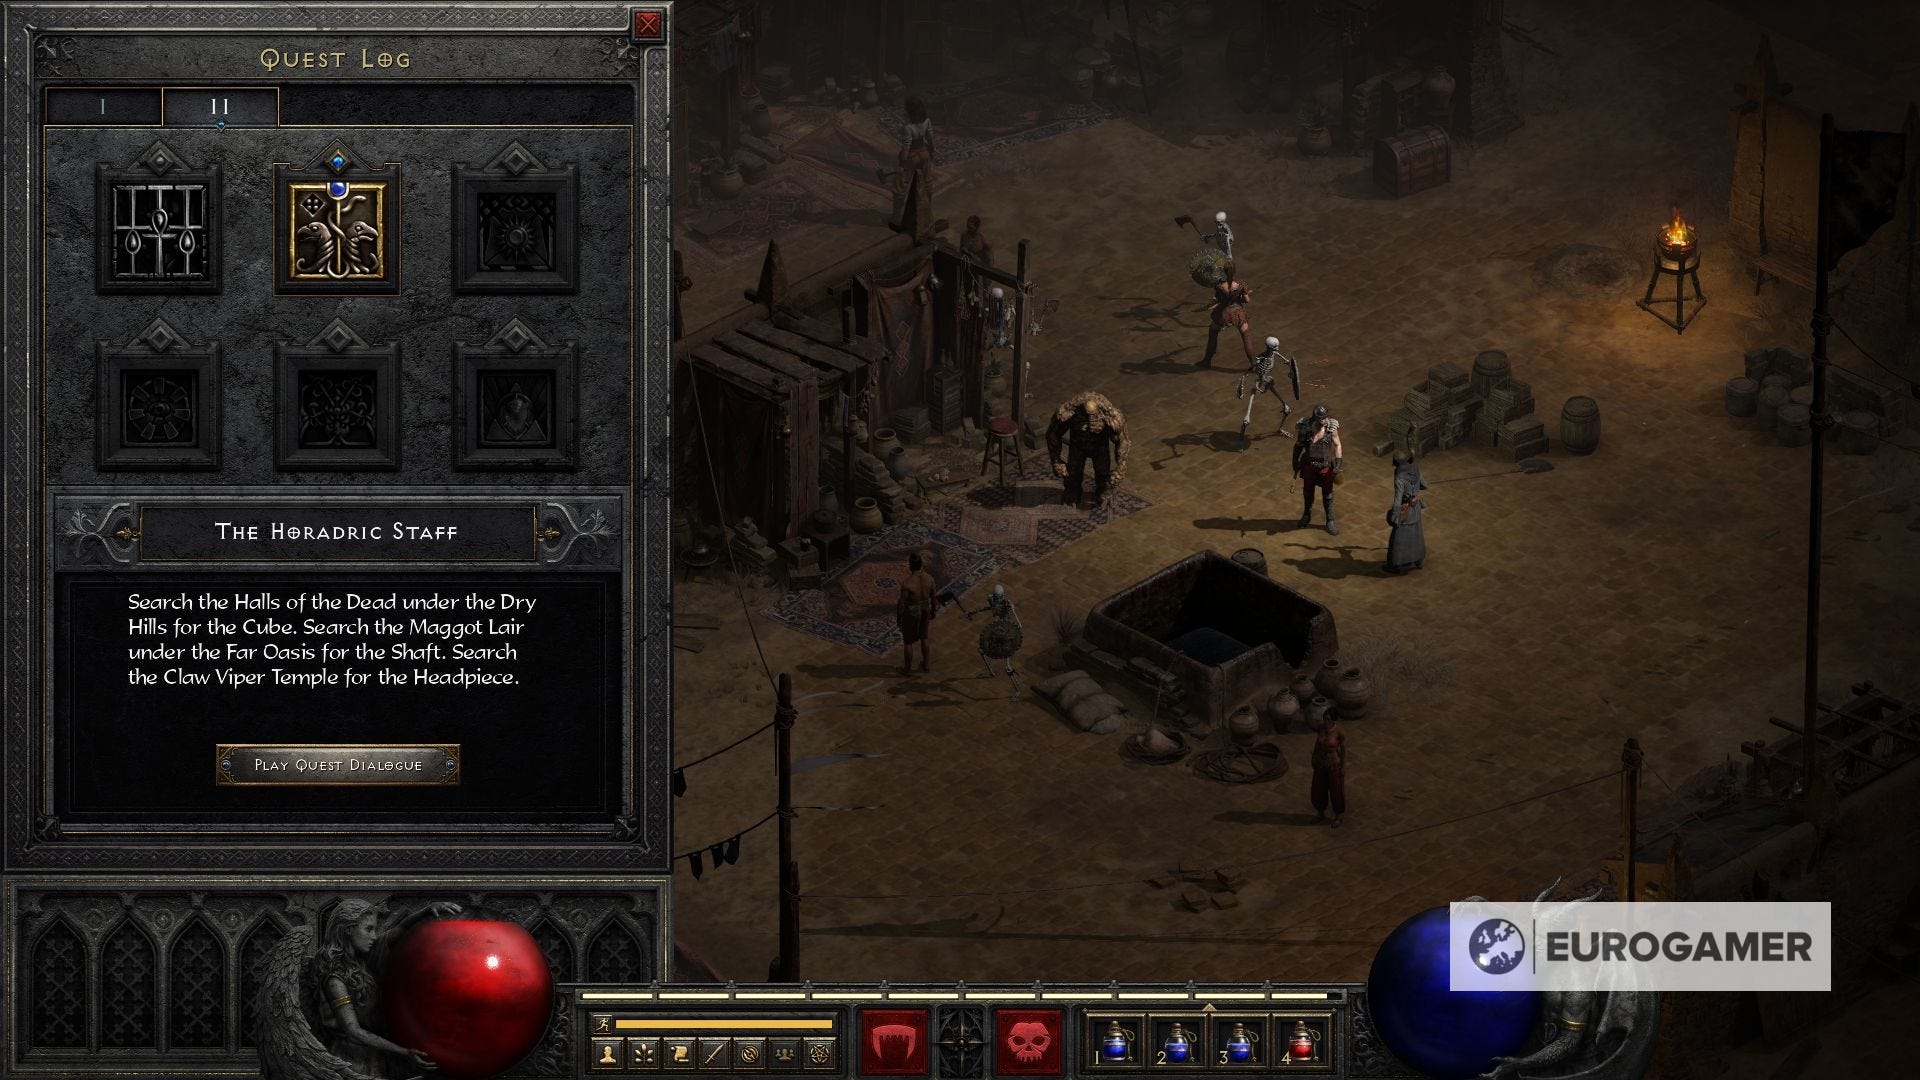
The quest involves searching for three key items, but we'll be focusing on the cube for this guide. For this, you'll have to exit the city and explore the area until you find a path to The Dry Hills.
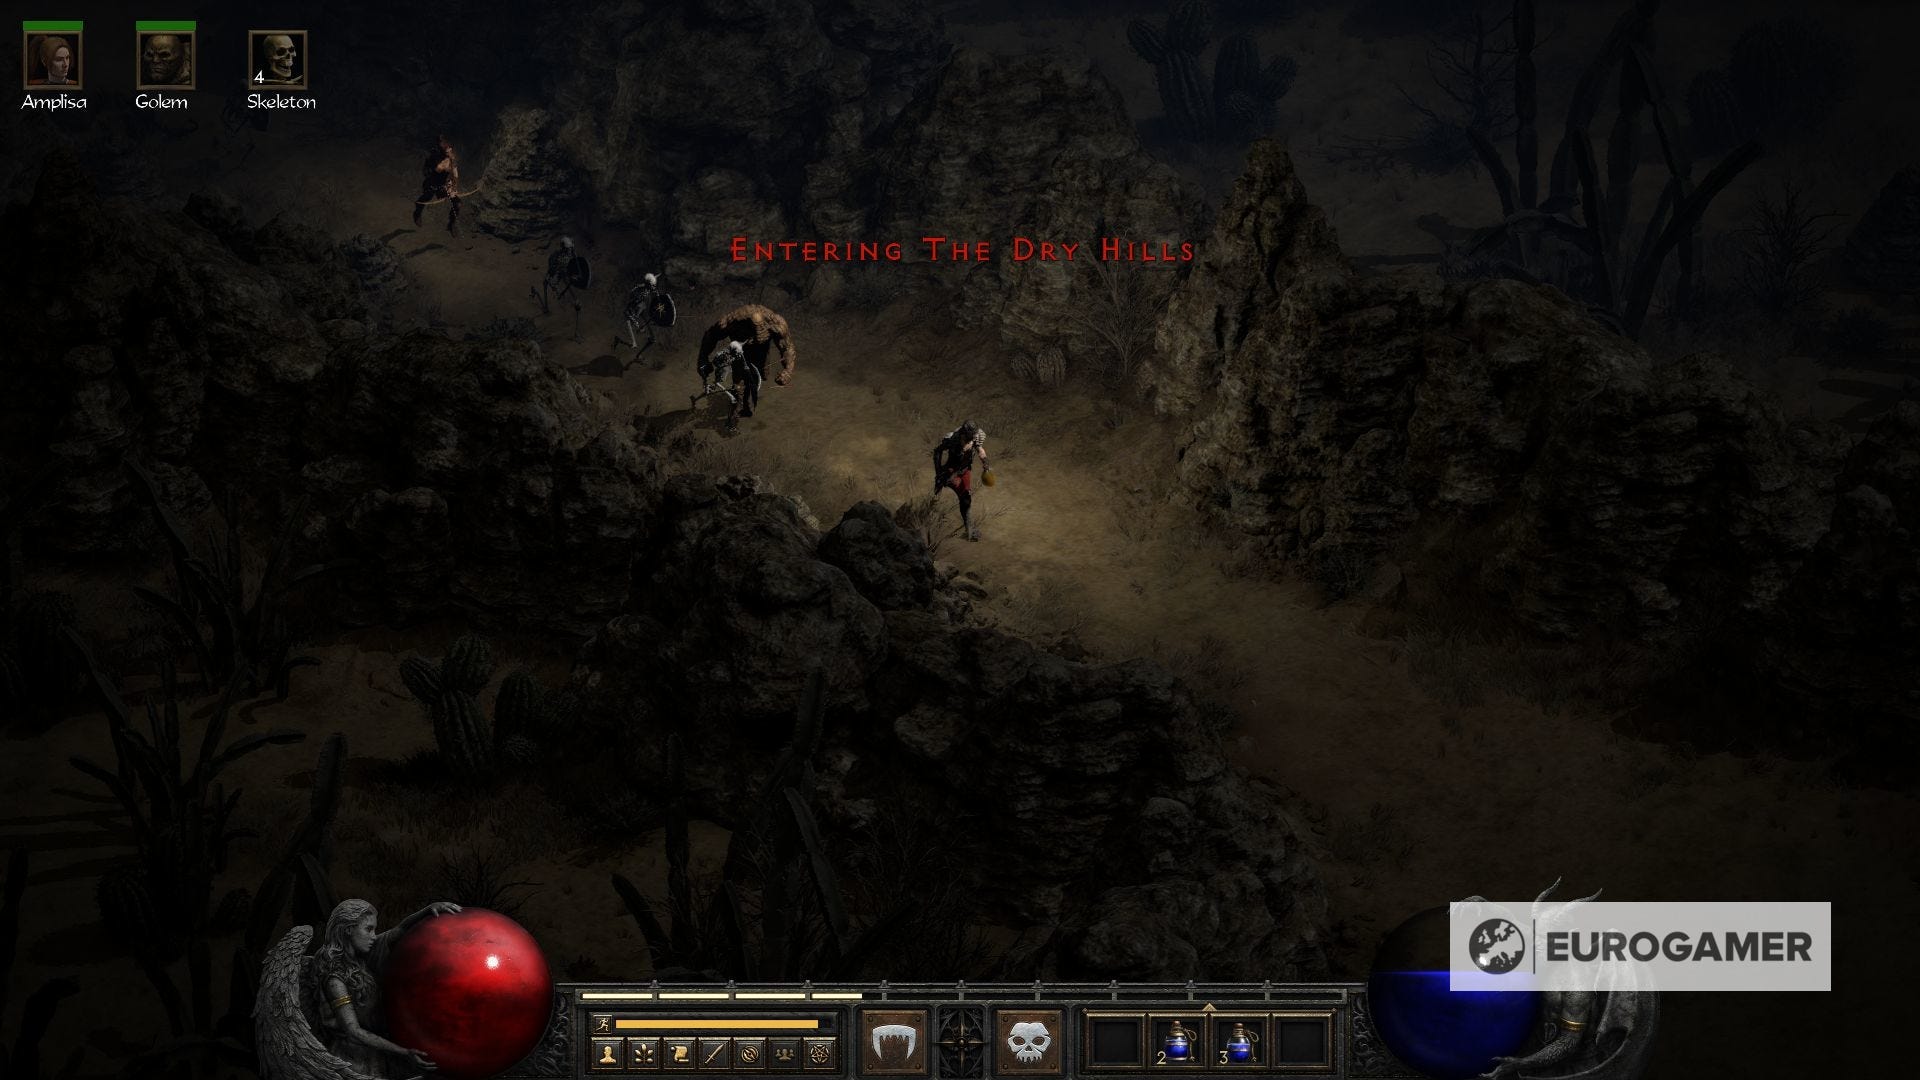
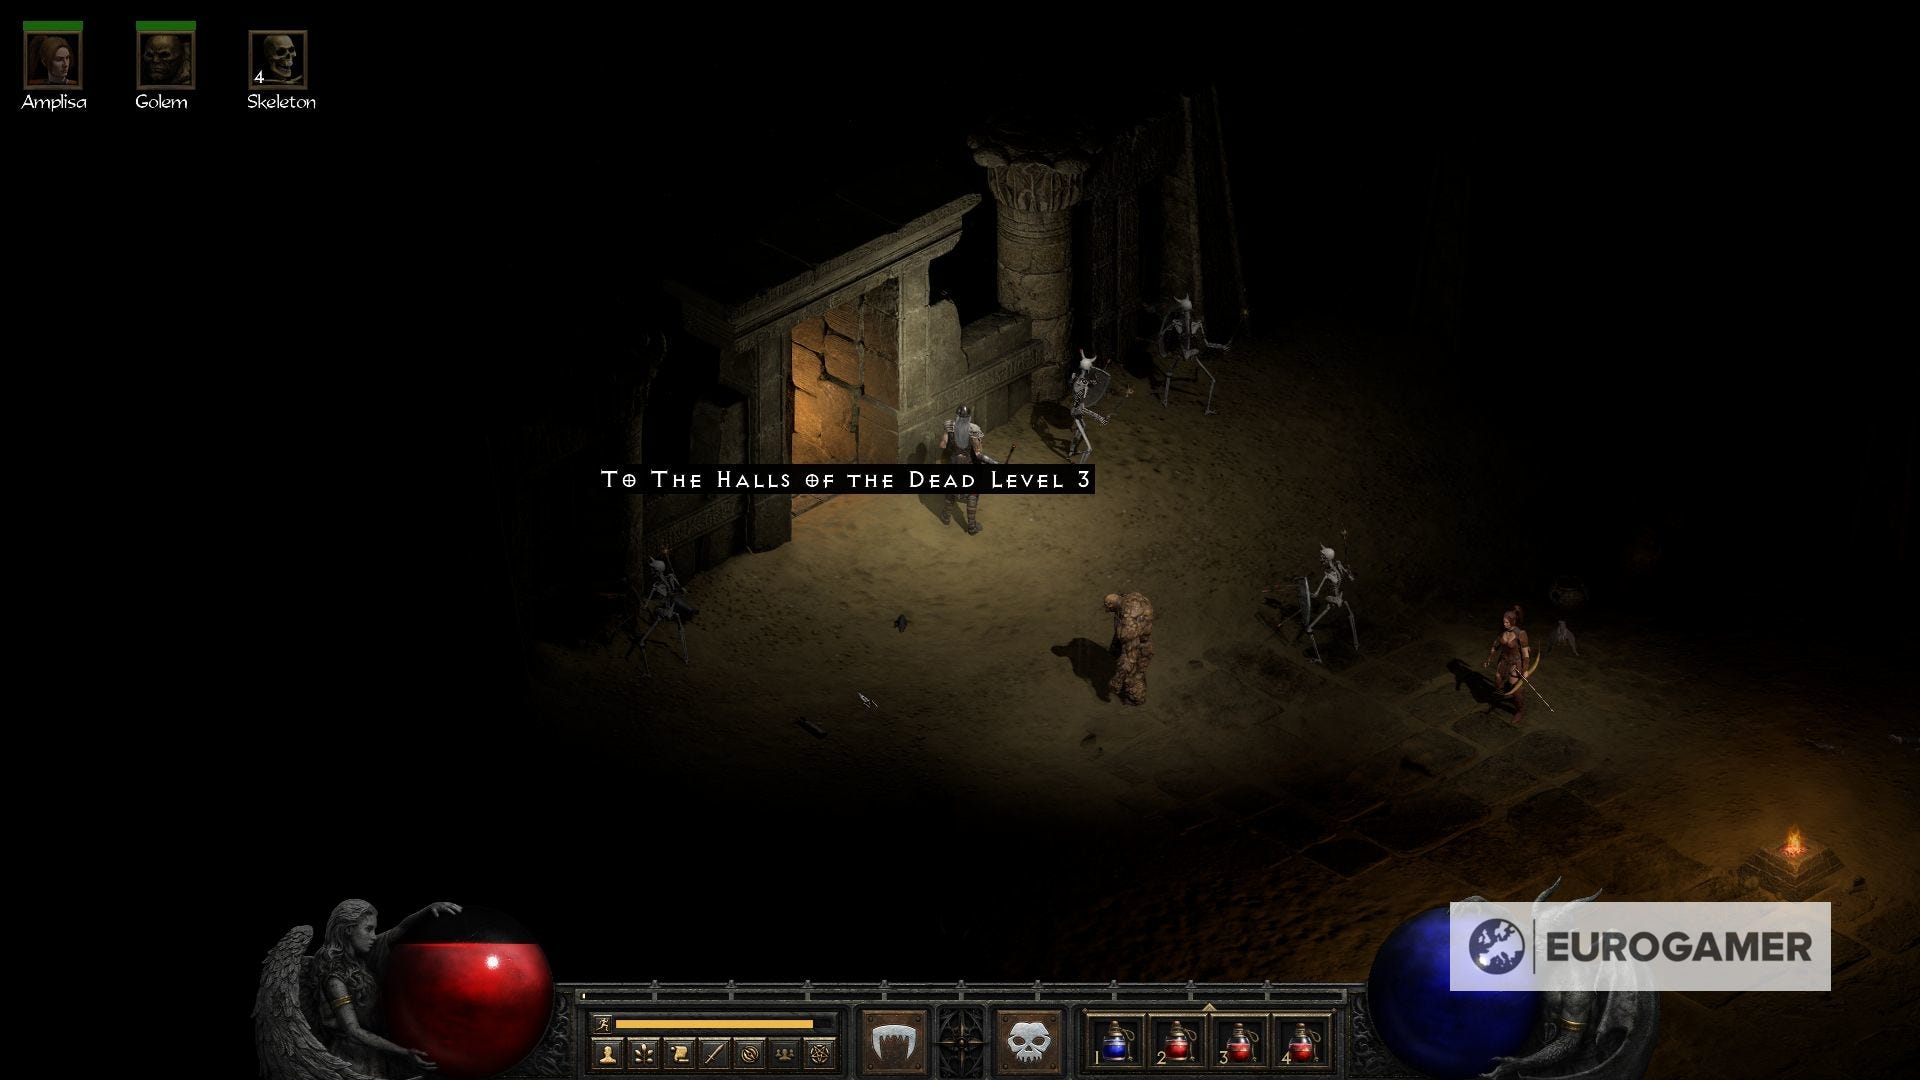
Somewhere in The Dry Hills lies the entrance to The Halls of the Dead, which is where the Horadric Cube is being guarded. Sadly, map layouts in Diablo 2 are randomly generated, which is why we can't show you the exact location.
That being said, as long as you don't leave the area, you're bound to bump into it soon enough. If you step into the Far Oasis, go back and continue exploring. In our experience, the entrance was right after a stairway that led us to a lower ground.

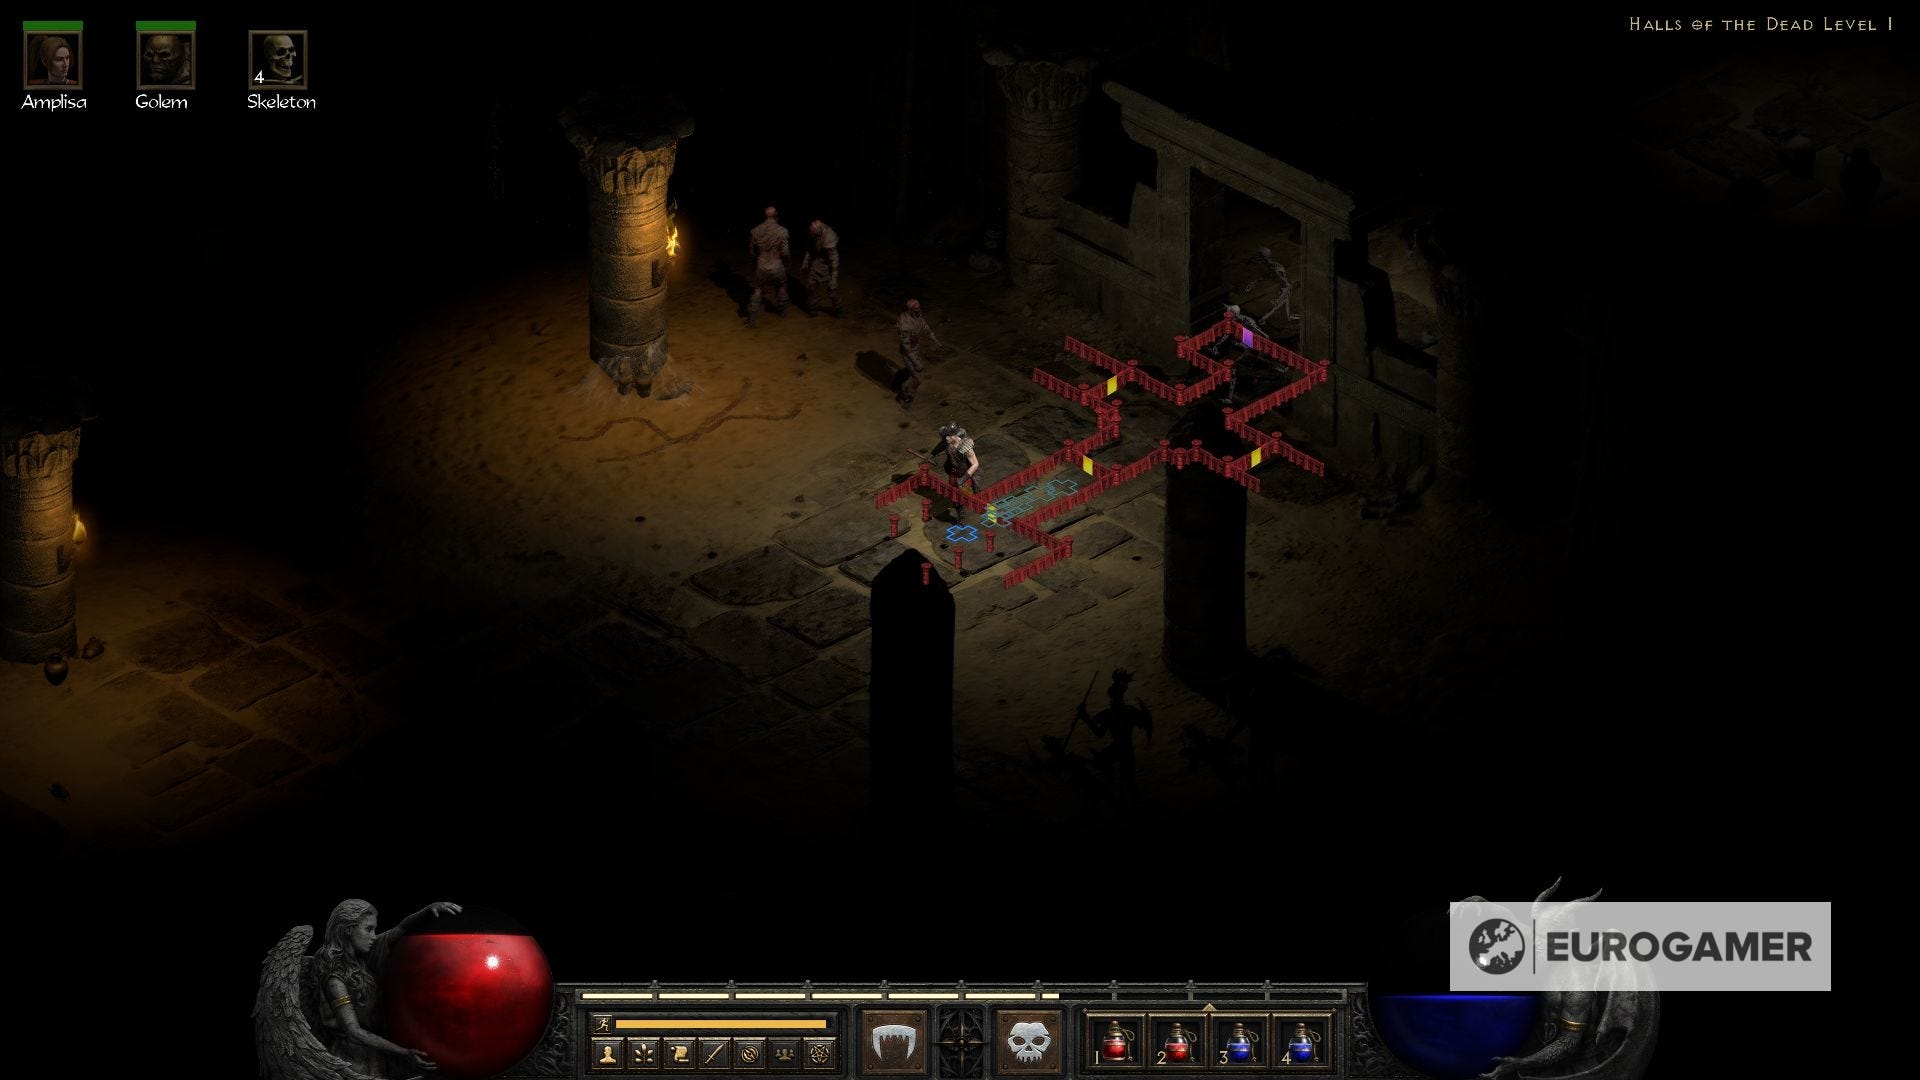
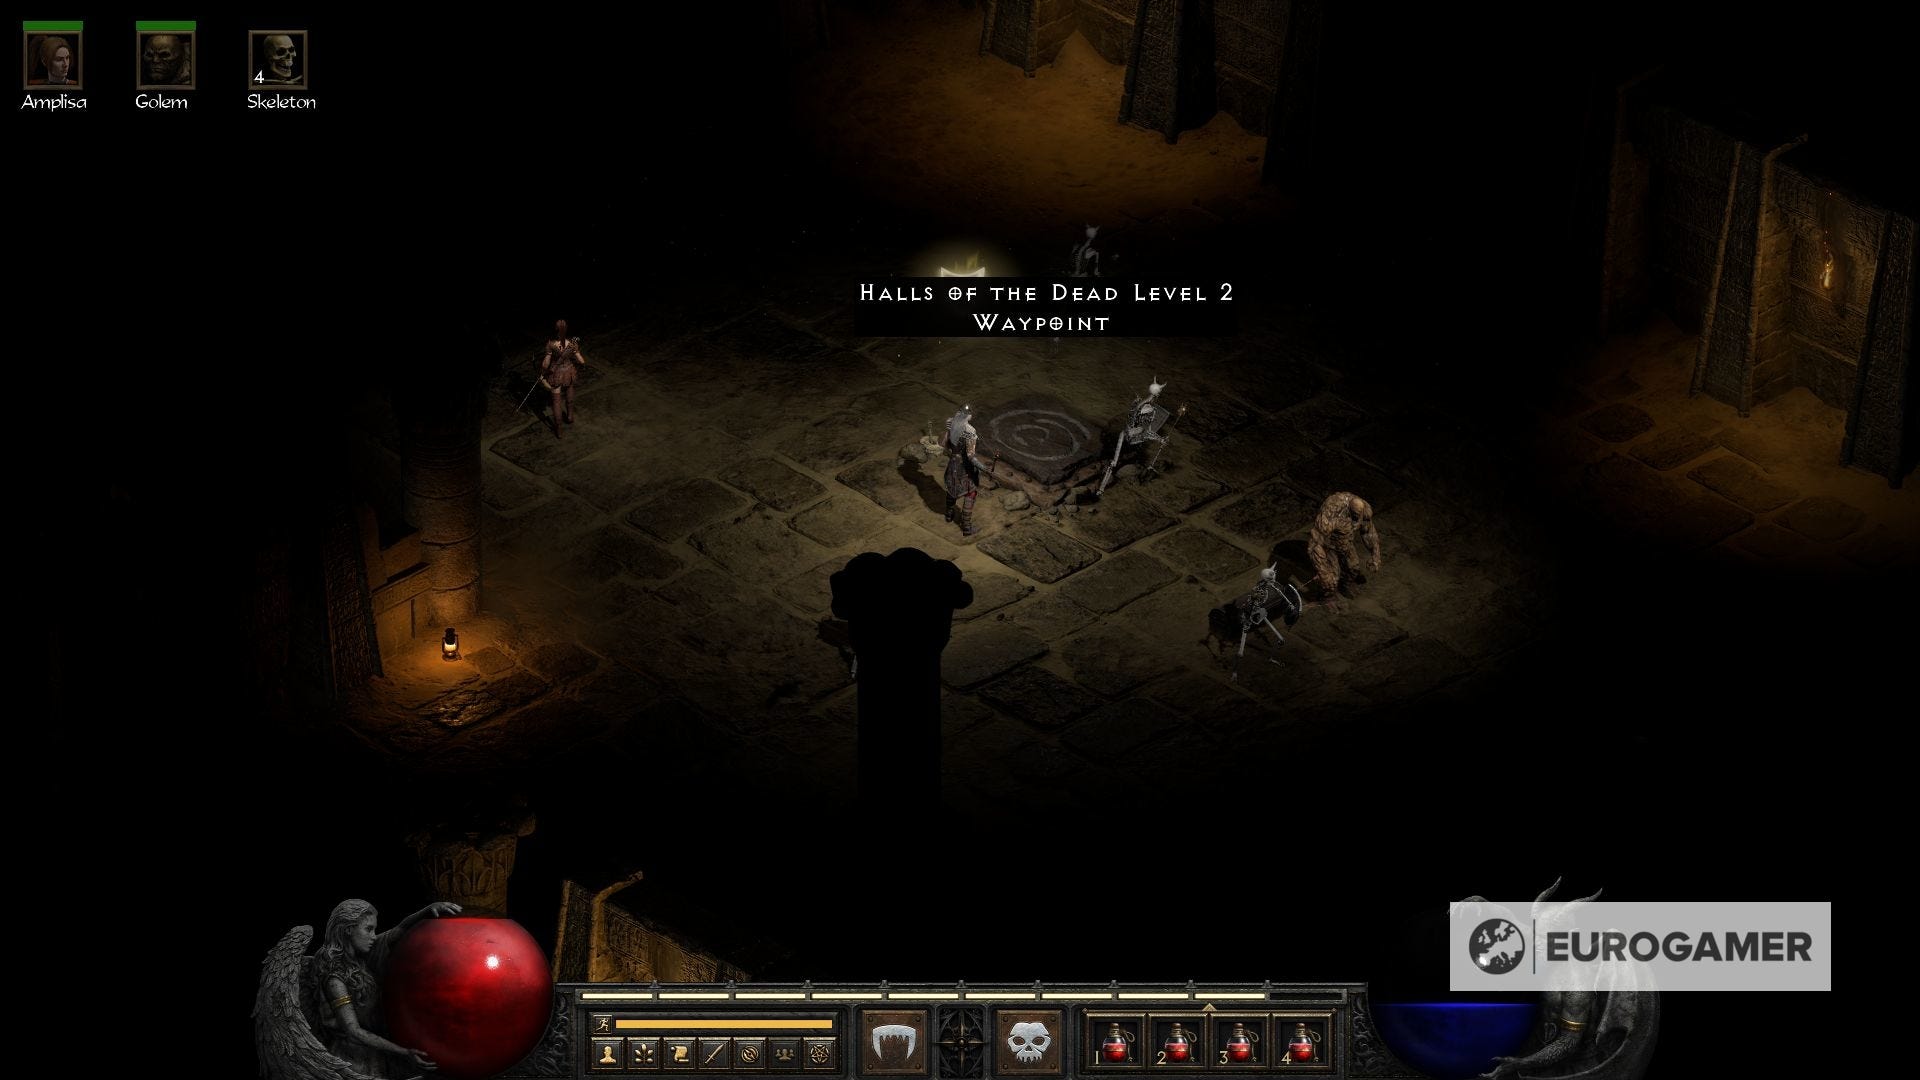
The Halls of the Dead has three floors packed with enemies and traps, so thread carefully. Make your way down below whenever possible, and make sure to grab the waypoint in the second floor, which is always nice to have.
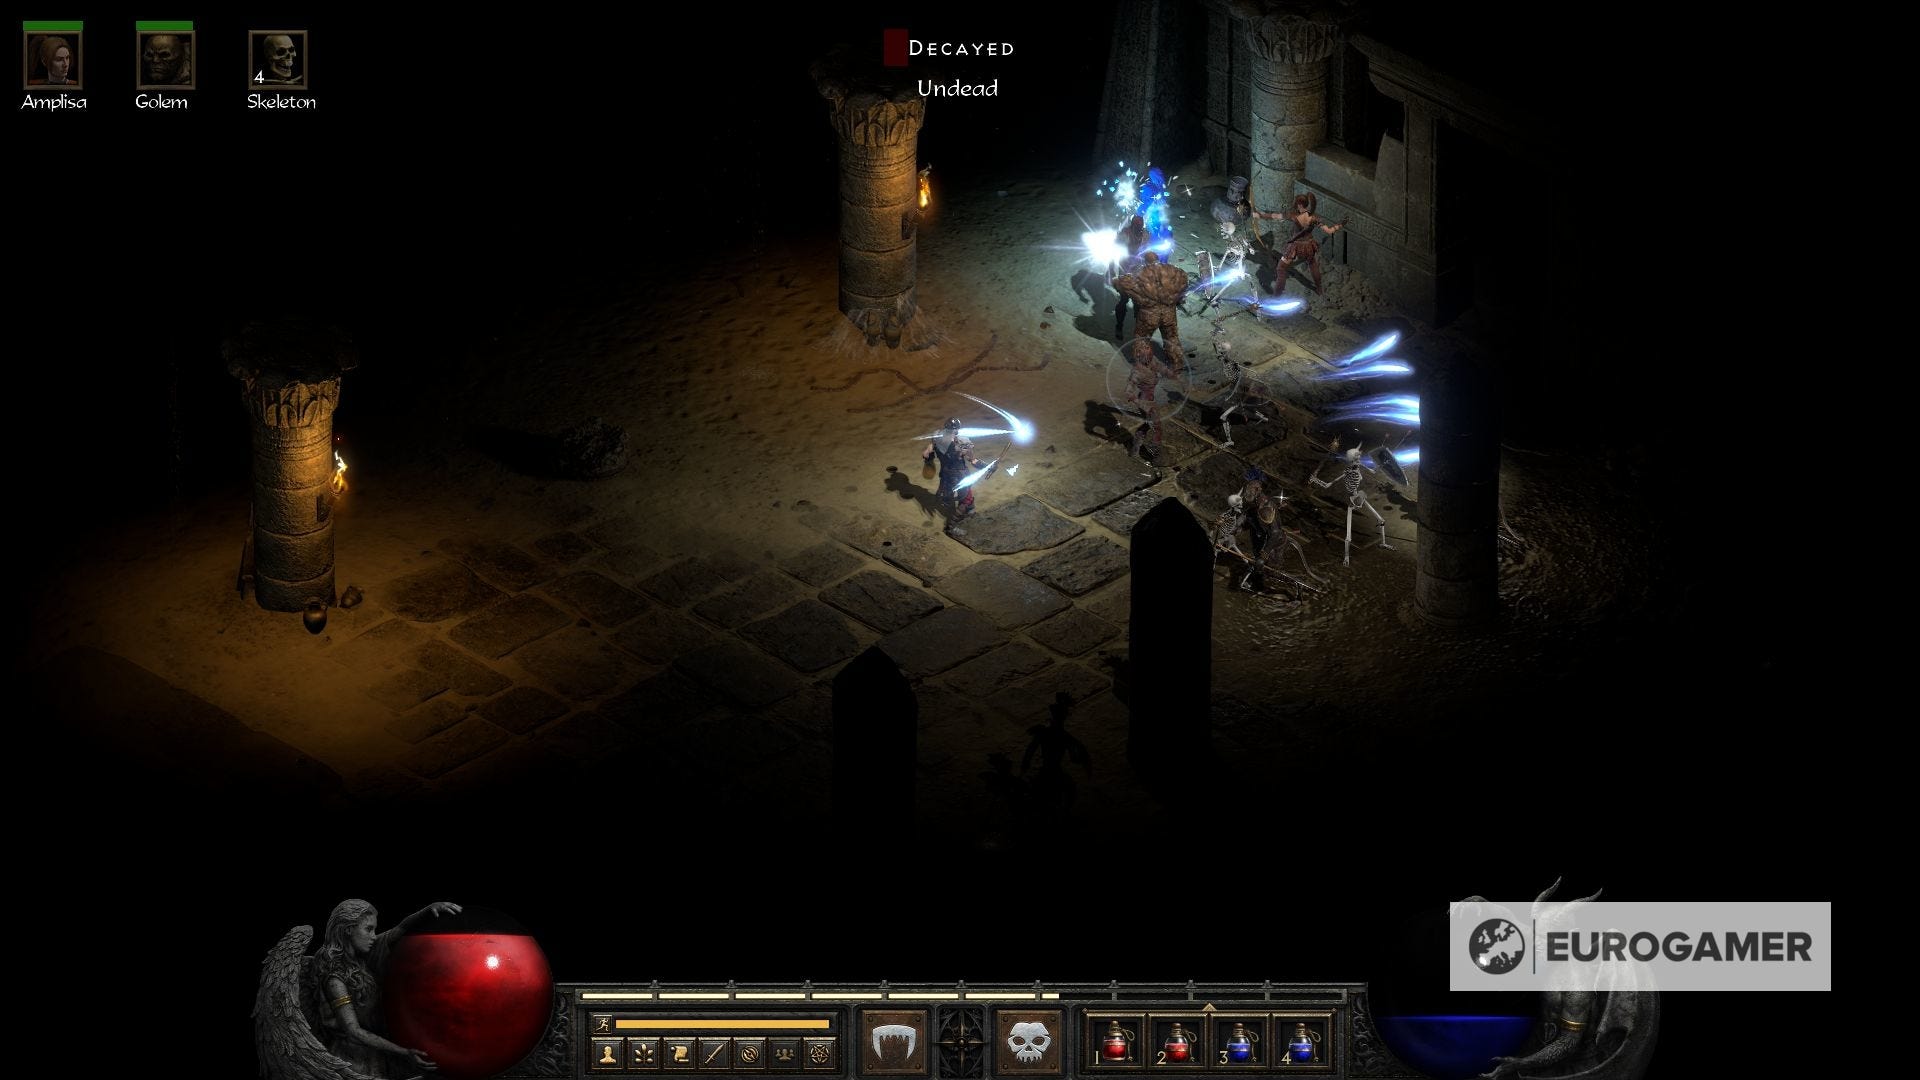
After you've found the entrance to the third floor, prepare for a big fight in the main room.
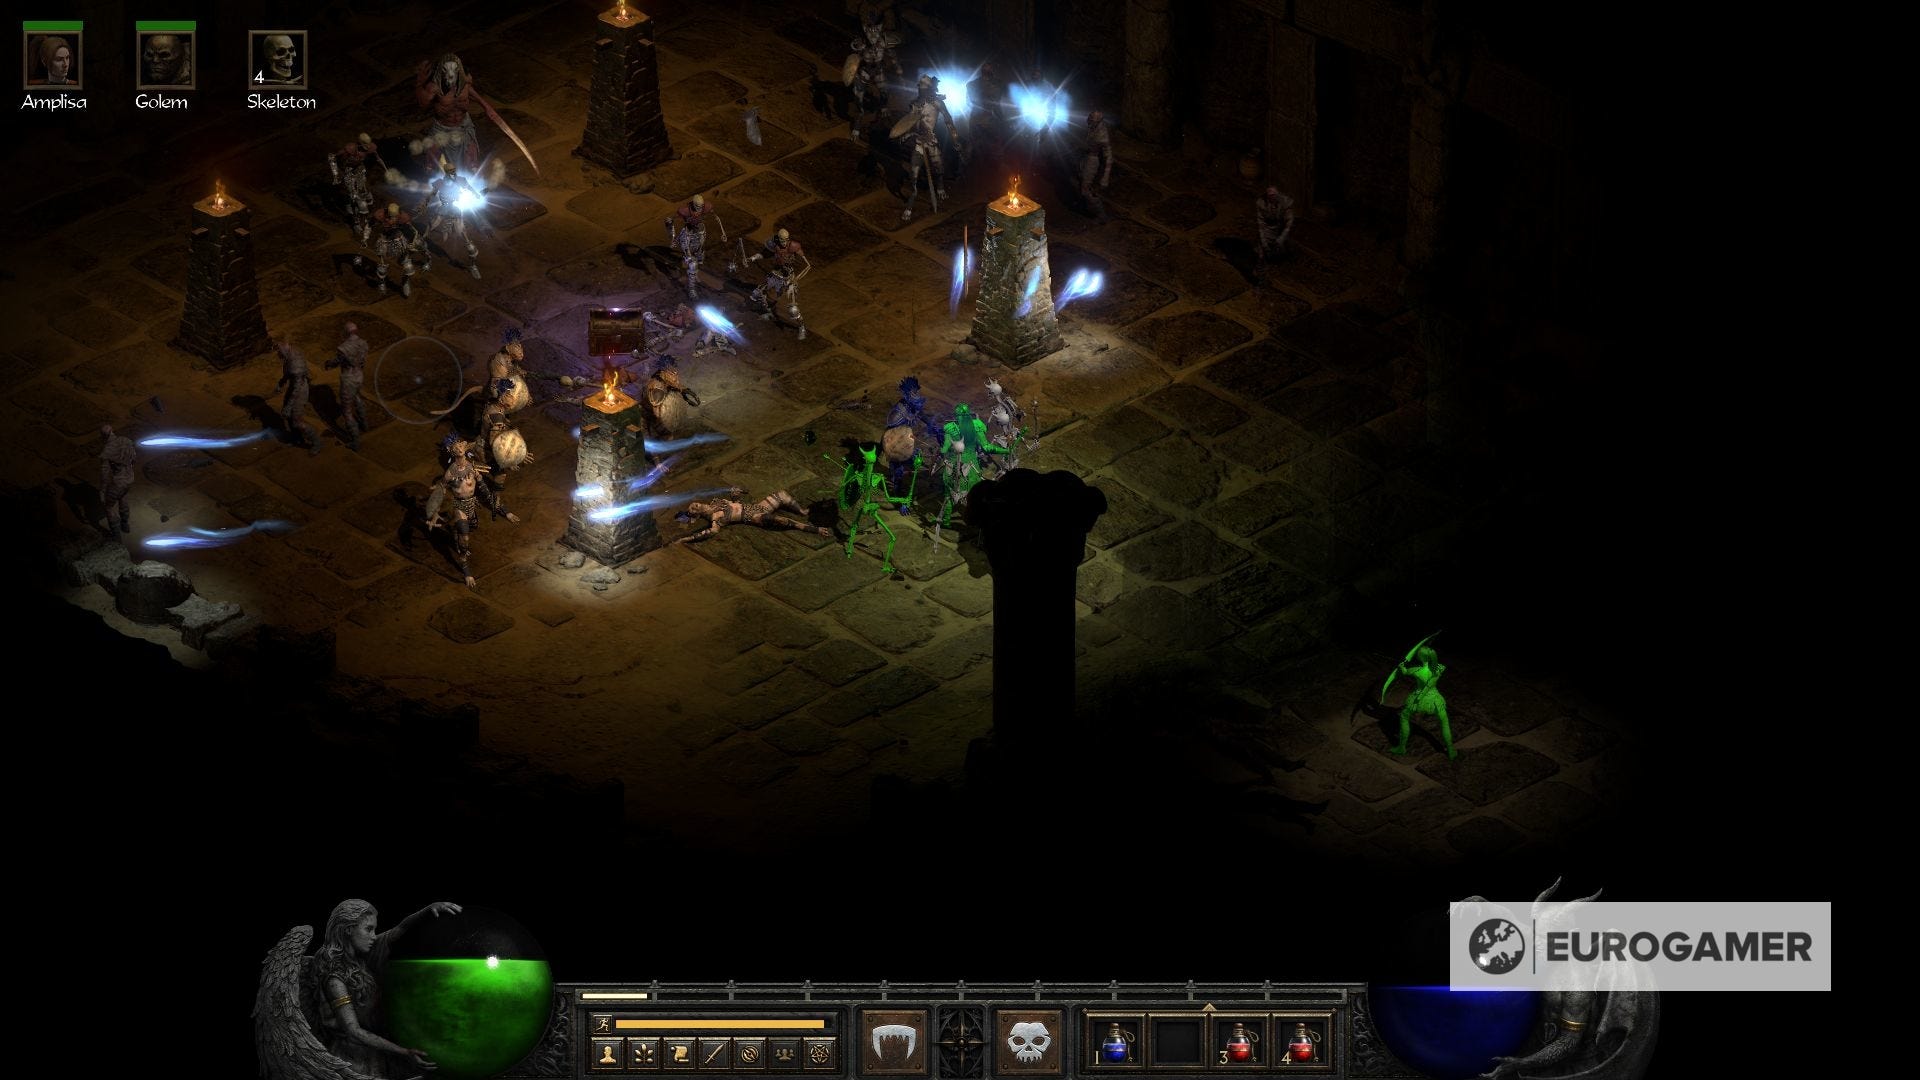
Take all enemies down and loot everything. Then, when ready, open the chest.
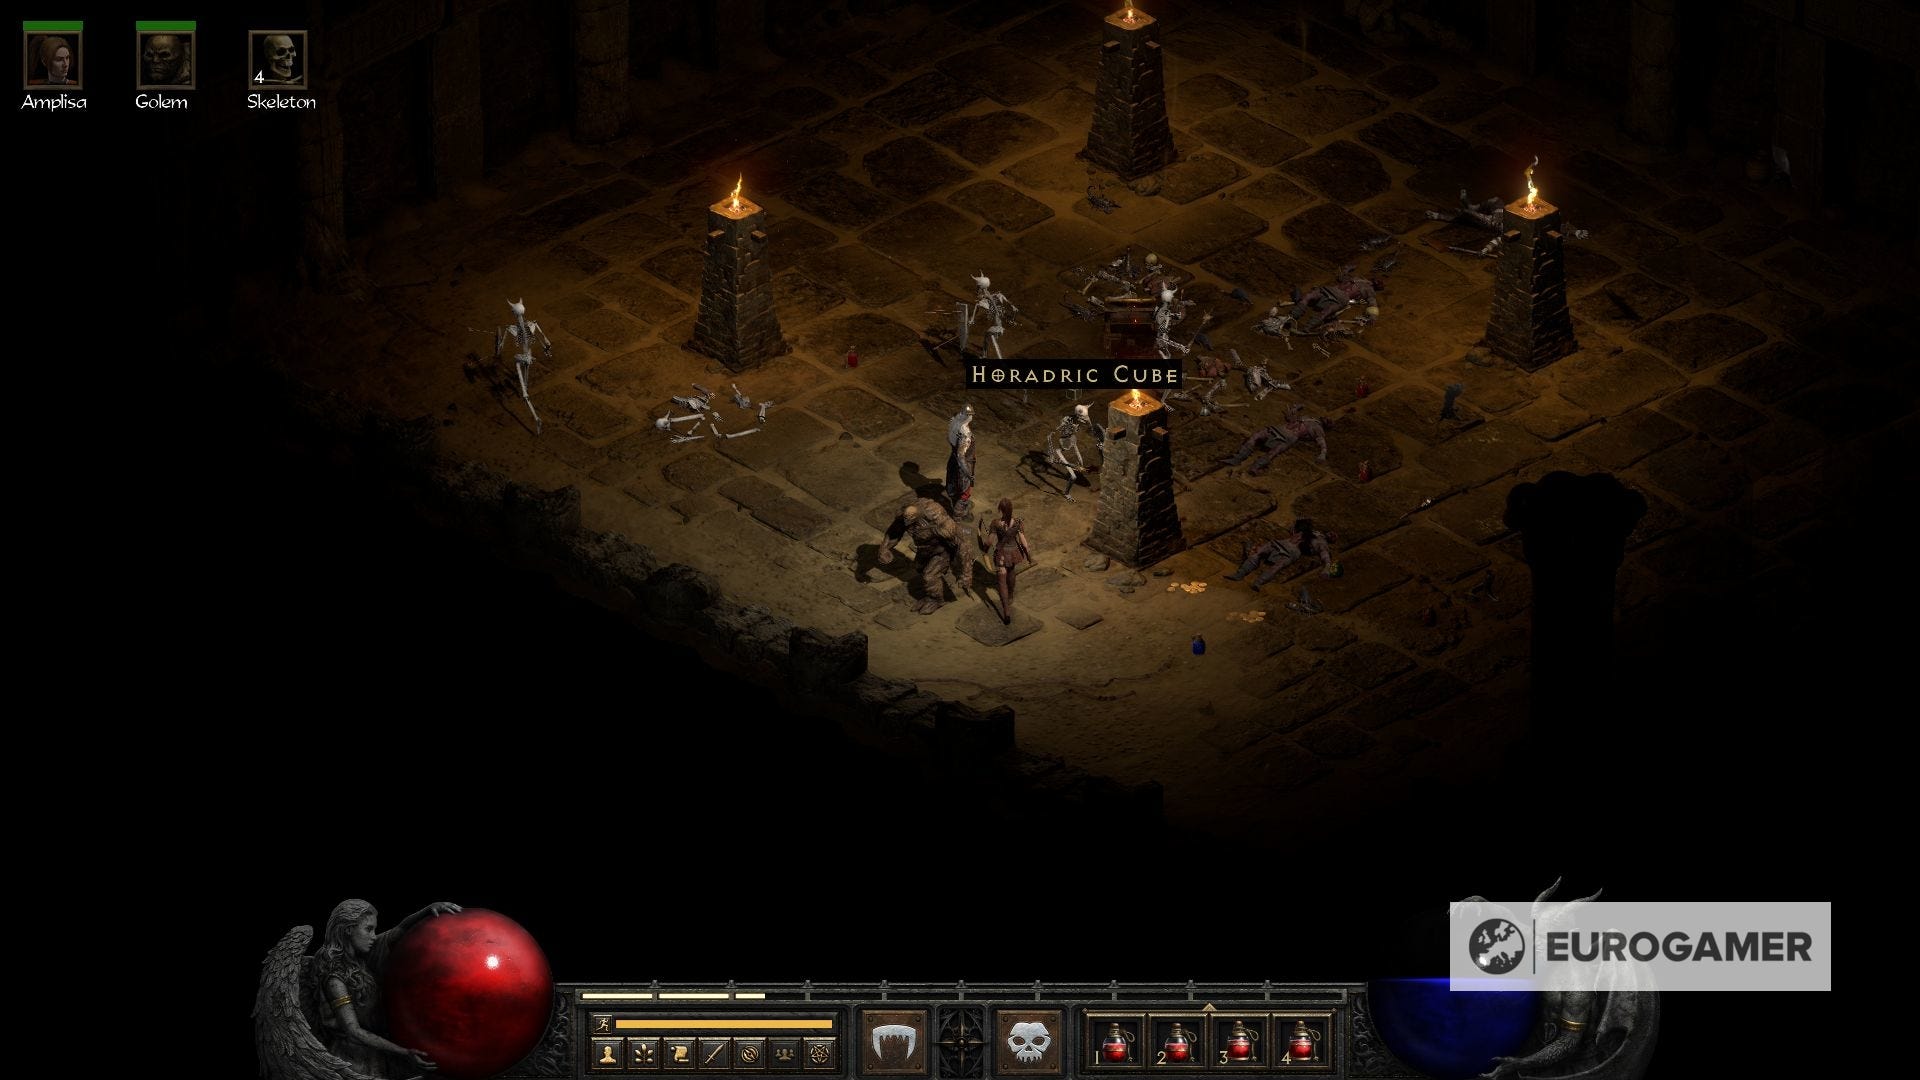
Make sure to have at least four free slots for the Horadric Cube in your inventory. If you don't, use a town scroll and either sell or save gear in your stash for the time being to pick it up. Now, let's see how it works.
How to use the Horadric Cube in Diablo 2
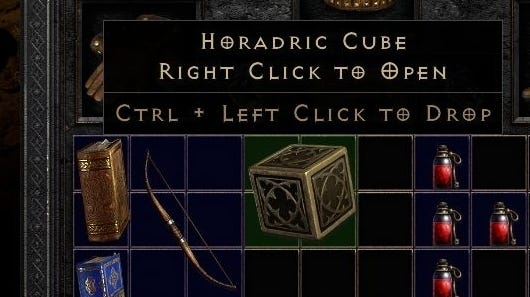
Using the Horadric Cube is fairly simple. You can interact and open it with right click or whichever button you use to equip gear. This can be done both from your inventory or your stash, in case you don't want to carry it around.
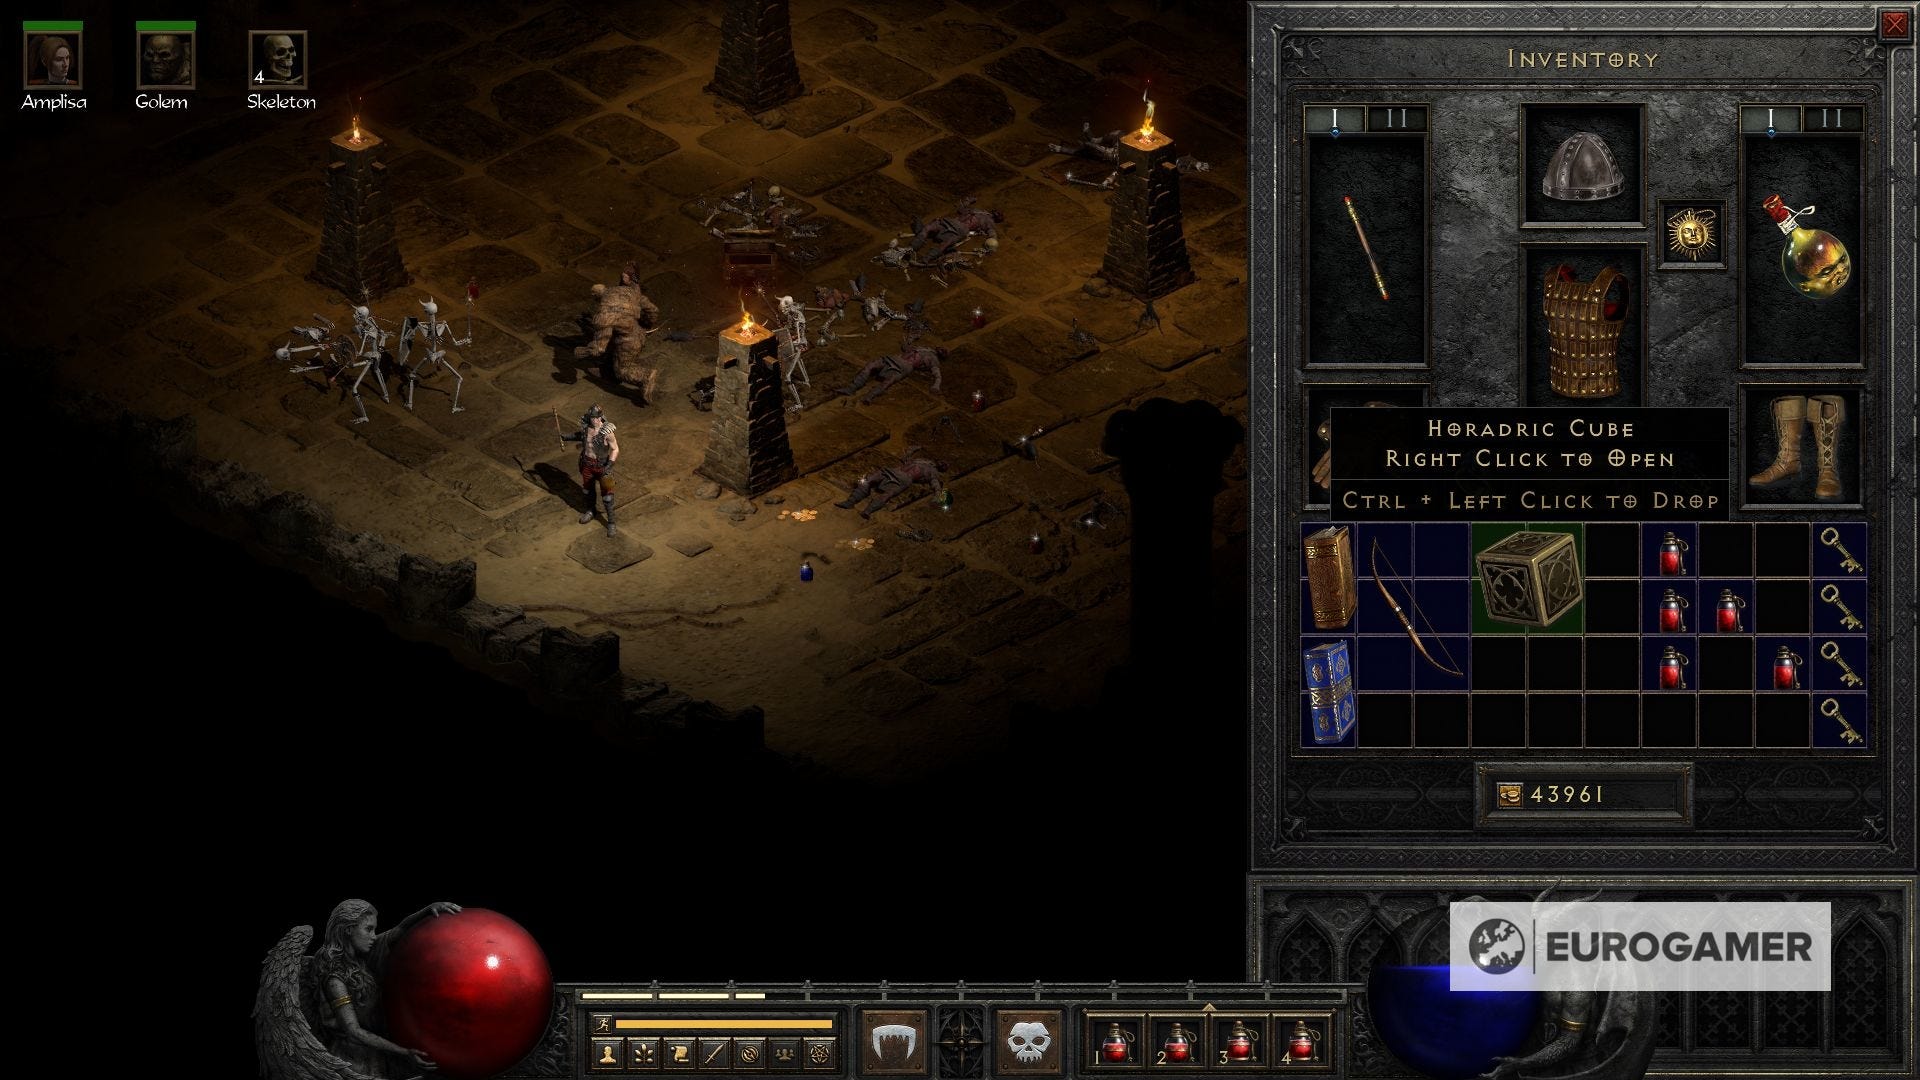
The purpose of the cube is to transmutate items if you provide it with the right item combinations. It doesn't matter where you place them inside the cube, mind you, as long as they're together.
It can contain up to 12 slots of items - if you'd like, you can also keep items stored inside the cube itself. Now, let's see those recipes.
Looking for more help? We have pages on the best Diablo 2 class, best Diablo 2 builds and runewords, Diablo 2 leveling, how to import saves, how to reset your skills, how to identify items, when and how to imbue items, where to find monastery locations and the underground passage, and finally, how to access the secret cow level.
Horadric Cube recipes list explained
From runes to gear for most classes, there's a myriad of possible combinations.
If you're curious about what's possible, here is the Horadric Cube recipes list:
Runes
- Eld Rune: 3 El Runes
- Tir Rune: 3 Eld Runes
- Nef Rune: 3 Tir Runes
- Eth Rune: 3 Nef Runes
- Ith Rune: 3 Eth Runes
- Tal Rune: 3 Ith Runes
- Ral Rune: 3 Tal Runes
- Ort Rune: 3 Ral Runes
- Thul Rune: 3 Ort Runes
- Amn Rune: 3 Thul Runes and 1 Chipped Topaz
- Sol Rune: 3 Amn Runes and 1 Chipped Amethyst
- Shael Rune: 3 Sol Runes and 1 Chipped Sapphire
- Dol Rune: 3 Shael Runes and 1 Chipped Ruby
The following are only eligible for single player, open or Ladder.
- Hel Rune: 3 Dol Runes and 1 Chipped Emerald
- Io Rune: 3 Hel Runes and 1 Chipped Diamond
- Lum Rune: 3 Io Runes and 1 Flawed Topaz
- Ko Rune: 3 Lum Runes and 1 Flawed Amethyst
- Fal Rune: 3 Ko Runes and 1 Flawed Sapphire
- Lem Rune: 3 Fal Runes and 1 Flawed Ruby
- Pul Rune: 3 Lem Runes and Flawed Emerald
- Um Rune: 3 Pul Runes and 1 Flawed Diamond
- Mal Rune: 2 Um Runes and 1 Topaz
- Ist Rune: 2 Mal Runes and 1 Amethyst
- Gul Rune: 2 Gul Runes and 1 Ruby
- Ohm Rune: 2 Vex Runes and 1 Emerald
- Lo Rune: 2 Ohm Runes and 1 Diamond
- Sur Rune: 2 Lo Runes and 1 Flawless Topaz
- Ber Rune: 2 Sur Runes and 1 Flawless Amethyst
- Jah Rune: 2 Ber Runes and 1 Flawless Sapphire
- Cham Rune: 2 Jan Runes and 1 Flawless Ruby
- Zod Rune: 2 Cham Runes and 1 Flawless Emerald
Items
- Add one socket to a rare item: 3 Perfect Skulls, 1 rare item and Stone of Jordan
- One high quality new rare item of the same type: 3 Perfect Skulls, 1 rare item and Stone of Jordan
- One random low quality rare item of the same type: 6 Perfect Skulls and 1 rare item
- A Magic Sword of the Leech: 4 health potions, 1 Ruby and 1 Magical Sword
- One new random magic item of the same type: 3 Perfect Gems and 1 magic item
- Magic shield of Spikes: 1 Magic shield, 1 Spiked Club and 2 Skulls
- Savage Polearm class weapon: 1 Diamond, 1 staff, 1 kris, 1 belt
- Secret Cow Level: 1 town scroll and Wirt's Leg
- Socketed magic weapon of the same type: 3 standard gems and 1 socketed weapon
- Socketed magic weapon: 3 Chipped Gems and 1 magic weapon
- Socketed magic weapon: 3 Flawless Gems and 1 magic weapon
- Socketed body armor of same type: 1 Tal Rune, 1 Thul Rune, 1 Perfect Topaz and 1 normal body armor
- Socketed weapon of the same type: 1 Ral Rune, 1 Amn Rune, 1 Perfect Amethyst and 1 normal weapon
- Socketed helm of the same type: 1 Ral Rune, 1 Thul Rune, 1 Perfect Sapphire and 1 normal helm
- Socketed shield of the same type: 1 Tal Rune, 1 Amn Rune, 1 Perfect Ruby and 1 normal shield
- Exceptional version of a weapon: 1 Ral Rune, 1 Sol Rune, 1 Perfect Emerald and 1 normal unique weapon
- Exceptional version of an armor: 1 Tal Rune, 1 Shael Rune, 1 Perfect Diamond and 1 normal unique armor
- Elite version of a weapon: 1 Lum Rune, 1 Pul Rune, 1 Perfect Emerald and 1 exceptional unique weapon
- Elite version of an armor: 1 Ko Rune, 1 Lem Rune, 1 Perfect Diamond and 1 exceptional unique armor
- Exceptional rare weapon: 1 Ort Rune, 1 Amn Rune, 1 Perfect Sapphire and 1 normal rare weapon
- Exceptional rare armor: 1 Ral Rune, 1 Thul Rune, 1 Perfect Amethyst and 1 normal rare armor
- Elite rare weapon: 1 Fal Rune, 1 Um Rune, 1 Perfect Sapphire and 1 exceptional rare weapon
- Elite rare armor: 1 Ko Rune, 1 Pul Rune, 1 Perfect Amethyst and 1 exceptional rare armor
- Fully repaired weapon: 1 Ort Rune with the weapon
- Fully repaired armor: 1 Ral Rune with the armor
- Fully repaired and recharged weapon: 1 Ort Rune, 1 Chipped Gem and the weapon
- Elite repaired and recharged armor: 1 Ral Rune, 1 Flawed Gem and the armor
- Remove items from sockets: 1 Hel Rune, 1 town scroll and the socketed item
- Token of Absolution: 1 Twisted Essence of Suffering, 1 Charged Essence of Hatred, 1 Burning Essence of Terror and 1 Festering Essence of Destruction
Potions
- Rejuvenation potion: 3 health potions, 3 mana potions and 1 Chipped Gem
- Full Rejuvenation potion: 3 health potions, 3 mana potions and 1 Gem
Jewerly
- Prismatic Amulet: 6 Perfect Gems and 1 amulet of magic type
- Jade Ring: 1 magic ring, 1 Perfect Emerald and 1 antidote potion
- Garnet Ring: 1 magic ring, 1 Perfect Ruby and 1 exploding potion
- Coral Ring: 1 magic ring, 1 Perfect Topaz and 1 rejuvenation potion
- Cobalt Ring: 1 magic ring, 1 Perfect Sapphire and 1 thawing potion