Cyberpunk 2077 how to use Photo Mode and Photo Mode settings explained
Night City is the perfect backdrop for photos!
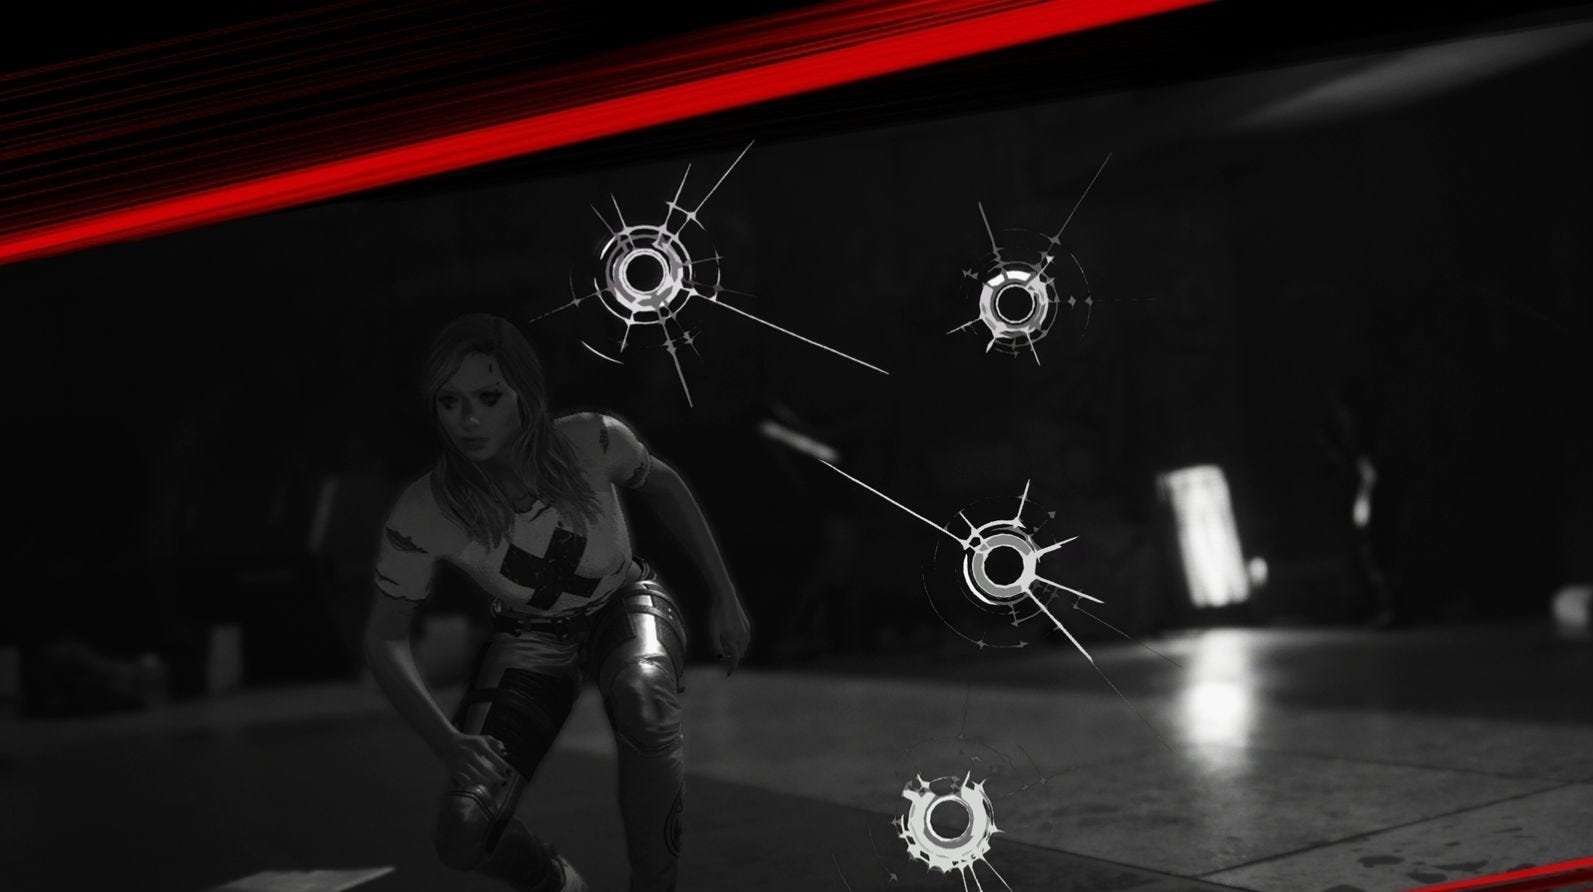

Photo Mode in Cyberpunk 2077 will help you take either some wonderfully beautiful or terrifying screenshots depending on what's currently happening in Night City.
First, however, you need to know how to access Photo Mode in Cyberpunk 2077 and it's also a good idea to know about the various Photo Mode settings, so you can take the best picture possible.
Experimenting with the Photo Mode settings can transform a good photo into a perfect one, even if it's taken during a gunfight!
On this page:
For more help with Cyberpunk 2077, we have pages on life paths and attributes.
How to access Photo Mode in Cyberpunk 2077
Before you can start using Photo Mode in Cyberpunk 2077, you need to know how to access it and, thankfully, that's very easy to do.
On the PS4, PS5, Xbox One, Xbox Series X, Series S or when playing with a controller on PC, you simply need to press both L3 and R3 (the two analogue sticks) down at the same time.
If you're playing Cyberpunk 2077 on the PC, however, you can open Photo Mode by pressing the N key.
If you keep accessing Photo Mode by accident as you play, it is possible to turn the mode off by visiting the main Cyberpunk 2077 settings and, in the miscellaneous section of the Gameplay settings, you'll be able to turn Photo Mode on and off.

Photo Mode settings in Cyberpunk 2077
If you want to take a photo in Cyberpunk 2077, you could simply open up Photo Mode and take a quick snap or you can explore the feature's settings to create a very memorable picture.
There are five different sets of settings for you to experiment with in Photo Mode:
- Camera
- Depth of Field
- Pose
- Effect
- Stickers
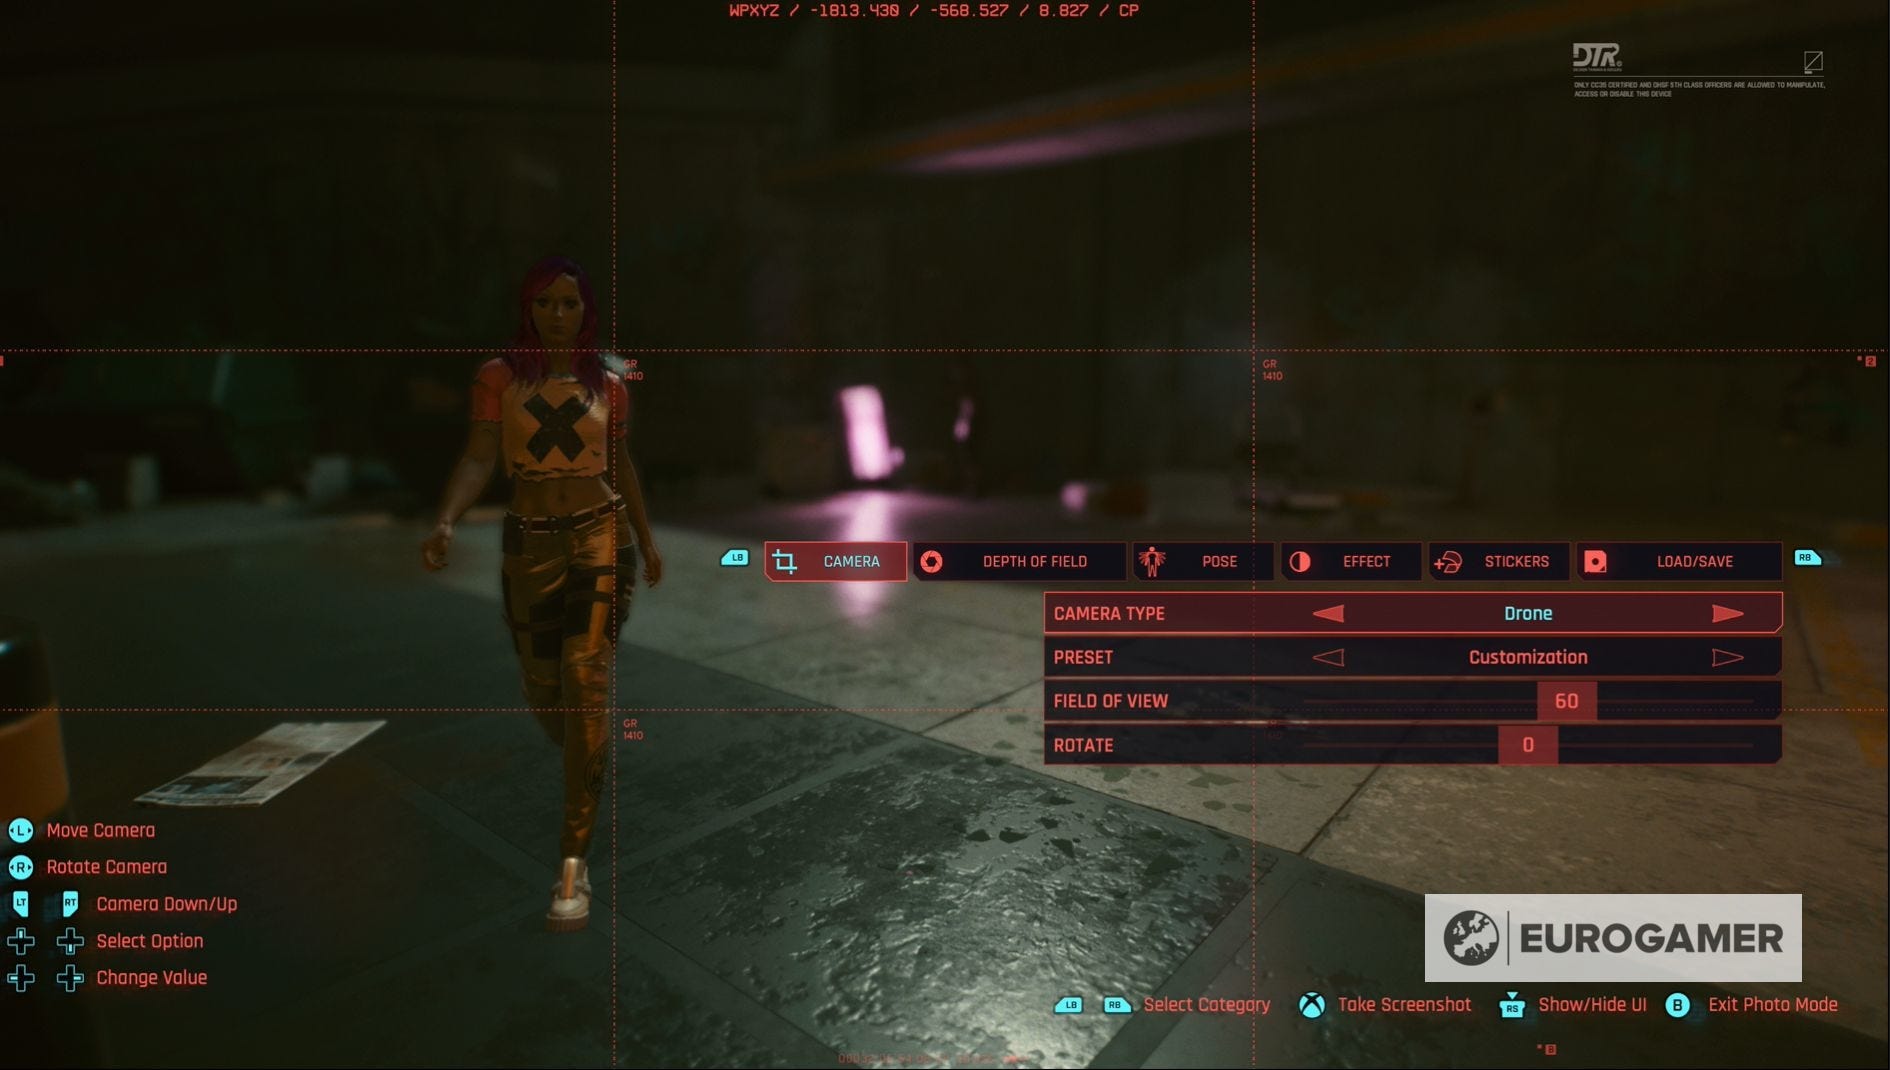
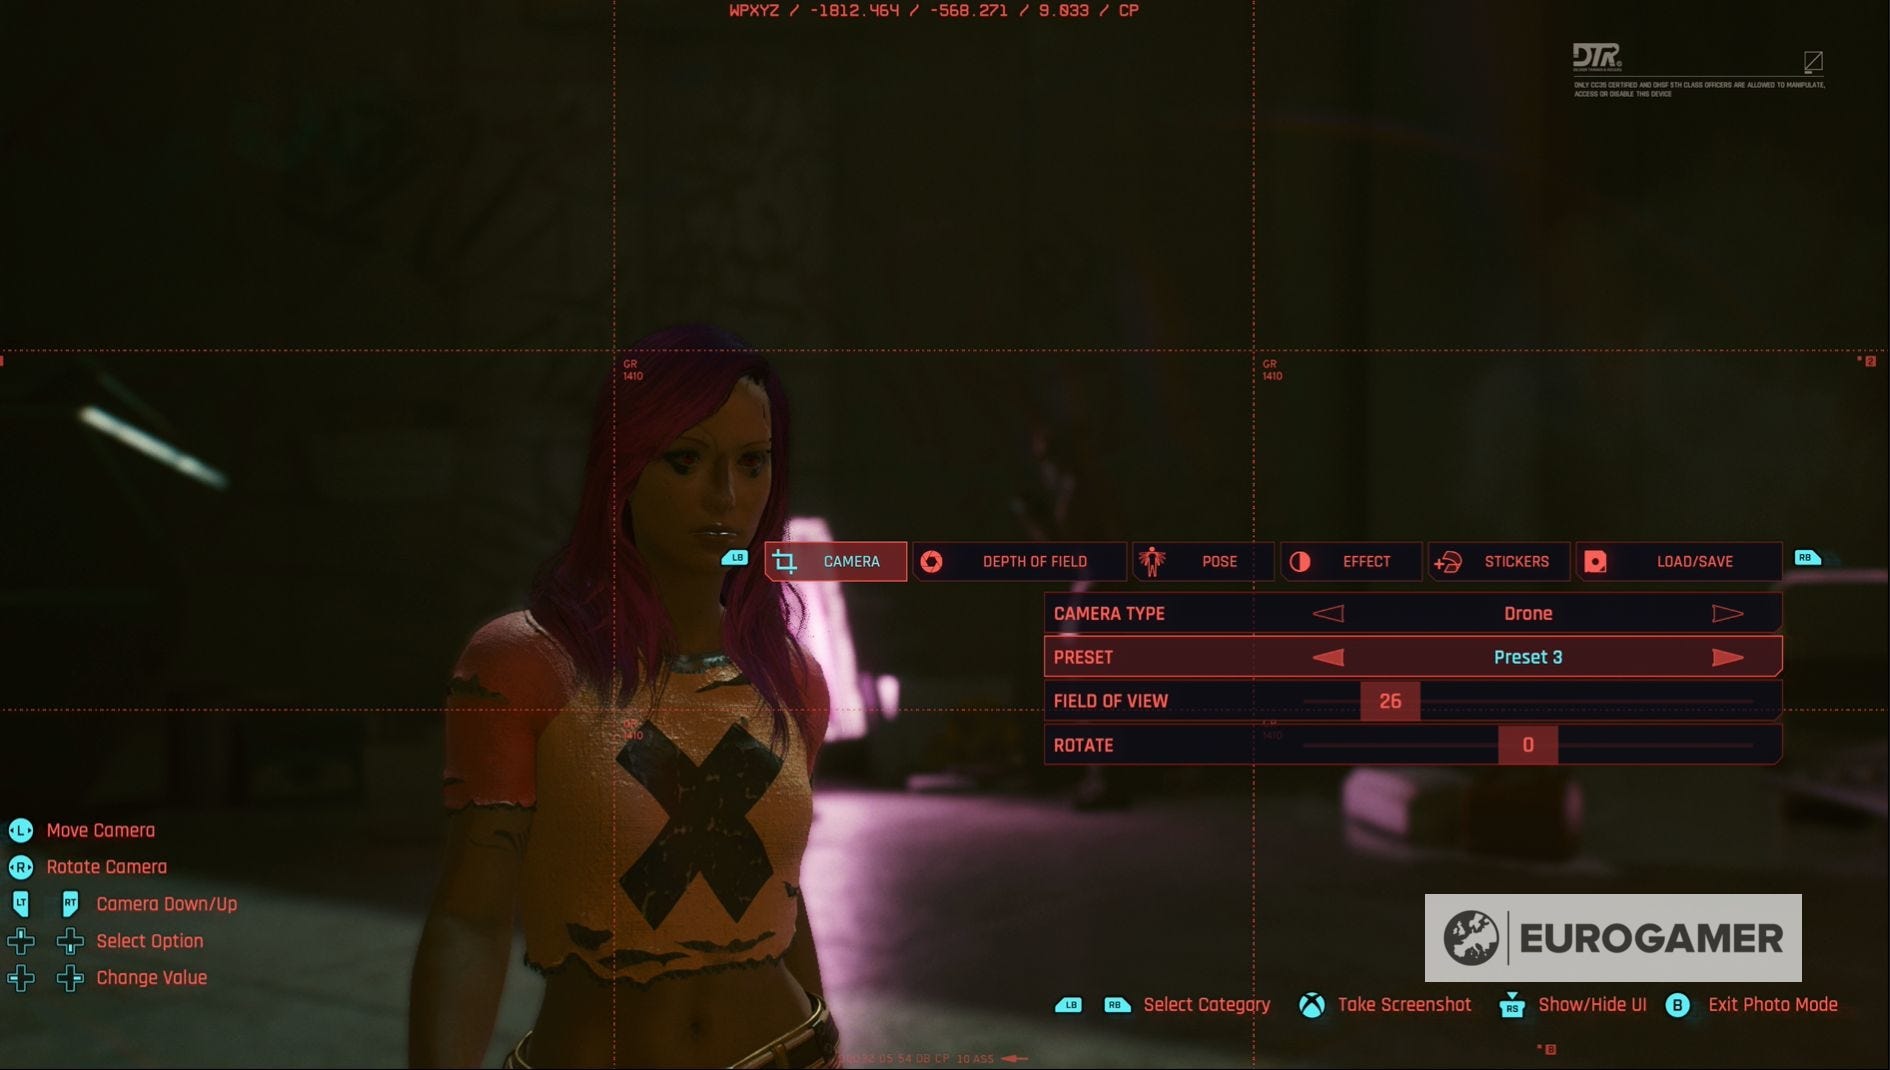
Camera, as the name suggests, puts you in control of the actual camera taking the photo.
You can switch from first to third person point of view, change the rotation and the field of view. There's also a number of pre-set camera settings, so that you can quickly snap a pic.
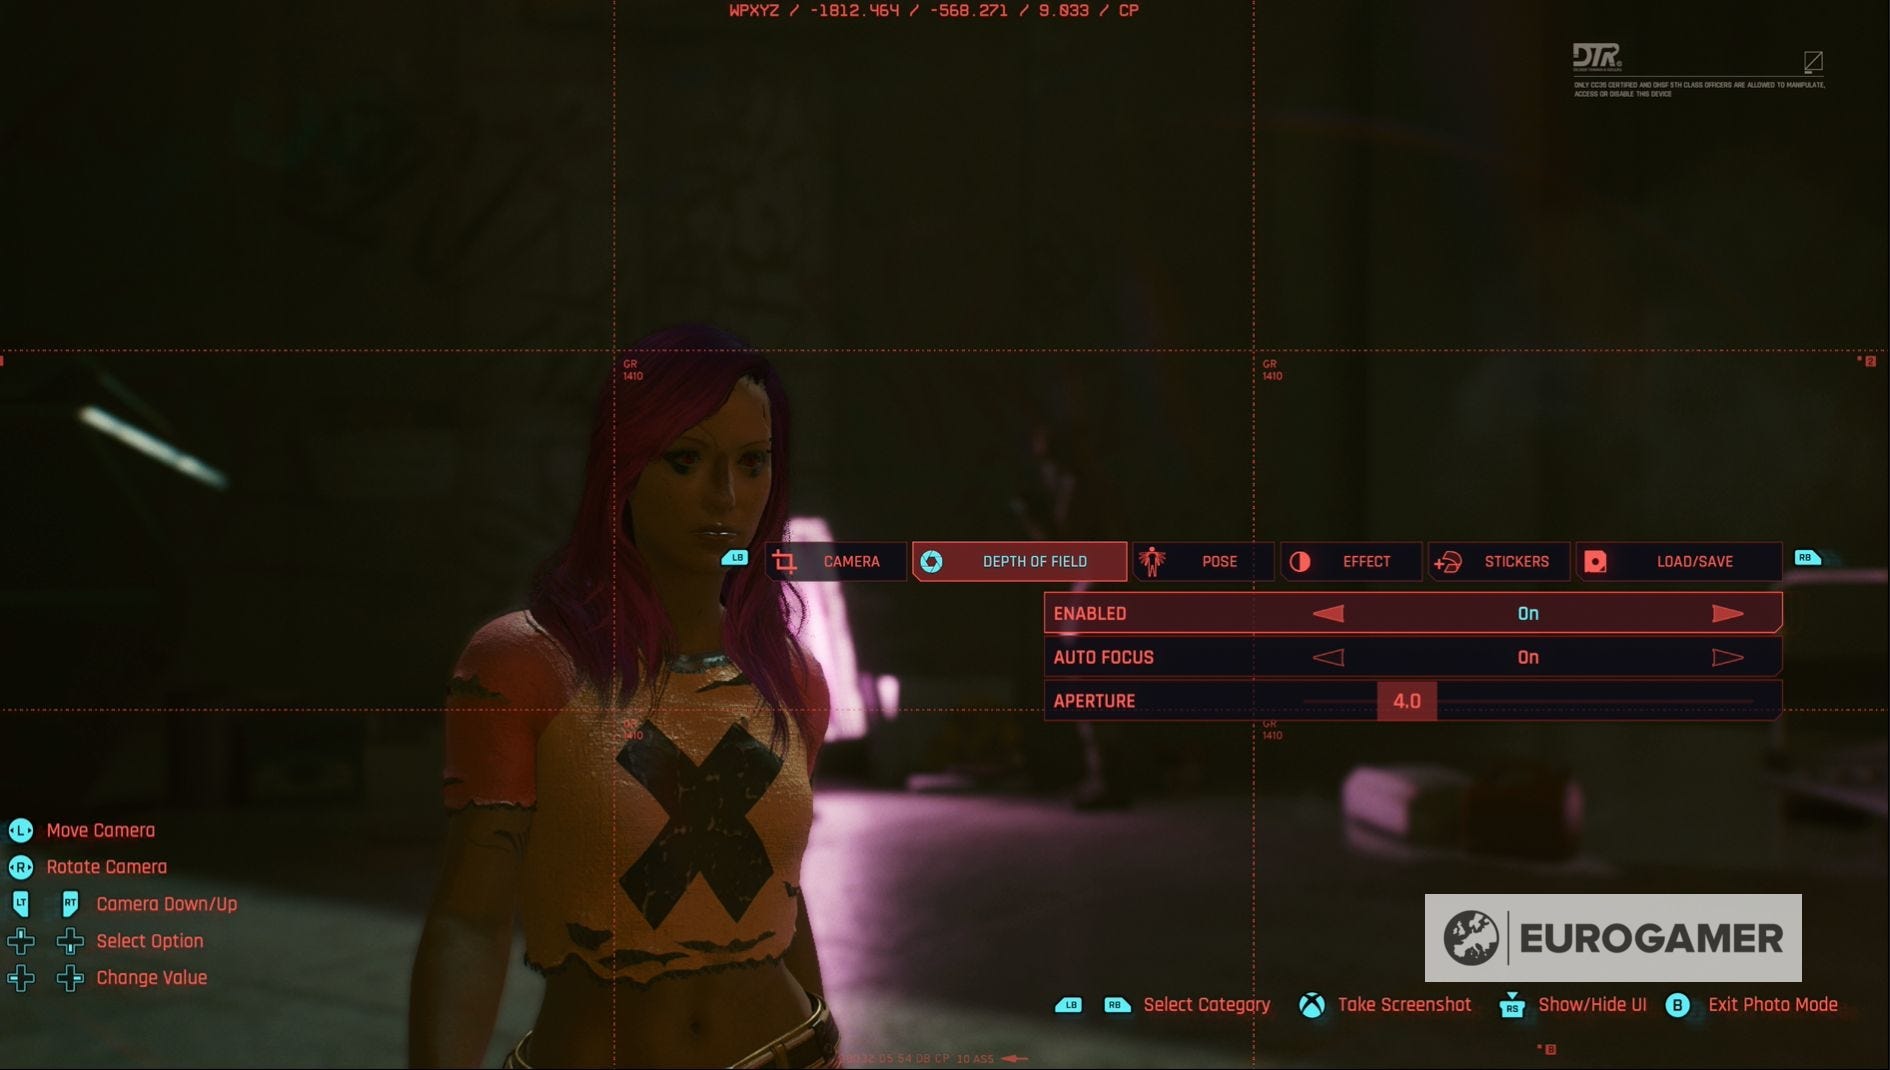
Depth of Field controls what the camera actually focuses upon, allowing you to blur either the foreground or background of a picture. This is great for highlighting specific parts or characters within the photo.
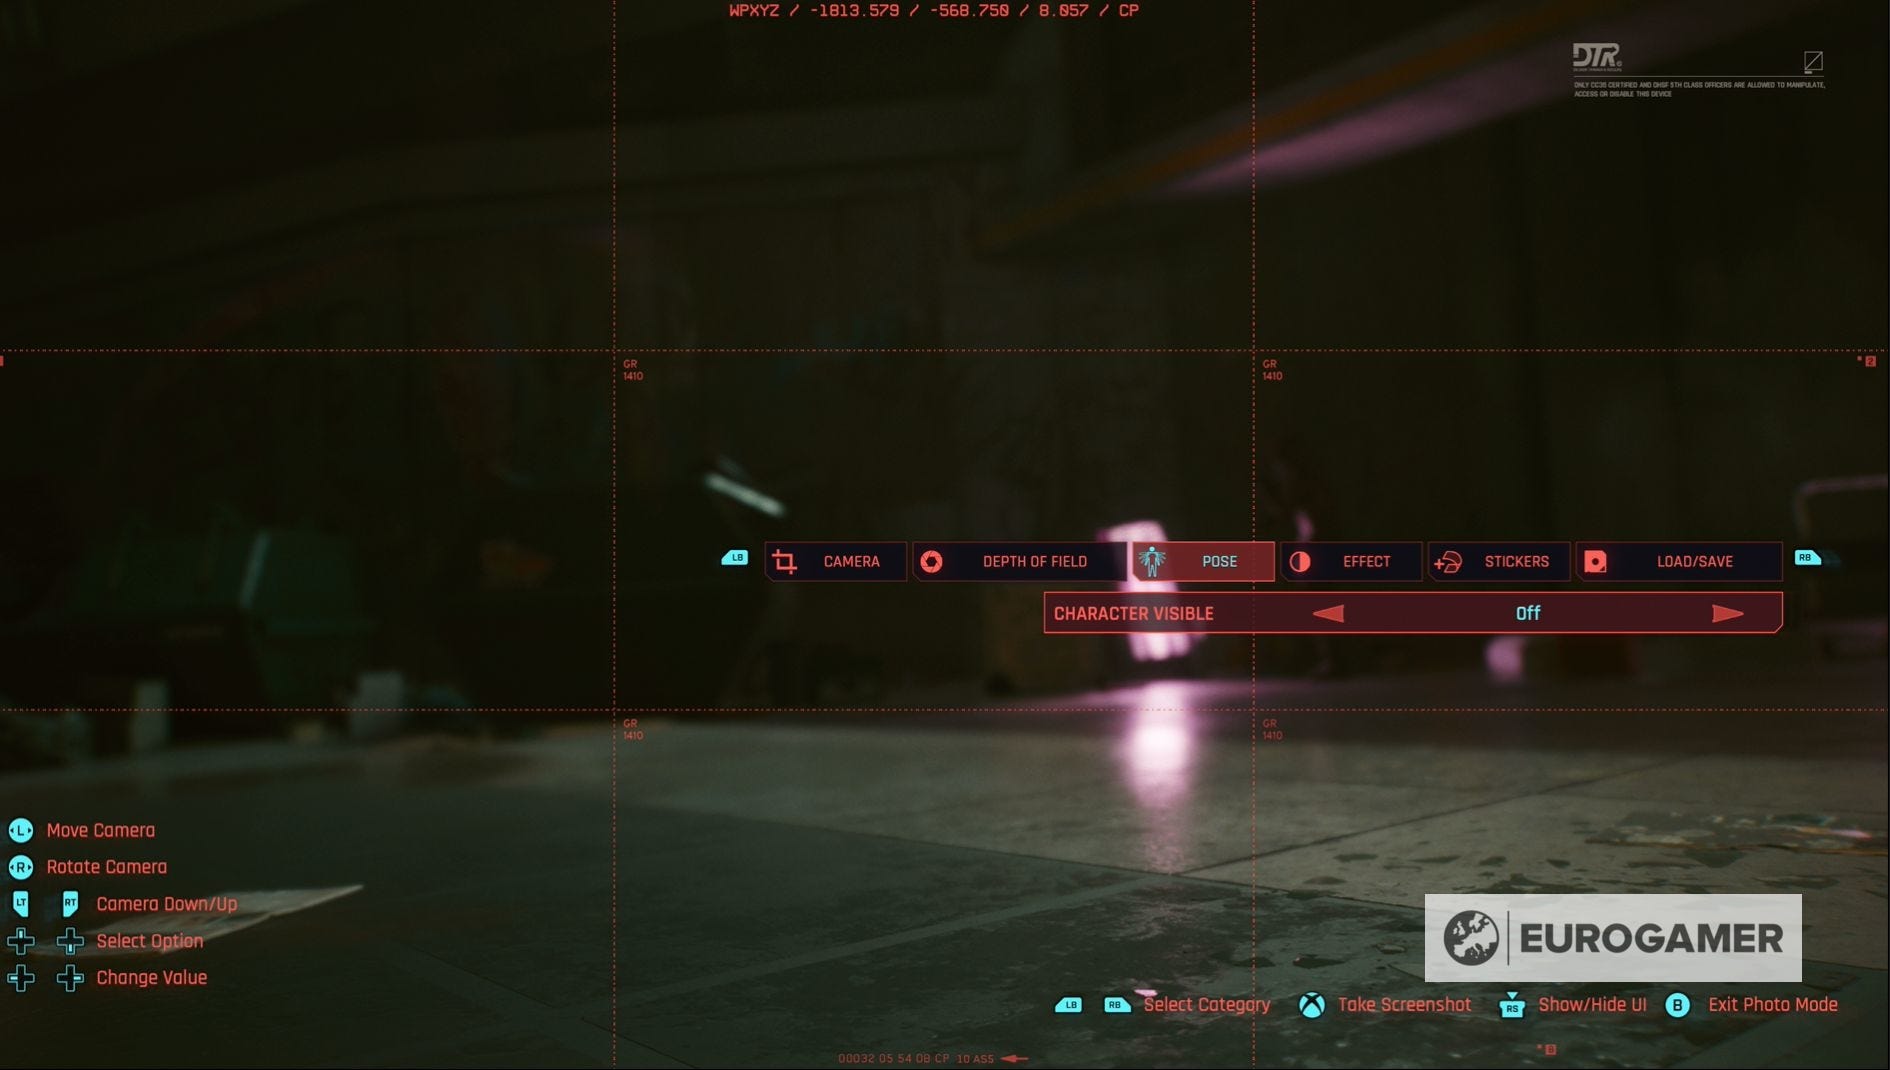
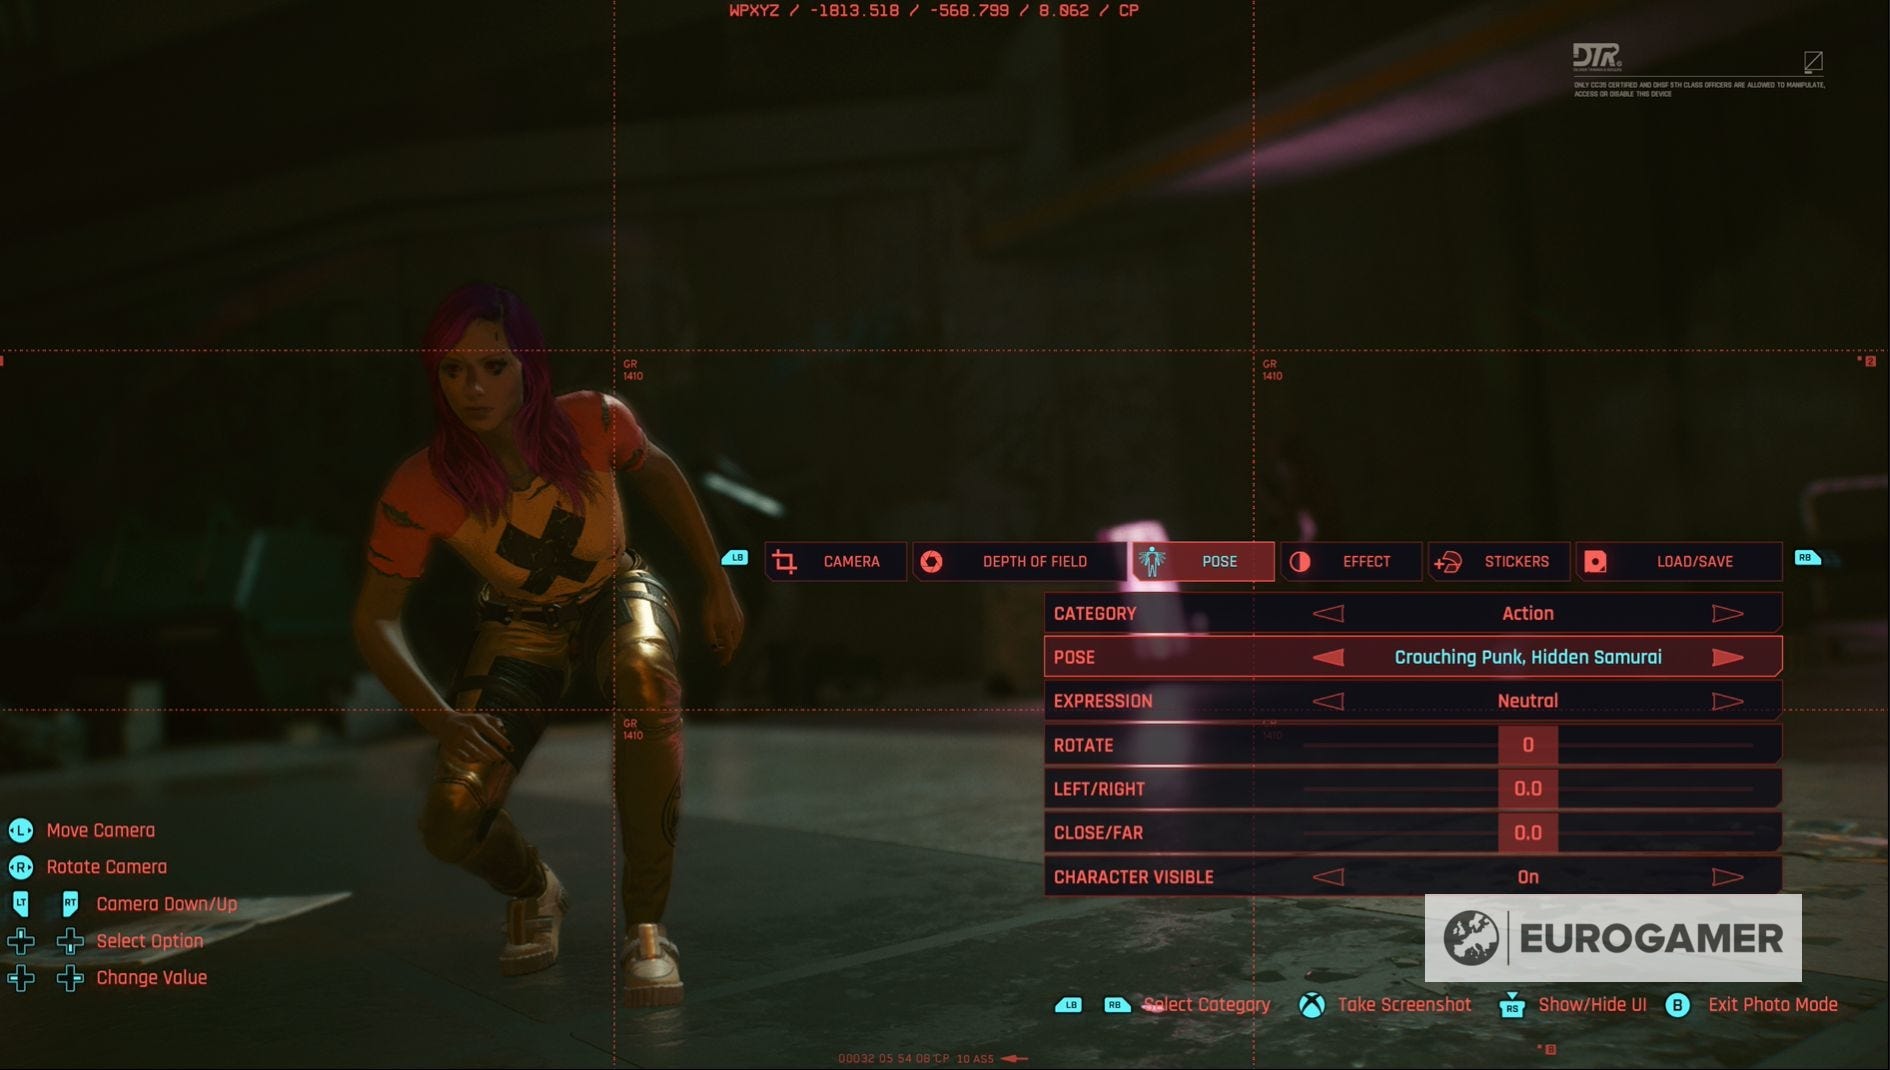
Pose allows you to change how V stands in the photo and, thanks to the 'Character Visible' setting, whether they appear in the photo at all.
There are a variety of different poses - divided into idle and action - that you can set V into and you also have the ability to change their facial expression too.
Effect changes the actual colour of the photo by changing the exposure levels, contrast, adding or removing highlights, among others. You can also add in set effects, such as changing the photo to black and white.

Finally, Stickers, allows you to add up to five different stickers to your photo and, with 196 different stickers, you might find this one taking up a lot of time. This is also the setting that will allow you to put a set backdrop to your photo or add a frame.

Thanks to the Load / Save option at the end of the Photo Mode settings menu, you don't have to lose your preferred camera settings. Instead, you can save up to three different sets of Photo Mode settings and load them whenever you like.
Aside from all of these settings, you can also manually move and rotate the camera however you like.
Good luck in Night City!