Super Mario Galaxy Star Guide
Part 2: Reach for the stars.
Welcome back, moustache fans, to the second part of the lovingly crafted Eurogamer Super Mario Galaxy Star Guide. You have, of course, already savoured the first part and we're now ready to get stuck into the next two observatories full of galactic gaming greatness.
Things have been fairly simple so far, but it starts to get trickier from here on so make sure you gather extra lives whenever you can. There are always 1Up mushrooms around the Observatory - in the crate behind the Starshroom in the Garage, for instance - so make a habit of stocking up between levels. Also keep your eyes on the Toad mailman, the one with pink spots. If he has a letter icon next to him, go and have a chat - it'll either be a letter from Princess Peach containing five bonus lives or, once you've found him, a Luigi mission for you to try. Hey, how come they can send letters while trapped in the centre of the universe, while it takes my first class post three days to get here? Pshaw.
Anyway, there's another handy respawning 1Up mushroom beneath the spiral staircase leading to the Kitchen observatory...and that's where we're going right now.
The Kitchen
Beach Bowl Galaxy
Star #1
Sunken Treasure
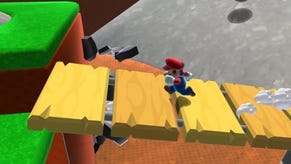
Take a deep breath and get ready for your first taste of underwater Mario fun. The swimming controls can take some getting used to (down is up, like a flight sim, and A propels you forwards) but luckily our hairy hero has impressive lung capacity so you'll have plenty of time to get the hang of it. Grab all five star pieces (there's one in that clam, and another in the crate next to the penguin) then launch yourself onto dry land. Do a high jump to reach the question coin, then follow the musical notes, clobbering plants along the way. Stomp on the button to create a wooden walkway up to the next area, but beware - it vanishes after a frustratingly short time. You'll just have enough time to almost reach the end before it starts to flash, so leap for the solid ledge as soon as you're able. Then just repeat the process on the next button, wall jump up to the star and shatter the crystal with a couple of spins.
NOTE: You should now be able to visit the Library to read the first two chapters of Mama's storybook. New chapters will be added as you complete more levels, an ideal diversion for those who enjoy whimsical backstory. Or just sniggering at the phrase "riding the turquoise comet".
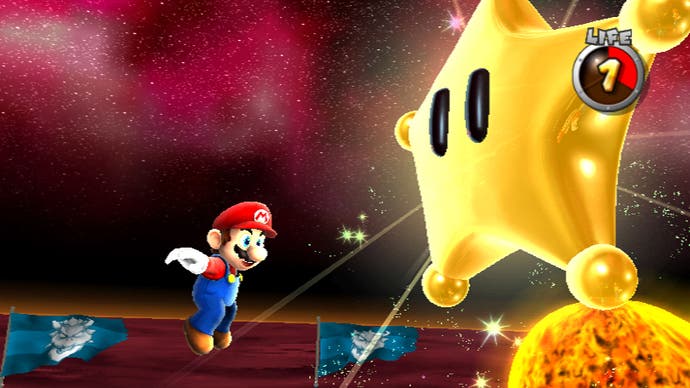
Star #2
Passing The Swim Test
A nice easy star, this one. Cross the wooden bridges to the large penguin, and enrol in the swimming school. Then just dive in and look for the penguin carrying the gold shell. Spin them, and you'll snatch the shell. Take it back to the instructor penguin for your star.
Star #3
The Secret Undersea Cavern
Go and talk the swimming instructor penguin again. You'll discover that swimming classes are cancelled - oh noes - because there's a cracked wall under the water. Don't smash it with a shell, he says. When was the last time you obeyed a penguin? Well, apart from the previous level. You know what to do - dive in, grab a shell and smash that wall down. You can't miss it, and there's even a chest containing an extra life in front of it. Pass through the cave, smash the crates and use the launch star to rocket up to the next section. There are two types of Thwomps here - the normal ones, that smash up and down on the spot, and rolling Thwomps. You'll notice the rolling ones have hollow insides, so it's a question of finding the right spot to stand where they'll pass over you without squashing you. Use the raised areas for a breather - the Thwomps can't roll over those - and make your way to the end of the pathway to smash the star out of the crystal. Feel free to ignore the extra life mushrooms, perched tantalisingly on the collapsing platforms along the way. You'll probably lose more lives getting them than you'd gain in return so, unless you're desperate or brave, save the 1Up hunting for the more chilled environs of the Observatory.
Star #4
Wall Kicking Up Waterfalls
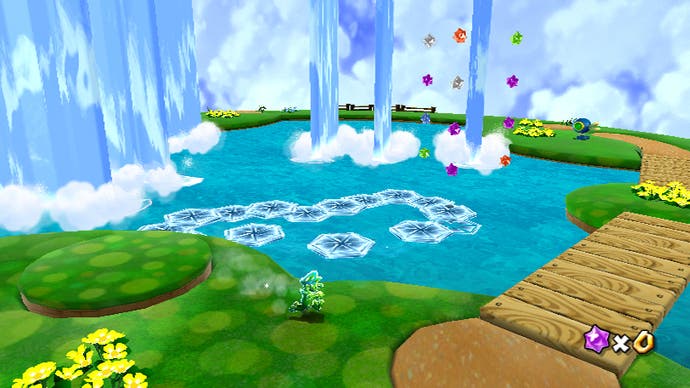
This secret star can only found by going back into The Secret Undersea Cavern mission. Once there, grab a green shell from the seabed and carry it up to the top of the waterfall. There's a green pipe in the middle of the water, which you can return to later for some more wall-kicking fun to earn a bunch of star bits, but for now head round to the right hand side. Throw the green shell at the chest, and use the launch star to zip off to where the fourth power star awaits. There's a new creature here, and when it hits you with its beak, you're propelled high into the air. Useful. Get it to follow you over to where the question coin in hovering, and use the creature to reach it. You can now pick up an ice flower, giving Mario new abilities - including walking on water. The ice flower is time limited though, so you need to move fast for this part. Run across the water to the waterfalls opposite and wall kick your way up them. Use the launch star at the top, and repeat the process again. There are three tiers in all, and you'll only just have time to make it to the top before the ice flower runs out. The final area has spiky icebergs which will shatter your frozen walkways, so watch their movements, pick your moment and then grab the ice flower and create a path for the creature to follow you over to the small island on the opposite side. Let it smack you into the sky here, and you'll grab the star. Phew.

