Sekiro General Naomori Kawarada fight - how to beat and kill Kawarada
How to beat the mini boss General Naomori Kawarada in Sekiro: Shadows Die Twice.

General Naomori Kawarada is the second mini boss in Sekiro, found in the game's Ashina Outskirts: Outskirts Wall - Gate Path area, following on from Sekiro's Leader Shigenori Yamauchi in our walkthrough of the game's bosses and mini-bosses.
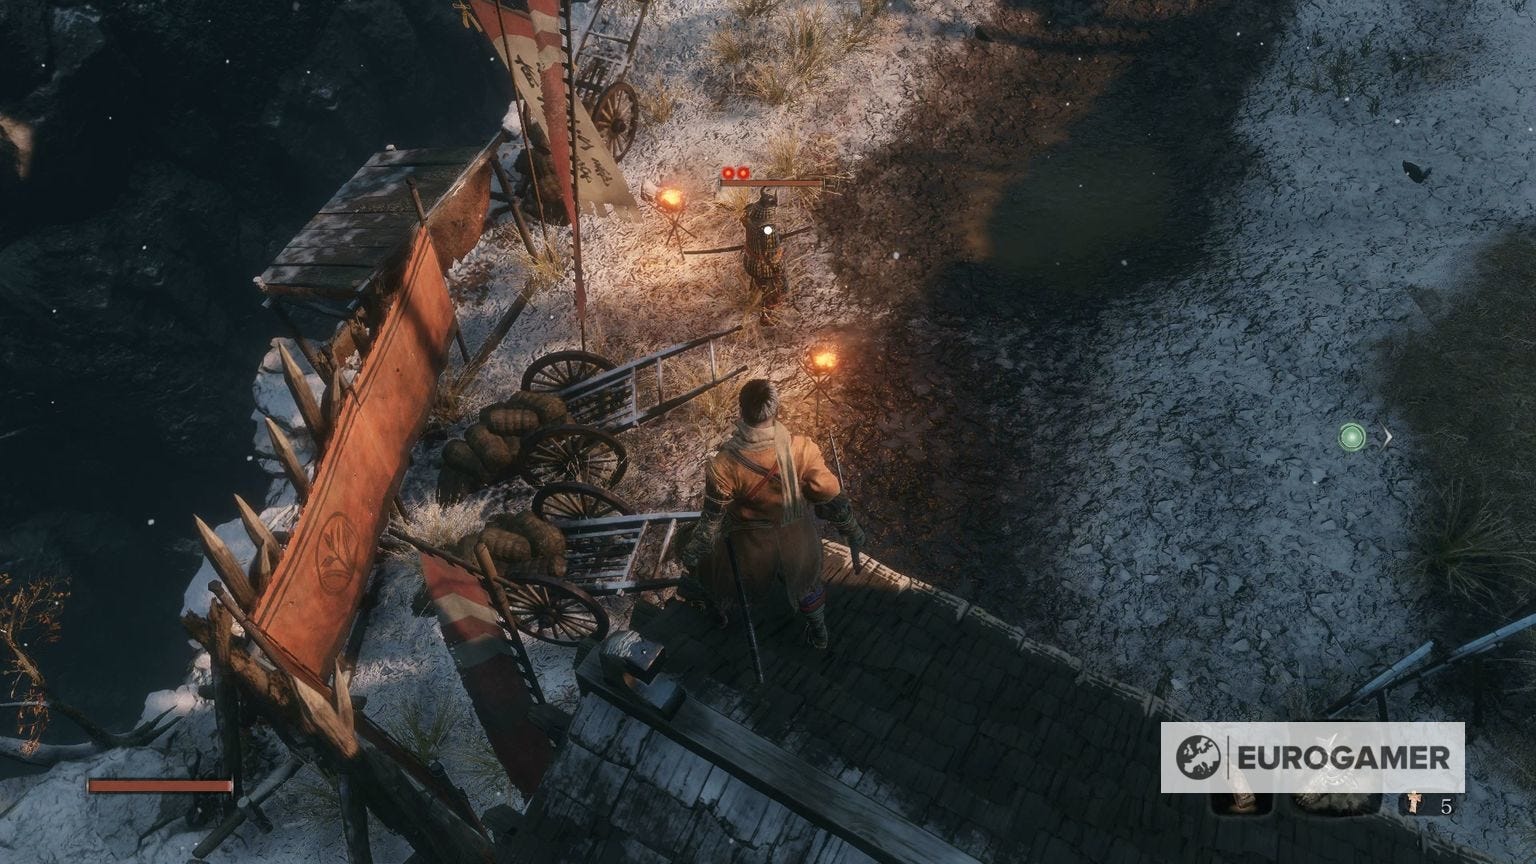
You'll find General Naomori Kawarada hanging out by a closed gate in a yard shortly after another gate, the one with the three wolves in front of it - where you got the Shinobi Shurken Wheel Prosthetic Tool.
Below, we'll cover how to beat and kill Sekiro's General Naomori Kawarada, including any particularly strong methods or weaknesses they might have and any handy things to bear in mind.
For more guides and pages like this, meanwhile, cycle back to our main Sekiro walkthrough and boss guide hub.
Sekiro General Naomori Kawarada fight - how to beat and kill Kawarada
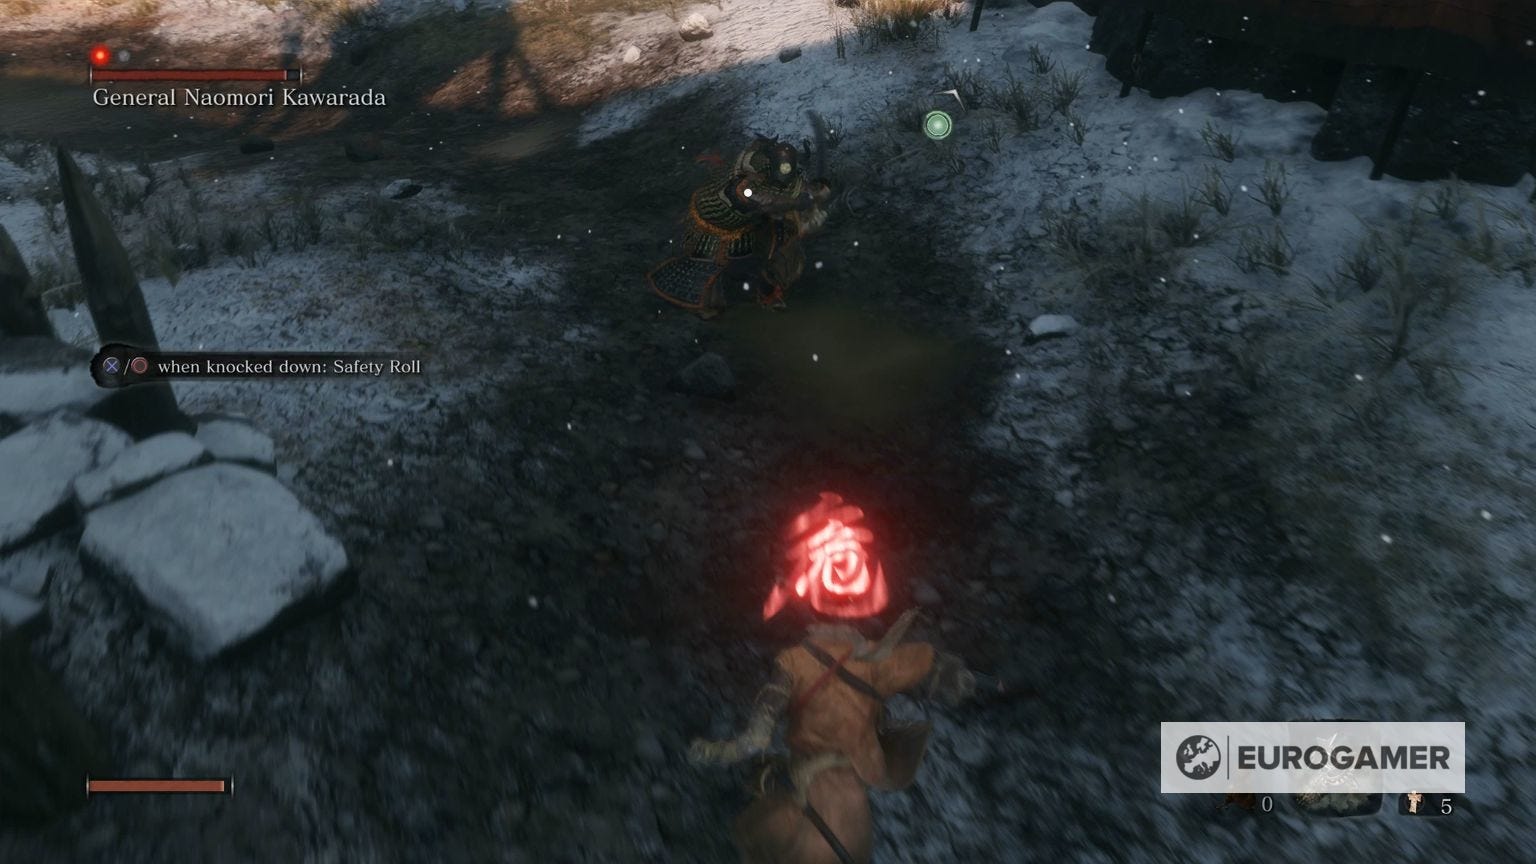
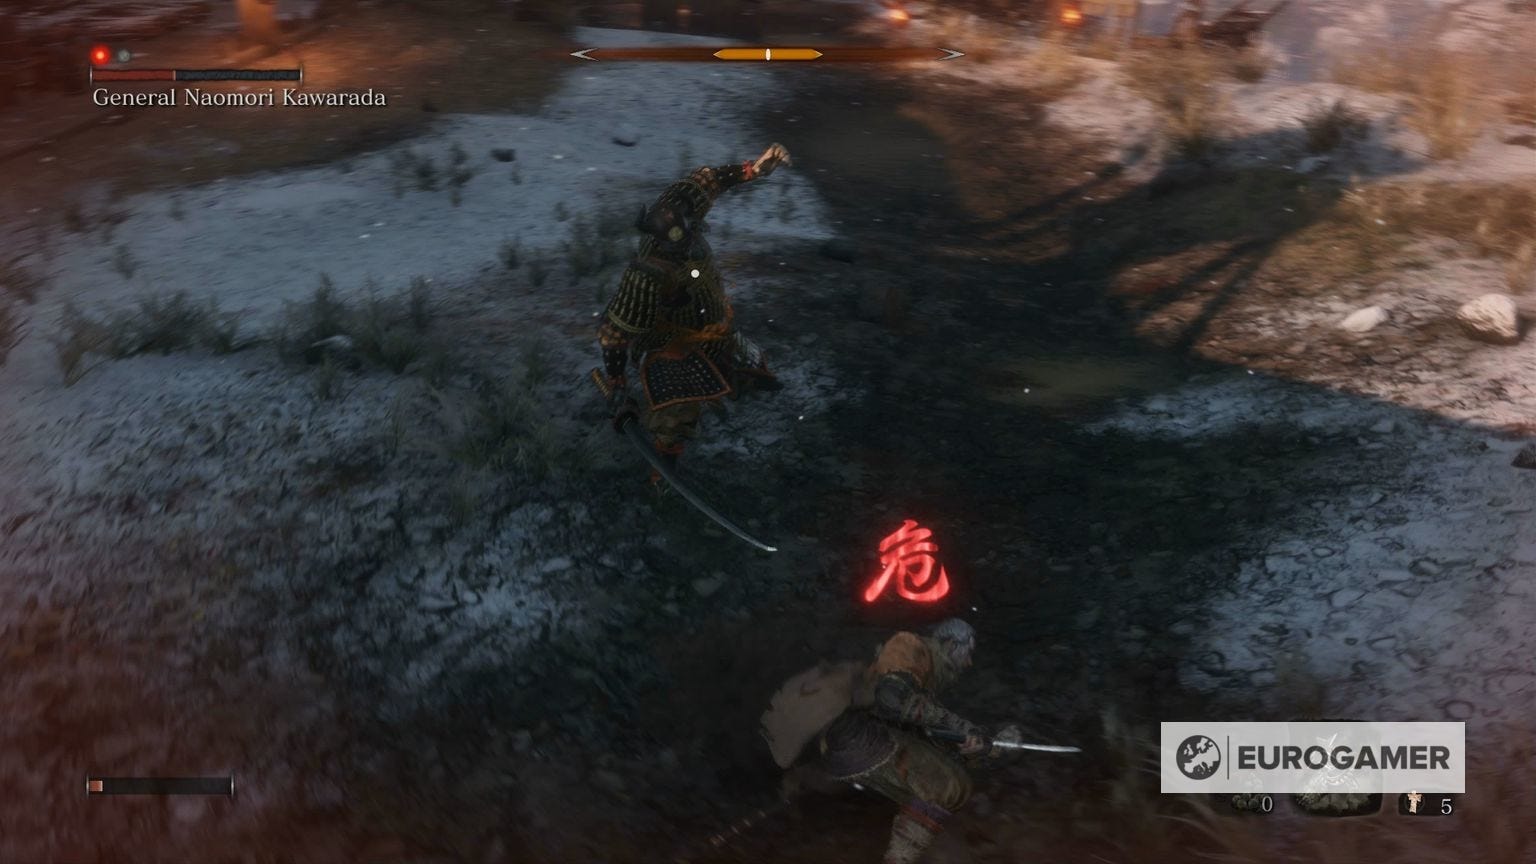
General Naomori Kawarada is a similar kind of mini-boss to Leader Shigenori Yamauchi. He has two Deathblow markers like usual, and will teach you the important of mastering another new fundamental of Sekiro combat: Perilous attacks.
Beating him will be a case of mastering these, as much as a case of mastering your previous knowledge of souls combat. To give you a brief lowdown, countering Perilous Attacks is all about playing rock-paper-scissors with enemy attack types. There are three kinds of Perilous Attack, and to 'teach' you the basics of the system General Naomori Kawarada will at least two of them. We go into much more detail on this in our Sekiro Combat system, Perilous Attacks, dodging and countering guide.
The most frequent Perilous Attack he uses is a 'sweep'. The counter to this is to jump - and actually, press jump again when in the air above him to kick him and do some heavy Posture damage.
The other is a grab - this one you can't block, and he'll do heavy damage if he lands it. You need to tap dodge and a direction to get away from it when you see him begin the animation.
Looking for more Sekiro pages like this? First up, the first main Sekiro patch notes for update 1.03 are live. Otherwise, our Sekiro boss guide, boss list and walkthrough hub has everything in one place, including pages on Lady Butterfly, Genichiro Ashina Way of Tomoe, Folding Screen Monkeys, Corrupted Monk, Guardian Ape, Great Shinobi Owl, Emma and Isshin Ashina, True Corrupted Monk, and Divine Dragon. We also have in-depth pages like Sekiro tips and tricks to get you started, Sekiro Skills, skill tree and Esoteric Text locations explained, our deep dive on the Sekiro combat system, Posture, and Perilous Attacks, or details on all Sekiro Prosthetic Tool locations, how to cure Dragonrot and Rot Essence in Sekiro, Gourd Seed locations, a Divine Confetti farm route method, all Treasure Carp Scale locations, all, Prayer Beads locations and all Snap Seed locations, too. And when you're ready - the how to beat Isshin Sword Saint and an Isshin Sword Saint cheese, plus the many Sekiro endings.

Dealing with those Perilous Attacks aside, there are a couple of other things to know about tackling General Naomori Kawarada.
- You can remove one Deathblow mark with stealth - from the entrance gate with the Prosthetic inside, head left on the roof, to the rocky ledge, and then work your way around behind Kawarada on the rooftop of the closed gate behind him. Lock on and drop down, tapping R1/RB when the reticule turns red for an easy Deathblow from above, doing half the work for you.
- Being aggressive works - Kawarada's Posture bar goes up pretty quickly even when he's blocking, which means you can take the offensive and push him pretty hard to fill up that bar and expose him for the second deathblow. It'll only take one or two big Deflects of his Perilous Attacks, combined with some standard attacks of your own, to tip him over the edge and get him ready to finish off.
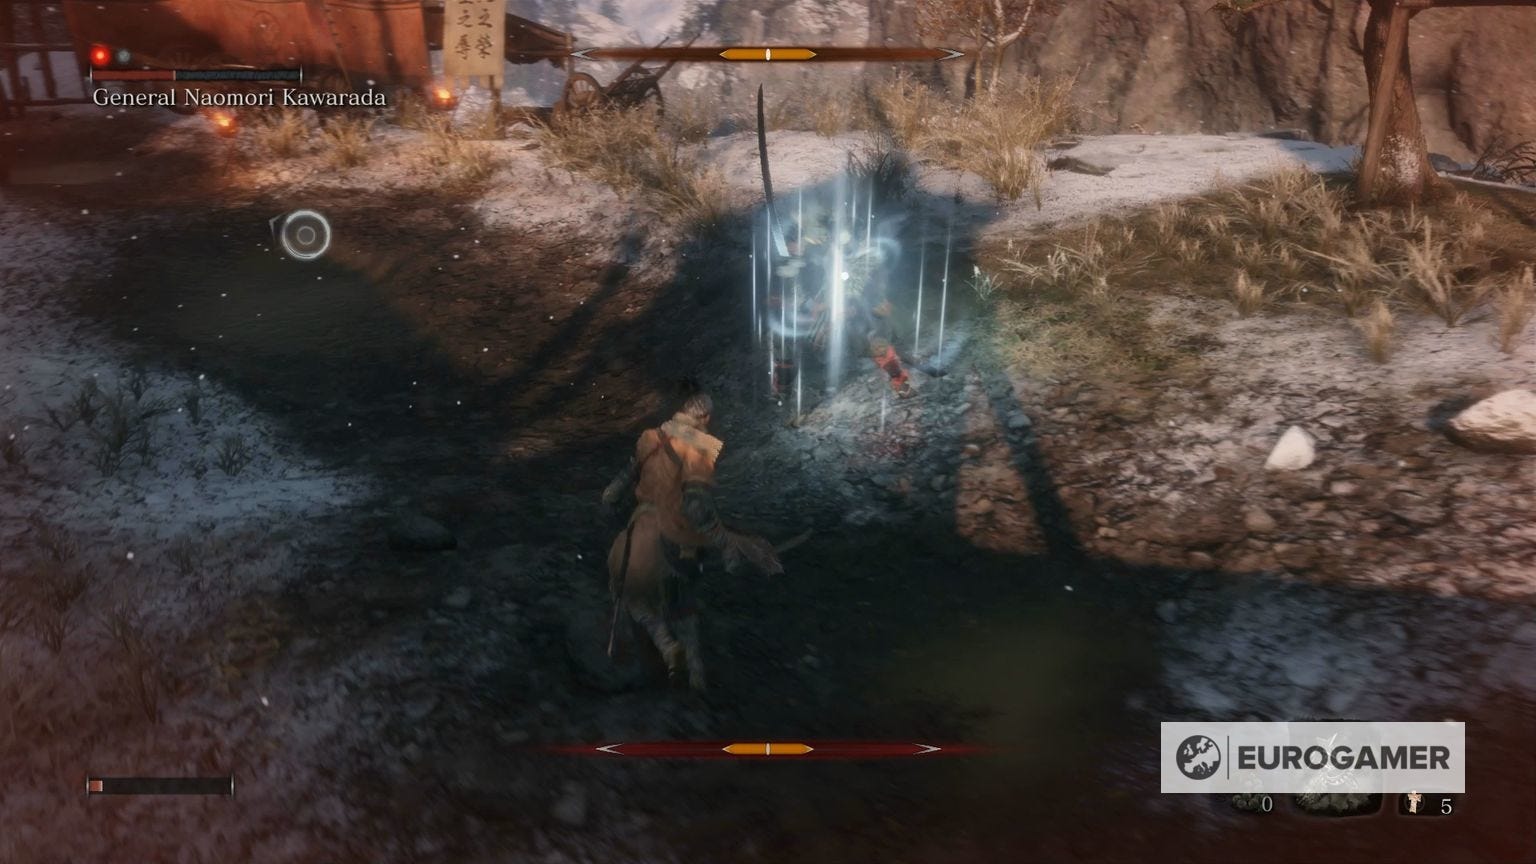
- He pauses every now and then to channel something - this is a perfect time to attack, if you're close enough. You'll see him stop for a moment and some white, wind-like effect will appear on him. Get a couple free hits in quickly when he does it.
That's all you'll hopefully need for tackling this encounter. Next up in our guide is the Shinobi Hunter Enshin of Misen fight, or you can cycle back to our main Sekiro walkthrough and guide hub for much more bosses, explainers and advice.