Sea of Thieves chicken, pig and snake locations - how to find and catch animals and Merchant Alliance quests explained
Everything you need to know about Sea of Thieves' animal-gathering voyages.


Sea of Thieves's chicken, pig, and snake locations can vary from game to game, but knowing where to go to track them down is going to be pretty essential if you want to make any kind of headway with Merchant Alliance Voyages.
Animals can be found on almost every island in Sea of Thieves' world, but the problem is that they'll often appear on one in one play session, but not be there in the next.
Here on this page then, we'll detail the best chicken, pig and snake locations for rounding them up, as well as detail exactly how to find and catch snakes, chicken and pigs and anything else you need to know.
Sea of Thieves chicken locations - how to find and catch chickens
The community has once again done some great work in rounding up various players' experiences in finding animals, as it seems their spawn locations with often change from one instance of the game to the next. In other words, load into one game and you'll find Chicken Isle full of poultry, but load into another and there won't be any there, despite the obvious-sounding name.
With that in mind, to start here's a list of all the places you can find chicken, according to this excellent doc created by redditor bridgermetz.
If you're looking for a specific island's location, our Sea of Thieves island map guide can help you find and indentify them quickly.
Sea of Thieves chicken locations
- Barnacle Cay
- Black Water Enclave
- Boulder Cay
- Cannon Cove
- Chicken Isle
- Crook's Hollow
- Crooked Masts
- Discovery Ridge
- Lagoon of Whispers
- Marauder's Arch
- Mermaid's Hideaway
- Mutineer Rock
- Old Faithful Isle
- Old Salts Atoll
- Plunder Valley
- Rapier Cay
- Sailor's Bounty
- Shark Bait Cove
- Shipwreck Bay
- Smuggler's Bay
- Thieves' Haven
- Tri-Rock Isle
- Twin Groves
- Wanderers Refuge
How to catch chickens and get chicken coops in Sea of Thieves
To catch a chicken, you'll need a chicken coop. These are acquired in two ways both of which are, thankfully, fairly simple.
The first is by talking to the Merchant Alliance trader who gave you a chicken-gathering Voyage, once you've started said Voyage - it has to be actually under way, by which we mean voted for on your ship and currently active, otherwise you won't be able to get the coops.
The second is by getting lucky and finding a chicken coop at random while exploring islands - this is pretty heplful for stockpiling chickens so you can complete Voyages in bulk later on.
Once you have a coop, you need to literally run after chickens whilst holding it - when you catch up to one, a prompt will appear for you to hold down a button and, if successful, you'll have picked up the chicken.
To get a chicken out of your coop, which you might need to do if you picked up the wrong one by accident for instance, there's unfortunately only one solution: you need to shoot or drown it!
Sea of Thieves pig locations - how to find and catch pigs
Much the same as chickens, pigs can be found on various islands, with different islands spawning pigs in different instances of the game. Here's all of the locations reported by the community to potentially have pigs so far:
Again, if you're looking for a specific island's location, our Sea of Thieves island map guide can help you find and indentify them quickly.
Sea of Thieves pig locations
- Blind Man's Lagoon
- Cannon Cove
- Chicken Isle
- Crescent Isle
- Devil's Ridge
- Fool's Lagoon
- Isle of Last Words
- Kraken's Fall
- Lone Cove
- Lookout Point
- Marauder's Arch
- Mermaid's Hideaway
- Old Faithful Isle
- Paradise Spring
- Plunder Valley
- Plunderer's Plight
- Sailor's Bounty
- Sea Dog's Rest
- Shark Bait Cove
- Shark Tooth Key
- Shipwreck Bay
- Shiver Retreat
- Snake Island
- Sunken Grove
- Thieve's Haven
How to catch pigs in Sea of Thieves
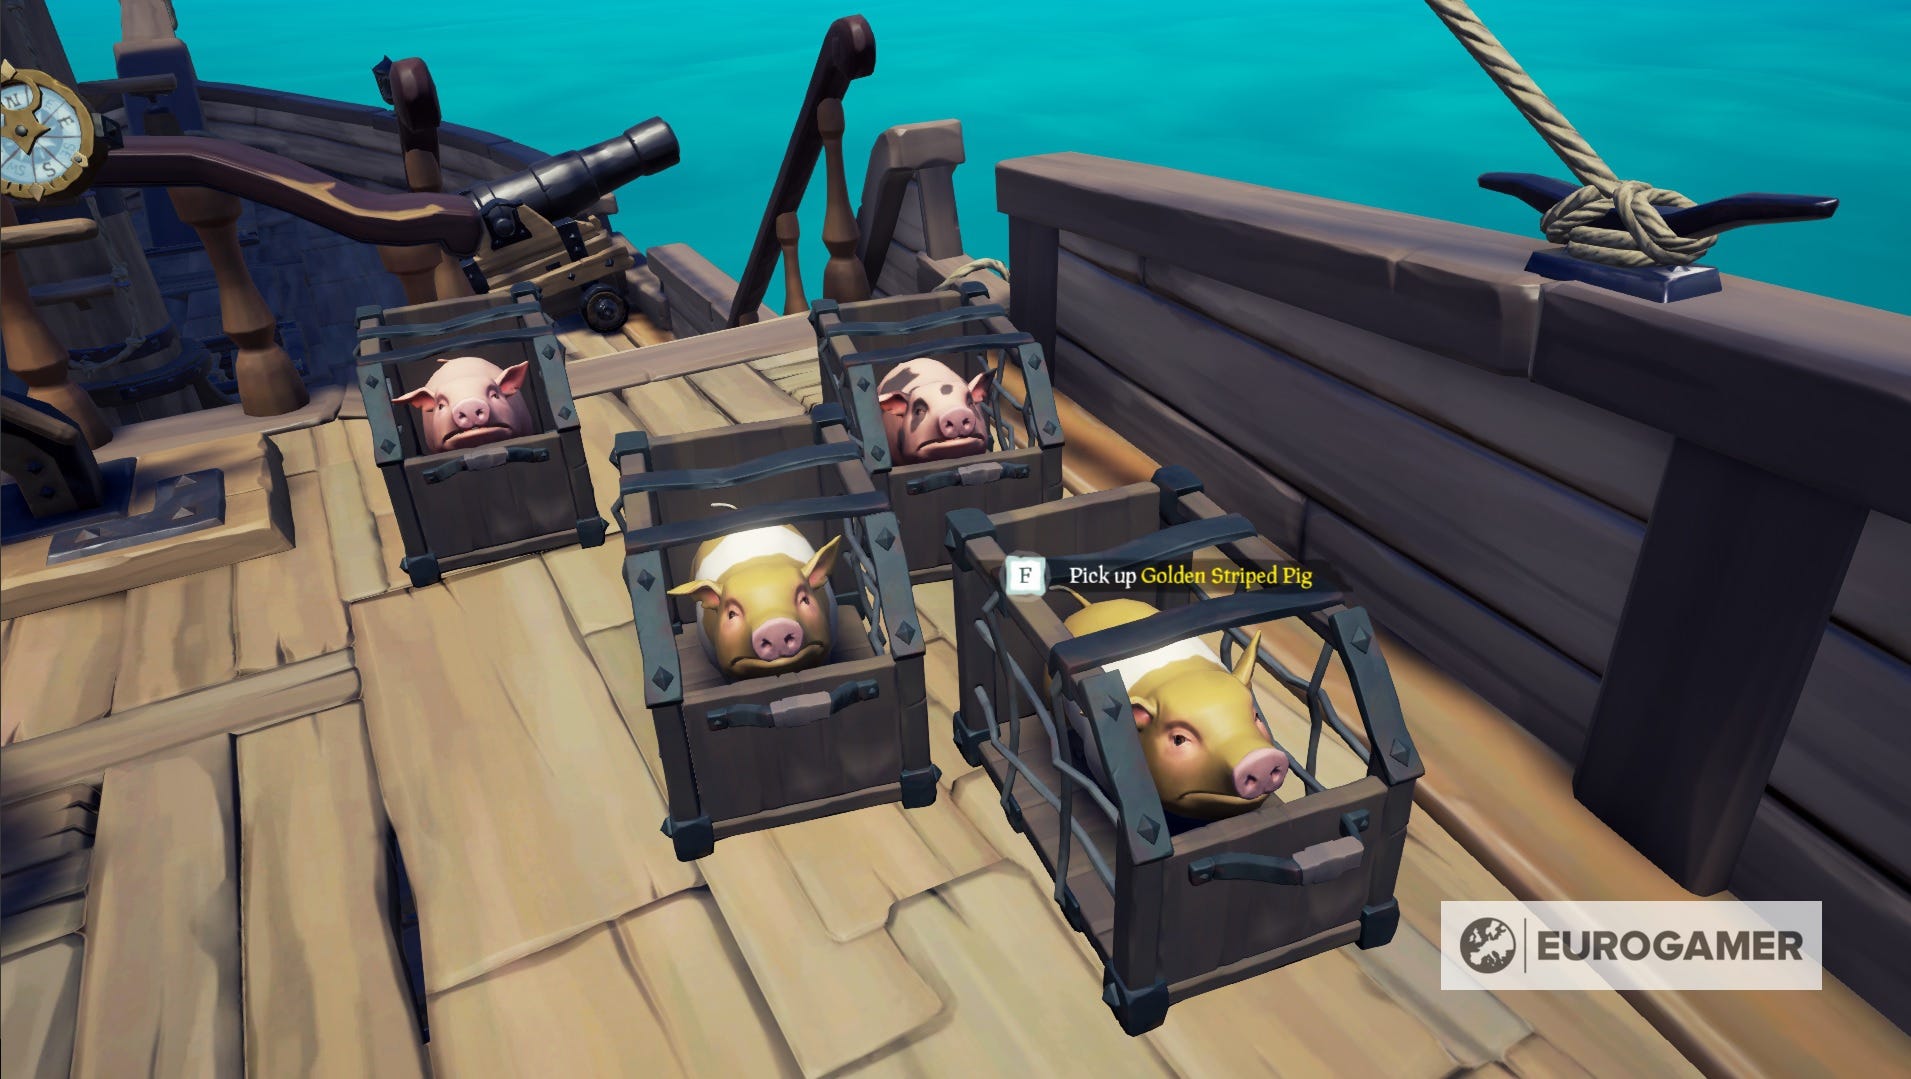
Catching pigs works pretty much identically to catching chickens. Collect the pig cages from the vendor who gave you the Voyage to catch them in the first place, and then run after them and scoop them up when you get close.
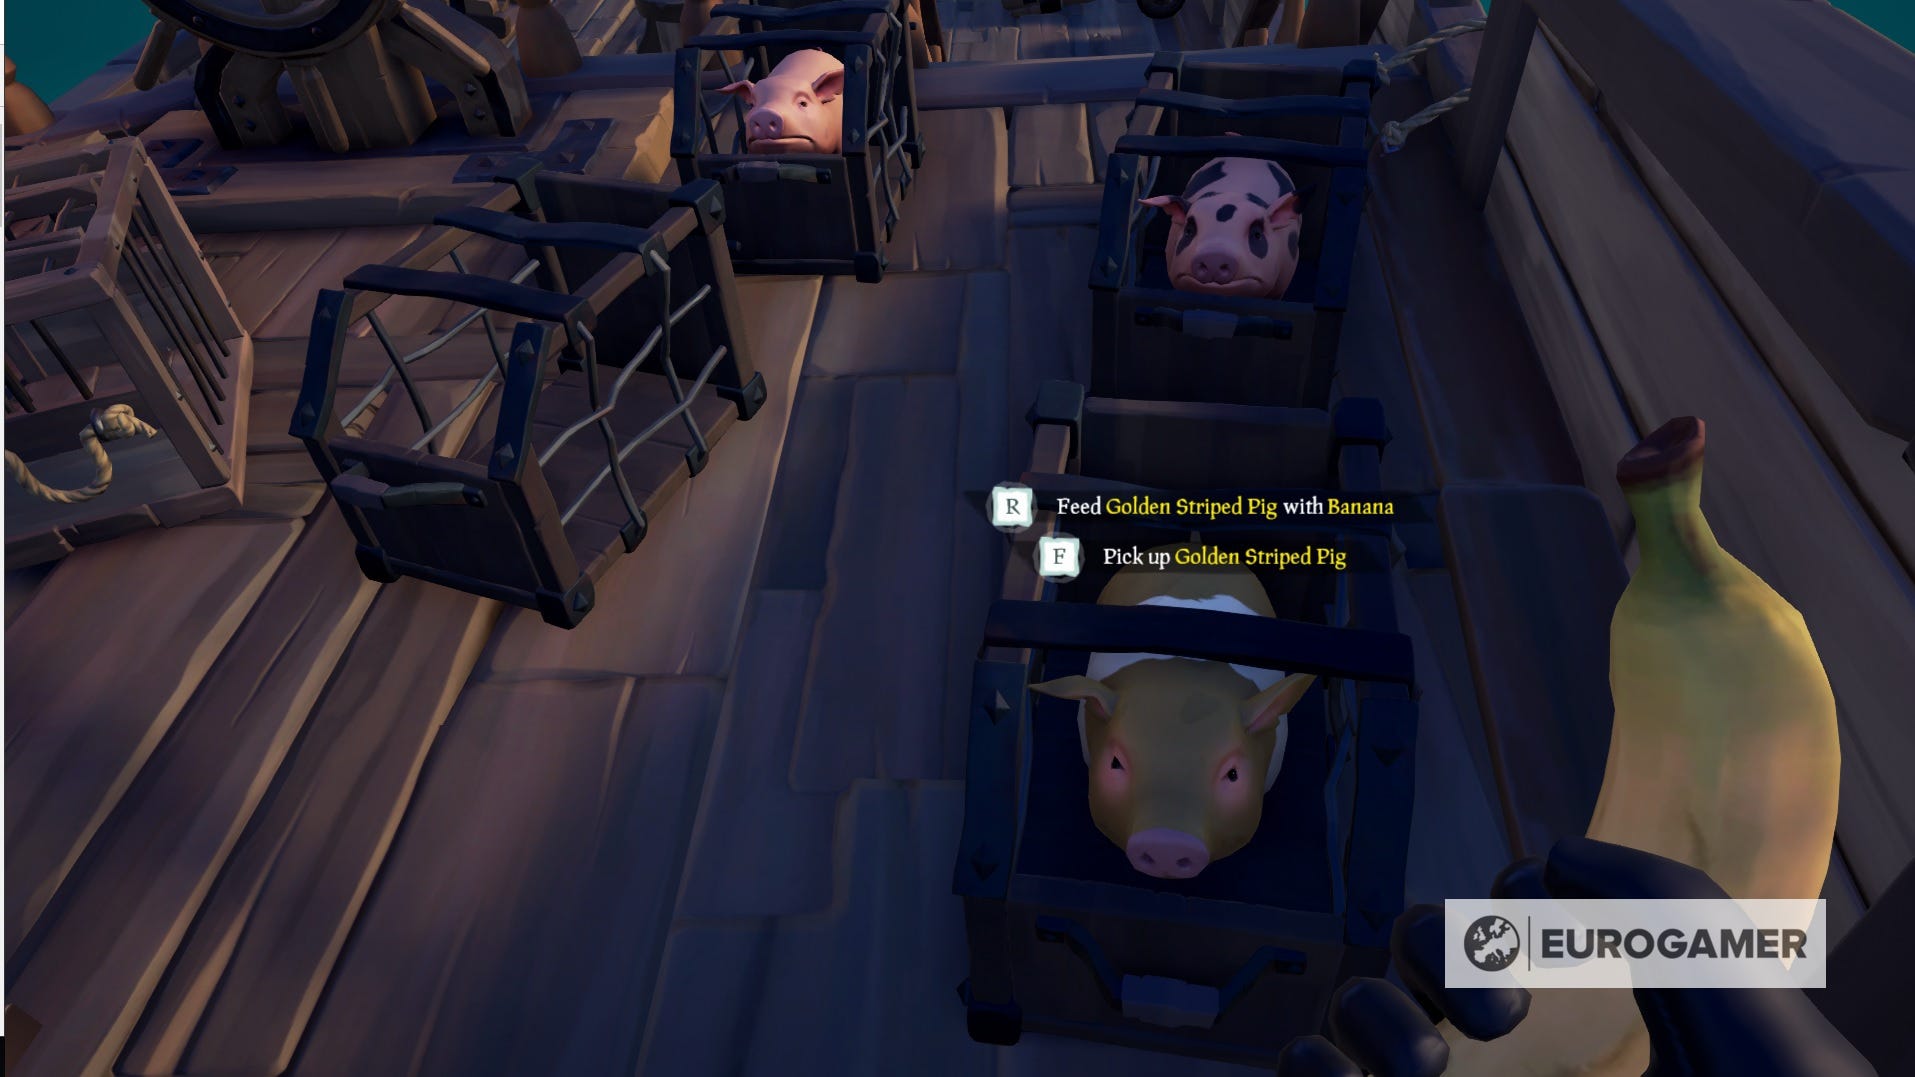
Where they differ is the 'maintenance', as such. Pigs need feeding roughly every sixty seconds - you'll know when they're in need of a bite when they make some pretty unsettling noises and start to slump down in their cages - which is done by holding a banana in front of them and interacting when the prompt to feed them appears.
Carry a healthy stock of bananas with you and on board the ship when you're going pig hunting, then - there's nothing worse than sailing all the way back to an outpost only to find little Sir Oinksalot has starved some time along the way!
Sea of Thieves snake locations - how to find and catch snakes
Finally, as you progress a little further with the Merchant Alliance you'll start being asked to round up snakes. As with the other animals, which islands these appear on is largely different from one play session to the next, but here's where the community's found them so far:
Once again remember that, you're looking for a specific island's location, our Sea of Thieves island map guide can help you find and indentify them quickly.
Sea of Thieves snake locations
- Black Sand Atoll
- Booty Isle
- Castaway Cove
- Crescent Isle
- Crook's Hollow
- Crooked Masts
- Cutlass Cay
- Devil's Ridge
- Discovery Ridge
- Isle of Last Words
- Kraken's Fall
- Lagoon of Whispers
- Liar's Backbone
- Lone Cove
- Lonely Isle
- Picaroon Palms
- Sandy Shallows
- Smuggler's Bay
- Snake Island
- Sunken Grove
- Wanderer's Refuge
How to catch snakes in Sea of Thieves
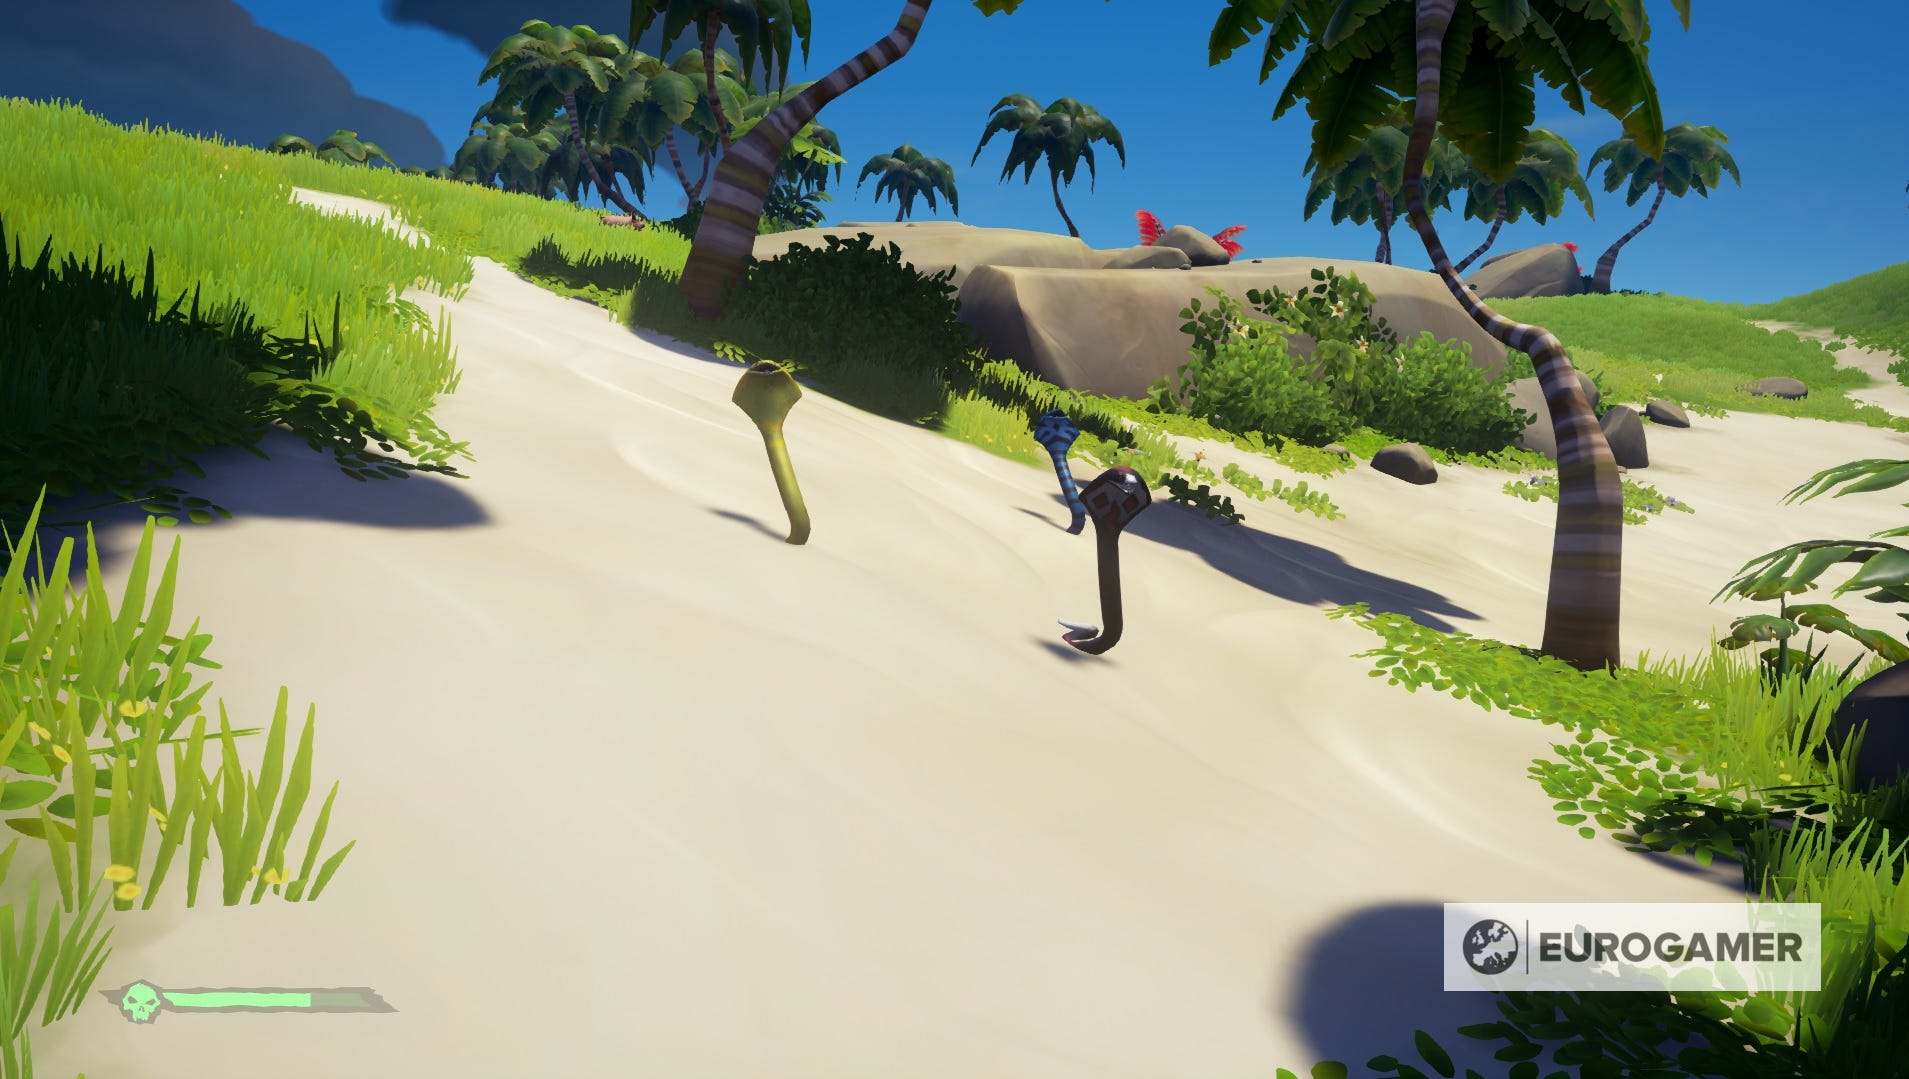
Unlike Sea of Thieves' other creatures, Snakes can actually attack, and can't just be scooped up right away.
In order to pick them up safely, you need another player to play some music to hypnotize, or just generally relax them enough for you to get close. If not, the snaks will attack, chipping away at your health gradually but still noticably over time.
Otherwise though they largerly work the same - you need to get special containers from the Merchant Alliance vendors that gave you the Voyage in the first place, once the Voyage has been started.
The first season has arrived! Learn about all Season 1 Battle Pass rewards and everything else added in the Sea of Thieves patch notes. New to the game? Learn what to do in Sea of Thieves and take take part in the Maiden Voyage tutorial, which teaches you the essentials of sailing and ship battles. It's also useful for beginners to know how to survive fights with skeletons and the kraken. Elsewhere we have advice on how to get easy gold and doubloons, complete skeleton forts and The Shroudbreaker, take part in fishing in Sea of Thieves and Sea of Thieves island maps.
Merchant Alliance Voyages explained and other things to know about animals in Sea of Thieves
Merchant Alliance Voyages are, like all of Sea of Thieves' Voyages, pretty simple.
One way or another, they're going to ask you to go and get something and bring it back within a certain time limit. Normally that thing is some combination of animals, like a Gold Snake and a Black Snake, say, but occasionally it's the slightly riskier task of collecting explosive Gunpowder Barrels.
The best way to find these is from unoccupied Forts - the militaristic islands that don't house any creatures but do play home to the tricky Skeleton Fort raids that appear at random from time to time.
Still, the main thing to know is that you need to get this stuff as quickly as possible - normally you have a couple of in-game days to do so - and bring it back to the right place. It's easy to forget, but Merchant Alliance Voyages always specificy the Outpost you have to take these items to. You can't just turn them in at any vendor like with the other faction's Voyages, so remember to check as you go and plan the fastest route.