Bloodborne: explore Hemwick Charnel Lane, kill the Soot Monsters and find the Witch of Hemwick
How to explore Hemwick Charnel Lane in Bloodborne.
This article explains how to explore Hemwick Charnel Lane, kill the Soot Monsters and find the Witch of Hemwick in Bloodborne, following on from Yahar'gul, Unseen Village.
If you're interested in more advice, our complete Bloodborne walkthrough and for the DLC our The Old Hunters guide and walkthrough can help.
Once you've finished with Vicar Amelia, and got that Grand Cathedral lamp lit, make your way back to Hunter's Dream. Spend your Blood Echoes here, and make any weapon and character adjustments you feel are necessary. Once you're done, jump back to the Grand Cathedral lamp.
Kill all of the Gravekeepers waiting down the stairs, then take a right. When you get to the end of the path you'll find a Bloodshot Eyeball on the body here. Keep heading down the stairs beyond that corpse until you come to another one in the grass. Take the Bold Hunter's Marks from it.
How to kill the Soot Monsters in Bloodborne
Carry on through the cave in front of you until you come to a clearing. This part of the map contains Demon Hounds, which are a bit like the Hounds you've fought already but are better at dodging your damage. There are also some gun-toting Henchmen, and possibly a few Soot Monsters too. These last creatures are extremely aggressive, and have a big health pool. You'll likely need a couple of critical hits at your current level to finish them off. There are weak to your gunfire as well though, so you shouldn't struggle too much.
Begin with the right-hand section of this area, where a group of rifle-toting Henchmen are waiting. Just by them is a load of corpses you can get Bone Marrow Ash and Thick Coldblood from. Use the gravestones and trees if you need any cover during the fight. If you're struggling to clear the pack, start from the left-hand side of the area and then come around. Alternatively, if you really can't get the job done, just leave it for now.
Go all the way around to the left to find another corpse with Pebbles to loot. There are more Henchmen here, so kill them, then look around the left-hand side of the area to track down the remaining Demon Hounds and Henchmen. Take the Quicksilver Bullets from a body next to a tree too.
Keep working around the left side until you've killed all the Henchmen, Hounds, and possibly another Soot Monster or two. When you reach the end of the path you'll come to a gate. Open it up and step on through into Hemwick Charnel Lane.
Hemwick Charnel Lane guide
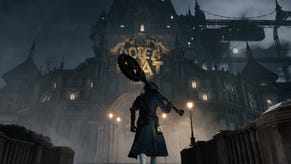
Carry on down the path and then light the Hemwick Charnel Lane lamp that's at the very bottom. Keep going down the hill until you come to half a dozen Crazed Hags at the bottom. These shouldn't present a big challenge for you, although a couple of them may be just out of your view at the start of the fight. When they're all dead, smash up the cart and take the Bloodshot Eyeball off the corpse.
Next, go into the area over on the right and take the Twin Blood Stone Shards from the body. Go up the wooden stairs, then talk to the woman in the hut by the red lantern. She won't say much of interest right now though.
Go right and take the Madman's Knowledge from the next corpse you come to. If you keep travelling along this path you'll come to a lever, but there's not a lot you can do with it right now. Instead, return to where you found the Crazed Hags, then go up the stairs on your right.
When you reach the top you'll have to kill a Soot Monster, a Demon Hound and a Crazed Hag. Let the Hound and Hag come to you first, so that you can pick them off before moving in to kill the Soot Monster while he's on his own.
You'll also need to keep an eye out for the Hag throwing Molotov Cocktails at you after this fight. Grab the Thick Coldblood from the corpse by the tree that's ahead of you, then make your way up so you can kill the two Hags.
Where to find the Twin Blood Stone Shards
Carry on up the next staircase and kill the Brute at the very top. Once he's dead, go towards the gate that's directly in front of you. You can't go through it right now, so instead take the path that leads up the hill on your right. Kill the Hag, then jump down onto the lower path where you'll find a corpse containing Twin Blood Stone Shards.
Head back to the area where the Hag was, but go down the left-hand path this time around. There'll be another Hag waiting to attack you when you reach the middle of this section. Kill her, then keep going forwards to a spot where a pack of Crazed Crows are waiting to your right. When you get close, a Soot Monster will appear.
If the Crows approach you, kill them, otherwise prioritise the Soot Monster. When everything's dead, take the four Pebbles from the body to your right. There's also a lever right by a lift. Tread on the lift to open the lever, creating a shortcut.
As soon as you've turned the lift on, head back up and then go towards the stairs that are on your right. You'll be ambushed by another one of those Hags when you get close to the stairs, so kill her, then take the Bone Marrow Ash from the corpse by the gravestones.
Go upstairs and kill the Brute waiting for you at the very top. You'll also need to watch out for another Molotov Cocktail-throwing Hag. Kill everyone, then go into the barn that's ahead of you. There's a second Hag to your right, and a Demon Hound will lunge at you when you get to the middle point of the barn.
Climb up the ladder, and head forwards towards the next corpse, but be ready for another Soot Monster to spawn. If you've got the Hand Lantern item, you can use it here to illuminate the area and shoot the enemy. Otherwise, use one of the Shining Coins you'll have picked up to achieve a lock-on.
When the Soot Monster is dead, take the Bloodshot Eyeball from the nearby corpse. Now turn around and take the left-hand stairs. When you reach the bottom, use the beams to get to the other side of the room. Head through the door, but be ready to fight a Wheelchair Blunder.
Kill it before it can hurt you, then take an Adept Blood Gemstone from the body on your left. Now search the remaining corpse to add one of those Madman's Knowledge to your collection.
Return to the top floor, and carry on working your way through the building. Head left to fight another Hag, then keep going until you reach the end of the roof. Kill the Brute and the pair of Hags before looting the corpse for Coldblood Dew.
Head left now and kill the pair of Hags and the Demon Hound. As you come to the end of the left-hand building, search nearby for a corpse with a pair of Twin Blood Stone Shards on it. Now keep going forwards to find another Hag.
When she's dead, head down the stairs to find a pair of Brutes waiting for you. They patrol quite separately from one another, making it easier to pick them off one by one. When they're dead, look left and take the Thick Coldblood from he corpse. Just after this fallen soldier is the other side of that gate you encountered earlier. Use the nearby lever to create a handy shortcut.
Work your way around the right-hand area and kill the Demon Hounds and the Hag. Further on you'll find a load of Bone Marrow Ash, a Lake Run and some Thick Coldblood. Once you've got them all, go left and head up the hill. Kill the three Hags and the Brute on this hill, and watch out for more Molotov Cocktails as you do so.
To the right is a house which you can access by going through a gap in the railing. Here you'll find a chest which contains a Tempering Blood Gemstone. Return to the main path and carry on travelling up the hill. Kill the Imp you see, then smash the barrels in the room to get another Madman's Knowledge from the freshly-revealed corpse.
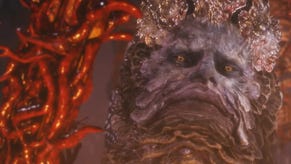
Go downstairs, head towards the large room, and get ready to face off against the Witch of Hemwick boss.
- The next part of our walkthrough explains how to kill the Witch of Hemwick.
- Return to the index page for more sections of our Bloodborne guide.


.png?width=291&height=164&fit=crop&quality=80&format=jpg&auto=webp)


