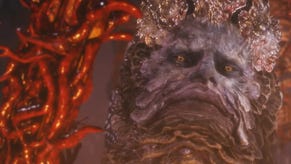
Bloodborne - River of Blood, Turret traps, Firing Hammer Badge, Old Hunter Top Hat
How to survive River of Blood in Bloodborne's DLC.
This article explains how to survive River of Blood in Bloodborne: The New Hunters.
If you're interested in more advice, our complete Bloodborne walkthrough and for the DLC our The Old Hunters guide and walkthrough can help.
Once you reach the cave mouth, head inside and proceed to the end of the tunnel. Prepare for bewilderment as you emerge on the other side, however. You'll find yourself on a ledge overlooking a bustling city. Strangely, the Grand Cathedral stands before you on the distant horizon - despite you having just left its imposing entrance moments ago.
Survive the turret section
Carefully make your way down the hill, following the route as it bends around to the left. As you close in on the abandoned carriage, hug the left-hand side of the path. Shortly, a gun turret will open fire from further along the road. Wait for the lull in its attack then sprint through the narrow gap ahead and duck behind the cluster of headstones near the railing to the right.
Immediately, a second turret will open fire from behind a column to the left - but, thankfully, you're safe behind the headstones. To continue, face the turrets and glance over to the left-hand side of the road. Up ahead, you'll spot what appear to be a large tree branch jutting out of the ground. Watch the turrets closely, identifying a gap in their attacks, then use the lull to race over the road and duck behind the tree-like object.
As you sprint to safety, a third and fourth turret (one near the original, and another on the right-hand side of the road) will open fire. Once again, you need to wait for a gap in their attacks before you leg it. When it's safe to move, quickly dash between the turrets at the end of the road.
You'll find two mostly-humanoid enemies standing watch here, so eliminate them quickly. Watch out for the fifth gun turret, however, sneakily hidden behind a root on the right. It's easy to stray into its line of sight during battle, taking additional damage as a result.
Clear out the grenade-throwing enemies
Once your opponents are down, destroy the turrets then proceed further along the road, following the path as it bends around to the right. At the bottom of the slope, you'll encounter another Boom Hammer-wielding enemy, plus a number of weaker foes. Don't underestimate the latter, however: they toss ticking grenades which can leave you injured and exposed if they explode underfoot.
Your safest bet here is to lure the Boom Hammer enemy back up the slope and onto the previously-turret-infested road. There's plenty of room to manoeuvre here, so finish him off at your leisure then return to the lower level, dealing with his grenade-tossing chums.
When the area is clear, descend the steps to right and take a left at the bottom. Eliminate the grenade-tossing foe ahead then grab the Twin Blood Stone Shards from the railing to the right. Next, head back up the steps and take a right at the top. Locate the arched entrance leading into the darkened building, then pull out your torch and step inside.
Almost immediately, you'll be ambushed from the right by two hairy beasts. Take them out then grab the Delayed Molotov from the body slumped against the railings ahead. Next, locate the window to the right of the staircase, leading back outside. Step through, drop down to the ledge below and grab the Old Hunter Top Hat from the corpse.
Next, slide down the rooftop to the left and follow the path through the bloody water, staying close to the debris on the left. Move carefully to avoid disturbing the parasitic creatures nearby and take the left-hand path once you reach it. Climb the slope and you'll re-enter the building you were in moments ago, albeit now at the bottom of the staircase.
From here, move into the room and turn left. Eliminate the beast that attacks then approach the glowing item on the ground. As you near, you'll hear a grenade begin to tick - a trap! Immediately about-face and sprint to the opposite end of the room in order to escape the ensuing blast. Once it's safe to return, swipe the Boom Hammer weapon from the ground.
Next, with the staircase to your right, use the left-hand doorway to exit the building. Out in the courtyard, climb the steps ahead and take a right at the top. Grab the Beast Blood Pellet from the ground then head on up to the next level. At the top of the steps, pass through the gates and prepare to encounter a strange new threat.
Kill the creature and receive the Firing Hammer Badge
This man-sized creature sports luscious wavy tendrils and a claw-like hand - the latter being capable of dealing reasonable damage if it hits you. He's also able to cover ground quickly with his spring-healed leap, and will roll frequently to escape your attacks. Luckily, he's not especially difficult to dodge, and the tight confines of the area around you means that he can never run very far. Take him out to receive the Firing Hammer Badge. Once your opponent has been defeated, backtrack down the steps, re-enter the house and pass through the doorway opposite.
- The next part of our walkthrough explains how to deal with Bloodborne's Bloodlickers.
- Return to the index page for more entries in our Bloodborne: The Old Hunters walkthrough.


.png?width=291&height=164&fit=crop&quality=80&format=jpg&auto=webp)


