Final Fantasy 15 - Adamantoise battle strategy for the Let Sleeping Mountains Lie quest
How to start and finish the marathon boss battle in the RPG's end-game.


Adamantoise in Final Fantasy 15 is one of the biggest trials you'll face, but not necessarily because of it's challenge. The mountain-sized creature has a huge amount of HP, and is a war of attrition to vanquish.
We'd recommend getting as high a level as possible - we did it at level 45, taking around three hours - as the more damage you can dish out the faster it will go. Unlocking the Limit Break nodes so each party member can do over 9999 damage will also help things go quicker.
How to start the Adamantoise quest 'Let Sleeping Mountains Lie' in Final Fantasy 15
When you return to Cape Caem after Chapter 9, speak to Iris outside the outpost. She'll tell you about some earthquakes and suggest that you ask Cindy about them, so head to Hammerhead to get more information.

Cindy will send you to speak to Dave, so wander over to him for more background, and then head inside the diner to talk to everyone else - exactly who's available in there may depend on story progression and other sidequests you've completed, but once you've found out all you can head into the desert and speak to Monica.
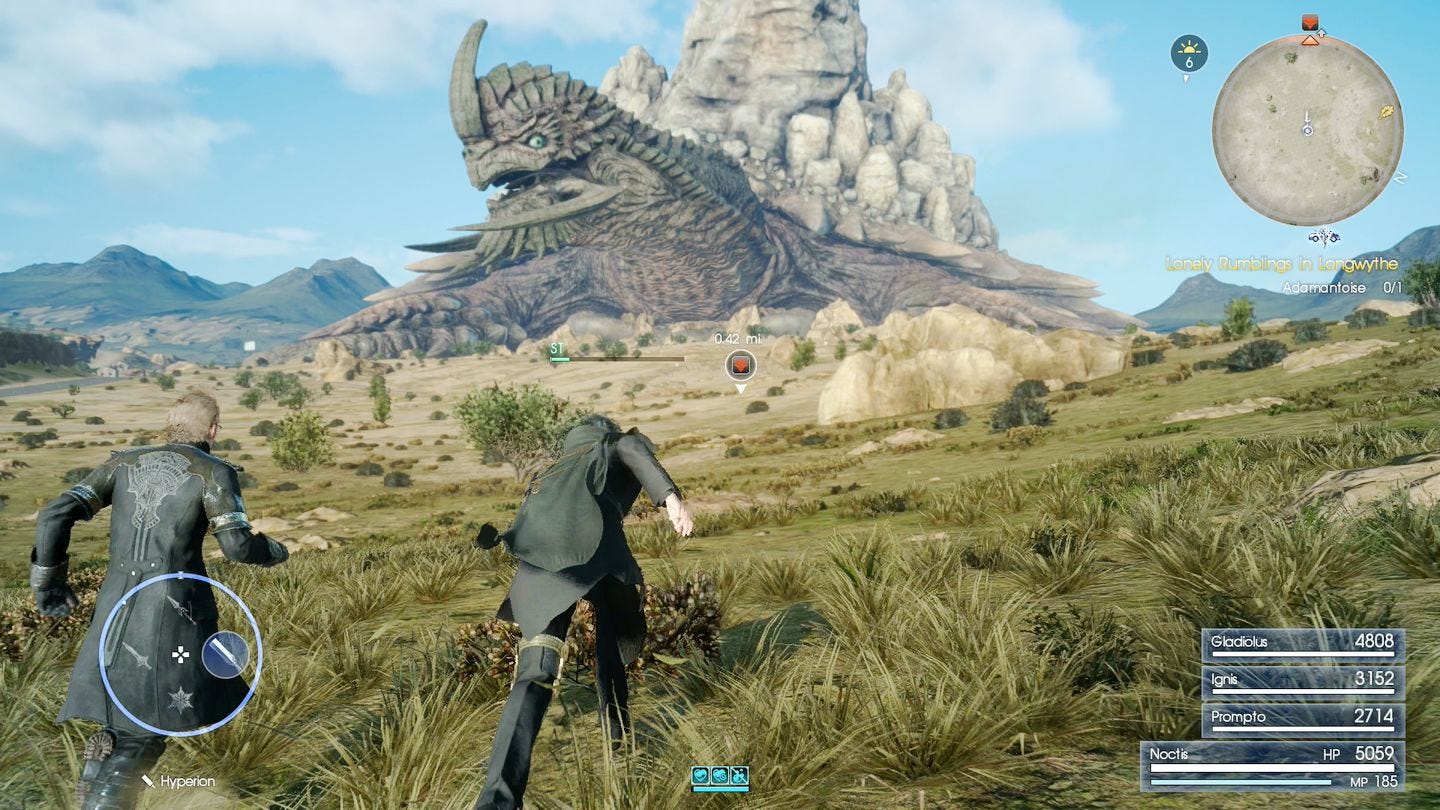
Once the conversation is over the Adamantoise will wake up. At this point there's nothing to be gained by attacking it, so follow the game's instructions and flee; it doesn't matter which way you head, just keep running until it tells you you got far enough. Go to Hammerhead, stock up on healing supplies before talking to Takka, and then accept the Adamantoise bounty.
Adamantoise battle strategy
Head back out into the desert and settle in for a very long fight. The strategy here is more one of patience than anything else; the Adamantoise has three basic attacks - sweeping his legs, smashing the ground, and rearing his head back - but he'll flash yellow when he's charging up so it gives you plenty of warning to get out of the way.
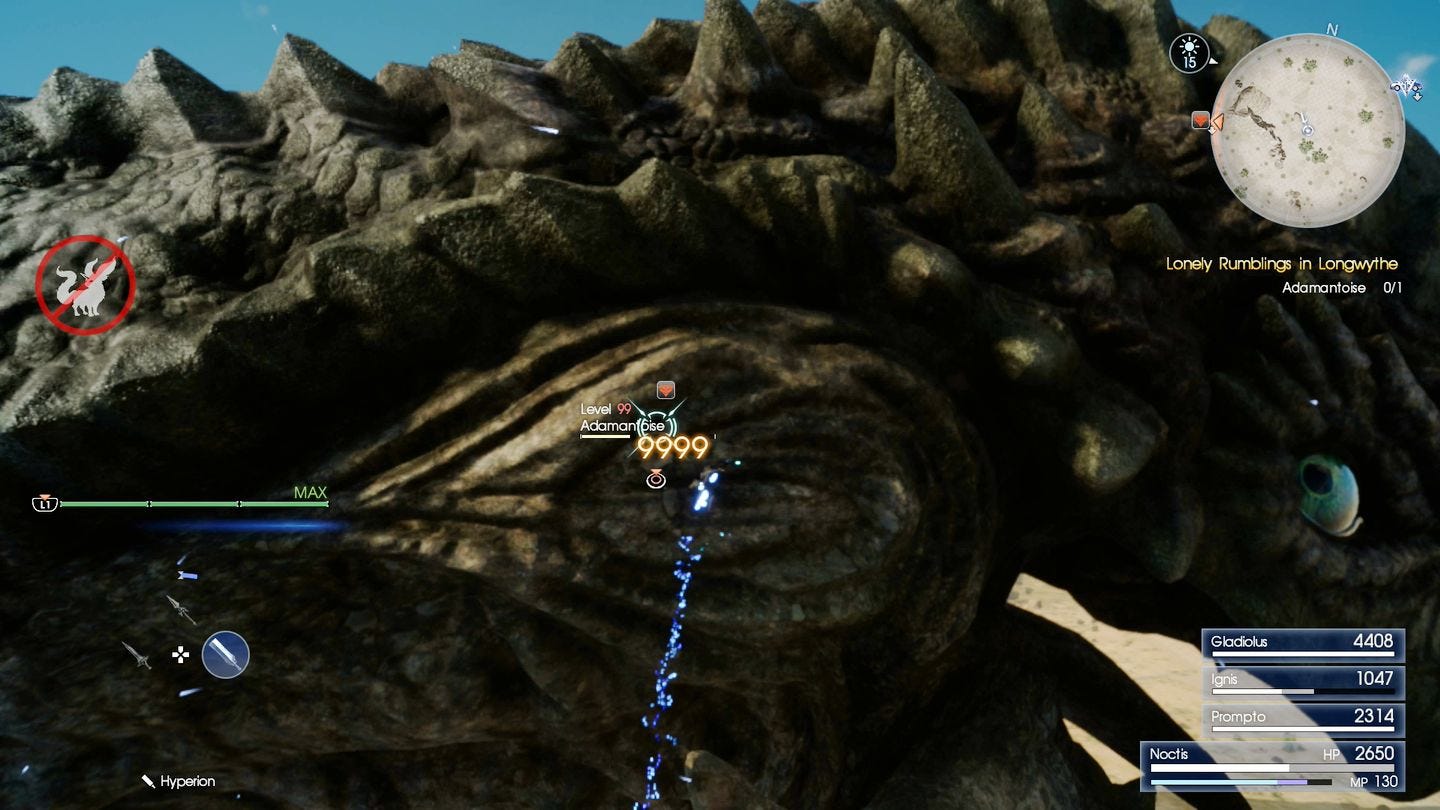
He has no areas that seem more vulnerable than others, but there are a couple of handy Warp Points either side of his head; move to one of those, lock on to his eye or the fleshy patch on the side of his neck, move in for a Warp Strike with your broadsword, then keep locked on it and Warp Strike form close range until your MP runs out, Warp to another Warp Point, and repeat.
With a lucky hit you can deal '9999' damage with a single blow (or more if unlocked) but you may also find that due to his size you get tangled up in his hitbox and do no damage at all. Armiger and Link Strikes waste time and do very little damage, and if you get the chance to summon Divine Intervention don't bother as it appears to have no effect.
Need more help? Our Final Fantasy 15 guide and walkthrough can provide tips on main story, as well as the open-world's many quests and activities. Learning how to get AP fast, EXP fast and money or Gil fast will aid you in many optional dungeons and tombs - including how to open and explore their locked doors. There's also plenty of interesting side-quests, too, such as the Scraps of Mystery and Professors Protege frog locations. And if you want to get around easier, you can rent a Chocobo, learn the infinite sprint trick and later in the game, get the flying car Regalia Type F. There's also more to see and do with DLC, such as Episode Gladiolus and Episode Prompto.
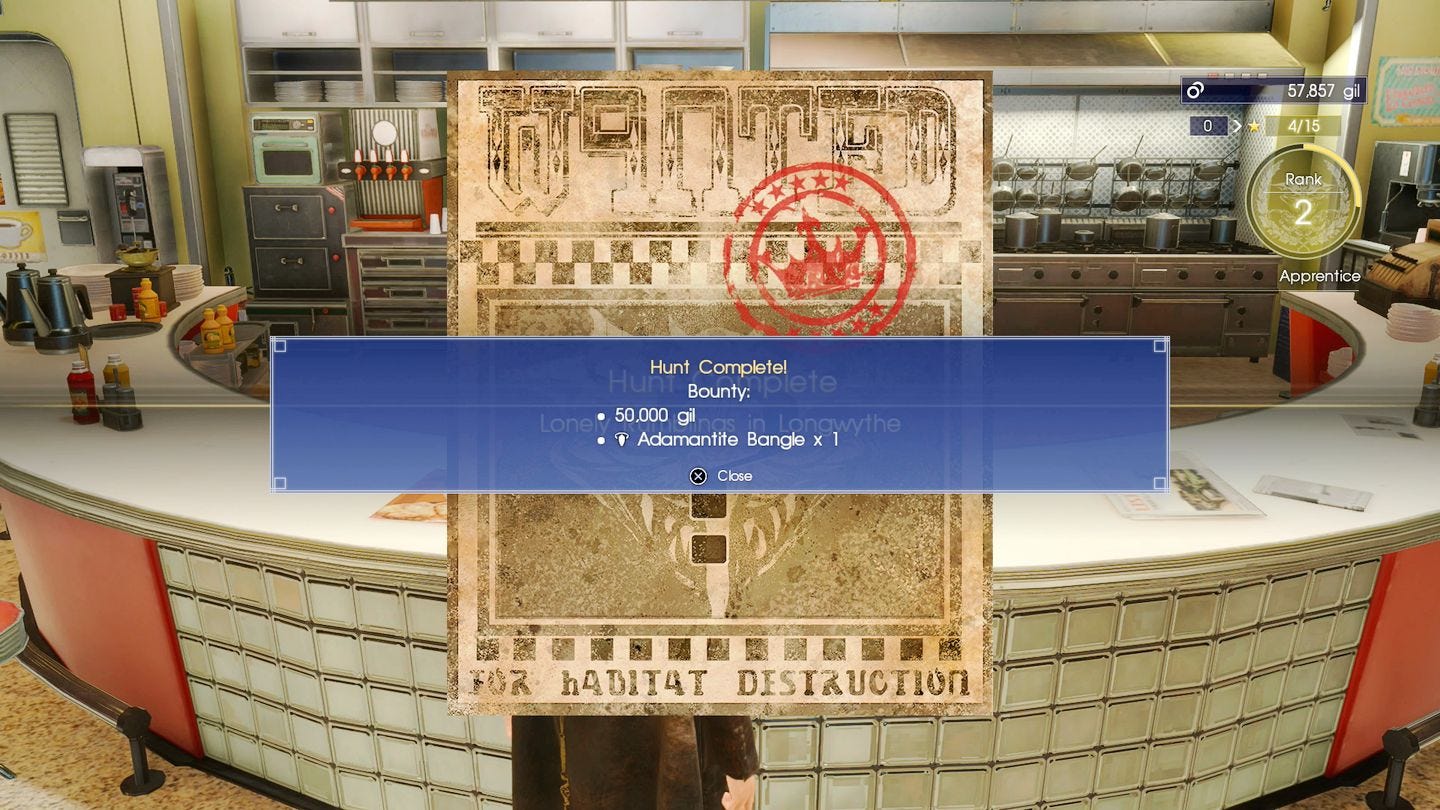
Simply keep repeating this process until he's down, then head back to Takka for your reward - 50,000 Gil and 50,000 EXP. We'd recommend you go and spend the night at Galdin Quay afterwards to double the EXP reward - you can easily afford it now!