Zelda - Gee Ha'rah, snowball rolling gate puzzle and Tandem solution in Breath of the Wild
How to solve the Hebra region trial.

Gee Ha'rah is one of the many Shrines located throughout Zelda: Breath of the Wild. Accessing it involves a difficult snowball rolling puzzle, followed by the short-but-sweet Tandem trial.
If you need help finding and solving other Shrines, our Shrine location maps page can help, while our Zelda: Breath of the Wild walkthrough and guide covers other aspects of the game.
Where to find Gee Ha'rah and snowball rolling puzzle
This is located in the north west Hebra region, specifically within the Kopeeki Drifts region that's just north west of Hebra Tower, before you reach Hebra Mountains.
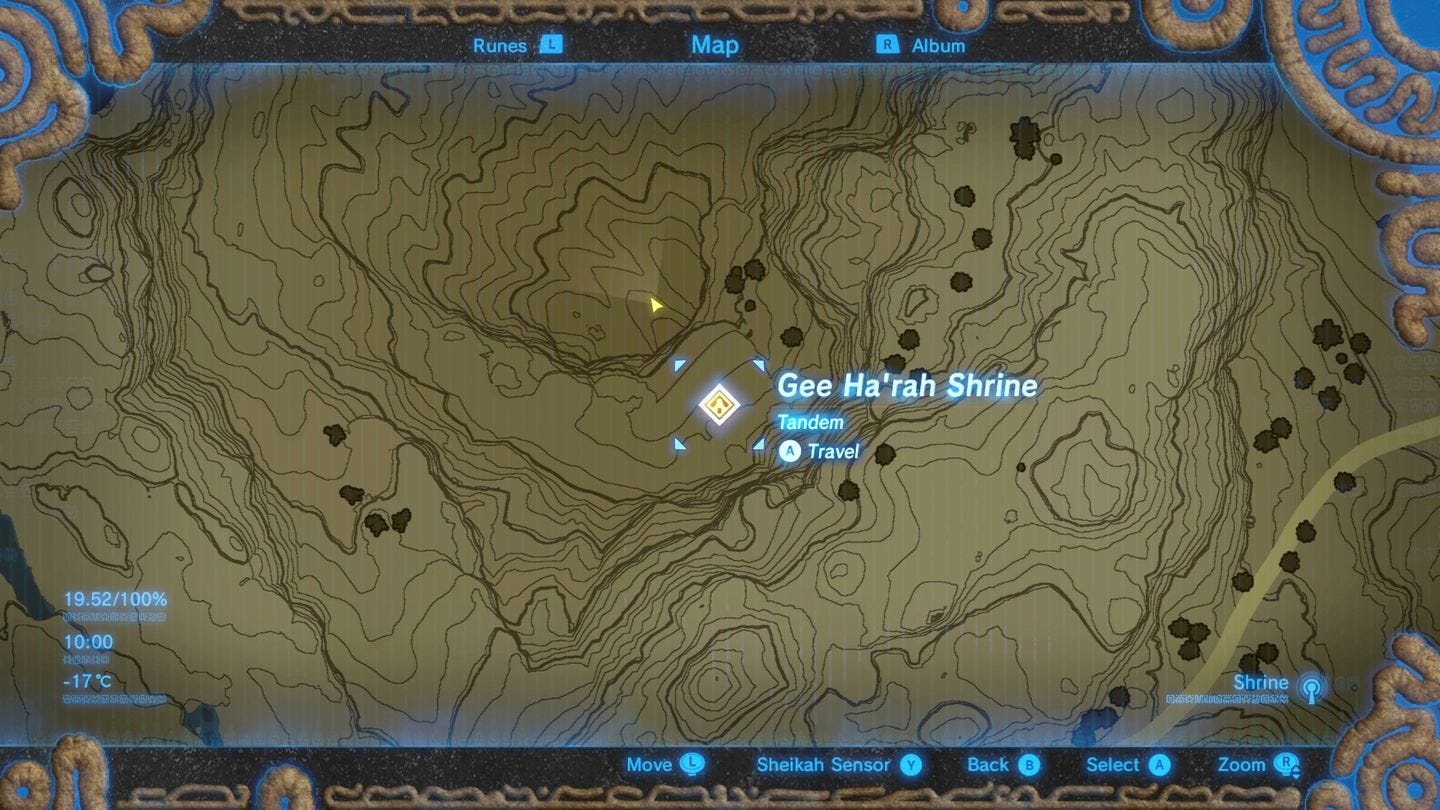
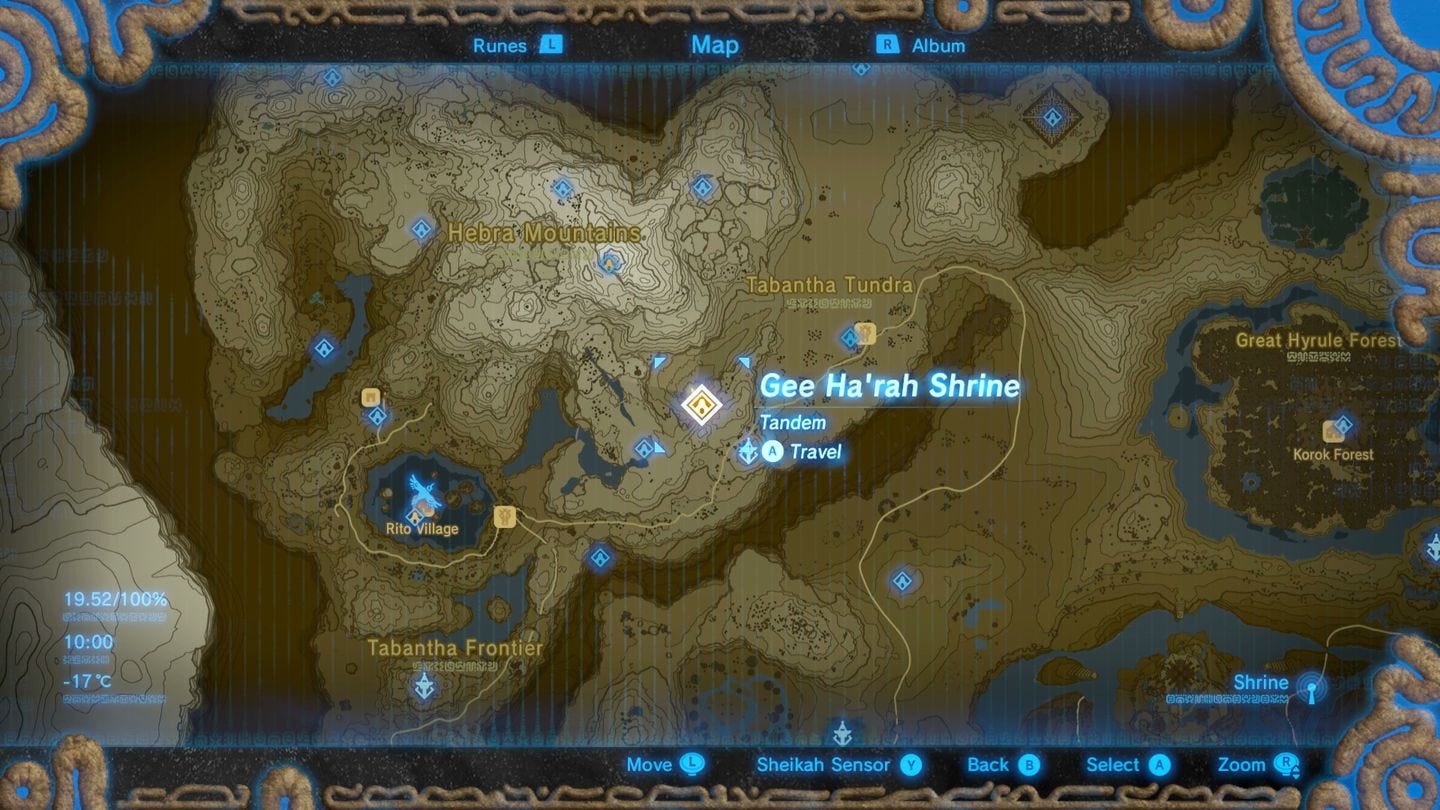
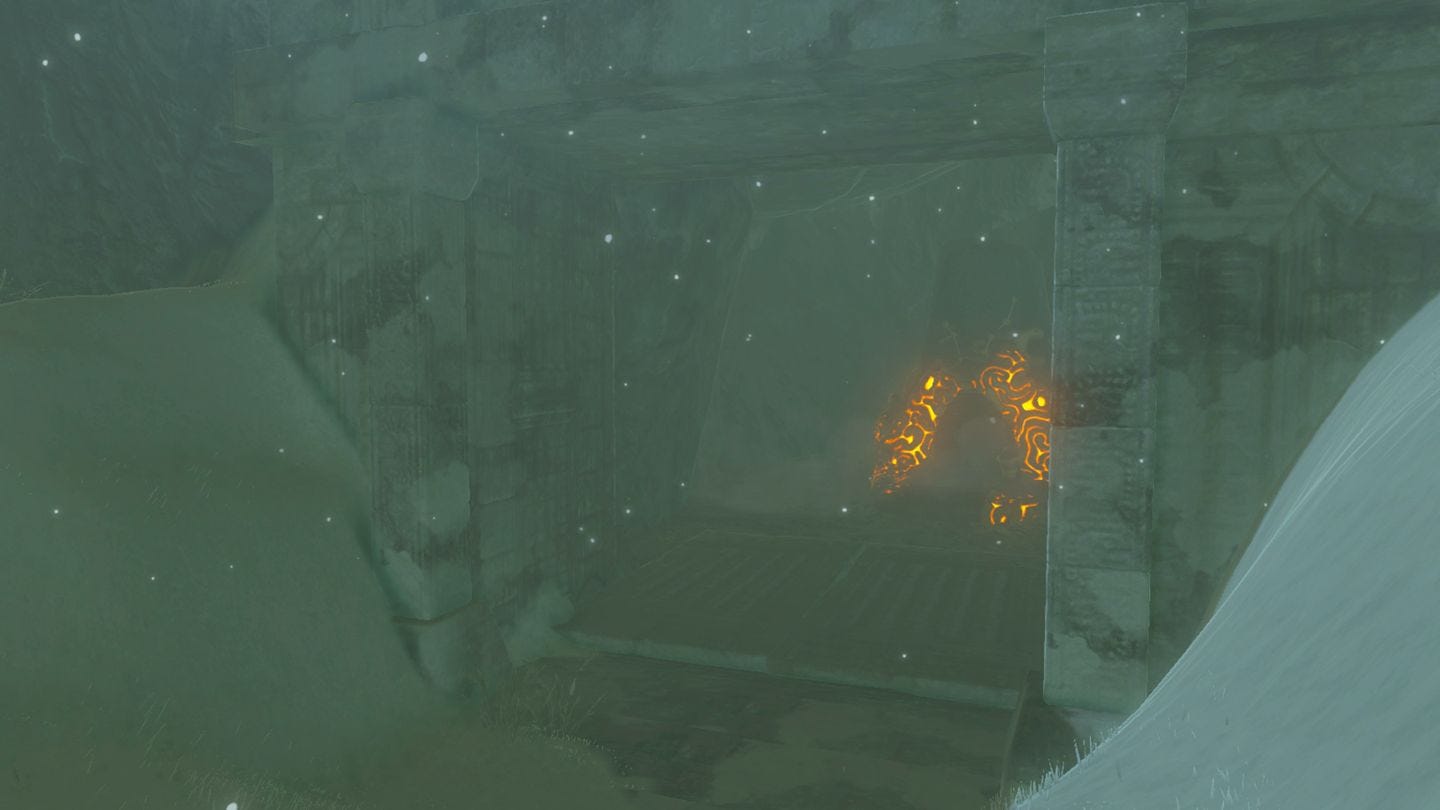
Simply glide from that tower until you reach an area with mounds of snow in grooves; at the bottom of here is a stone gate, which is where the Shrine is located.
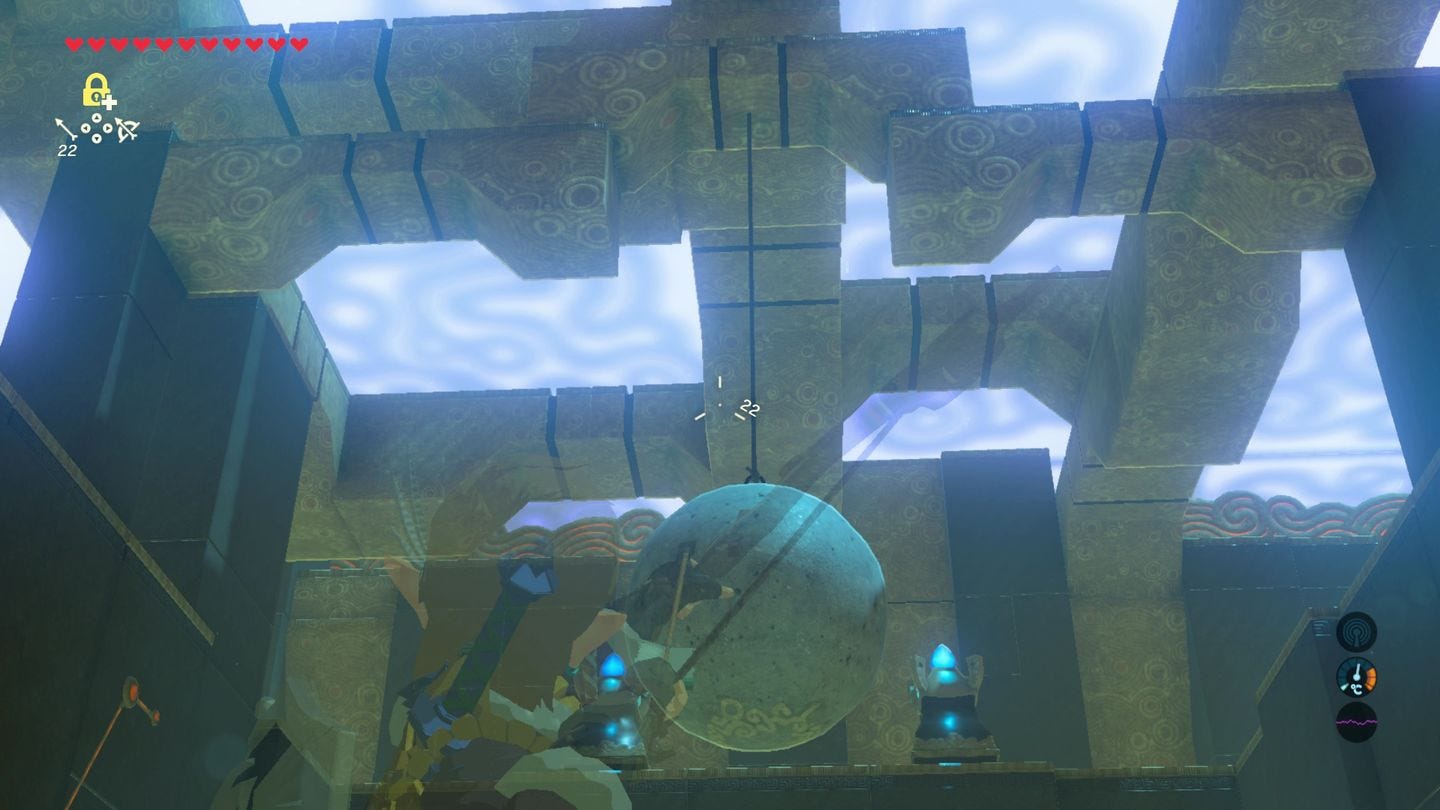
To open it, you have to roll a snowball from the top of this area, along the right set of grooves, growing in size and momentum. Choose the wrong path, and it'll either explode before it gets there or miss it entirely.
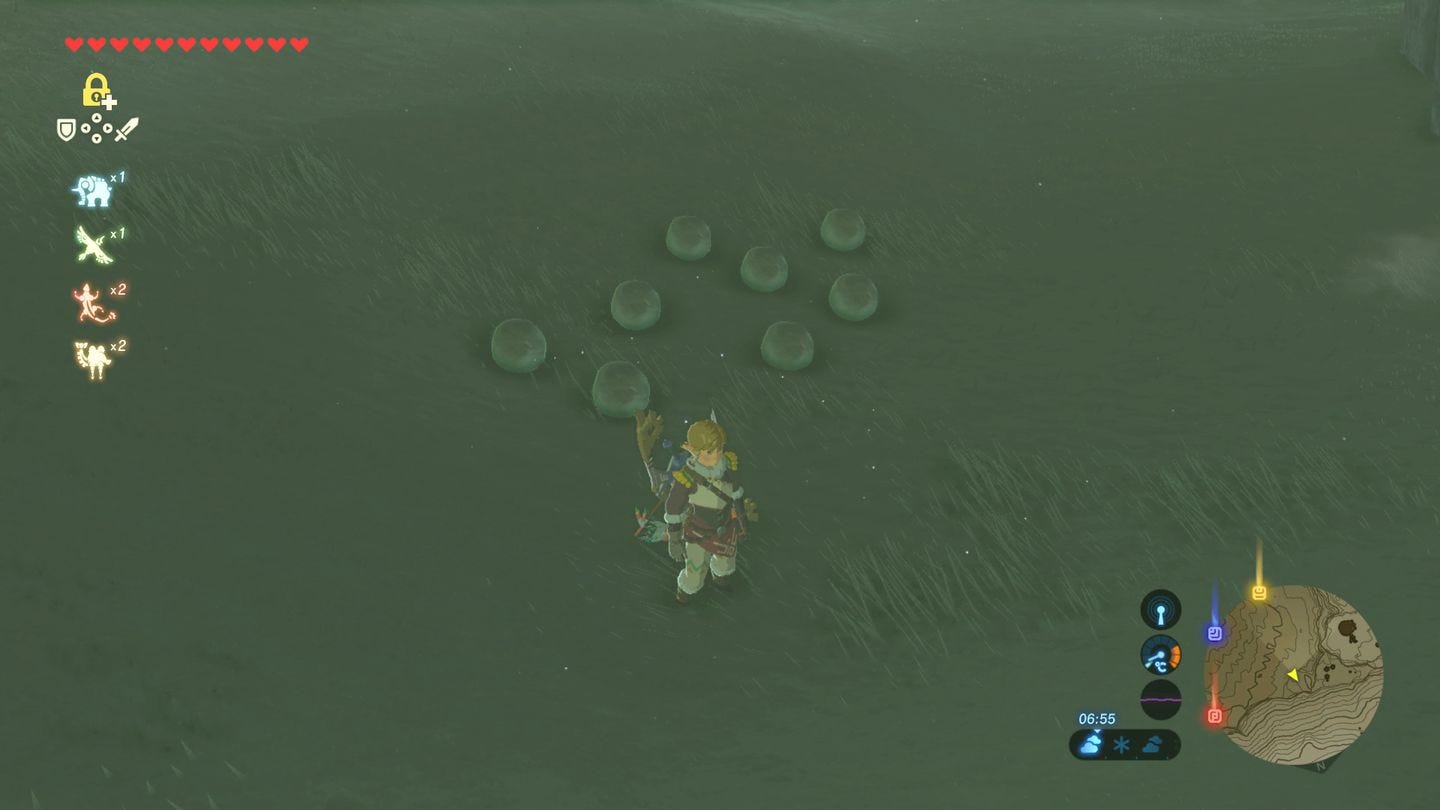
There's a few ways to do this, but the easiest way is to take the second 'groove' right of the black rock that's just next to the group of snowballs.

Make sure you throw it instead of rolling; it'll then roll over the little hill that follows and just out of view, but then take a right until it's on a straight path in front of the gate. It'll then knock it down and reveal the Shrine.
Gee Ha'rah and Tandem solution
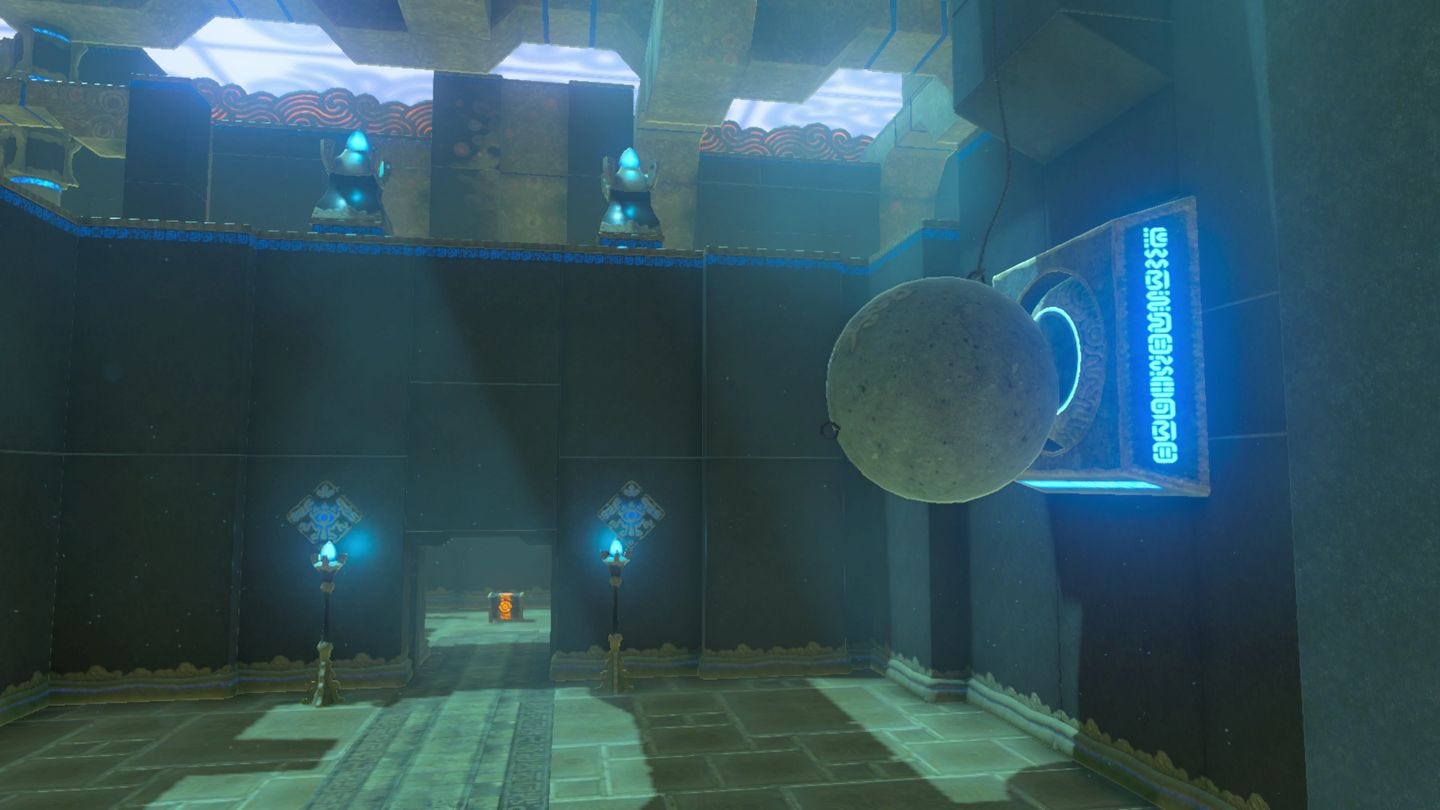
This Shrine involves shooting rope that's holding suspended balls to hit a series of levers.
First, shoot the rope directly above the all ahead to drop it straight down below, opening the door ahead.
Go through, and you have a choice of going left to an optional chest, and right to the altar and the end of the Shrine. Let's go left first.
The solution on the left ball is shooting the left rope, which causes the ball to swing right, hitting the lever on the wall. The door behind has a chest behind it, containing a Diamond.

Thanks to a new update, it's now possible to play Zelda Breath of the Wild in VR. Want help with the main game? Our Zelda: Breath of the Wild walkthrough can help complete Divine Beasts Vah Ruta, Vah Rudiana, Vah Medoh and Vah Naboris and more. There's also how to get the Master Sword, Hylian Shield and all Zelda Captured Memories and Great Fairy Fountain locations, while our Shrines locations and Shrine maps hub explains where to find and solve every puzzle room, including dragon locations and Labyrinth solutions. We also have a DLC 1 guide and DLC 2 guide, including all Tingle, Majora's Mask, Phantom, Midna outfit locations.

Go right now, and you'll see another ball suspended between two ropes, with the lever below. To solve this, use Statis on the ball, then quickly shoot both ropes before it expires, which sees it drop directly down when it does.
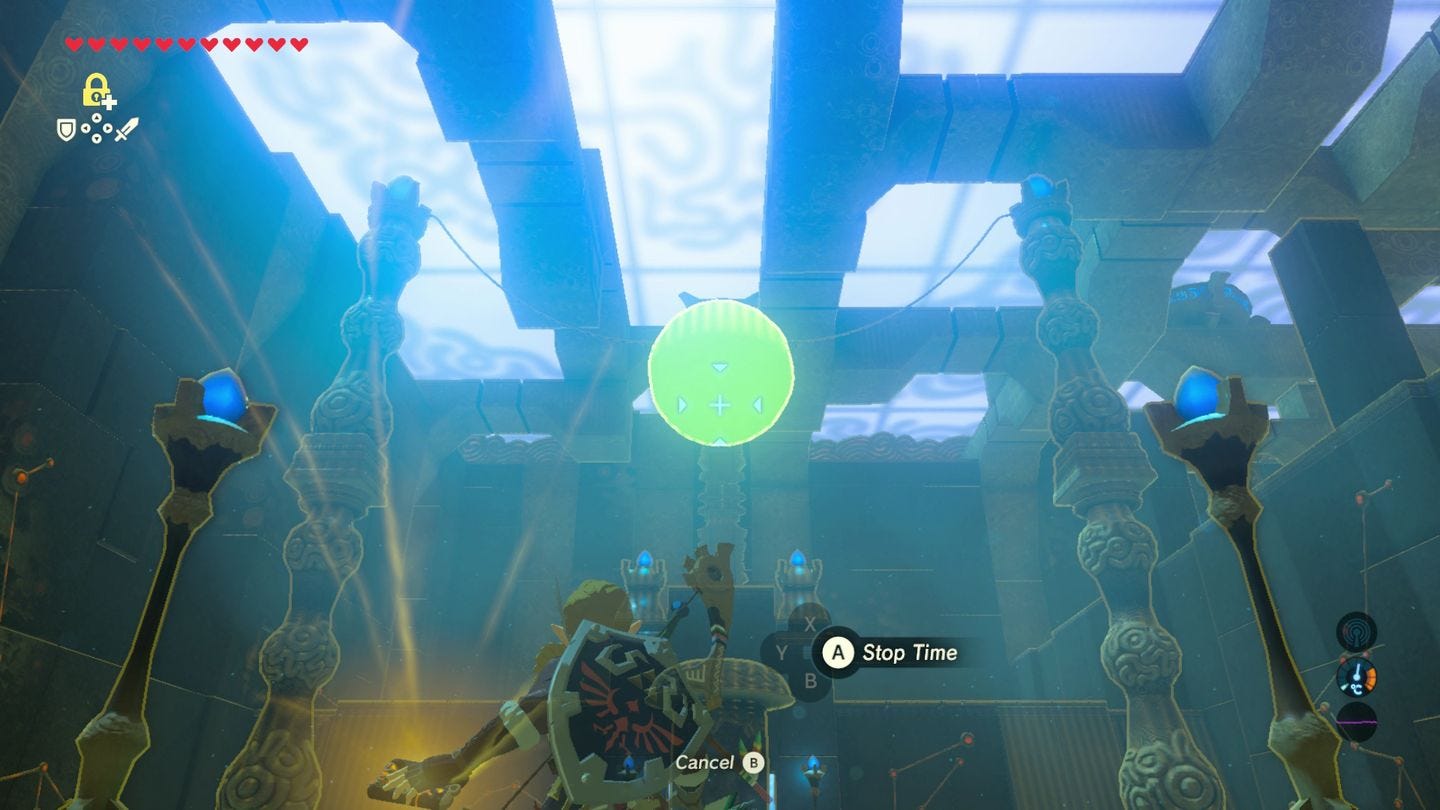
The lever will be activated if done correctly, opening the door behind, taking you to the altar and the end of the Shrine.
While you're here, here are other Shrines within this region:
Hebra region (13 Shrines)
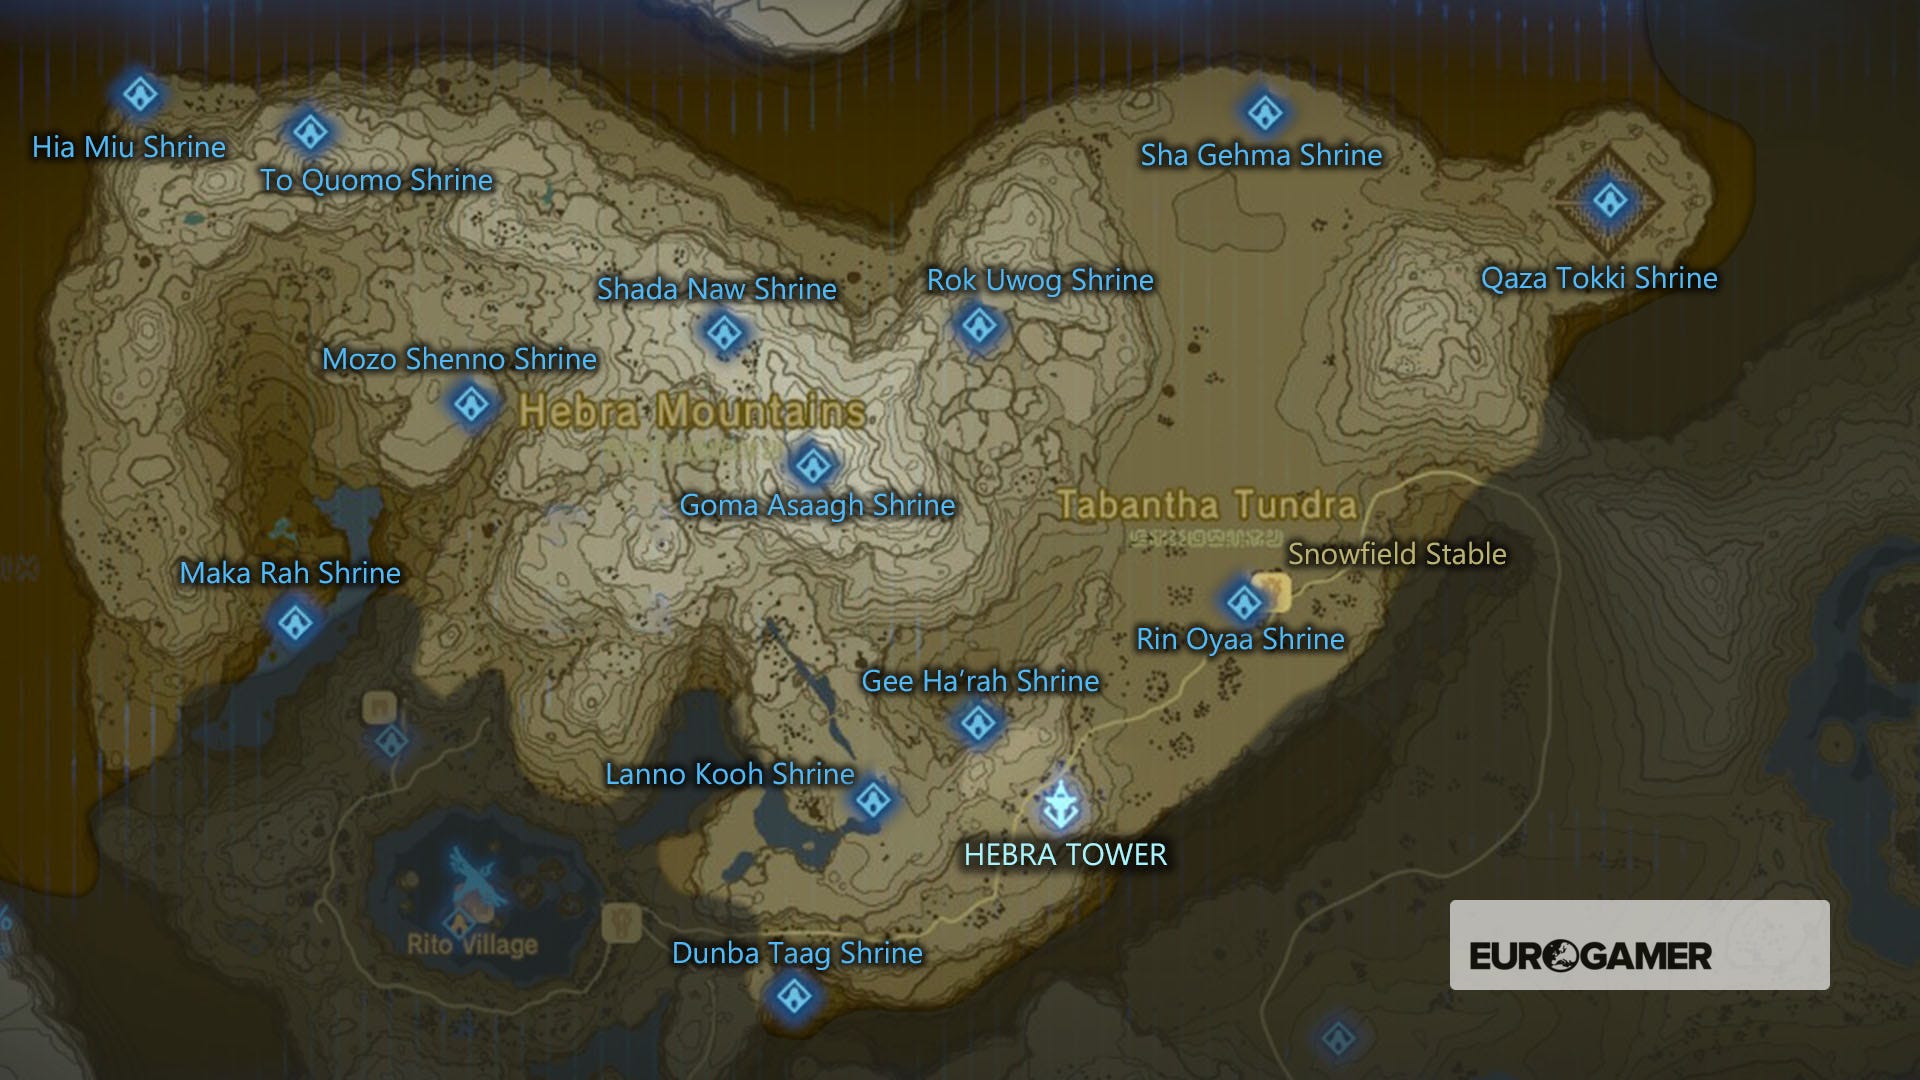
- Dunba Taag shrine, Build and Release solution
- Gee Ha'rah shrine, snowball rolling gate puzzle and Tandem solution
- Goma Asaagh shrine at the foot of Hebra Peak
- Hia Miu shrine location
- Lanno Koch shrine and Lanno Koch's Blessing solution
- Maka Rah shrine at Lake Kilsie and Steady Thy Heart trial solution
- Mozo Shenno shrine and The Bird in the Mountains quest solution
- Rin Oyaa shrine and Directing the Wind solution
- Rok Uwog shrine and Power of Reach solution
- Sha Gehma shrine and Shift and Lock solution
- Shada Naw shrine and Red Giveaway solution
- To Quomo shrine and how to open the Hebra North Summit gates
- Qaza Tokki (North Lomei Labyrinth)
If you're after other trials, then our Zelda: Breath of the Wild Shrine locations and maps hub page can help with other regions.