Resident Evil Revelations - Final boss fight against Norman, the Ultimate Abyss
Continuing episode 12 in Resident Evil Revelations.

Time for the last boss fight in Resident Evil Revelations, against Norman, the Ultimate Abyss. As you can probably guess, this concluding part is pretty much all boss fight, as we go toe to talon with the towering, virus-mutated version of Norman.
If you need more help, our complete Resident Evil Revelations walkthrough can assist with other sections of the game, including all Handprint locations, Raid mode and unlockables.
Last boss fight Norman, the Ultimate Abyss
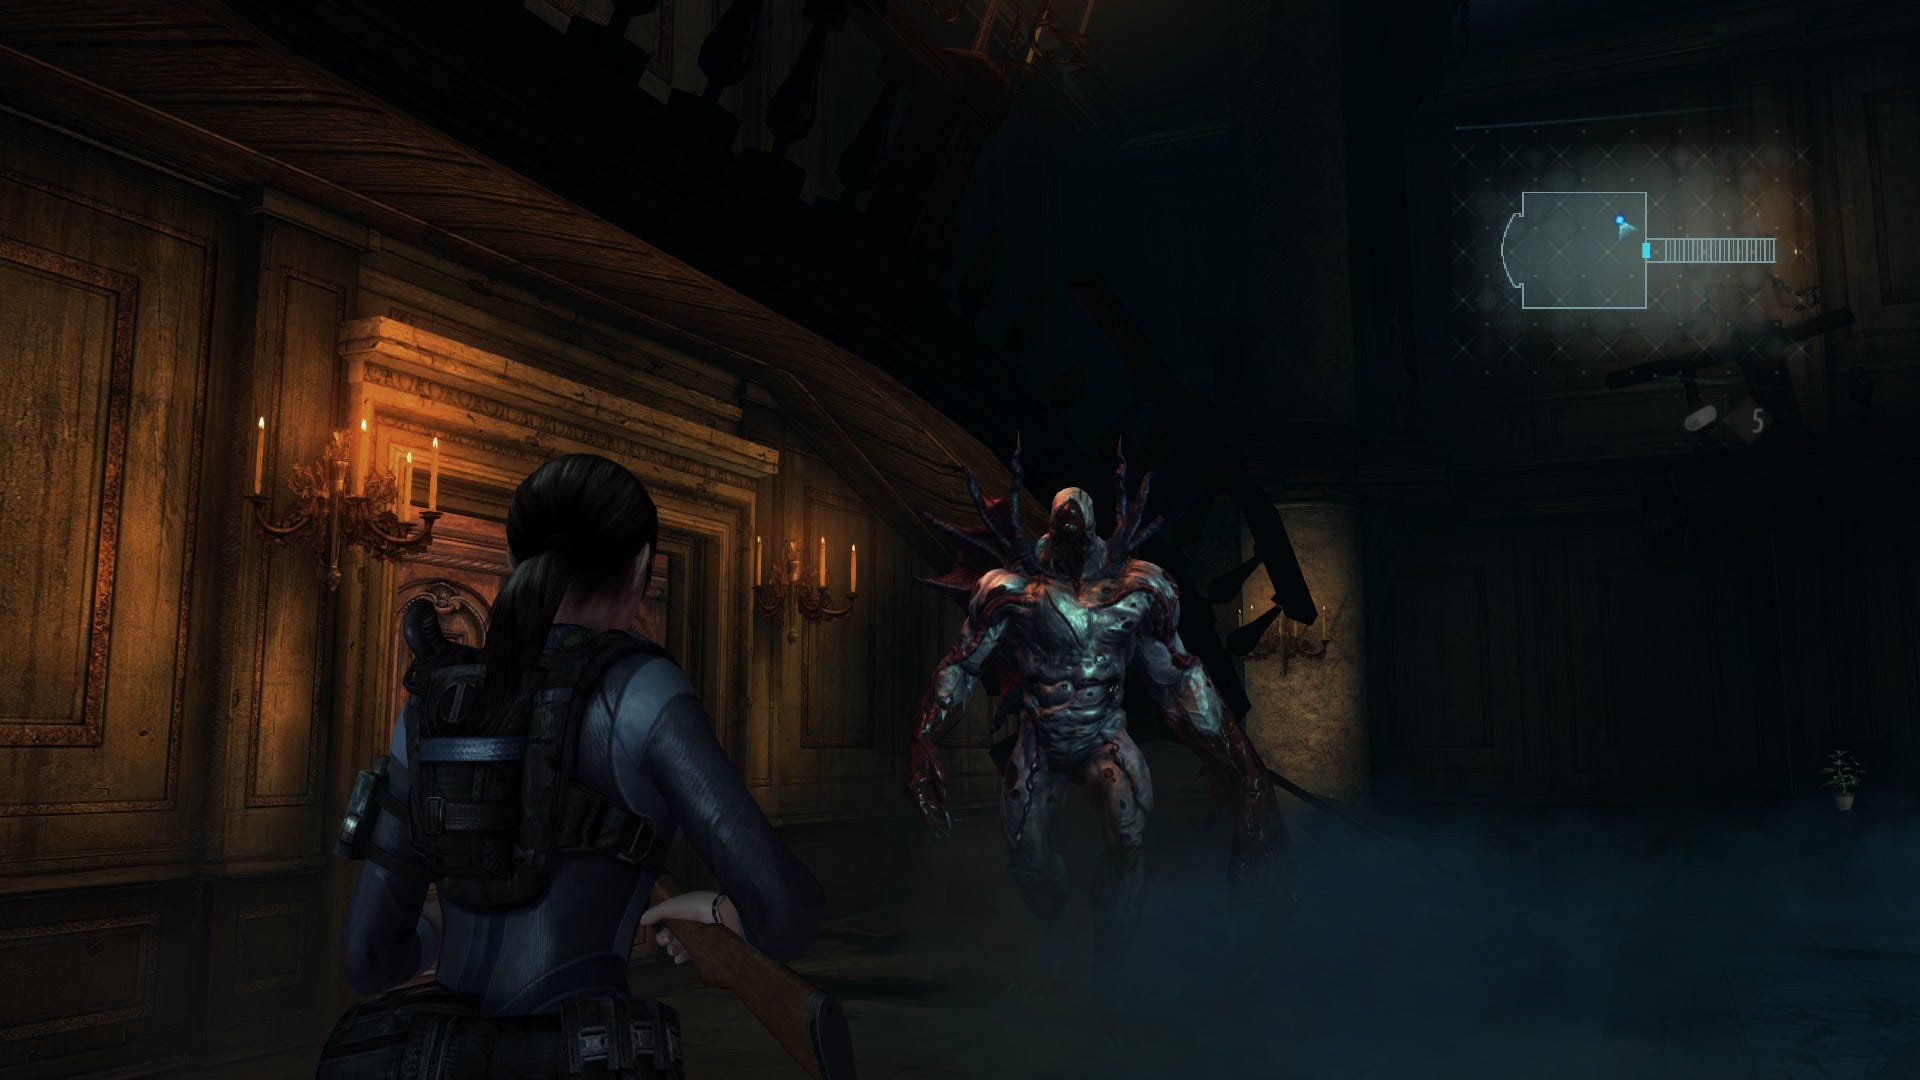
Once the opening cutscene is over, Norman (aka the Ultimate Abyss) will begin his steady march toward you. Immediately attempt to lay on some damage with a couple of headshots.
Norman's primary method of attack is to wink out of existence then teleport right in close to strike. If Norman doesn't immediately reappear in front of you whenever he vanishes, it likely means that he's teleported to your rear. Quickly run out of reach, about-face, and resume your assault.

Whenever Norman gets in close, he'll unleash one of two moves: he'll either use his left arm (that is, the arm to your right when facing him) to perform a mighty smash attack into the ground, or he'll attempt to grab you with his right arm.
If this second attack is successful, you'll be be hoisted into the air - and you'll need to frantically wriggle free, or suffer a humiliating end.
Thankfully, both moves are clearly telegraphed and you've ample time to either dodge or slip out of the way. However, if Norman successfully performs his ground slam at mid-range, which has a much longer warm-up, you'll be knocked off your feet - if this happens, be prepared to hammer the button as indicated onscreen to get back up again.
Headshots will do some damage and are easy to land given how slow Norman's walking speed is in the opening part of the fight - just be sure to use a high-damage weapon, such as a levelled shotgun or rifle. His real weak spot, however, is his heart.
This only becomes visible immediately prior to an attack: as Norman raises his arm ready to slam it down, a smouldering hole will open in his chest exposing the heart. At close range, the warm-up is swift, so you won't have much time to shoot it before you get smacked in the face. Aim and fire fast - a direct hit will immediately send Norman staggering, interrupting the incoming attack.
At mid-range, when the warm-up is longer, you'll have more time to strike. However, Norman will attempt to shield his heart with his hand, so you'll need to reposition yourself for a direct hit.
Remember that you can scan the boss to gain an extra green herb if you run out - and there are more supplies around the room. Incidentally, the green weapon crate to the south can be used at any point if you need to adjust your load-out. The battle will pause when you do so.
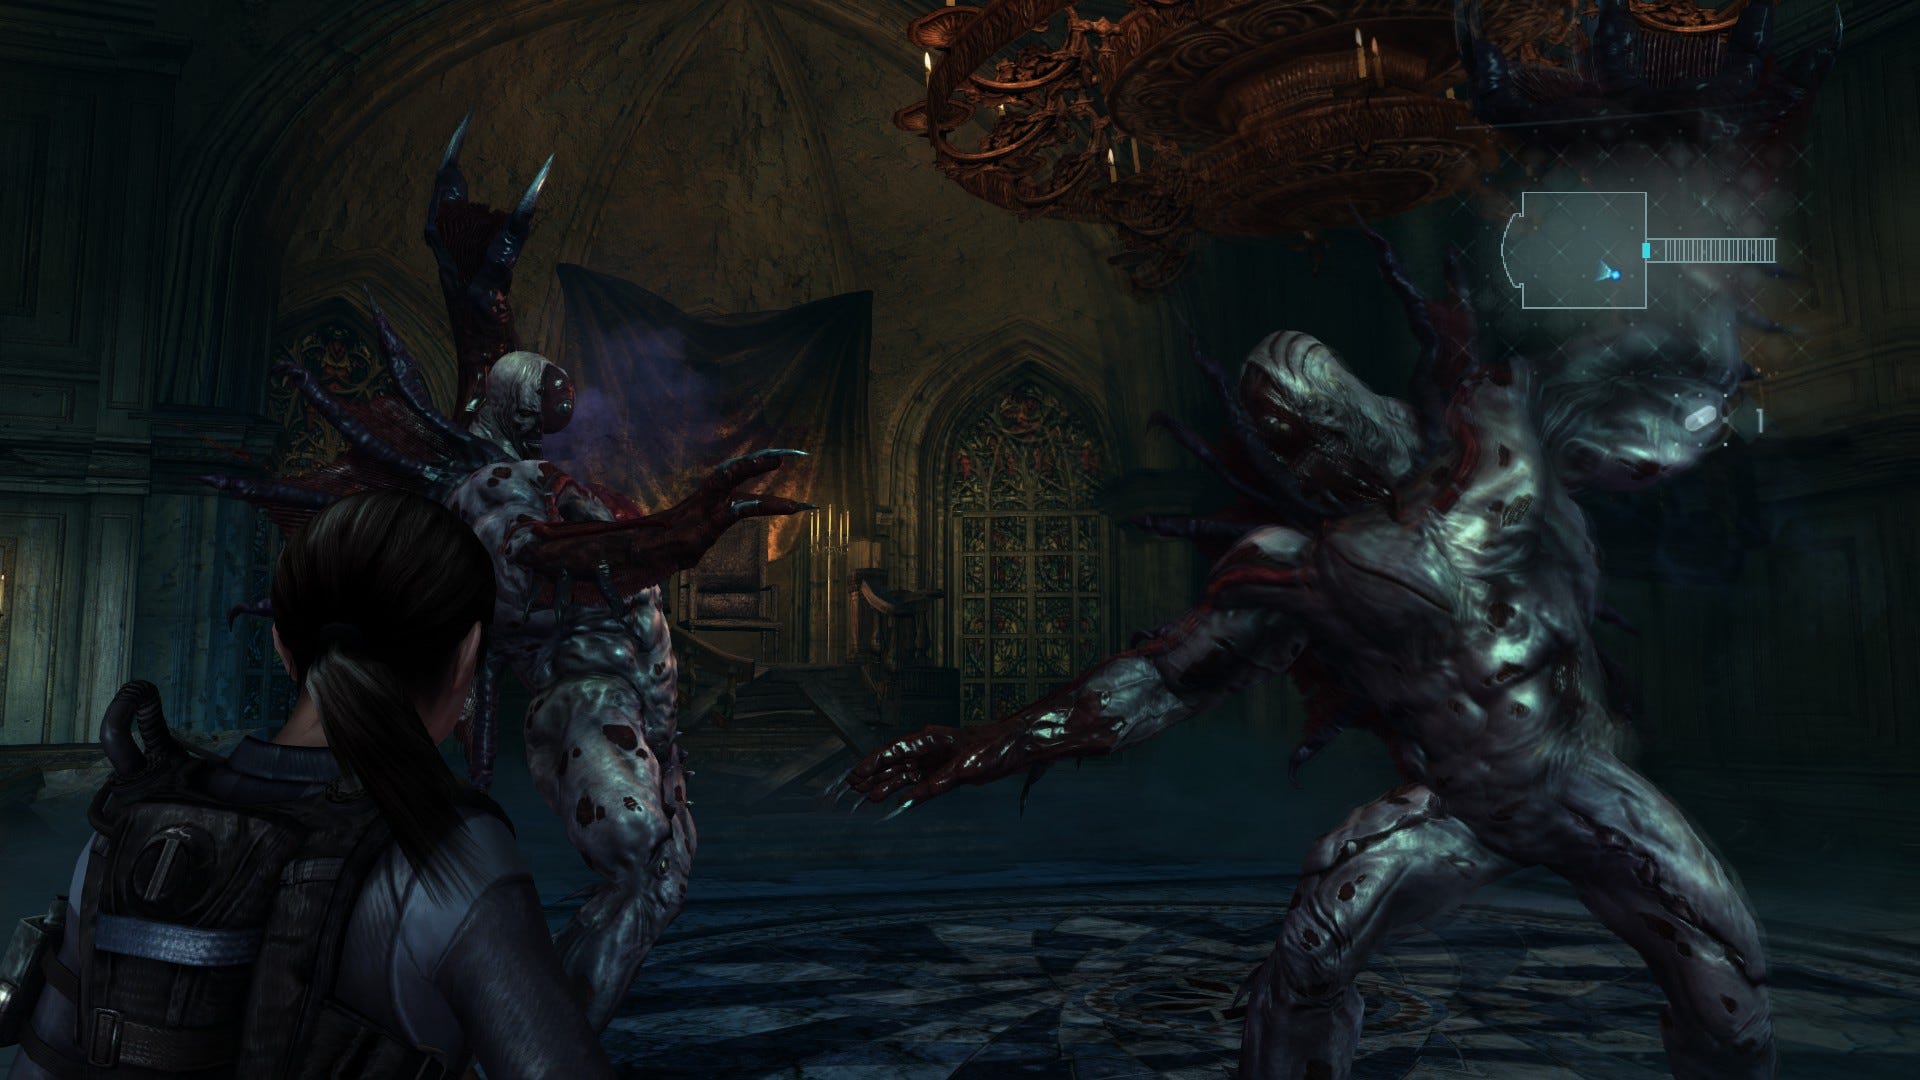
Once you've inflicted enough damage, Norman will let out a huge roar and conjure a clone into the arena. The fight will continue as before, but now you'll have two enemies to contend with.
The good news is that the clone's attacks won't harm you. Instead, the main concern here is that your shots won't count unless you're hitting the real Norman, making it easy to waste ammo if you're not careful. Thankfully, the real target is easy to spot - it's the only one that opens its chest-hole prior to an attack.
Keep up the fight and Norman will eventually bend over panting, giving you ample opportunity to unleash shots into his exposed heart. Watch out though: once he vanishes and teleports in again, he'll add a dash attack to his repertoire, and you'll need to step out of the way as fast as possible.
From this point on, he also begins to deploy an upward swipe with a surprisingly long reach - so dodging is your only real option here.
It all gets a bit frantic from here on out. Now, Norman will variously rush you, attack solo, and attempt to trick you with a little help from his clone. This last part can be manic, with both beasts flashing in and out in rapid succession.
Invariably, the clone will appear in front of you and feign an attack while the real Norman lines up an actual, devastating strike behind you - so don't let your guard down, and always be mindful of your rear.
Throughout this portion of the battle, Norman will constantly stop and bend forward while he catches his breath, giving you the chance to shoot his heart unhindered. He'll also occasionally drop to his knees. When this happens, you won't be able to reach his heart, so aim for the yellowy growth on his back.

Once the boss is down for good, enjoy the closing cutscene and give yourself a pat on the back for a job well done. After the episode is over, you'll unlock Raid Mode Stages 18-20, plus a bonus stage, for completing Episodes 10-12. Cue the end credits!
What else can you do now you've completed the game?
When the post-credits cutscene is done, you'll earn the Custom Parts Charge Shot 3 for clearing the game on Casual difficulty or higher, and the Hydra shotgun for clearing the game on normal - both for Campaign use.
Additionally, you'll be able to reuse your post-game save to start a new game with all of your weapons and upgrades intact - and there's a Select Outfit option available now too, meaning you can finally fight mutants and look fashionable while you do it.
There are plenty other Resident Evil Revelations unlockables, as well as the whole of Raid Mode to play if you haven't been going through it as stages have been unlocked. Go get 'em, slugger!