Resident Evil Revelations 2 - Ep 1: Unlock the gate, bring the crane back to life, then head to the Radio Tower
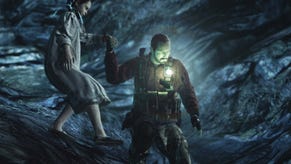
Our walkthrough for the first episode of Resident Evil Revelations 2 ends with a guide to the last leg of Barry and Natalia's journey.
The radio tower is closer than ever, but there are still numerous obstacles to overcome before your journey reaches its end. For starters, two more long-limbed mutants block the route ahead. Crouch down behind the shipping crate, then carefully wind your way toward the next crate nearby. There's a Firebomb Bottle on the ground here, so toss it forward and bring down both mutants at once in a literal blaze of glory.
How to access the building
Up ahead, you'll spot two red doors. Make note of their position, then look for a small path between the rocks to the left. Follow it along and enter the building at the end. Inside, there's a Topaz (100BP) on a shelf, and a movable cage. Shift the cage out of the way to reveal a hole leading into the next - currently inaccessible - room. Switch control to Natalia, scramble on through, and unlock the door from the other side.
Take control of Barry once more and grab the crate you moved a little earlier. Next, carry it into the previously locked room and drop it against the red shelving in the corner. Climb up and retrieve the Parts Box above. Finally, swipe the Green Herb from the table and backtrack to the red doors you noted previously. Step on through and proceed up the steps.
Before continuing onward, look for the blue door on your right. There's a Forest Map on the wall next to it and an Empty Bottle on a table nearby. Head through the door and locate the Tourniquet on the shelves and the Handgun Ammo on the table. There's also a workbench here, enabling you to upgrade your weapons using the Quick Load Lv. 1 parts you liberated from the building a little earlier on.
Back outside, take a right and drop down the wooden steps, slowly making your way toward the illuminated radio tower in the distance. Soon you'll reach a pair of heavily chained, currently impassable gates. Interact with them to start a brief cinematic - cluing you in on your next task - and then prepare to fight three multi-limbed menaces.
Deal with them in the usual way, then head on through the newly-created opening in the fence to the right. Once inside the yard, start winding you way around the maze of debris until you reach the door to the nearby building (sadly, the blue door immediately to your right is currently locked), and deal with the solitary enemy you encounter on the way.
Restoring power to the crane
Before you enter the building, grab the Ruby (250BP) from the crate at the top of the steps, then proceed inside. Interact with the generator to restore power to the crane back in the yard, then return to the heavily chained yellow gates outside - you can blast the lock off the previously blocked blue door if you want to take a shortcut.
Back at the gates, look to the ground and follow the large snaking red pipe to the right. As it disappears beneath a fence, glance right again and you'll spot another pathway winding between numerous log piles. Follow it around and enter the building at the end.
Inside, head into the next room and deal with another gangly-limbed mutant. When the coast is clear, grab the Handgun Ammo from the nearby shelf. Move into the next corridor and go through the right-hand-door. There's yet another mutant to deal with through the left-hand door, so it's best avoided unless you're feeling particularly feisty.
Pass through the next blue doorway, then follow the corridor around to the left. Soon you'll reach another door to your right - head on through and out into the open. There's a lever directly ahead and a crate containing some Assault Rifle Ammo nearby. Grab the latter, then yank the lever to activate the crane arm and smash your way through the large yellow gates.
Head to the Radio Tower
Finally, it's time to make judicious use of your newly-cleared route. Unfortunately, the pathway back is now crawling with mutants, so deal with the ones posing an immediate threat and dash around any others as you sprint toward the open gate. Reaching it triggers a brief cinematic.
With the carnage safely behind you, follow the grassy path ahead and drop down to the earth below. At long last, you've made it to the other side of the bridge and, more importantly, the radio tower. With the end in reach, step inside the building, activate the control panel in the next room and sit back to enjoy the episode's gripping cliffhanger. Good work, you!
- You can find the rest of our Resident Evil Revelations 2 guide from the first page of this article.


