Resident Evil Revelations 2 - Ep 1: Find the Gear Kog, escape the prison, and learn how to open locked boxes
Our walkthrough continues with a guide to locating the Gear Kog, using those deadly blades to your advantage, and opening locked boxes.
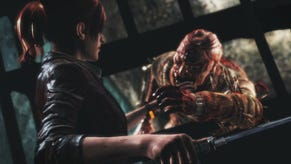
After a truly spectacular detour, you find yourself back in the cog panel room - now made more deadly by the shifting, spinning blades. Dodge around the first one to reach the centre of the room and then glance through the door to the right. This way leads back to the main prison complex and - surprise, surprise - it's now teeming with enemies.
As the mutants approach, either prepare your weapon of choice or lure your opponents into the path of the spinning machinery. Don't stroll into the blades yourself, of course - it won't end well.
Get the missing Gear Kog
Once peace has been restored, take the corridor to the right of the cog panel and continue onward until you reach the room from a little earlier. With the power back on, you can activate the strange machinery. Yank the lever, retrieve the missing Gear Kog and jog back to the previous area, taking care of one last mutant on your way.
As you place the cog in its panel and the gate ahead opens, mutants begin surging into the area from behind. You need to work quickly here to avoid being overwhelmed. First, pass through the newly-opened gate and turn your attention to the strange device in the centre of the room.
Use the machinery to kill the mutants
Immediately rotate the machinery so that its nozzle faces toward the doorway. While that animation plays out, quickly switch characters (if you're playing solo) and turn the valve against the wall in order to activate the flame. Make absolutely sure that you rotate the device before spinning the valve, otherwise you'll destroy the Rare Parts Box sitting in the corner.
Quickly deal with any mutants that managed to slip through during the set-up, then use Moira's crowbar to prise open the gate. With the path ahead clear, grab the nearby Green Herb if you need it (and ignore the inaccessible Rare Parts Box - you'll get to it later), then open the steel shutter ahead.
Escape the prison
Finally, fresh air! Once you've had a brief chat with the Overseer and celebrated your prison break, start making your way toward the narrow ravine in the distance, stopping to grab the Green Herb resting against the trunk of a nearby tree.
Follow the rocky path as it winds around then pass through the gate at the end. Pause to admire the beautiful sunset and the rousing oceanic vista, then continue toward the bridge up ahead.
Before crossing, glance left and locate the storage shed set back against the rock. Here, you'll find a locked door and, just next to it, a locked box. As this is your first locked box mini-game, you're given a quick tutorial explaining the basics. Locate the box's sweet spot as described, then hit the relevant button to focus your cursor. Repeat the process one more time to pop it open and grab the Parts Box inside.
Cross over the bridge
With that little adventure out of the way, proceed over the bridge and make your way toward the radio tower. Following a spot of mild, bridge-crossing peril, make your way up the steps and enter the building ahead. There's a workbench inside and, thanks to your recent lock-picking frenzy, you're able to apply the Quick Load Lv. 1 upgrade to your weapon of choice.
Finally, about-face and head along the corridor, following it as it doubles-back around and to the right. There's a crate on the floor containing Shotgun Ammo, as well as a control panel nearby. Simply interact with the latter, then sit back to enjoy the end of the game's first chapter as Claire and Moira
- Read on for the first part of our guide to Barry and Natalia's first chapter.
- Head back to the first page for the rest of our Resident Evil Revelations 2 walkthrough


