Resident Evil Revelations 2 - Ep 3: Solve the gravestone puzzle, get a new Assault Rifle and kill mutant Neil
Explore the crypt and solve the gravestone puzzle to get the assault rifle, uncover a shocking secret and defeat Neil’s deadly mutant form.
Make your way along the passage and marvel as you emerge in some strange, underground crypt. At the junction, take a right and pass through the archway ahead. There's a small bridge leading to more graves on your right. Cross on over and look below the bridge from the right-hand side in order to locate another Tower Emblem.
Next, move back over the bridge and examine the large, bloody stone ahead to receive the 'A Eulogy for my Brethren' note. Smash the crate to the left, then make your way toward the illuminated archway at the rear of the room. Pass on through and take a left to retrieve the 'Release our Sworn Comrades' document, providing some clues on how to proceed.
How to solve the gravestone puzzle
Return to the room full of graves and immediately look to the first row on your right. The second grave along is missing a headstone, so examine it to solve the first part of the puzzle. Next, cross over the bridge ahead and investigate the first grave from the right - it's the only one with its insignia stamped on the back. Next, cross the bridge once more and look to the first row of graves on your right. Here, examine the fourth grave from the right, then move forward a row and investigate the grave missing its upper-half.
That optional little puzzle will open the gate beyond the illuminated archway, so climb the steps, grab the Parts Box from the shelf to the right and take the MP-AF Assault Rifle on the ground. Next, head back down the steps and take a left along the corridor.
Once you reach the large room at the end of the passage, climb the steps. At the very top, head through the blue door and follow the corridor to the left. Finally, pass through the door at the end.
In the next room, immediately take a right and head up the staircase, passing through the door into the plush office beyond. Grab the Red Herb from by the window and the 'Instructions for Stuart' note from the table. Next, take the 'Stuart's Valediction' note from the bookcase behind the hanging corpse. When you're done, leave the room, descend the steps and head up the large spiral staircase winding around the cylindrical shaft in the centre of the room.
Learn the truth about Neil
Cross over the first walkway to the right and take a left at the end. There's a crate and a Green Herb in the alcove nearby. Continue around the room's perimeter until you reach the blue door, then head on through.
In the storeroom on the other side, examine the document on the table to learn of Neil's fate. Once the cut-scene is over, take the Green Herb in the corner and the 'A Letter to my Compatriots' document from the blue table. Finally, use the workbench to equip the Capacity Lv. 2 and Charge Shot Lv. 1 upgrades that you procured earlier on in the episode.
Before leaving, be sure to equip your most powerful weapons (one of each type), ready for the chapter's final battle - and arrange your inventory so that Claire has easy access to any healing items you might need. Once you've finished, leave the storeroom and return to the previous area.
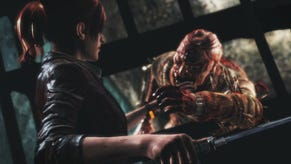
As soon as you enter, a life will descend the central shaft. Make your way to the lower level and attempt to step inside. As you do so, an infected Neil will tumble out and begin to mutate. Unsurprisingly, Neil's giant mutant form can take a huge amount of damage, but there's a bit of a trick that can make this battle surprisingly easy.
How to kill mutant Neil
Rather than emptying round after round into mutant Neil, lure him toward the large yellow crates containing flammable gas around the room. Once he's close, he'll slam into them with his fist, causing a massive explosion and setting himself on fire. As soon as this happens, dash around to the opposite side of the burning debris and lure him through the fire again.
Keep doing this and, once he's received a certain amount of damage, Neil will yell “I'm burning up!” - causing a glowing weak spot to burst from his body. Shortly after, Neil runs over to a water pipe and smashes it to cool himself down.
Use this opportunity to empty your most powerful weapons into his weak spot while he remains stationary. After a few moments, the weak spot will retract and you'll need to start the process again. Luckily, there are numerous yellow crates around the room, so conserve your ammo, concentrate on setting him alight and only take a shot when his weak spot is exposed.
After mutant Neil's first burn-up, the entrails on his chest will begin to stretch over his body, wrapping around to form a huge, undulating arm. From this point on, it's important to keep your distance while you're shooting in order to avoid his powerful charge attack and fist pound.
Be ready to dodge aside at any time, as mutant Neil regularly flicks his stretchy arm across the room and leaps into the air in order to slam down hard. Be extra vigilant for his arm attack once he hops onto the walkways above - it can be tricky to dodge if you're not aware of his position.
A little way into the battle, Neil will begin dropping tendrils on the ground. Be sure to avoid these as they can ensnare you, and do damage in the process. If you start to run out of ammo, check the ground and the crates around the room's perimeter throughout the fight. Use the above strategy, however, and it shouldn't take you too long to take him down.
Once mutant Neil has been defeated, return to the lift and slip inside. Next, hit the button and prise open the doors as soon as the car comes to a halt. Prepare for one more - thankfully non-interactive - confrontation with Neil, then prepare to switch control to Moira and begin crawling towards the gun. Once you're close enough, pick it up and enjoy the chapter's final cut-scene.
- The next part of our walkthrough explains how to find the Sewer Passage Key.
- Head back to the first page for the rest of our Resident Evil Revelations 2 Episode 3 walkthrough


