Resident Evil Revelations 2 - Ep 3: Move the power source cube, restart the elevator and escape the mines
Our guide to Episode 3 concludes as we show you how to restart the elevator, take on the claw boss a second time and escape the mines.
Once the claw mutant has fled, look for the pile of crates near the window and clamber on up to leave the building. Outside, head right and grab the cage-like power source from beneath the conveyor belt.
As you do, a new enemy - a variant of the long-limbed beasts you've encountered before - will drop off the nearby ledge and start to attack. Again, you need to keep shooting its limbs in order to expose its weak point. Watch out for its pulsating arm though - this squirts vision-impairing pus when hit, and the creature can launch more goo by swinging his arm.
Open up the gate
With the creature defeated, retrieve the power source once more. Carry it up the rusty staircase leading to the conveyor belt that you noted prior to the claw-boss battle and drop it on.
With that taken care of, climb up the dirt ledge in the centre of the area and follow the conveyor belt on your left along to the end. Note the power source on the ground, then turn your attention to the long-limbed mutant nearby. Quickly stealth attack it from behind, then retrieve the power source. Next, carry it to the green generator near the gate and drop it onto the square platform immediately to the right. Now, enter the small cage behind you and approach the lever.
Switch to Natalia and look for the small hole in the side of the fence immediately behind the green generator. Slip on through, smash the crate and approach the nearby lever. Pull it then immediately switch back to Barry. Pull the lever in front of you and the gate will rise. Finally, grab the power source and make your way through the now-open gate.
On the other side, look for the broken ladder to the right of the building ahead. Drop the power source next to it and climb to the upper level. Smash the crate then enter the building.
How to move the power source cube
Inside, cautiously make your way down the stairs. There's a roaming mutant at the bottom so deal with it stealthily by attacking from behind. Once it's dead, smash the crate, unlock the nearby door and collect the power source from outside. Re-enter the building and carry the cube upstairs, dropping it onto the conveyor belt at the top.
With that done, head back outside and look for the ladder on the right. Climb up, grab the power source to the left and drop it onto the conveyor belt at the top of the rusty steps on the right. Now, move back down the steps and take the ladder up to the next level.
Use the ladder on the right and wait for the power source to plop down in front of you. When it does, hoist it up and drop it down to the level below. Finally, rejoin the power source and place it on the platform next to the green generator ahead. You can now yank the lever on the left to summon the elevator - but there's a long-limbed mutant to deal with before it's safe to ride.
Restore power to the elevator
Take him down, then enter the elevator car, pushing the button to reach the upper level. When the car grinds to a halt, hop onto the metal girder and take a left. Follow the path around the side of the elevator shaft and leap over the gap once you reach it. Now, clamber up the ledge and follow the makeshift walkway around to the right. At the junction, smash the crate on the left then take a right, continuing along the path.
Climb the staircase and immediately deal with the two mutants ahead. You can stealth them if you like, but their route is a little meandering - so feel free to obliterate them with ammo instead. At the top of the steps, take a left and collect the Ruby (250BP) lying on the ground nearby. Next, smash the crate about halfway across the railway tracks on the right.
Follow the tracks back to solid ground, then smash the crate on the left up ahead. When you're done, turn right and make your way back to the elevator shaft on the right-hand side of the decimated bridge. Smash the crate, then collect the power source from the ground.
The return of the claw boss
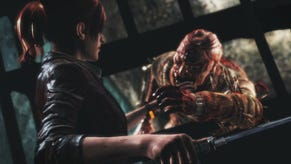
Turn around and start carrying it forward, sticking close to the right-hand wall. As you approach the centre of the area, you'll encounter the claw-boss from earlier in the episode. You can deal with him in exactly the same way as before - but focus on eliminating the two enemies toward the rear of the area first. In particular, prioritise the destruction of the parasite-tossing mutant, as its vision-impairing splash damage can make the battle particularly trying.
Once the coast is clear, return to the power source, retrieve the 'Note on Corpse Disposal' document from the nearby table and smash the barrel for some goodies. Next, pick up the power source and carry it to the green generator at the far end of the area. Pop it down on the adjacent platform and yank the lever to the right. This open the gate to the left, so head on through.
When you reach the ledge ahead, drop on down. Push through the bushes and hoist yourself up to the next level. Follow the path between the rocks and you'll soon reach a ruined shack to the left. As you do so, an old foe will make unexpected appearance, bringing the episode to a close.
Head back to the first page for the rest of our Resident Evil Revelations 2 Episode 3 walkthrough

