Resident Evil Revelations 2 - Ep 2: Sneak through the abandoned village and locate the Back Gate Key
With Barry and Natalia back in the spotlight, follow our guide to make it through the mutant-infested village and locate the Back Gate Key.
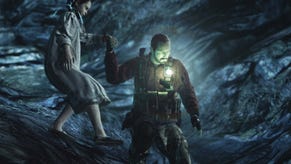
Barry and Natalia haven't made too much progress since the end of Episode 1, and we join them in a clearing outside the radio tower control room. The Overseer's tower looms ominously on the horizon, so it's time to start the journey toward it. Take the Handgun Ammo from the crate tucked around the far corner of the control room building, then start working your way through the mist.
Once you reach the tunnel, head inside and continue forwards, emerging back into the forest at the other end. Push forwards between the rocks and take the Assault Rifle Ammo from the barrel outside the ruined building to the left. Finally, enter the building, retrieve the 'Gabe's Note' document from the shelf, then leave via the opposite doorway.
Continue right, following the forest path ahead, and examine the corpse on the ground. After a spot of grumbling from Barry, continue along the trail to the left and pass through the gate, dropping off the nearby ledge to proceed.
Sneak through the abandoned village
Slowly make your way forward between the abandoned buildings, then crouch down when you spot the mutant ahead. It's stealth time again, so edge toward the opening in the nearby wall and take down the mutant with a stealth attack from behind.
Follow the path forward, staying close to the building, then take a left at the junction. Note the dirt trail leading down the hill to the right. Continue around the building and smash the barrel at the end to retrieve a Sapphire (500BP).
With that taken care of, retrace your steps and begin heading down the sloping track you noted earlier. Keep moving forward and follow the route around until you reach the small platform overlooking more abandoned buildings below. Break the nearby barrel to secure some Handgun Ammo, then drop on down.
Two more long-limbed creatures meander up ahead. Rather than charging in and confronting them both head-on, look for the broken window leading into the ruined building nearby and vault over. Proceed cautiously toward the opposite corner, then edge around the wall to the right.
Wait for one of the creatures to skulk by and come to a stop up ahead. When he does, quickly sneak up and take him down silently from behind. The second mutant travels around the central building in a clockwise direction, so duck back into your hiding spot and wait for it to pass. As soon as it does, nip out and stealth-finish him.
Orientate yourself so that the large building is on your right, move toward the barrel up ahead, then slip into the dilapidated shack on the left. There's a blue Tower Emblem hanging on one of the walls, so shoot it down to add it to your stash.
Next, continue working your way around the central building until you spot the sealed chainlink gates ahead. Sadly, they require the Back Gate Key to open, so smash the blue barrel nearby to score a Ruby (250BP), then look for the dirt trail leading up the hill to the left. Follow it along and pass through the door at the end.
How to get the Back Gate Key
In the next area, grab the Smokescreen Bottle lying alongside the building up ahead. This new weapon obscures an enemy's vision when thrown, giving you time to land a stealth attack or - if you're in a pinch - simply make good your escape.
There are three more creatures to deal with in this area - two roaming around near the centre, and another hiding around the corner of the furthest building.
Begin by sneaking to the left and moving along the first building. When you reach the end, peer around the corner to the right and note the position of the two central mutants. Don't forget that you can use Natalia's Awareness ability to get a clearer picture of their whereabouts.
First, ignore the creature roaming back and forth along the central path, and instead aim to deal with the second one moving clockwise in and out of the small ruined building to the left. Wait until the first mutant's back is turned, move along the path, then vault over the broken window to the left when the coast is clear.
Once inside, quickly sneak through the opening opposite the window. Travel clockwise around the wall until you're close enough to bring the roaming mutant down undetected. Next, sneak forward between the bushes, and head back toward the central path. The second creature wanders back and forth directly ahead of you.
Wait until he begins to move left, then slip on out of your hiding spot and take him out with a stealth attack. The third and final mutant stands patiently around the corner of the nearest wooden building, so move clockwise around it and take him out from behind.
When the area's clear, look to the steps on your right and note the broken red ladder nearby. Before using it, retrace your steps and claim some Handgun Ammo and an Empty Bottle from the barrels lying around the yard.
Back at the ladder, adjust your position so that it's on your left, then look directly forward. You should just about be able to make out a movable cage through the window of the ruined building ahead. Retrieve the cage then drop it beneath the ladder to create a route up onto the roof.
Clamber up, then move toward the walkway leading over to the next building. Before proceeding, glance at the ground to your left and shoot the Tower Emblem resting on some rocks. Next, use the walkway and descend the ladder at the end of it.
Once inside the building, grab the Rifle M1891/30 from the shelf, then switch to Moira in order to open the wooden chest and claim a Parts Box. Finally, take the Back Gate Key from the table nearby.
With the key in your possession, head up the ladder and retrace your steps until you reach the blue gate leading back out of the area. Before passing through, look right, switch to Moira and open the wooden chest to secure the Handgun Ammo Case. With that taken care of, leave the area and make your way down the slope toward the locked gate requiring the Back Gate Key. Open it, then continue down the hill, passing through the fence at the end.
- The next part of our guide explains how to kill the invisible enemies.
- You can find the rest of our Resident Evil Revelations 2 Episode 2 guide from the index page of this article.

