Assassin's Creed Origins - Gennadios the Phylakitai and End of the Snake
Everything you need to know about stealthing and stabbing your way along the Nile.

Gennadios the Phylakitai and End of the Snake are the fifth and sixth quests you'll encounter in Assassin's Creed Origins, which have you tackle a couple of different targets.
These follow on from Aya I and May Amun Walk Beside You.
We'll cover everything you need to know about completing Gennadios the Phylakitai and End of the Snake below, while you can head back to our main Assassin's Creed Origins walkthrough and guide hub for all the other missions so far, and more.
Gennadios the Phylakitai
Head for the marker and then use Senu to locate your target. He patrols the walls so his exact location will vary, but once you've located him you can either bide your time and wait for your moment to launch a surprise strike, or you can just run in waving your sword around.

Whichever approach you choose, once the cutscene is over you'll be notified about the Phylakes that are now hunting you down. These high-level foes will attack on sight, and right now you stand no chance against them, so if at any point the game warns you there's one nearby make sure you're heading away from them! Their locations and level will be marked on the map, so keep checking in and plan your movements accordingly.
Completing this mission also unlocks the uniqe sidequest Philakes' Prey, which has a pretty great reward - more on that in our dedicated Philakes' Prey guide!
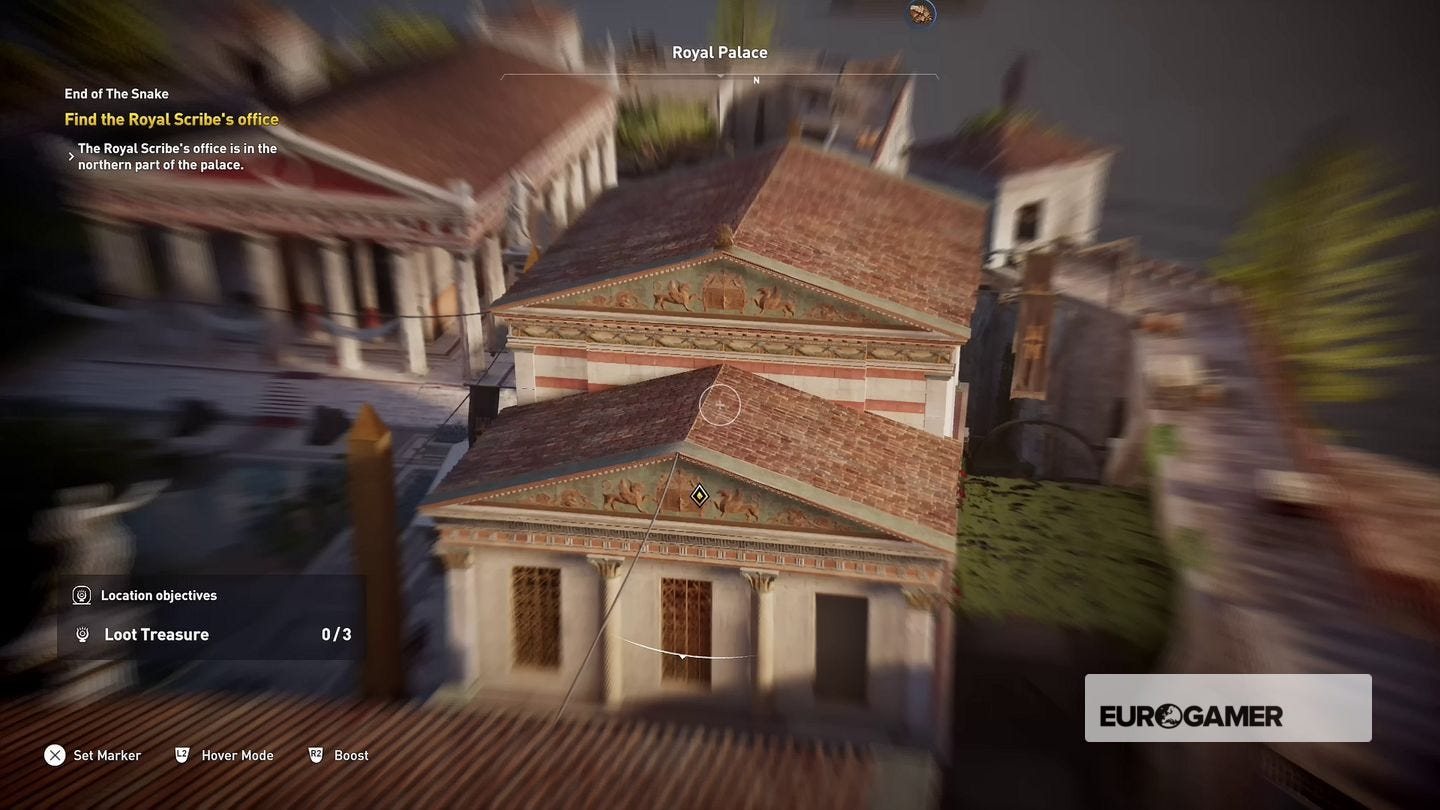
End of the Snake
Head to the marked area and use Senu to tag as many of the soldiers in the palace as you can - avoiding detection will make your job a lot easier. The scribe's office is near the eastern wall in the north of the area, so once you've got everyone under surveillance make your way around the base of the wall, then climb up and drop down the other side near the vine-covered roof.
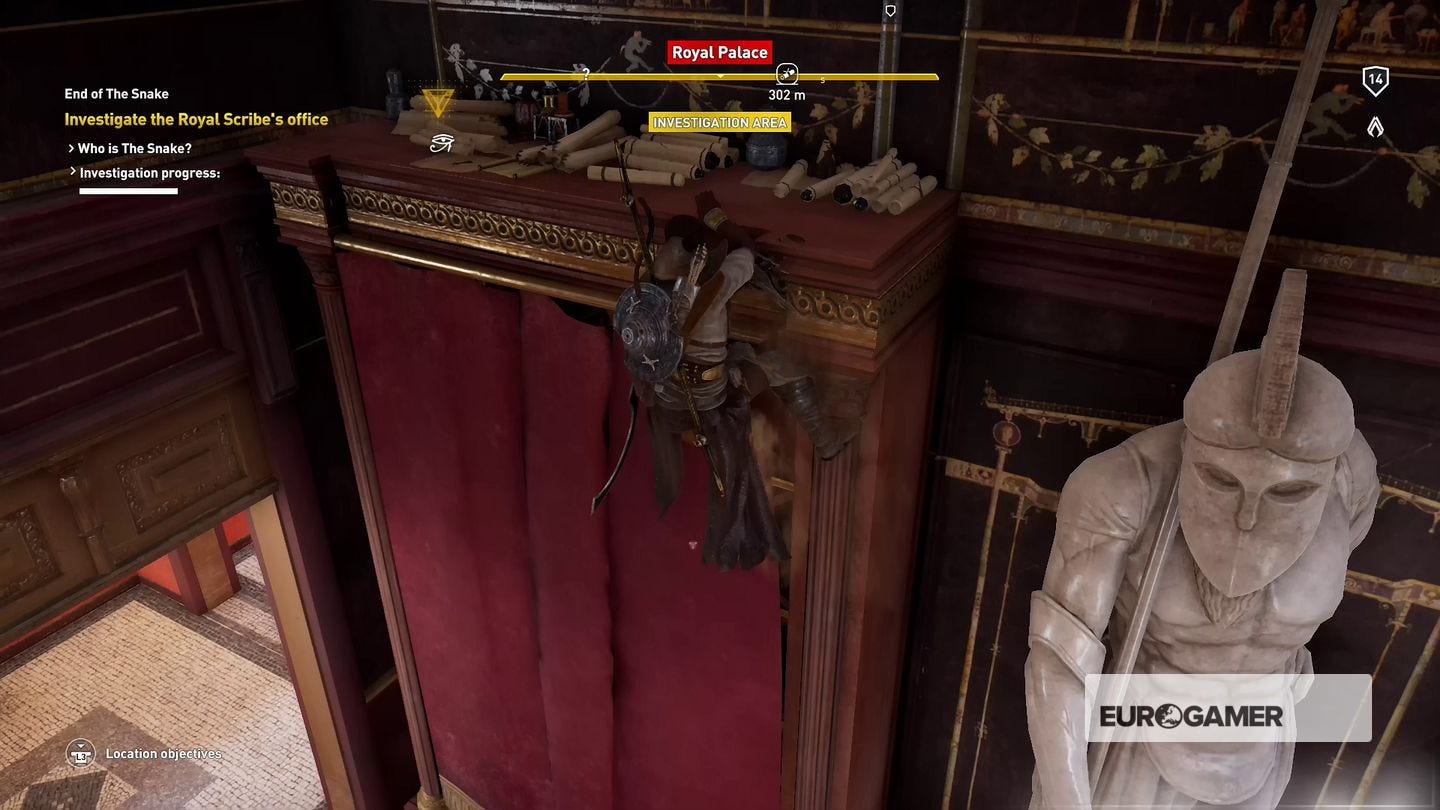
Quickly deal with any nearby guards, then head inside and make for the stairs in the far left corner of the room, making absolutely sure you've not been spotted - it's a dead end, so you don't want to be followed.
Need more help? Our Assassin's Creed Origins walkthrough and guide will take you through every step of the main story and quests, whilst we also have guides on how to grind XP and level up, plus explainers on how Assassin's Creed Origins sidequests work, alongside how to get crafting materials and animal goods, and even complete solutions and walkthroughs to all Assassin's Creed Origins Tombs, Silica, and Anchient Mechanisms. We also have a list of all Papyrus Puzzle locations, Origins' cursed and legendary weapons and how they're acquired, and finally a detailed page Phylakes, Phylakes' Prey and how to get the Black Hood outfit.
Use an Animus Pulse to highlight objects on interest in the scribe's office. Look at the scroll on the desk and the ladder on the floor, and then climb the shelves near the ladder, shimmy across to the left via the statue, grab the key from on top of the shelves covered by a curtain, then examine the locked chest next to the desk.
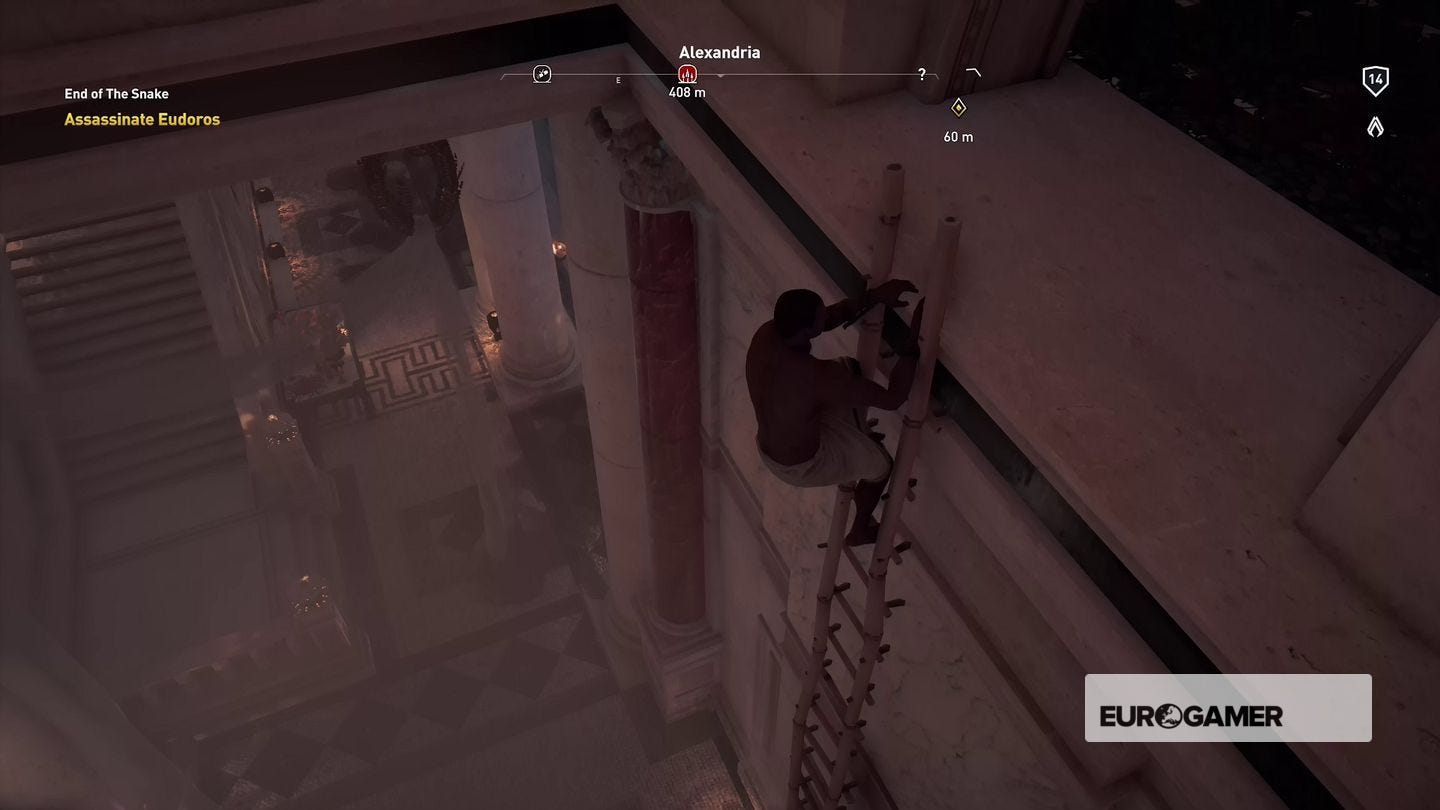
Leave the building (you can just Fast Travel if you want to play it safe) and head for the bathhouse. When you get inside use one of the ladders in the alcoves either side of the room to reach the upper level, then make your way towards the room in the far left and perform an aerial assassination on your target. (You can also brute force your way through, but there are a lot of guards hanging about so it's a dangerous option.)
Next Up: Aya II and The Hyena
Once he's dead climb back up to the top level - the guards will all run towards one of the ladders, so wait until they're heading up and then run towards the other one, drop to the floor quickly, and leave with all possible haste!