Metal Gear Solid 5 - Backup Back Down: Armoured vehicles, transport truck, FAKEL-46
How to destroy the armoured Soviet vehicles and rescue the prisoner of war in the Backup, Back Down mission of Metal Gear Solid 5.
Welcome to Metal Gear Solid 5 - Backup Back Down, the ninth main story mission of the game, following on from Occupation Forces.
Backup Back Down Mission checklist:
- Eliminated an armoured vehicle
- Eliminated multiple fighting vehicles or gunships
- Eliminated all armoured vehicles without receiving a resupply or fire support
- Secured the weapon the transport truck was carrying
- Extracted an armoured vehicle
- Extracted 4 soldiers searching for the escaped prisoner
- Extracted 6 prisoners
- Extracted 3 tanks
Before continuing, you might find it useful to upgrade your binoculars to Level 2. This adds a special analyser feature to them, enabling you to scan soldiers and POWs in order to get a read-out of any special skills they might have. This will give you a better idea of their usefulness before you Fulton them back to Mother Base.
When you're ready to begin your next objective, select 9-Backup, Back Down from your mission list then choose the Landing Zone just south of Wakh Sind Barracks. Note that missiles are recommended for this mission, so make sure you're properly equipped before you step out into the field. Finally, commence the objective and set the Drop Time to 0600.
Your task in this mission is to eliminate as many enemy combat tanks as you can within the 15 minute time window before the guerrilla operation ends. Your mission will fail if no vehicles are destroyed - so don't dally around! Note that the more tanks you take out, the greater your reward will be at the end of the objective. Best get destroying!
Backup Back Down: Eliminate the Soviet fighting vehicles
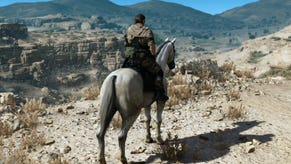
Once you've landed, mount your horse and locate the red waypoint markers onscreen. These indicate the enemy tanks in the area, so gallop toward the nearest one. Your first target should be along the road to the north-west and will begin moving imminently. There's a second tank travelling up from the south which you can deal with once the first has been destroyed.
As you move along the main road toward your first target, you'll approach a Soviet outpost. Given the time limit on this mission, it's best to ignore the guards here and focus on eliminating the tanks. To avoid the outpost, leave the main road and travel around to its left.
Continue galloping forward then, once you're safely past the guard post, rejoin the main road. Next, make a note of the bridge leading west directly ahead then turn your attention to the first tank, which should be close by (provided that you moved swiftly enough, of course).
Make sure your FAKEL-46 grenade launcher is equipped then bring the tank down with a few well-placed shots (you can also use your Fulton device, provided that it's sufficiently upgraded). If you don't deal with the tank quickly, it's occupants will likely alert other hostiles in the area to your presence - making your task significantly more difficult.
Once the first tank is down, head west over the bridge that you noted earlier. Your second target should still be moving along the main road to the south - gallop on over and bring it down. Before long, more vehicles will be added to your map; if any manage to leave the mission area before you've destroyed them, they're gone for good. Simply move onto your next target.
Eliminate any vehicles that take your fancy and, before too long, Ocelot will alert you to the presence of a jeep nearby - one that's carrying a useful-looking prisoner.
Need help with The Phantom Pain? Our Metal Gear Solid 5 guide and walkthrough explains how to complete every main story mission, and explains their many optional objectives. We also have lists of Blueprint locations, Tape locations, Key Item locations, how to unlock S Ranks and a Metal Gear Solid 5 Achievement and Trophy list.
Rescuing the POW
Start moving north along the main road until you spot the supply outpost up ahead. There are numerous guards in the area, so race by as quickly as possible, continuing along the main road.
When you spot the jeep, immediately use your tranquilliser gun to put the driver and guard in the front seats to sleep. Next, once the vehicle comes to a halt, pull the prisoner out of the back and lay him on the ground. Finally, Fulton him out of the area - and whisk the guards away too if they look like they might be useful.
Rescuing the prisoner will reveal the location of a hidden enemy staging area on your map - so feel free to go investigate it if you have a spare moment.
With that taken care of, hop back onto your horse and begin scouring the area for more enemy tanks. As before, gallop to their position and bring them down before they can leave the map. If you run out of ammo, remember that you can request a supply drop to replenish your reserves!
As the mission enters its final few minutes, you'll be alerted to the presence of a truck moving along the main road from the north. It's carrying an extremely powerful CGM 25 multi-lock homing missile - so it's well worth heading over to liberate the weapon. Simply tranquillise the driver as the vehicle approaches then, once it comes to a halt, hop into the back and collect your reward. Doing so will complete one of the mission's hidden objectives.
Once all tanks have been eliminated (or the timer hits zero), the mission is complete. Summon a helicopter and hop onboard to bring things to a close. When you're back in the air, your Side Ops list will be updated with the Make Contact With Emmerich mission. Good work!
- Head on to the next page for our guide to completing Angel with Broken Wings in MGS 5.
- Stuck somewhere else? Head back to the first page for the rest of our Metal Gear Solid 5 walkthrough.


