Metal Gear Solid 5 - Skull Face: OKB Zero and how to reach each gate
How to reach OKB Zero and track down Skull Face in the penultimate missions of Metal Gear Solid 5: The Phantom Pain.
Welcome to Metal Gear Solid 5 - Skull Face, the 30th main story mission of the game, following on from Metallic Archaea.
Skull Face Mission checklist:
- Made contact with Skull Face
- Got information from Skull Face
- Extracted 4 Walker Gears
- Obtained cassette tape at OKB Zero
- Extracted 7 red containers from OKB Zero
- Extracted 3 tanks from OKB Zero
Once you're back in the air, open your mission list and choose 30-Skull Face. You won't need to select a Landing Zone this time around and will be taken straight to the Sortie Prep screen. Ideally, you'll want to tackle the next mission as stealthily as possible - so pack your favourite infiltration tools and, if you have it, the Sneaking Suit. Finally, select D-Dog as your buddy - along with his Sneaking (Knife) equipment - set the Drop Time to 0600 and commence the mission.
Now that you've learned the location of Skull Face's (not-very-secret, it turns out) hideout, it's time to put a stop to his dastardly plans. You'll need to infiltrate Skull Face's fortress (also known as the secret Soviet weapon design bureau, OKB Zero) and prevent him from deploying the Sahelanthropus that you encountered earlier in the game.
Skull Face: Reach OKB Zero
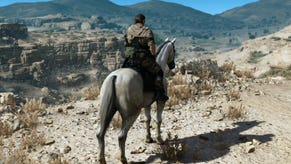
Once you land in the mission zone, begin heading down the hill to the south-east. When you reach the start of the dirt track, take a left and make your way onto the flat grassy outcrop overlooking the road. From here, move north-east and drop from ledge to ledge until you join the road at the bottom. Follow it along to the north-east, heading loosely toward the yellow objective marker, and stop once you arrive at the abandoned guard post.
Skull Face has used his weaponised virus to wipe out the Soviet forces in the area. As such, you won't meet any resistance until you're closer to his base. Pilfer the guard post for supplies (including gun placements and red resource containers) then follow the road to the east, passing through the large stone archway ahead.
Reach the first gate
On the other side of the archway, continue along the road as it winds around the bay toward Skull Face's hideout. When the route bends to the north-east, look for the crumbling tower perched on the high rock to the left of the road. Immediately lie prone in the tall grass on the left-hand side of the road to avoid the sniper ahead.
When you're safely hidden from view, look north-east and locate the large entrance gate in the distance, surrounding by hostiles. In order to reach the other side of the gate, you'll need to find a safe route around the soldiers, Walkers and snipers stationed outside.
Skull Face's many, many troops are incredibly well-armed (and armoured). As such, it's wise to avoid engaging hostiles completely as you attempt to infiltrate the base. To that end, we'll be taking a fairly circuitous route toward Skull Face, keeping well away from enemy patrols.
Stick to the left-hand side of the road and carefully move through the tall grass toward the gate in the distance. As you near your target, keep watch for proximity mines lying in your path - and adjust your route accordingly.
Before long, you'll spot several barricades positioned immediately outside the gate. Just to the left, there's a path leading up a hill toward a dilapidated tower. Make your way to the base of the hill and begin navigating the various stones and ledges at the bottom until you reach the path above. Follow it up to the tower then climb the ladder. Once you reach the top, immediately lie prone.
Reach the second gate
Turn to face north-east and begin descending the slope ahead, using the stone blocks on your right as cover. Shortly, you'll spot a small path on your right leading to ground level. Follow it down and carefully make your way south-east through the tall grass. Keep the barricades to your left and then, once you reach the road, carefully cross over to the other side. Note that there's a sniper situated to the north-east so don't dawdle around!
Once you've crossed the road, locate the narrow dirt path leading up the hill to the south-west. Next, make your way to the top, still using the tall grass as cover. When the path levels out, take a left and head south-east until you reach the long stone wall. Move in close, putting the wall to your right, and cautiously begin crawling along it.
Keep low in the grass and patiently work your way along the wall, moving toward the huge orange cranes in the distance. Eventually, you'll spot another low archway behind a barricade ahead. Make you way toward it, still sticking close to the wall, and slip passed the two guards to your left, standing directly in front of the archway. Note that the grass thins out considerably as you close in on the guards, so you'll need to be proceed extra cautiously.
Once you're safely behind the soldiers, cross over to the other side of the road (moving north-west) and begin scaling the incline ahead. Navigate the rocks and ledges until you reach the ladder set into the high, south-west-facing wall. Make your way to the top and pass through the hole.
Reach the third gate
Once you've entered the room at the top of the ladder, head left and make your way down the steps on the right. Be warned that the area ahead is positively crawling with hostiles (and there's an enemy gunship roaming the skies) so you'll need to remain as stealthy as possible.
If you're spotted at any point, the resulting gunfire can be hard to escape - so it's often easiest to reload your previous checkpoint and try again.
At the bottom of the steps, turn left and drop off the ledge to your right. Once you land, quickly move south-east into the alleyway, watching out for the camera to the north-east as you go. Almost immediately, you'll spot a green door to your left - head on through, take a moment to catch your breath, then pass through the door opposite.
Back outside, continue sneaking north-east. Stay low, descend the steps and move through the crumbling archway ahead. Just beyond, you'll find your route forward blocked by a large stone wall. Thankfully, you're able to duck down and crawl through the hole in its base.
On the other side of the wall, take a left and approach the staircase nearby. Carefully make your way to the top of the steps then slip through the archway on your left. Climb the long staircase ahead and be prepared to tackle the guard standing watch around the corner. Once he's down, continue to the top of the steps and peer through the archway opposite.
Check that path outside is free of hostiles (and that the gunship is nowhere to be seen) then step into the open and take a left. Stay low and carefully move along the walkway, sneaking north-east. Up ahead, there's a guard on lookout near some crates, with another archway directly behind him. Use the crates to slip passed the guard then continue north-east, moving through the archway.
Once you're on the other side, stay prone and continue north-east. Ignore the staircase on your right and follow the walkway along until you reach the end. Next, use the ledges on your right to drop back down to ground level. Stay close to the wall on your left and follow it toward the open gate. Move cautiously and slip through the gate without alerting the Walker standing watch nearby.
In the next area, take a right and locate the metal steps leading up at the far end of the room. Climb to the top and turn right through the door. Back outside, move along the walkway then take a left, heading toward the yellow objective marker. When you reach the small platform at the end of the walkway, climb the staircase to reach the helipad above.
Need help with The Phantom Pain? Our Metal Gear Solid 5 guide and walkthrough explains how to complete every main story mission, and explains their many optional objectives. We also have lists of Blueprint locations, Tape locations, Key Item locations, how to unlock S Ranks and a Metal Gear Solid 5 Achievement and Trophy list.
Locate Skull Face
Once the cutscene is over, follow Skull Face back through the base until you reach the elevator platform. At the bottom, climb into the jeep and be prepared for a long, long drive through the desert. Some considerable time later, you'll reach a familiar hangar and meet your old friend the Sahelanthropus again. Watch the cutscene and, finally, the mission will come to an end. You'll receive the Skull Face, Cipher and XOF emblem parts as your reward.
- Keep reading for our guide to completing Sahelanthropus, the next mission in the game.
- Head back to the first page for the rest of our Metal Gear Solid 5 walkthrough.
