XCOM 2 The Chosen - How to beat the Assassin, Warlock and Hunter, plus all Chosen abilities, traits and weapon rewards listed
How to beat the three primary antagonists.

XCOM 2: The Chosen foes Assassin, Warlock and Hunter are the three big bads of the War of the Chosen expansion, each with a different approach to combat and a unique set of weapons and skills.
One's a close-range assassin, another a Psionic warlock, and the third is a mid-range hunter. Here we explain how they appear in the game, how best to tackle them and their specific abilities and traits.
If you need more help, our XCOM 2 War of the Chosen guide provides a breakdown on how else you can tackle the huge expansion.

How The Chosen Assassin, Warlock and Hunter work in XCOM 2
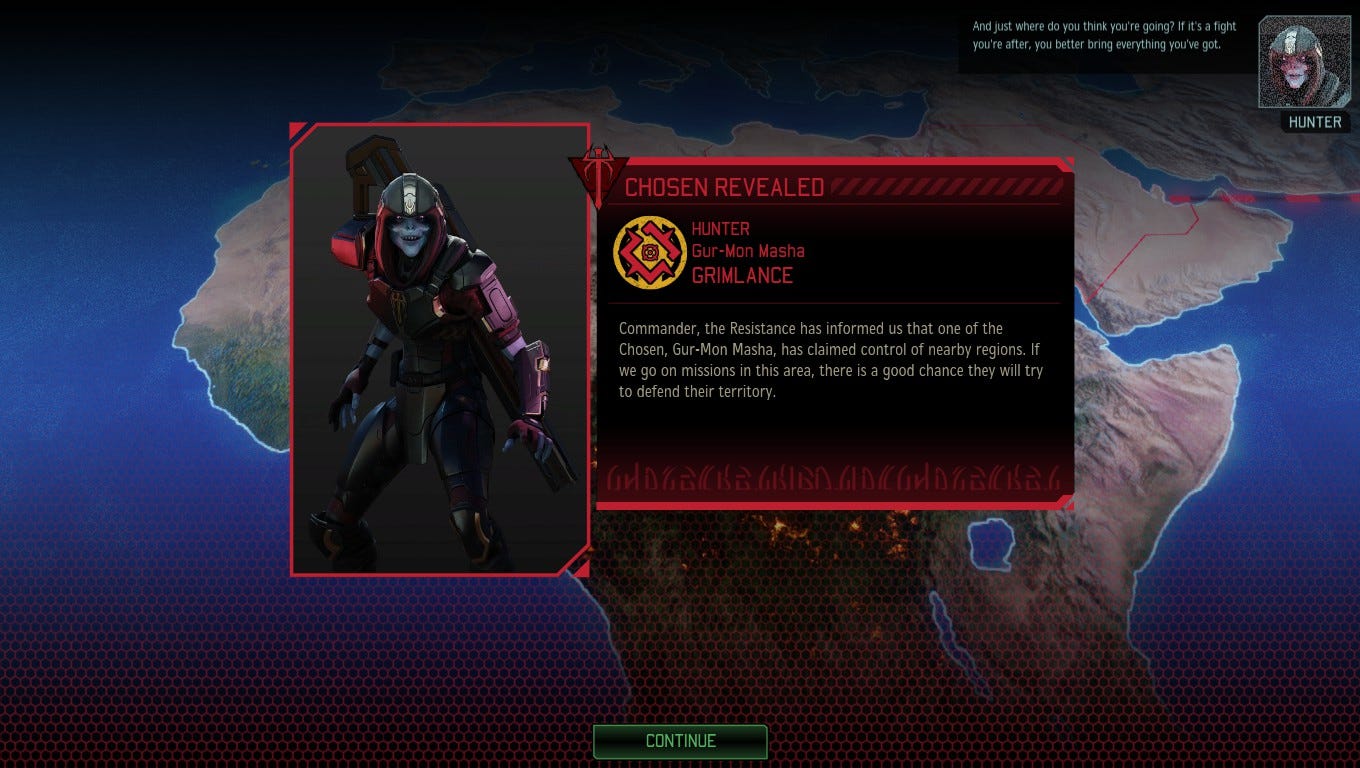
Having divvied up the world map between them, each Chosen has a region of control that means there's a chance they'll show up on any mission you conduct in that region.
Like SITREPs, this lends a degree of randomness to your campaign, but unlike SITREPs there's no chance that the appearance of The Chosen might make your life easier or grant you bonuses.
When a Chosen shows up, they'll harass you until either you've finished the mission objective or forced them to retreat by taking them down. In the meantime, they'll unleash their powers against you on top of whatever else you're dealing with during a mission.
However, the Chosen's primary goal is not to kill your soldiers outright. The Chosen are each out to prove themselves to the Elders by locating and taking back the commander, after you were freed from an Advent facility. As such, each Chosen as abilities that can daze your troops or render them unconscious and, from there, they'll look either to extract knowledge from your incapacitated solider before beating a tactical retreat or to take your soldier hostage.
This knowledge is used by the Chosen for a variety of goals from reducing the efficiency of the Resistance and disrupting your monthly supply drops through to tracking down the Avenger and launching a full scale assault upon it.
The good news, if there is good news when it comes to the Chosen, is that you can launch counter covert missions to find each Chosen's base of operations and eventually shut them down for good.
Doing so is a multi-part mission covert mission launched via the Resistance Ring, which requires relationships to be formed with each of the Reaper, Skirmisher and Templar factions. After committing soldiers to each covert operation, you'll unlock more info on the whereabouts of the Chosen, and once three of these covert missions have been undertaken you'll have the location of one of the Chosen bases to assault.
How to beat The Chosen Assassin, Warlock and Hunter in XCOM 2
Mounting an assault on the hidden bases belonging to each of three members of the Chosen is the only way to permanently put them down. Until each base is located and stormed, and the Chosen inside defeated, they will keep showing up on missions in their territory.
This results in them gaining knowledge of your activities, disrupting resistance plans, reducing monthly supplies and, ultimately, directing an assault on the Avenger (detailed in the Avenger Defence mission guide). Failing to take out each of the three Chosen prior to undertaking XCOM 2's final mission means any remaining Chosen will show up there, too.
Ultimately, then, conducting the three covert operations with each of the three new factions - Reapers, Skirmishers, and Templars - via the Resistance Ring, and then taking the fight to each of the Chosen in their home base is a must.
Once you do, the missions themselves are relatively straightforward.
- Each of the three Chosen missions is the same in structure and so the same effective strategies can be employed for each one. A Chosen base consists of two distinct parts: three to four self-contained rooms with a pod of enemies in each on the way to the Ascension Gate (a fancy name for a lift/elevator). Upon activating the Ascension Gate, you're taken to a separate area where you'll fight both regular enemies and the Chosen whose base you're storming.
- There's no time limit to the first part of the mission, prior to reaching the Ascension Gate, so take your time. Clear one room at a time, then reload and gather your troops before tackling the next room
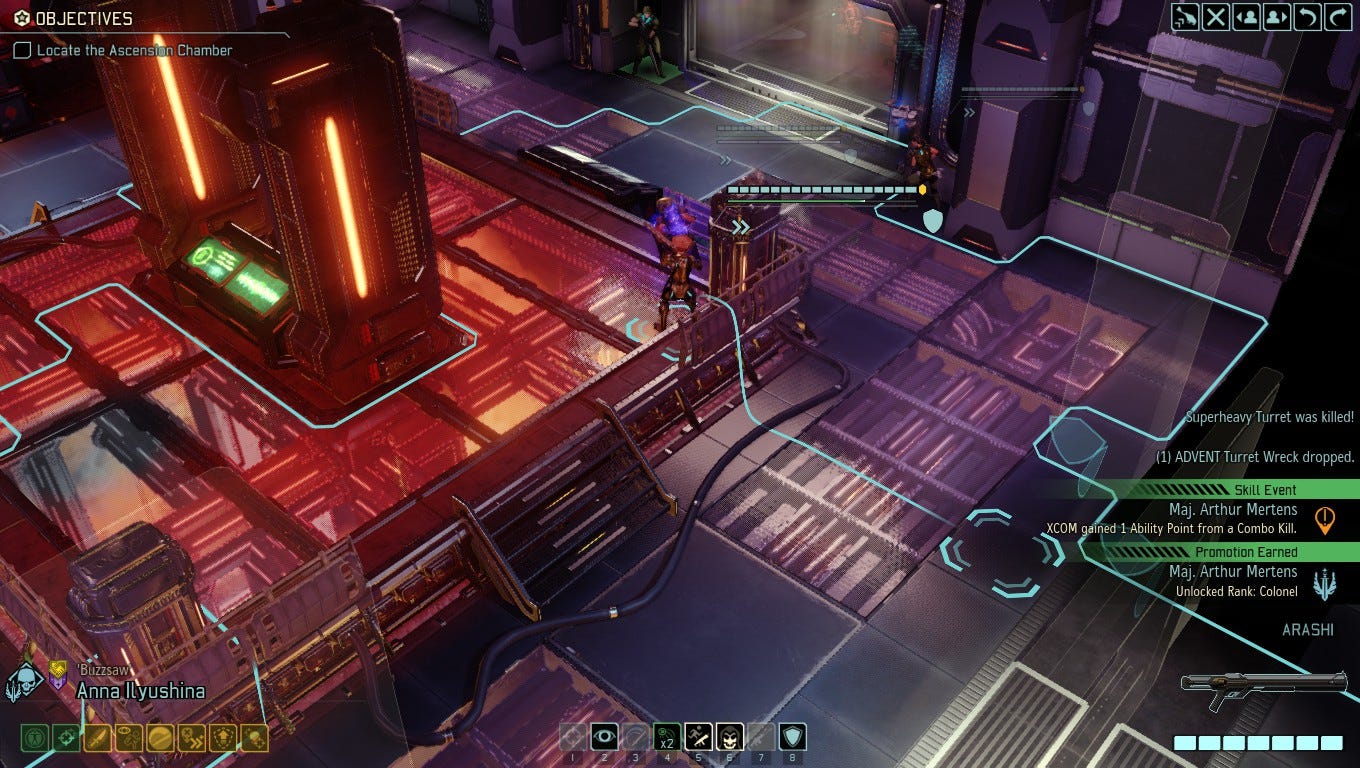
- Upon reaching the Ascension Gate, ensure all soldiers are standing on it before activating it. Any left behind will return to the Avenger, and will be unavailable for the next section: the fight with the Chosen.
- After activating the Ascension Gate, you'll be in a single large room where the final showdown will begin.
- There's still no time limit here, but there will be a couple of enemies to the left or right of the room, so scout them out and take them down without moving too close to the far end of the room, where a large, rectangular structure stands. Venturing too close to this (about two-thirds of the way up the room) will trigger the Chosen to arrive, and it's better to have taken care of the regular enemies before this happens.
- This rectangular structure is actually a sarcophagus that heals the Chosen, hence whey they are able to keep showing up on your missions even after you've taken them out.
- Your goal here is to reduce the Chosen's health to zero, forcing it back inside the sarcophagus and then destroy the sarcophagus before the Chosen's health has fully regenerated.
- Once the sarcophagus is reduced to zero health, the Chosen will appear once more on the next enemy turn for a final showdown. The quicker you can destroy the sarcophagus, the less healing the Chosen will have benefited from. This is indicated by a timer that counts up the Chosen's health regeneration in multiples of 20%.
- While the Chosen is healing, enemies will spawn from the square pads in either side of the room. The primary goal here is to destroy that sarcophagus as soon as possible and then take out the Chosen. Killing the Chosen will result in a successful mission, regardless of any other enemies left in the room.
- Use the same strategies as you have when facing the Chosen before. Taking note of their strengths, weaknesses and adversary. Ideally, take note of these as they appear throughout the game so that you're clued-up as to which types of soldiers are a must for the mission when you come to assault the Chosen base.
- Once defeated, you'll be treated to a cinematic that reveals more about that particular Chosen's backstory, and you'll receive some cool new weapons.
- Each group of weapons - Assassin's, Warlock's, and Hunter's - will need to be researched by Dr Tygan's team aboard the Avenger. Once that is complete you will have access to one of each type of weapon (detailed elsewhere in this guide).
- Remember, the exact enemies in each base may change but the structure and approach remains the same. Happy hunting!
You read more specific advice for each Chosen enemy below.
Assassin, Warlock and Hunter abilities, traits and weapon rewards
Like many of the elements of War of the Chosen, the specific attributes and traits of the Chosen themselves are randomly selected from a pool of many. They each have strengths and weaknesses, ensuring that while they offer a distinct challenge unique to one another and to all other enemies, none of them feel overpowered.
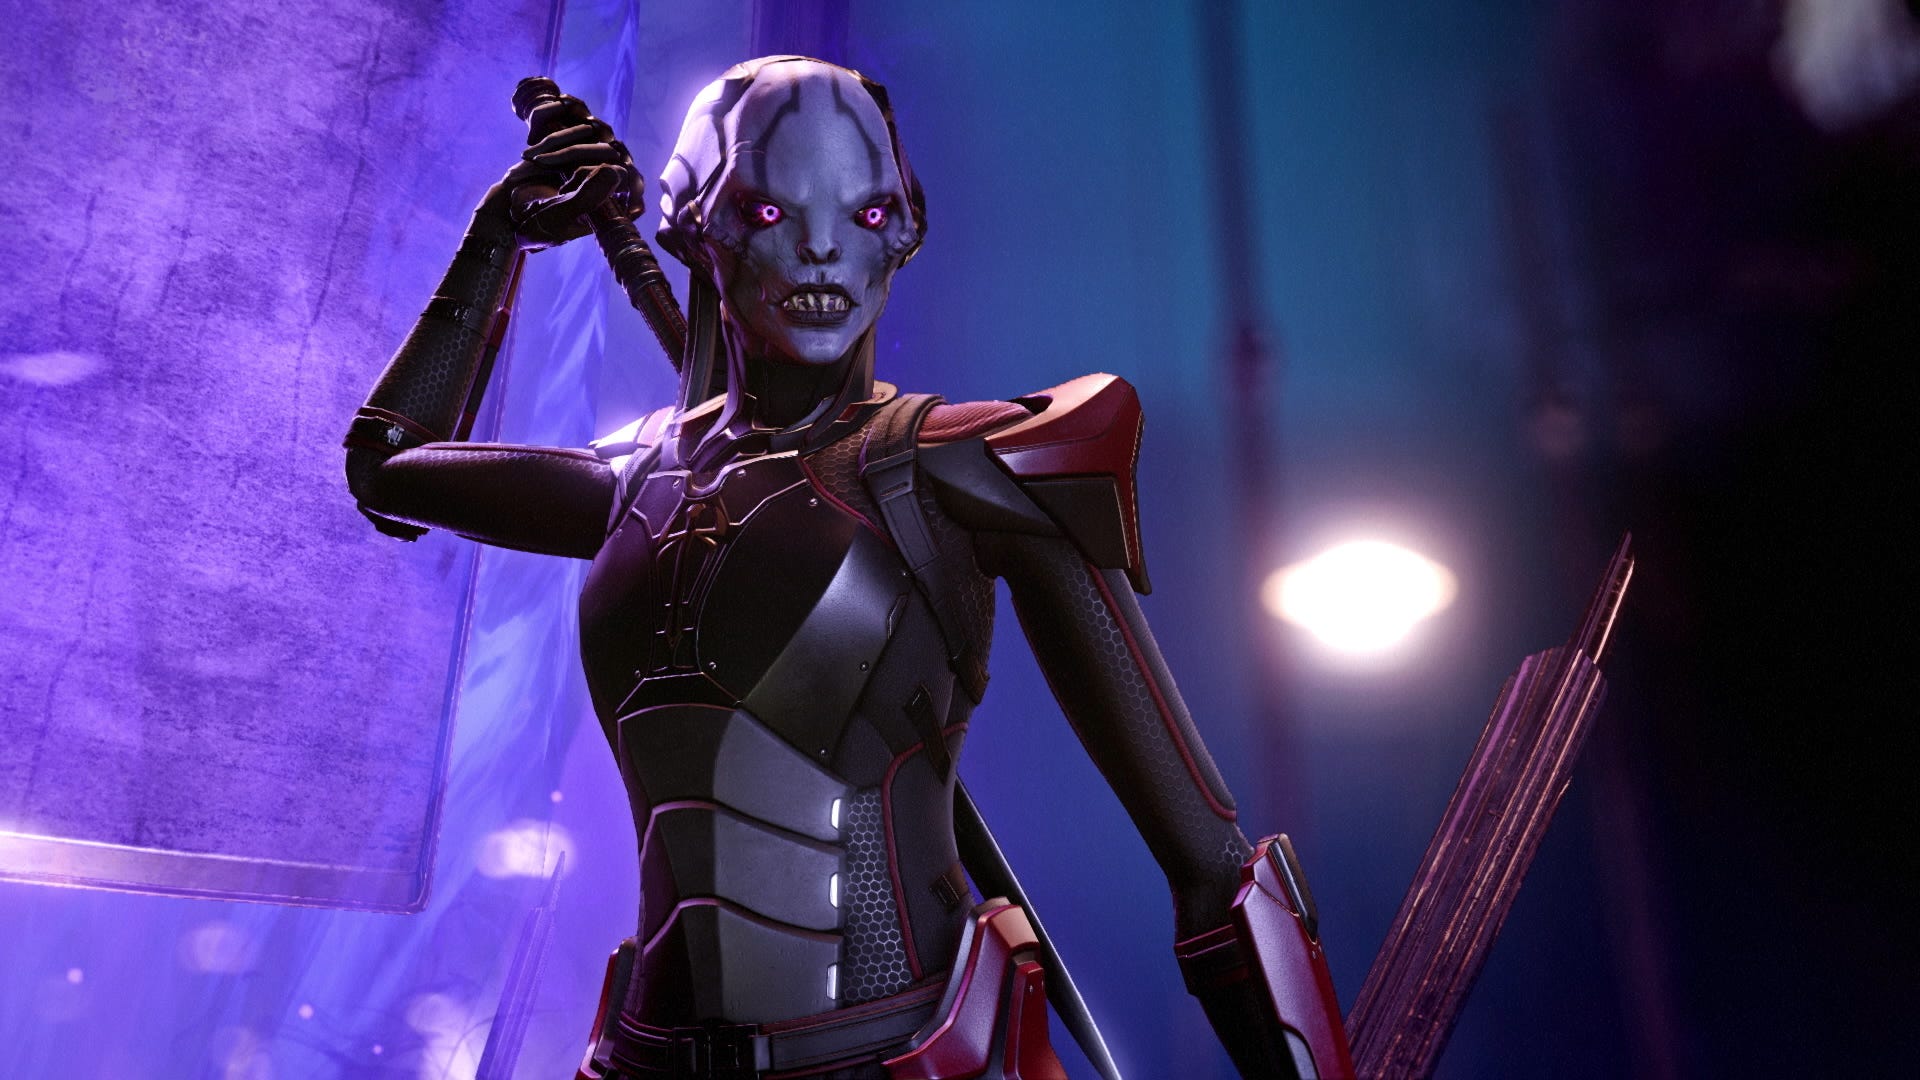
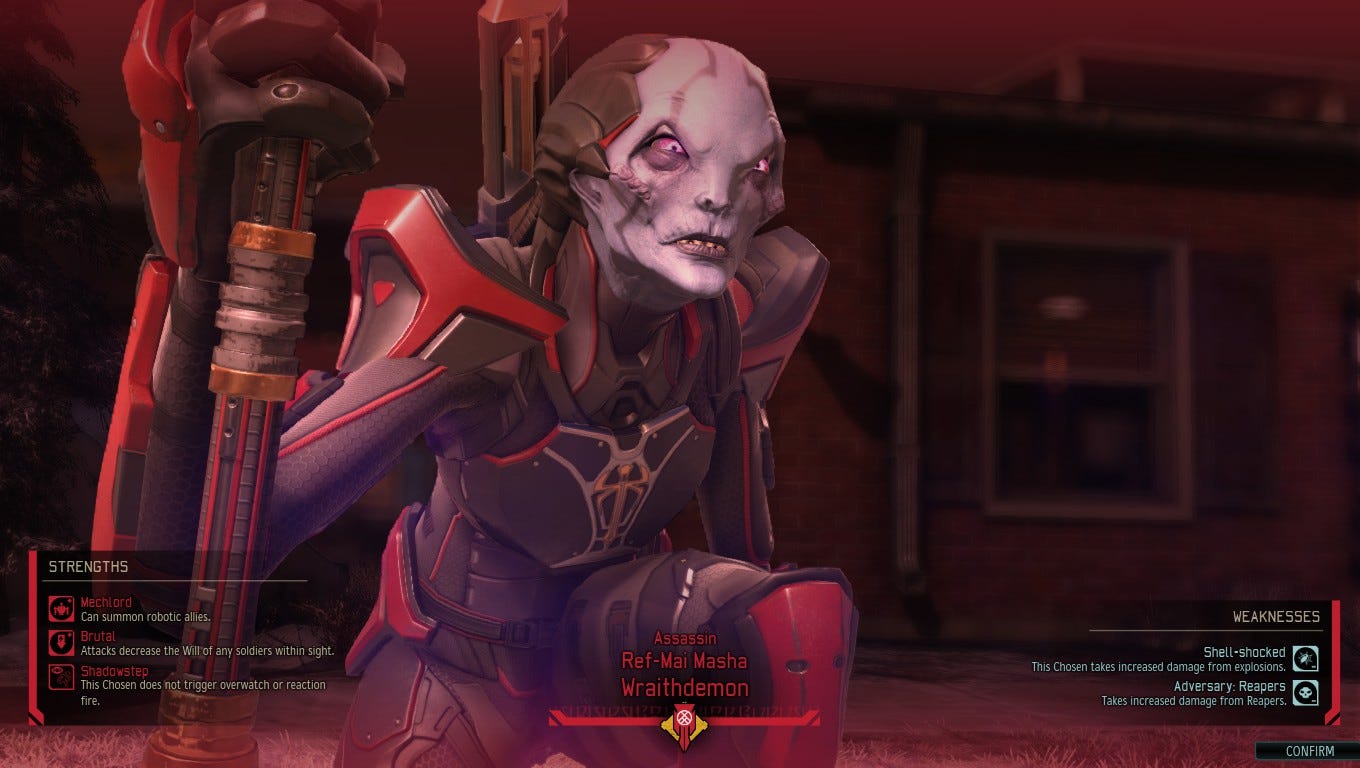
The Chosen: Assassin
Combat type: Stealth and close-quarters
Abilities:
- Can enter concealment at will, rendering her invisible until she reveals herself or your soldiers get very close to her position.
- Sword attacks that are guaranteed to hit and daze. Dazed soldiers can be interrogated by the Assassin, or taken hostage.
- Can unleash a Psionic wave from a distance to hit and daze soldiers in her line of sight.
Specific advice for defeating:
- The Assassin's sword attacks daze victims, are undodgable and cannot be countered by overwatch or other forms of reaction fire. Keep your soldiers within touching distance of one another so that they can revive each other from daze.
- Avoid placing your soldiers too close together, or in a line. The Assassin's Harbour Wave is a long range Psionic attack that will hit all soldiers in a straight line.
- Once the Assassin has appeared, take her down as quickly as possible by exploiting her randomly assigned weaknesses. She is the deadliest of the three Chosen and will deal the most direct damage to your troops, as well as taking soldiers out of the fight one by one with her daze attacks.
Weapons gained through defeating her at her hideout:
Arashi Shotgun (Ranger-only)
- Damage: 8-10
- Clip Size: 7 (with built-in Superior Expanded Magazine)
- Critical Chance: +25% (with built-in Superior Laser Sight)
- Bonus Action Chance: +15% (with built-in Superior Hair Trigger)
- Missed Shot Damage: +3 (with built-in Superior Stock)
Katana Blade (Ranger-only)
- Damage: 8-9
- Armour Pierce: 5
- Katana attacks cannot miss or be dodged, and ignore 5 points of armour.
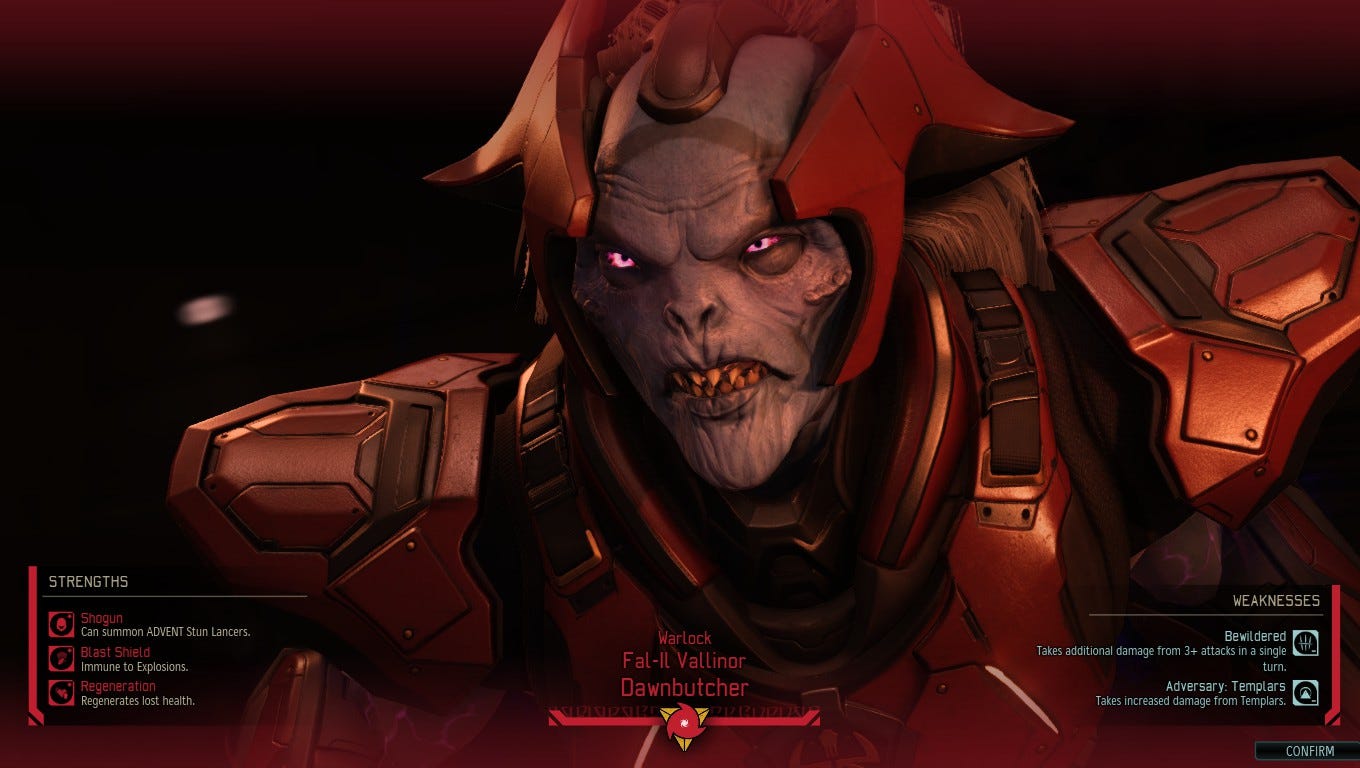
The Chosen: Warlock
Combat type: Psionic and long-distance
Abilities:
- Can summon spectral zombies that move to surround soldiers and explode on next turn, or when killed.
- Can use Psionic powers to mind control soldiers.
- Capable of summoning a spectral army of two melee attackers. The Warlock remains invulnerable while these attackers are active.
Specific advice for defeating:
- Depending on where the Warlock spawns on a mission, he is the Chosen most likely to keep his distance. His ability to summon spectral zombies is a nuisance but a manageable one.
- Spectral zombies come in a pair and will look to move towards and surround the nearest soldier, boxing them in if possible. They will then prime themselves to explode on the next turn. They will also explode when they are killed. Ensure you give your soldiers a chance to escape by not taking cover in a corner after the Warlock as entered the fray.
- The Warlock's spectral army ability summons two melee zombies that will actively attack soldiers. While they are active, the Warlock is impervious to any and all damage. Take them down in order to harm him further or, if you're soldiers are in a rough place, use this opportunity to complete your objective and evacuate the mission area.
Weapons gained through defeating her at her hideout:
Disruptor Rifle (Ranger, Specialist, and Psi-Operative only)
- Damage: 7-11
- Clip Size: 7 (with built-in Superior Expanded Magazine)
- Critical Chance: +15% (with built-in Superior Laser Sight)
- Bonus Action Chance: +15% (with built-in Superior Hair Trigger)
- Missed Shot Damage: +3 (with built-in Superior Stock)
- The Disruptor Rifle is guaranteed to critically hit Psionic enemies.
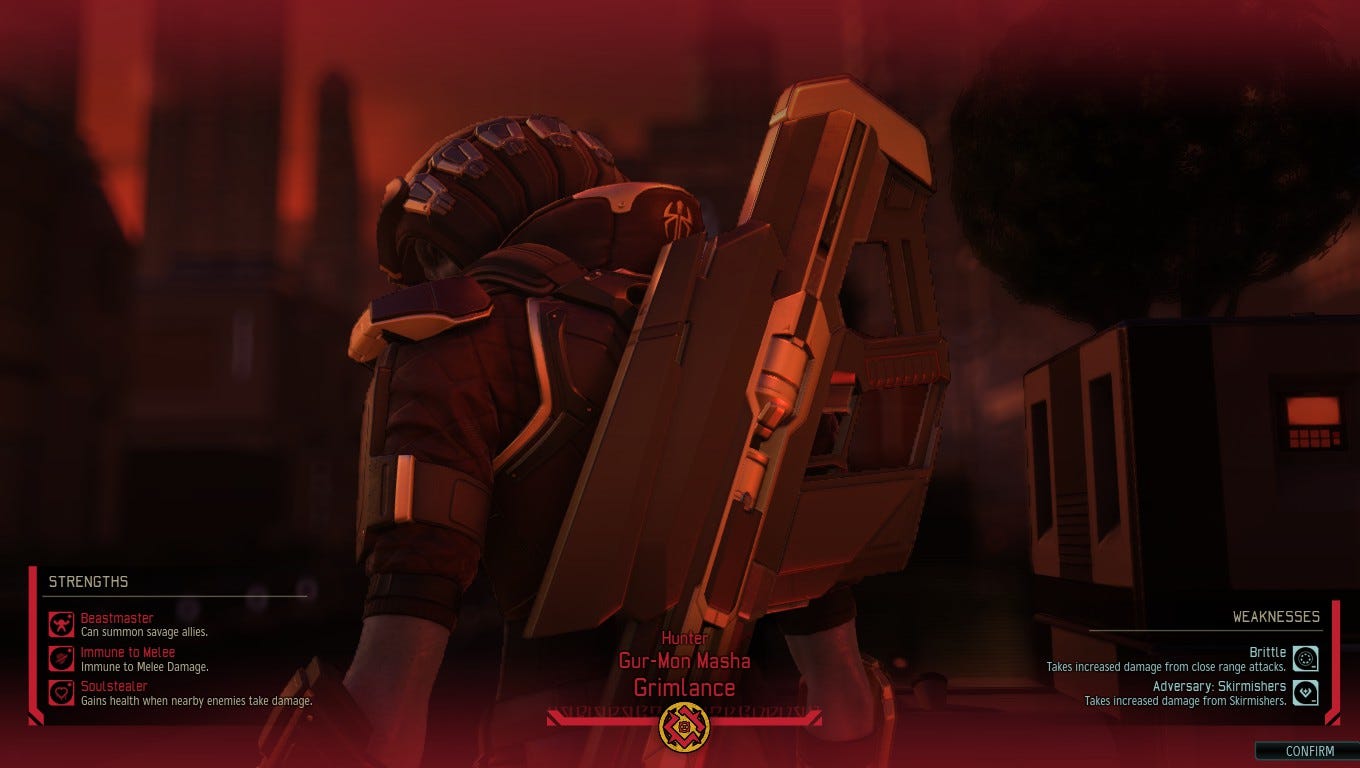
The Chosen: Hunter
Combat type: Highly-mobile and mid-range
Abilities:
- Grapples around the map, remaining just out of reach.
- Uses area of effect concussion grenades, or a tranquiliser shot to render soldiers prone to abduction.
- Targets soldiers with a tracking shot, giving them one turn to break line of sight before the hunter takes his shot.
Specific advice for defeating:
- Don't group soldiers too closely together, the Hunter has a concussion grenade that can daze any soldiers caught in its blast radius.
- The Hunter's Tranq Shot will daze a single soldier, ripe for interrogation or abduction. Be sure to revive them on the same turn that they are dazed to avoid the Hunter preying on them.
- When the Hunter uses Tracking Shot, you can use this to your advantage to maximise your attacks against him. Once activated, he'll stay where he is for one turn and while he may be perched in a hard to reach spot you can seize this opportunity to locate and eliminate him.
Weapons gained through defeating her at her hideout:
Darklance Sniper Rifle (Sharpshooter only)
- Damage: 8-10
- Clip Size: 3
- Critical Chance: +10%
- Aim: +15% (with built-in Superior Scope)
- Bonus Action Chance: +15% (with built-in Superior Hair Trigger)
- Free Reloads: +3 (with built-in Superior Auto-Loader)
- Missed Shot Damage: +3 (with built-in Superior Stock)
- Unlike other sniper rifles, the Darklance only costs one action to fire.
If you need more help with XCOM 2's expansion, our XCOM 2: War of the Chosen guide and tips can explain everything you need to know, from how to beat The Chosen Assassin, Warlock and Hunter and the new The Lost, Spectre and Advent units. Combat them by learning about each new faction with our Reaper abilities and skill tree, Skirmisher abilities and skill tree and Templar abilities and skill tree pages, as well as learning about the new Challenge Mode, Resistance Ring, Ability Points, Fatigue and Bonds systems. Good luck, Commander!
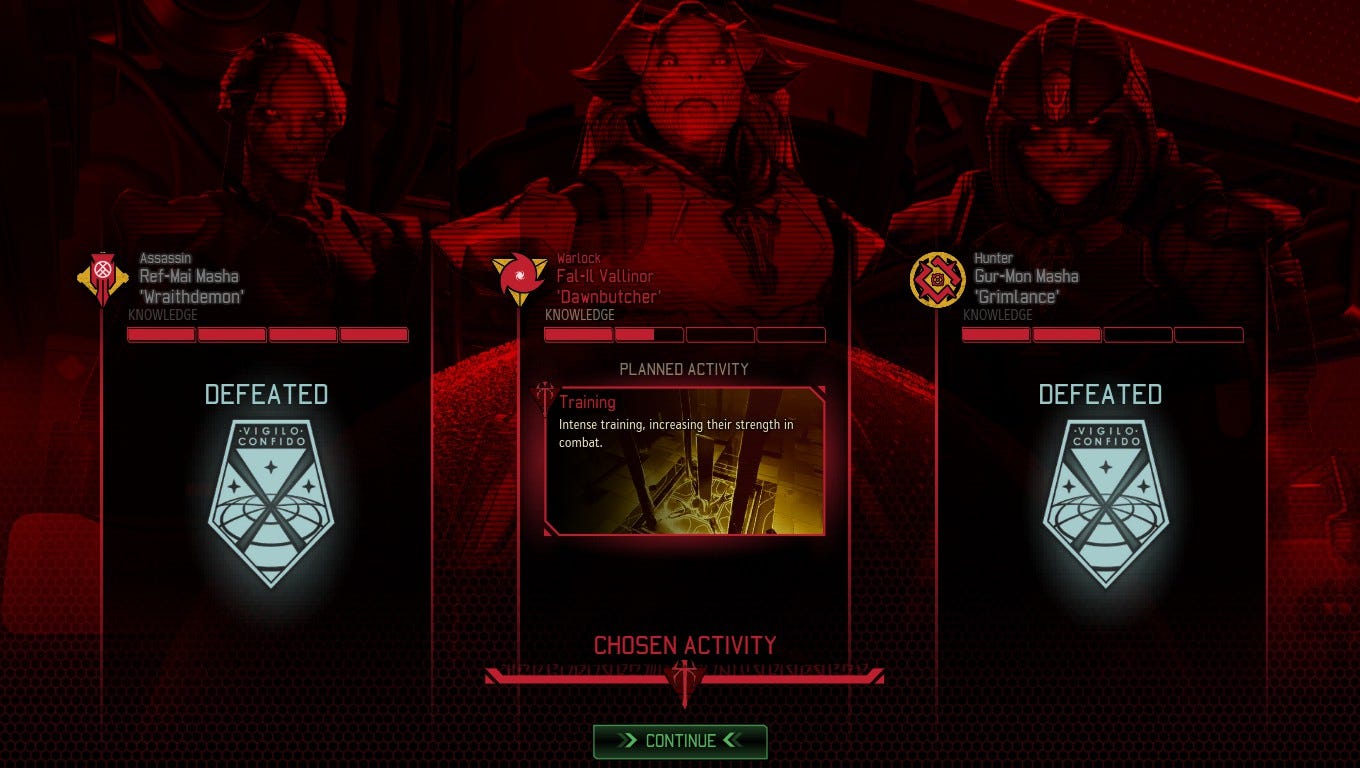
Typically, each Chosen will begin with two negative traits in the form of one weakness and one adversary. The adversary for each of the Assassin, Hunter and Warlock Chosen will be either the Reaper, Skirmisher or Templar class.
The Chosen will take additional damage from these adversaries and deliver some interesting and revealing trash talk to them during the missions, which begin to point to where the Chosen might have originated from.
Each Chosen's weakness, on the other hand, will be randomly assigned from a group that includes taking increased damage from close range, or from explosives, or if they are attacked more than three times in a single turn. In each case, it's something that requires you to approach them in a specific way in order to maximise your damage against them.
Their strengths, on the other hand, are many and varied. These include an immunity to melee damage, the ability to summon a specific enemy type (such as mutons, ADVENT soldiers or robotic enemies), healing health when their allies take damage, not triggering overwatch shots and many more.
This random mix of strengths and weaknesses makes the method for fighting the Chosen largely dependent on their unique combination of traits. However, being prepared for their abilities can also help keep you out of harms way when they do, inevitably, show up.