Zelda: Breath of the Wild Test of Strength locations and tips for beating Minor, Modest and Major Tests of Strength
How to find and complete the combat-focused Shrines.

The Test of Strength trial in Zelda: Breath of the Wild is a reoccurring kind of Shrine that pits you against a Guardian Scout in one-on-one combat.
Found across Hyrule in a variety of difficulties, the challenge is simple - become the victor and you'll walk away with a chest and a Shrine Orb.
It's a handy way to practice your combat skills in Breath of the Wild, and though the Guardian Scout IV is a formidable opponent, but the end of the game becomes one of the more straightforward Shrines - so if you know where to find each Test of Strength location, can be an easy source of Shrine Orbs to get those all-important health and stamina upgrades.
If you need help finding and solving other Shrines, our Shrine location maps page can help, while our Zelda: Breath of the Wild walkthrough and guide covers other aspects of the game.

Zelda: Breath of the Wild Test of Strength locations
Test of Strength locations can be found dotted all over Hyrule. You'll find a few easily enough in the early game to help introduce you to combat, but later they become a welcome source of Ancient weapons, materials and easy Shrine Orbs when you're equipped with upgraded weapons and armour.
Hateno
Faron
Lanayru
Hebra
Gerudo
Akalla
Central Hyrule
Tabantha
Lake
Ridgeland
Tips for beating Guardian Scouts in each Test of Strength difficulty
There are three types of difficulty - Minor, Modest and Major - each increasing the health, attack power and moves the Guardian Scout you come up against has. Here's how to defeat each type.
A Minor Test of Strength
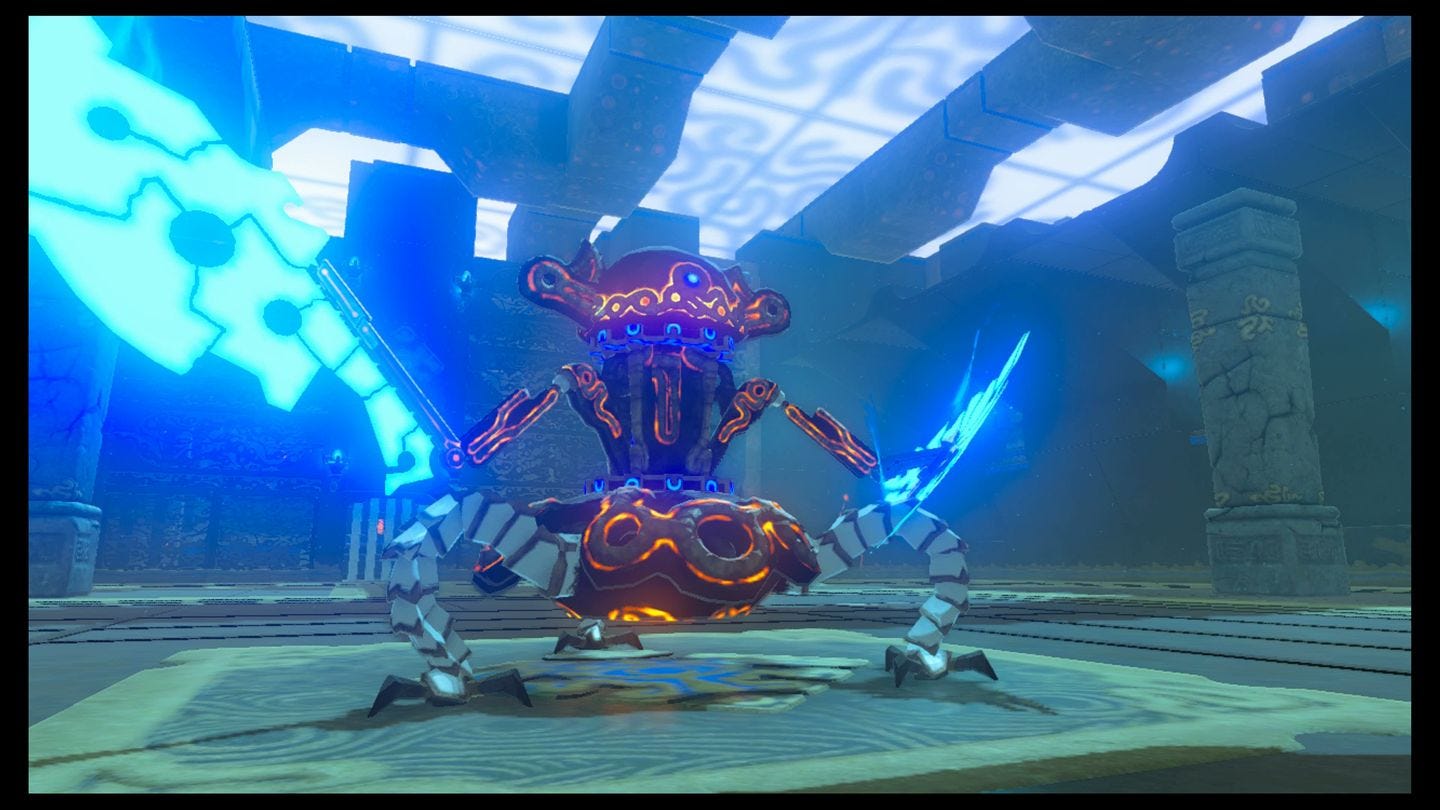
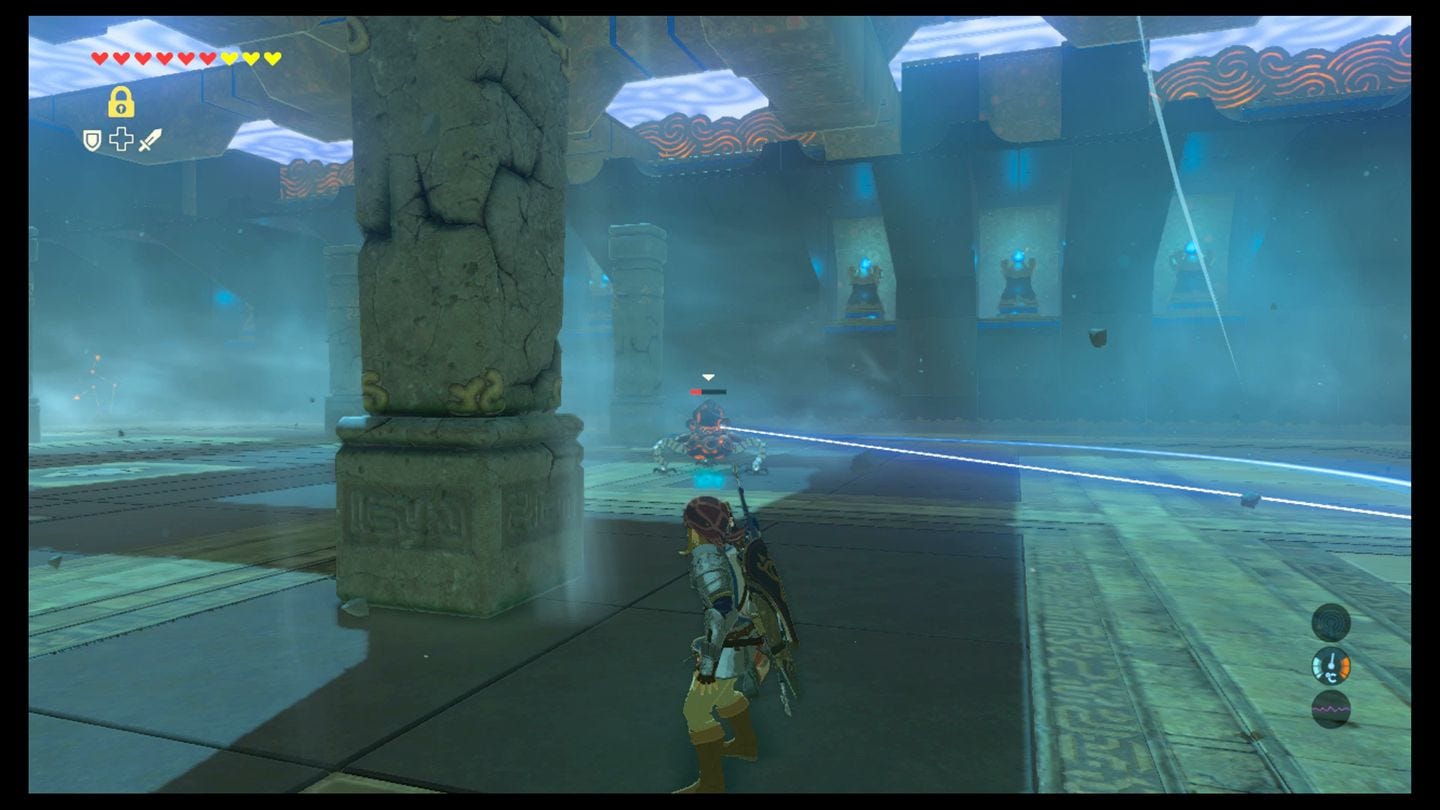
A Minor Test of Strength is a pretty accurate description here, because inside the Shrine is a Guardian Scout II, which uses a variety of melee, ranged, and mixed attacks against you, and requires a relatively small amount of damage to take down.
To defeat the Guardian Scout, you need to learn its move sequence and play accordingly. Like the Guardian Scout IV found in the Chaas Qeta Shrine, or Scout III found in the Muwo Jeem Shrine, it has several main moves:
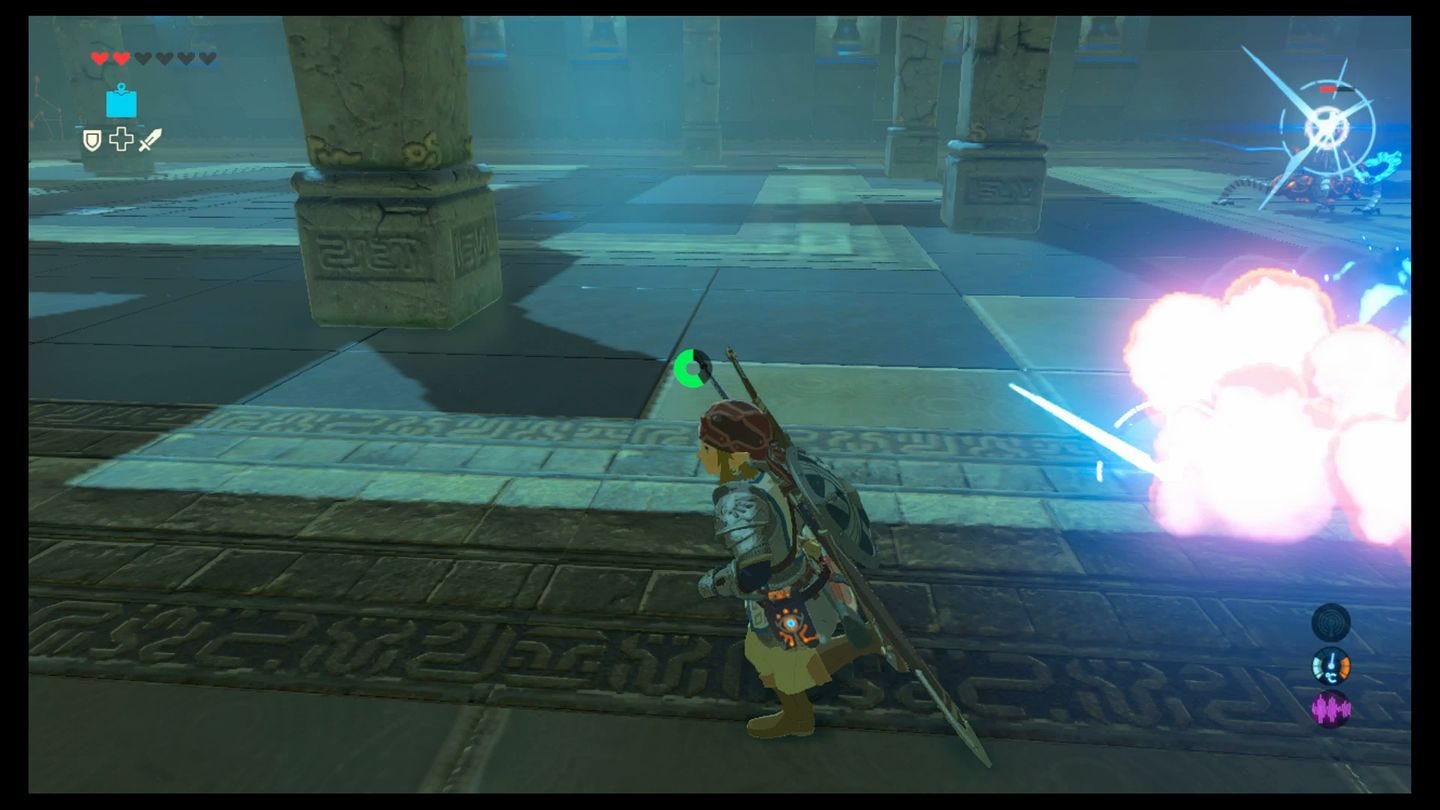
A quick laser attack - ranged, this shoots one quick blast at you dealing moderate damage. To avoid it, simply keep moving. Like most enemy projectiles it will shoot just behind you if you're running.
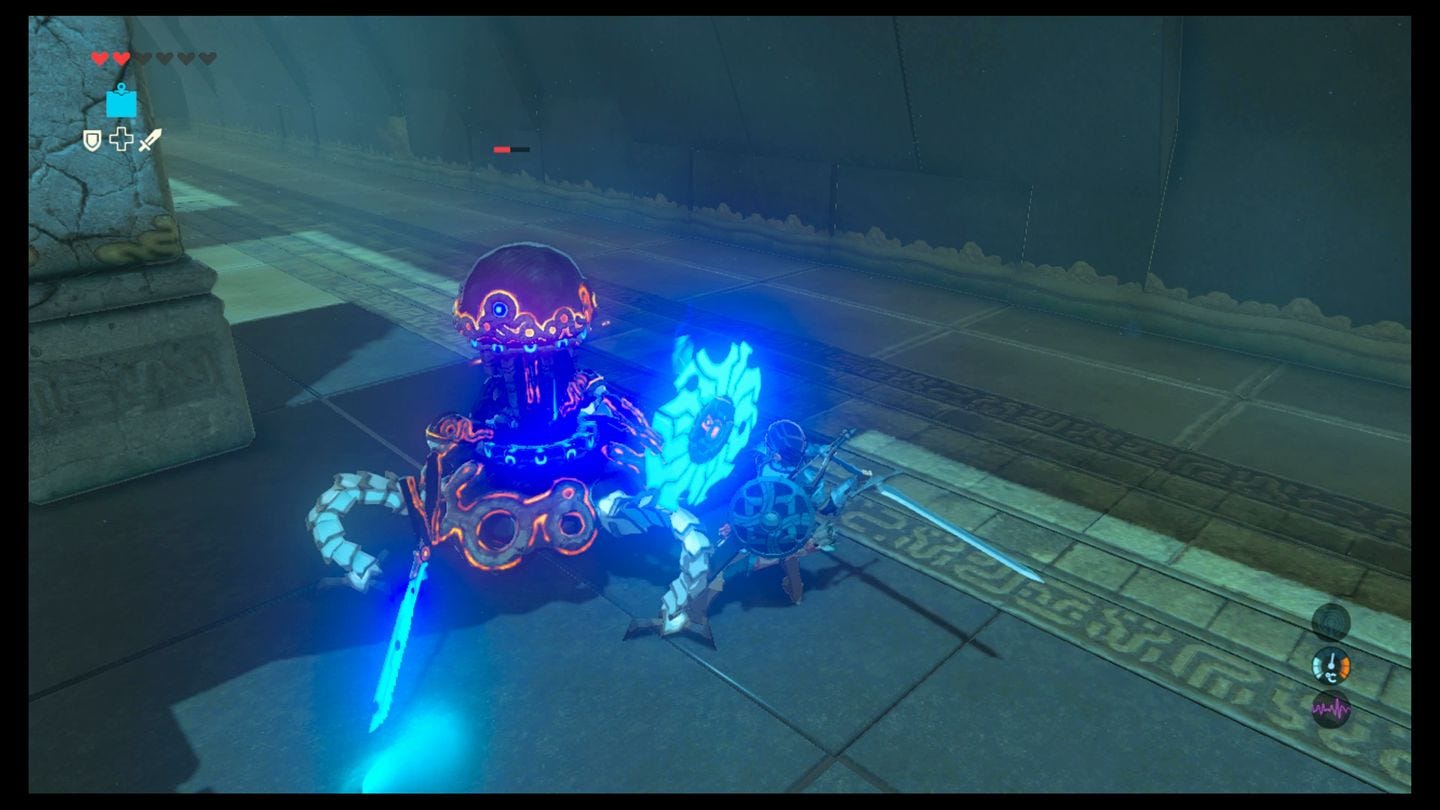
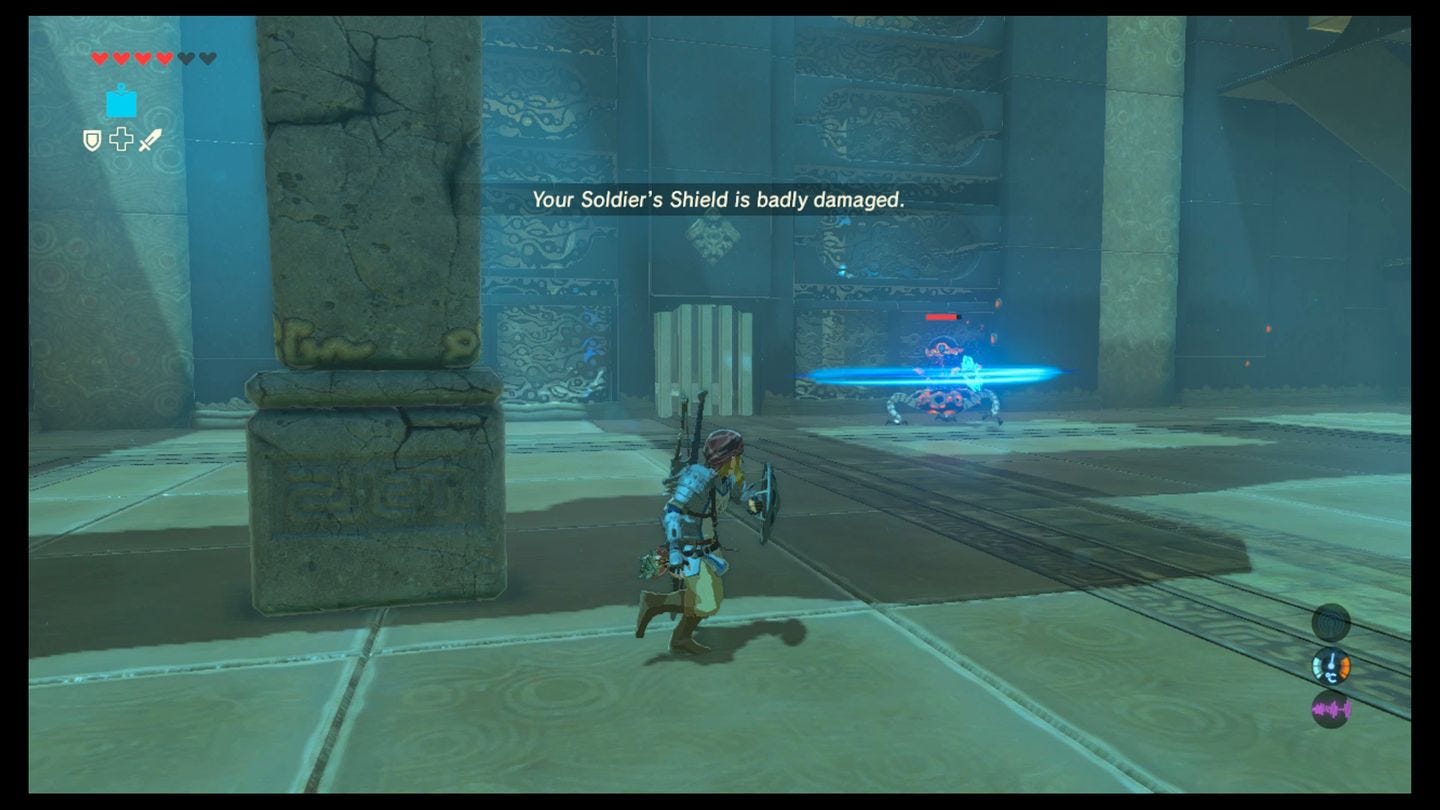
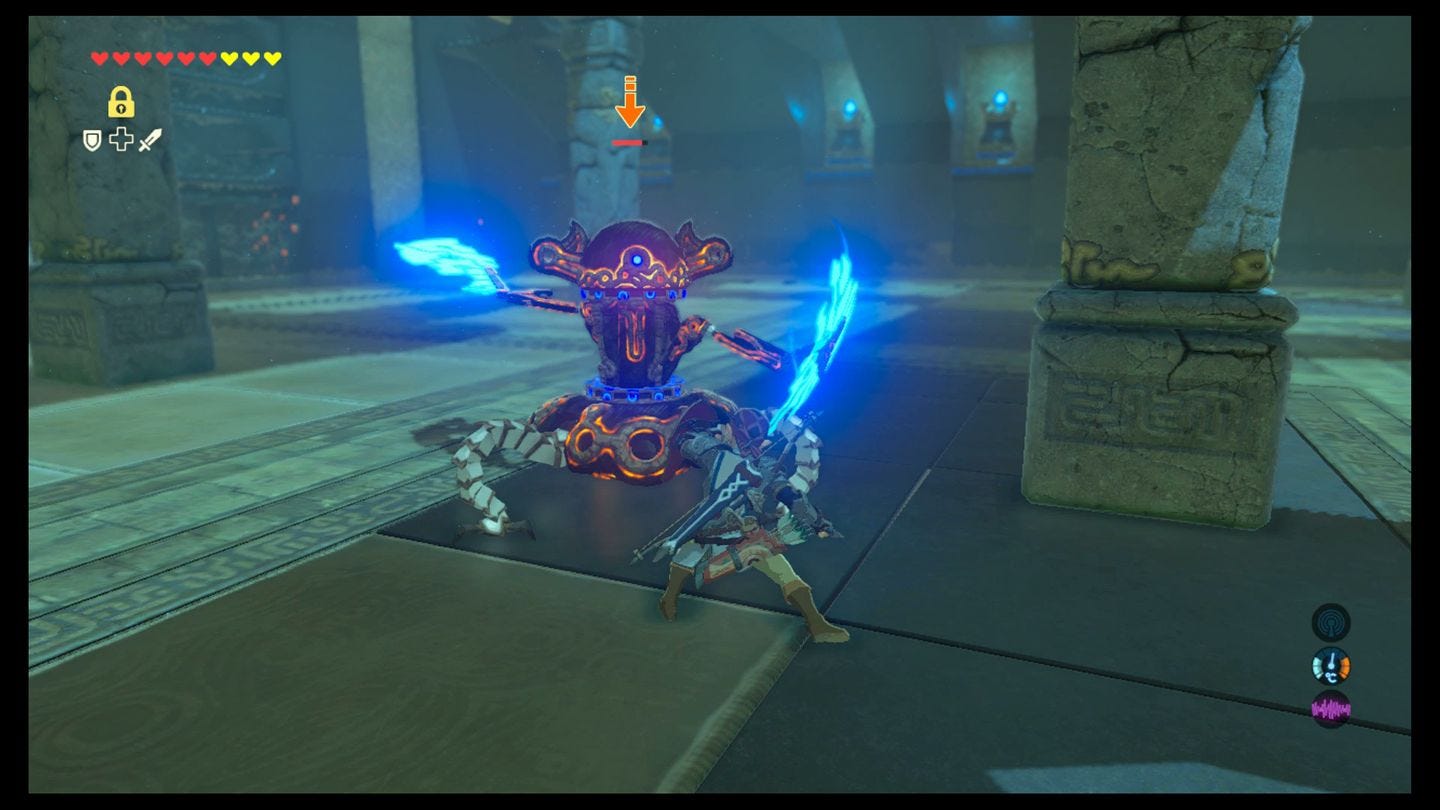
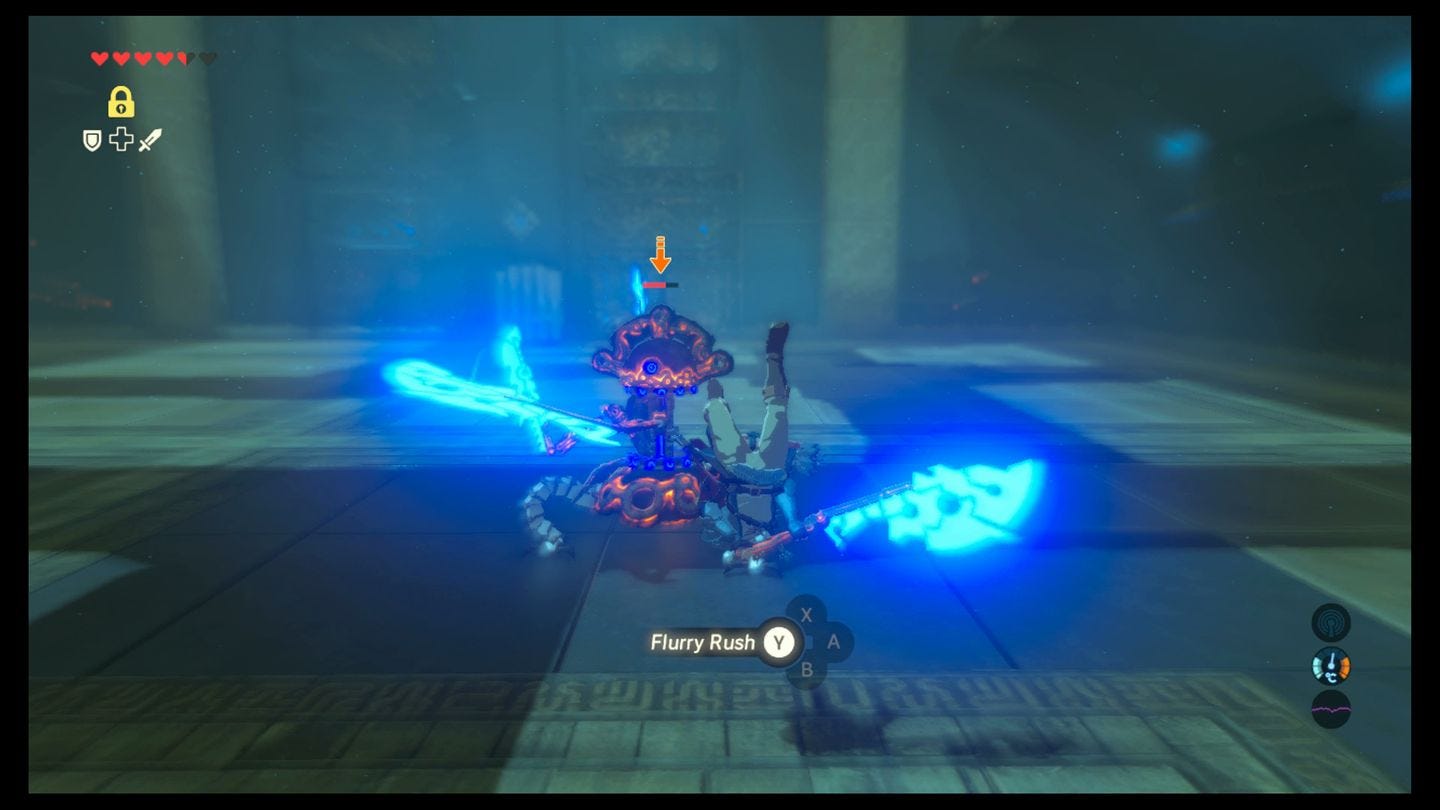
Melee attacks - the sequence here is a single vertical slice. The Guardian rotates its arm right before it attacks, which is an indicator of when to parry or dodge for a flurry attack. This one also has a shield, which blocks your first attack from the front each time.
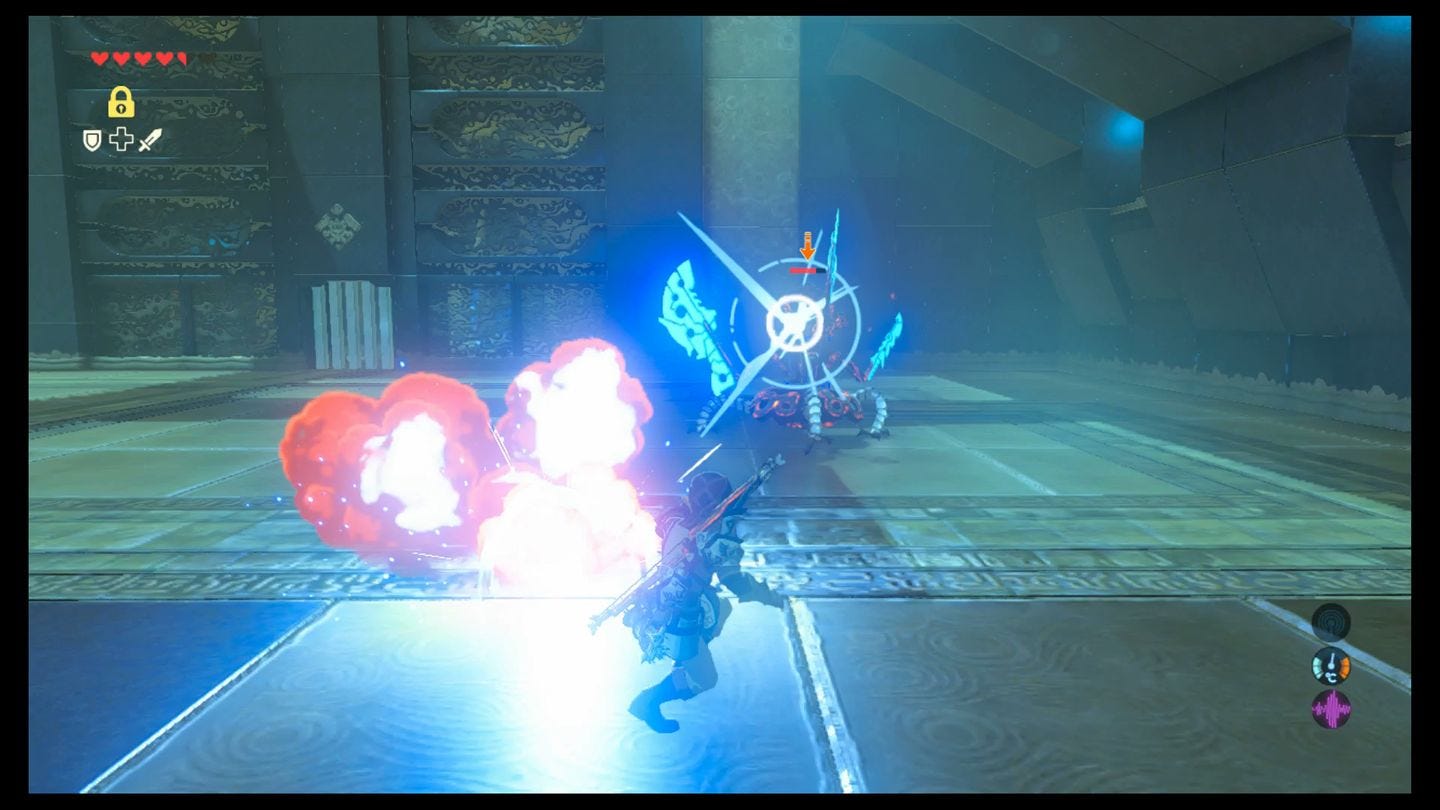
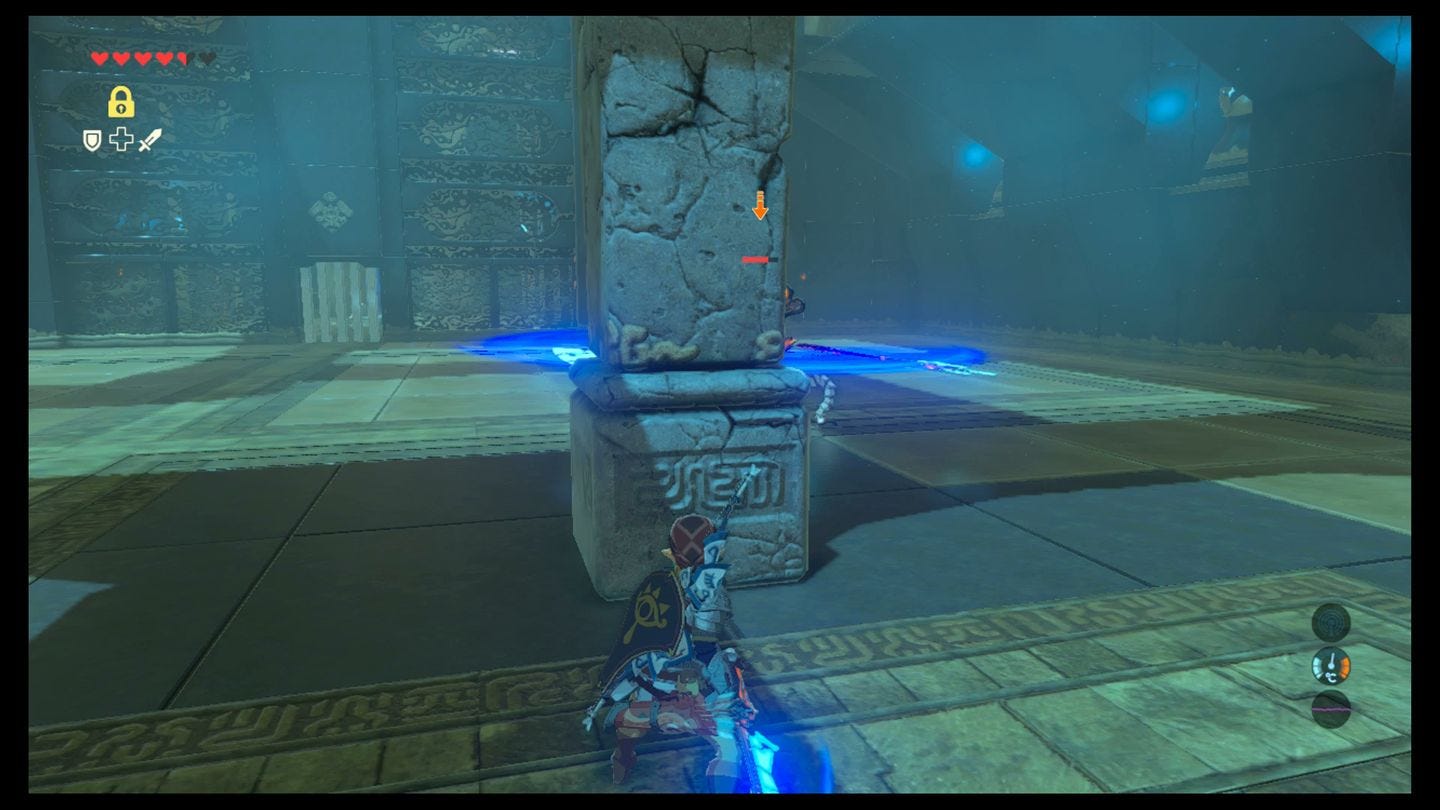
Spinning charge - after a few melee attacks, the Guardian will jump backwards and extend all three arms for a spinning attack towards you. It's almost impossible to dodge and lasts the length of the room, so when you see it do this hide behind a pillar, which it'll crash into and be stunned in the process, too.
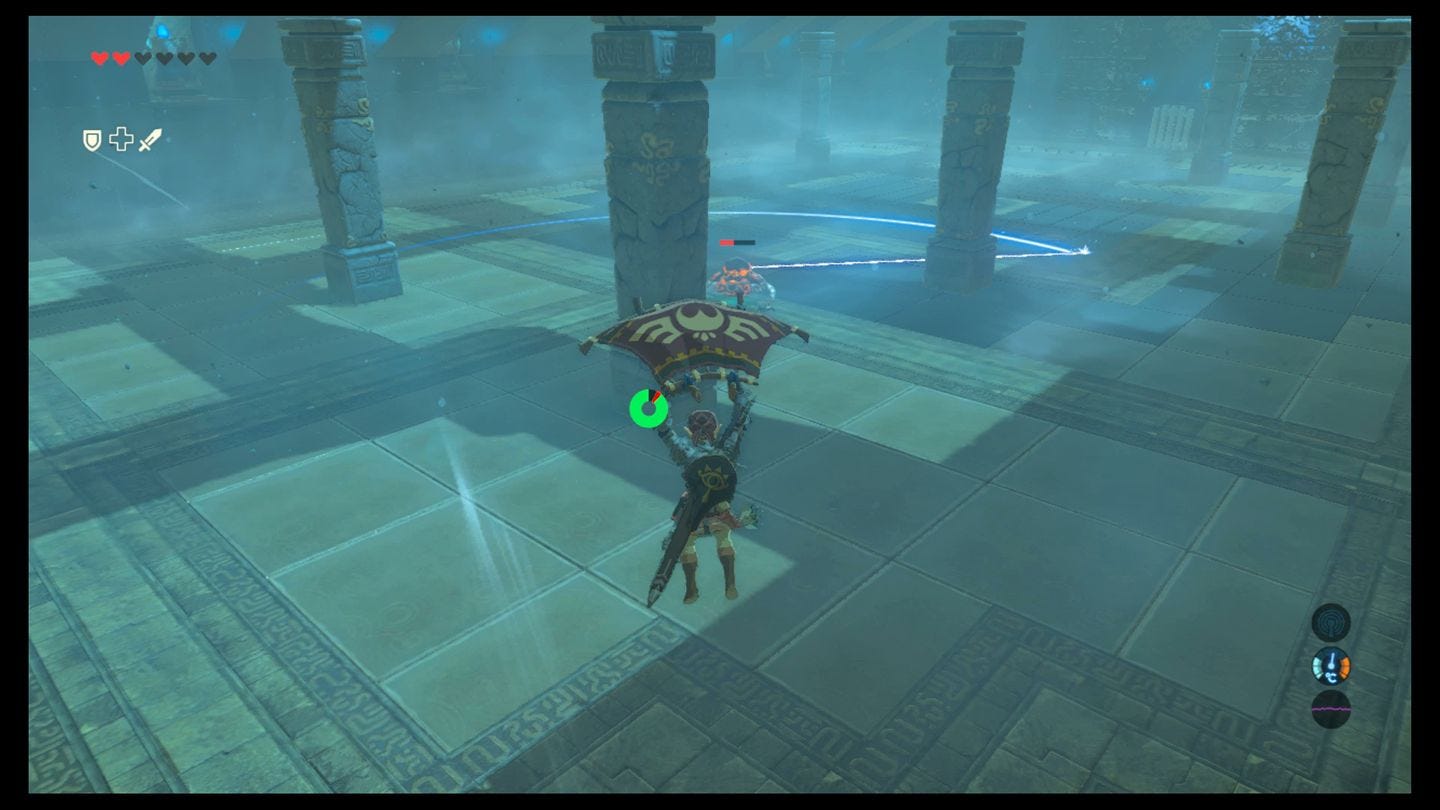
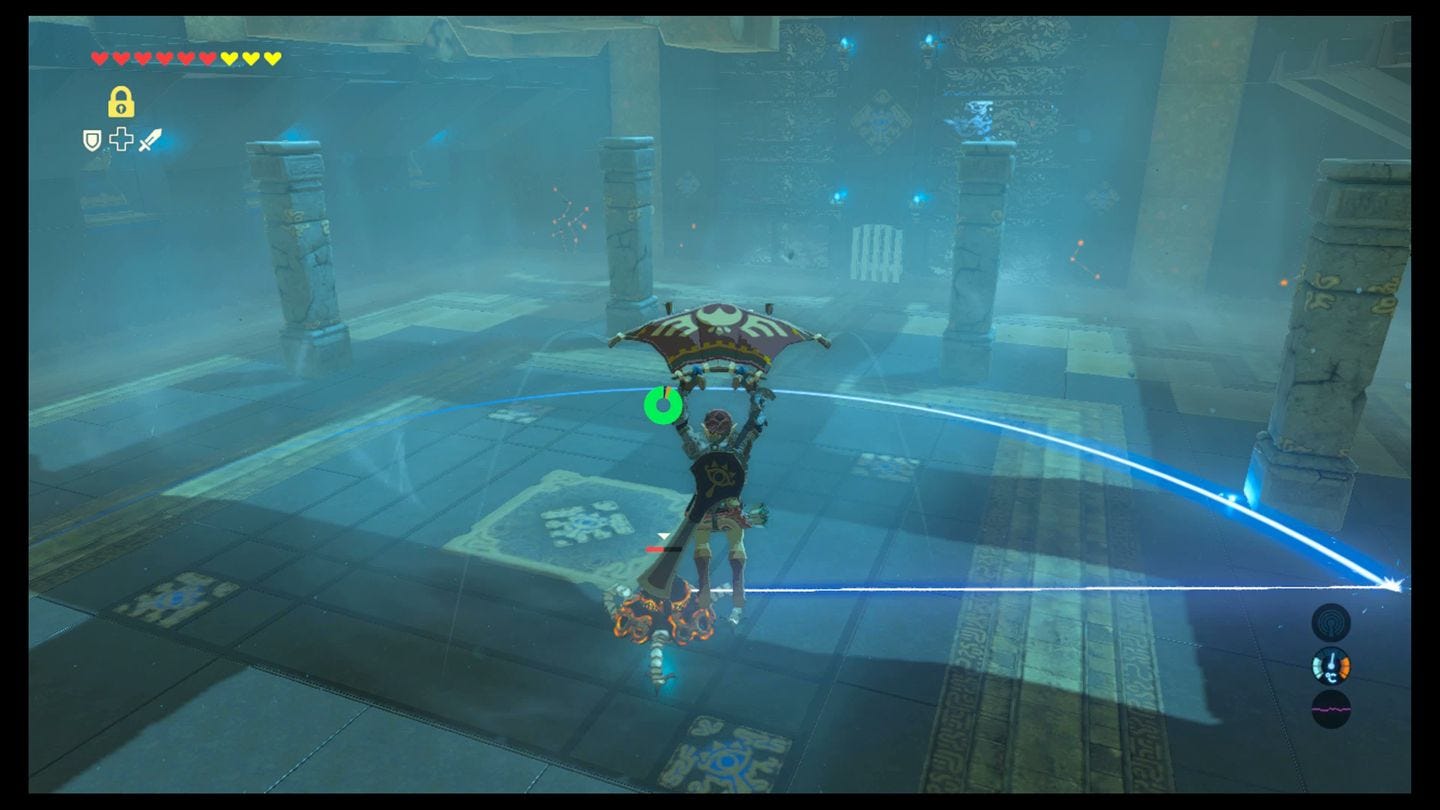
Spinning laser - this starts to be used when the Guardian Scout is below half health. A large circle opens up around the guardian and it shoots a constant, spinning laser around itself. If you're caught by this you'll receive huge damage. Either get out of the range, or use your paraglider to rise above it thanks to the plumes of wind whipped up by the attack.
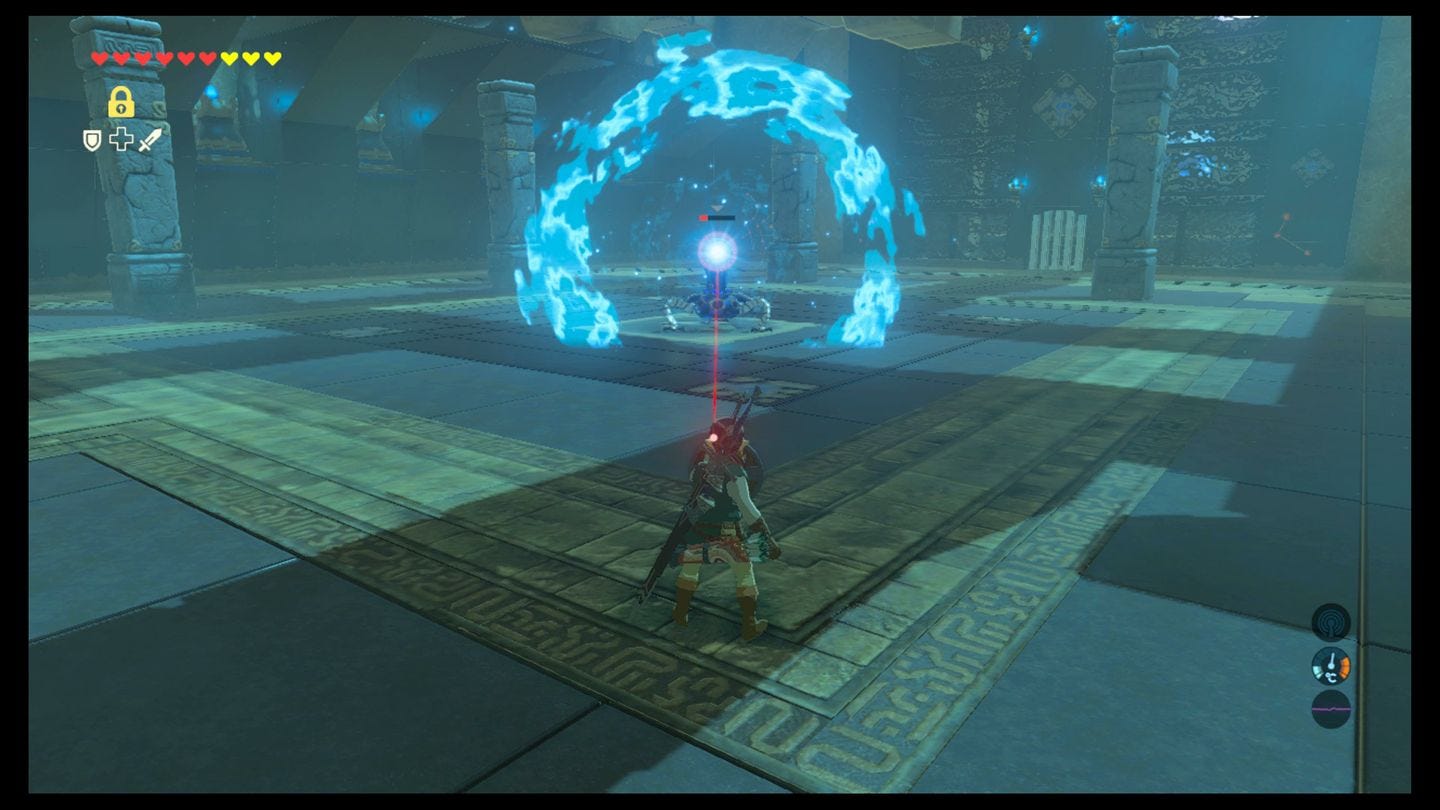
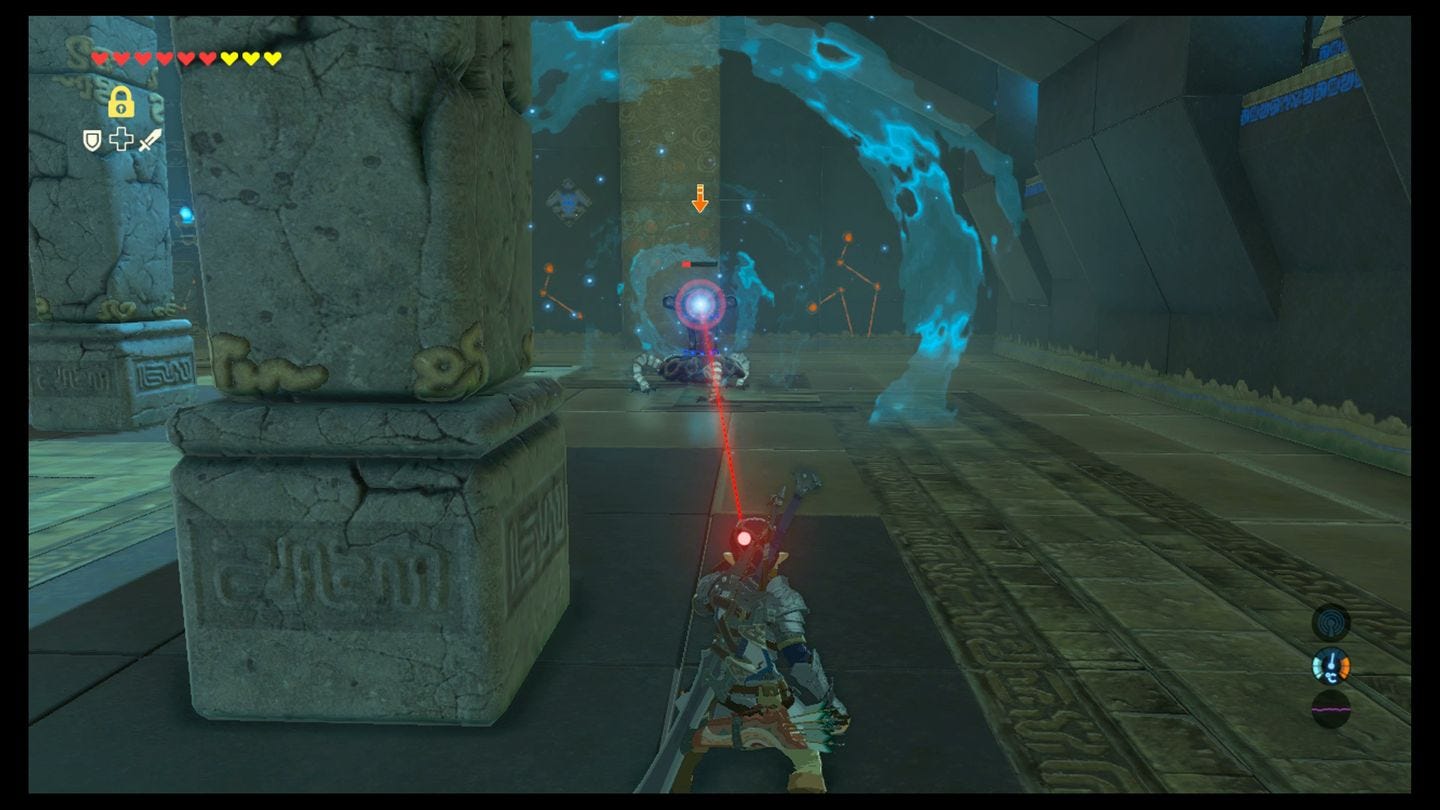
Charged laser - this is the hardest part. When its health is low enough, the Guardian Scout will shoot two blasts of a charged laser at you for huge damage and a knockdown. Unlike with standard Guardians back above ground, the Guardian Shield won't automatically reflect damage back at it - instead you need to time a parry perfectly to defeat it.
Your strategy here then is as follows:
- Dodge or parry the melee attacks and get in as much damage as possible between them. Note that once the Guardian Scout starts an attack sequence, it stays facing the same way, so you can walk round behind it for unlimited attacks until it moves. If you're feeling confident, try to get a perfect dodge and a flurry attack, and remember that its shield will block front-on attacks, but can be bypassed by attacks from the side and back.
- Keep moving to avoid the intermittent quick lasers.
- Hide behind pillars when the Guardian Scout prepares a spinning charge. The pillar will crumble and the Scout will be stunned, leaving it open to charged up heavy attacks.
- Wait out the spinning lasers, shoot the Scout with an elemental arrow, or fly above it with the paraglider and drop for an attack to interrupt it.
- Perfect parry the charged laser attacks for the kill or, if you have very strong attacks, burst it down before it finishes charging.
Thanks to a new update, it's now possible to play Zelda Breath of the Wild in VR. Want help with the main game? Our Zelda: Breath of the Wild walkthrough can help complete Divine Beasts Vah Ruta, Vah Rudiana, Vah Medoh and Vah Naboris and more. There's also how to get the Master Sword, Hylian Shield and all Zelda Captured Memories and Great Fairy Fountain locations, while our Shrines locations and Shrine maps hub explains where to find and solve every puzzle room, including dragon locations and Labyrinth solutions. We also have a DLC 1 guide and DLC 2 guide, including all Tingle, Majora's Mask, Phantom, Midna outfit locations.

A Modest Test of Strength
A Modest Test of Strength is a pretty accurate description here, because inside the Shrine is a Guardian Scout III, which uses a variety of melee, ranged, and mixed attacks against you, and requires a significant, if not tremendous amount of damage to take down.
To defeat the Guardian Scout, you need to learn its move sequence and play accordingly. Like the Guardian Scout IV found in the Chaas Qeta Shrine, it has four main moves:
Melee attacks - the sequence here is usually a vertical slice, then a horizontal swipe in one direction, then the other. The Guardian rotates its arms right before it attacks, which is an indicator of when to parry or dodge for a flurry attack. Note that the horizontal swipes do huge damage if they hit, so be careful. This one also has a shield, which blocks your first attack from the front each time.
Spinning charge - after a few melee attacks, the Guardian will jump backwards and extend all three arms for a spinning attack towards you. It's almost impossible to dodge and lasts the length of the room, so when you see it do this hide behind a pillar, which it'll crash into and be stunned in the process, too.
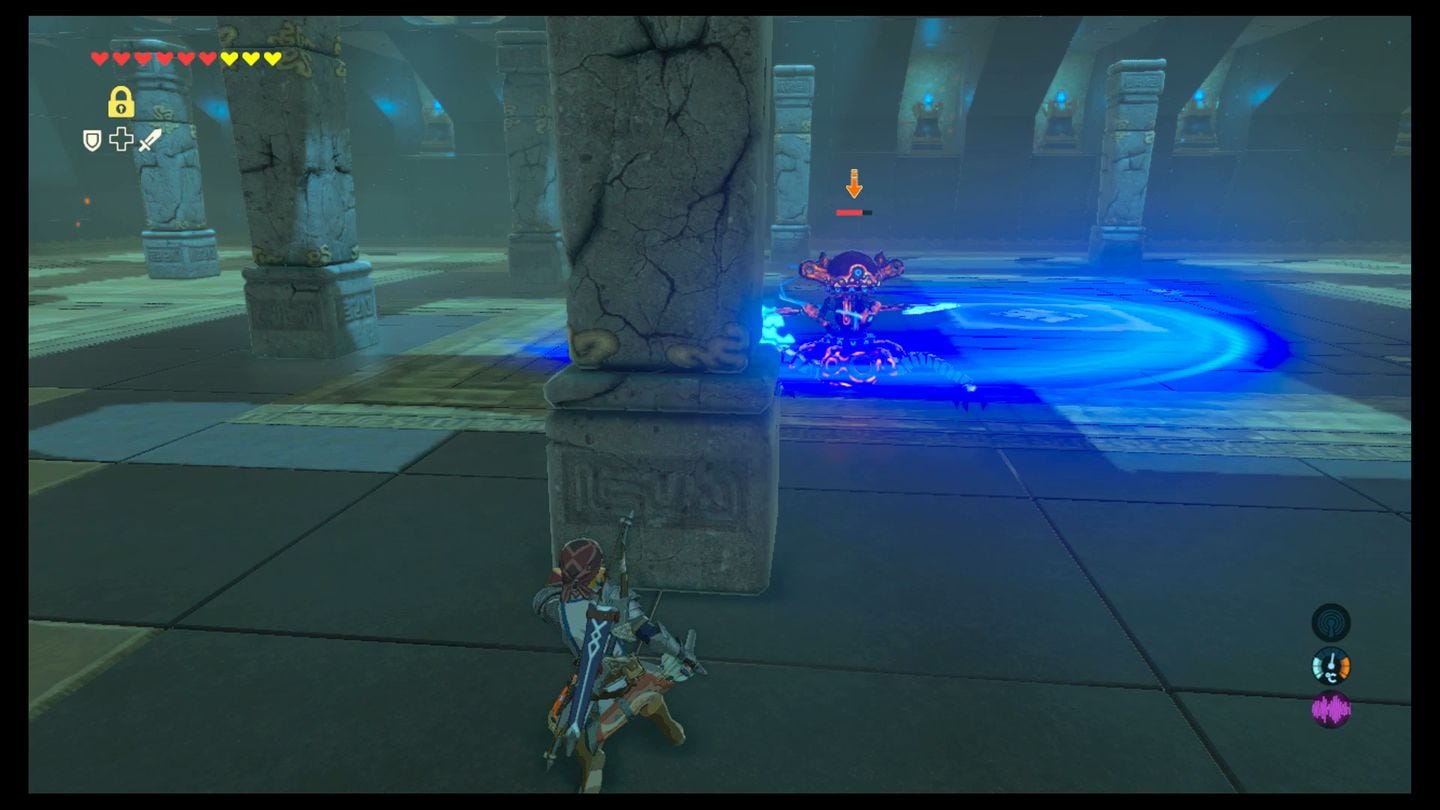
Spinning laser - this starts to be used when the Guardian Scout is below half health. A large circle opens up around the guardian and it shoots a constant, spinning laser around itself. If you're caught by this you'll receive huge damage. Either get out of the range, or use your paraglider to rise above it thanks to the plumes of wind whipped up by the attack.
Charged laser - this is the hardest part. When its health is low enough, the Guardian Scout will shoot two blasts of a charged laser at you for huge damage and a knockdown. Unlike with standard Guardians back above ground, the Guardian Shield won't automatically reflect damage back at it - instead you need to time a parry perfectly to defeat it.
Your strategy here then is as follows:
- Dodge or parry the melee attacks and get in as much damage as possible between them. Note that once the Guardian Scout starts an attack sequence, it stays facing the same way, so you can walk round behind it for unlimited attacks until it moves. If you're feeling confident, try to get a perfect dodge and a flurry attack, and remember that its shield will block front-on attacks, too.
- Hide behind pillars when the Guardian Scout prepares a spinning charge. The pillar will crumble and the Scout will be stunned, leaving it open to charged up heavy attacks.
- Wait out the spinning lasers, shoot the Scout with an elemental arrow, or fly above it with the paraglider and drop for an attack to interrupt it.
- Perfect parry the charged laser attacks for the kill or, if you have very strong attacks, burst it down before it finishes charging.
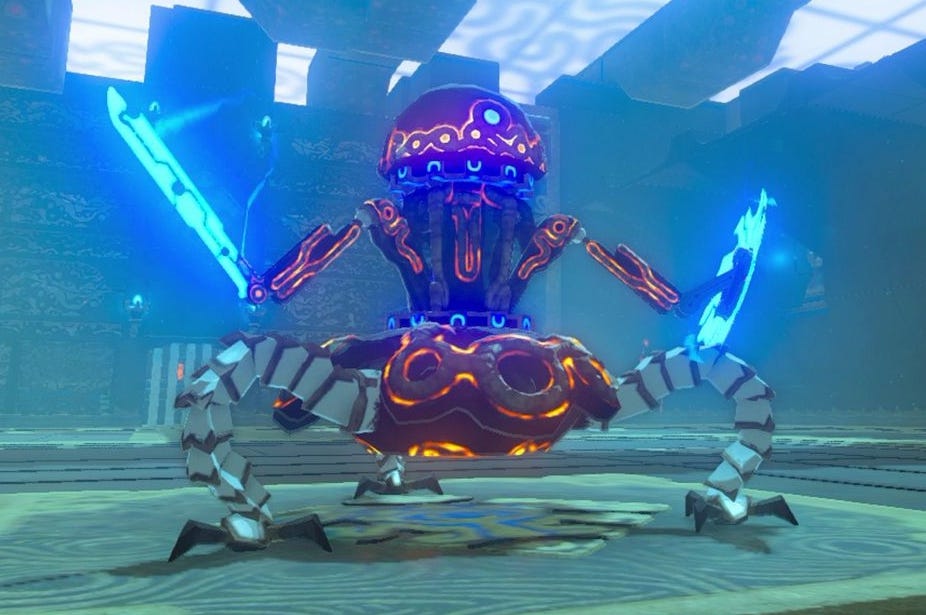
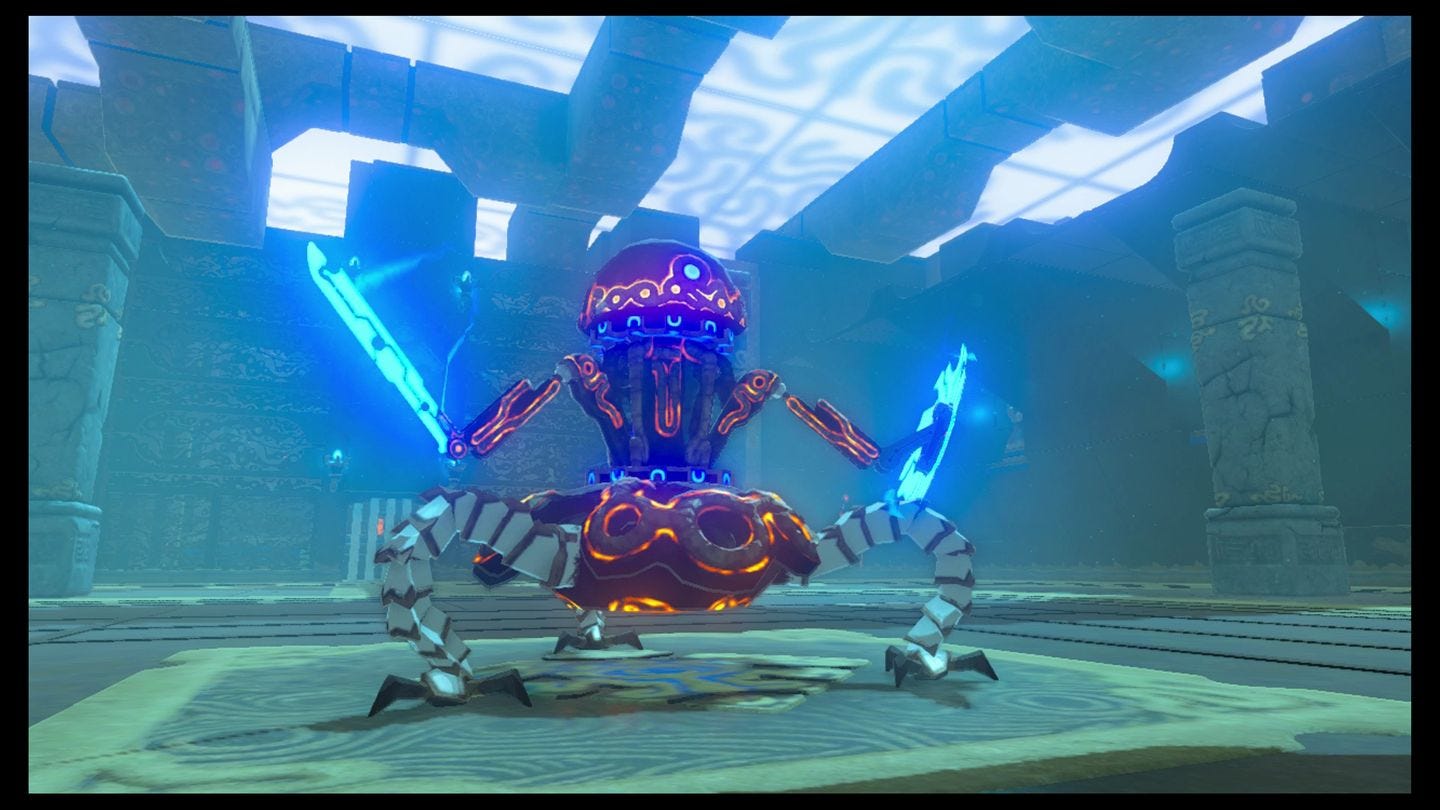
A Major Test of Strength
A Major Test of Strength is a pretty accurate description here, because inside the Shrine is a Guardian Scout IV, which uses a variety of melee, ranged, and mixed attacks against you, and requires a great deal of damage to take down.
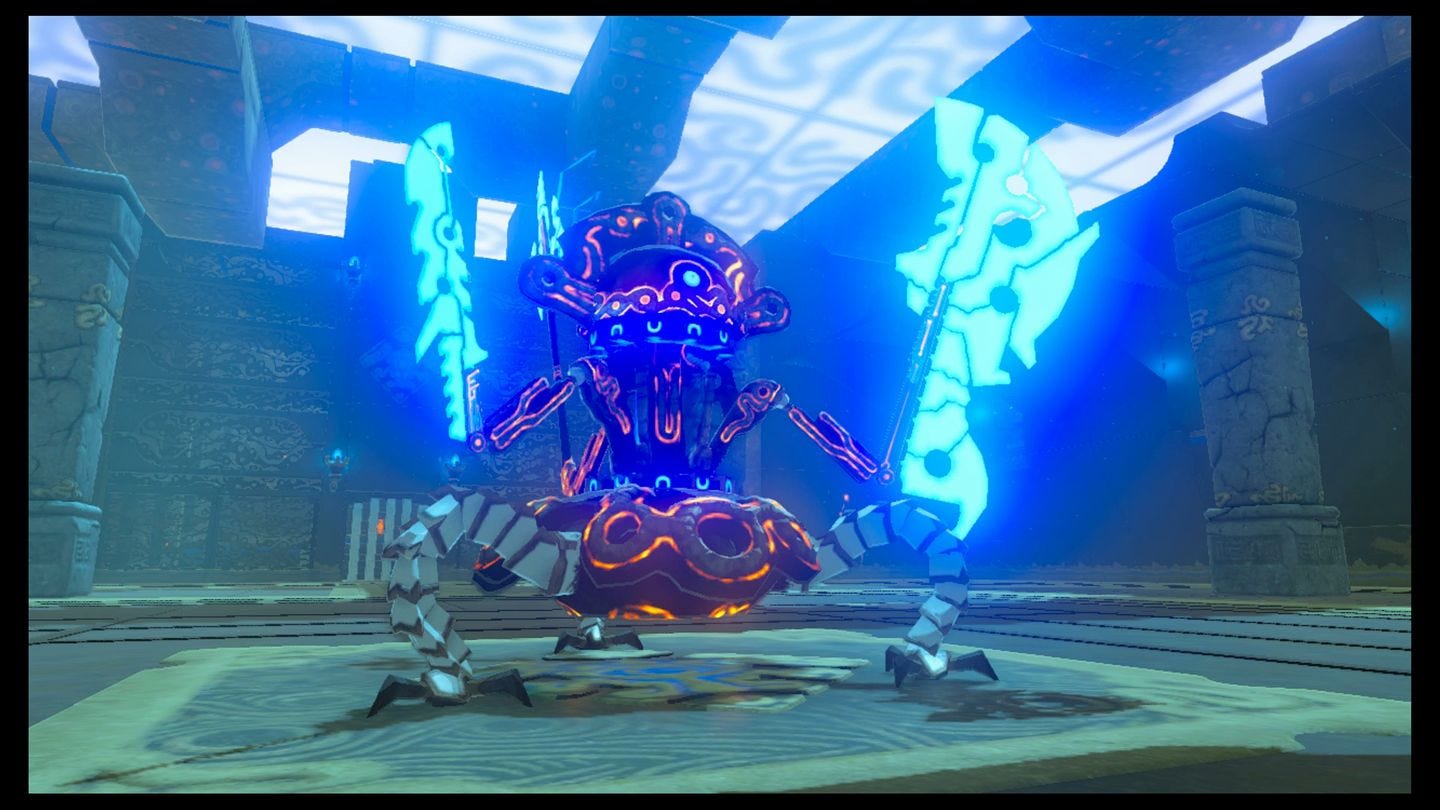
To defeat the Guardian Scout, you need to learn its move sequence and play accordingly. It has five main moves:
A quick laser attack - ranged, this shoots three quick blasts at you dealing moderate damage. To avoid it, simply keep moving. Like most enemy projectiles it will shoot just behind you if you're running.
Melee attacks - the sequence here is usually a vertical slice, then a horizontal swipe in one direction, then the other. The Guardian rotates its arms right before it attacks, which is an indicator of when to parry or dodge for a flurry attack. Note that the horizontal swipes do huge damage if they hit, so be careful.
Spinning charge - after a few melee attacks, the Guardian will jump backwards and extend all three arms for a spinning attack towards you. It's almost impossible to dodge and lasts the length of the room, so when you see it do this hide behind a pillar, which it'll crash into and be stunned in the process, too.
Spinning laser - this starts to be used when the Guardian Scout is below half health. A large circle opens up around the guardian and it shoots a constant, spinning laser around itself. If you're caught by this you'll receive huge damage. Either get out of the range, or use your paraglider to rise above it thanks to the plumes of wind whipped up by the attack.
Charged laser - this is the hardest part. When its health is low enough, the Guardian Scout will shoot two blasts of a charged laser at you for huge damage and a knockdown. Unlike with standard Guardians back above ground, the Guardian Shield won't automatically reflect damage back at it - instead you need to time a parry perfectly to defeat it.

Your strategy here then is as follows:
- Dodge or parry the melee attacks and get in as much damage as possible between them. Note that once the Guardian Scout starts an attack sequence, it stays facing the same way, so you can walk round behind it for unlimited attacks until it moves. If you're feeling confident, try to get a perfect dodge and a flurry attack.
- Keep moving to avoid the intermittent quick lasers.
- Hide behind pillars when the Guardian Scout prepares a spinning charge. The pillar will crumble and the Scout will be stunned, leaving it open to charged up heavy attacks.
- Wait out the spinning lasers, shoot the Scout with an elemental arrow, or fly above it with the paraglider and drop for an attack to interrupt it.
- Perfect parry the charged laser attacks for the kill or, if you have very strong attacks, burst it down before it finishes charging.