Life Is Strange photo locations guide - find every collectible across all chapters and unlock the Platinum Trophy
Every hidden collectible location and get every Trophy or Achievement.

Life Is Strange photo locations unlock the game's many optional Trophies, and aren't your typical hidden collectible; each one is cleverly embedded in the game's episodic world, requiring you to position people and places in just the right way - sometimes using time travel - to line up the perfect shot for budding photographer Max to take.
With Life Is Strange now available on mobile, there's no excuse to play one of 2015's best releases.
And for the Trophy hunters out there, it's a straightforward and satisfying Platinum; complete the story however you see fit, and as long as you find the 10 photos per chapter at some point, it's yours.
On this page:

How Life Is Strange's photos work
While you can collect photos, as you go, the game provides an easy way for you to jump back into each chapter and find whatever you've missed.
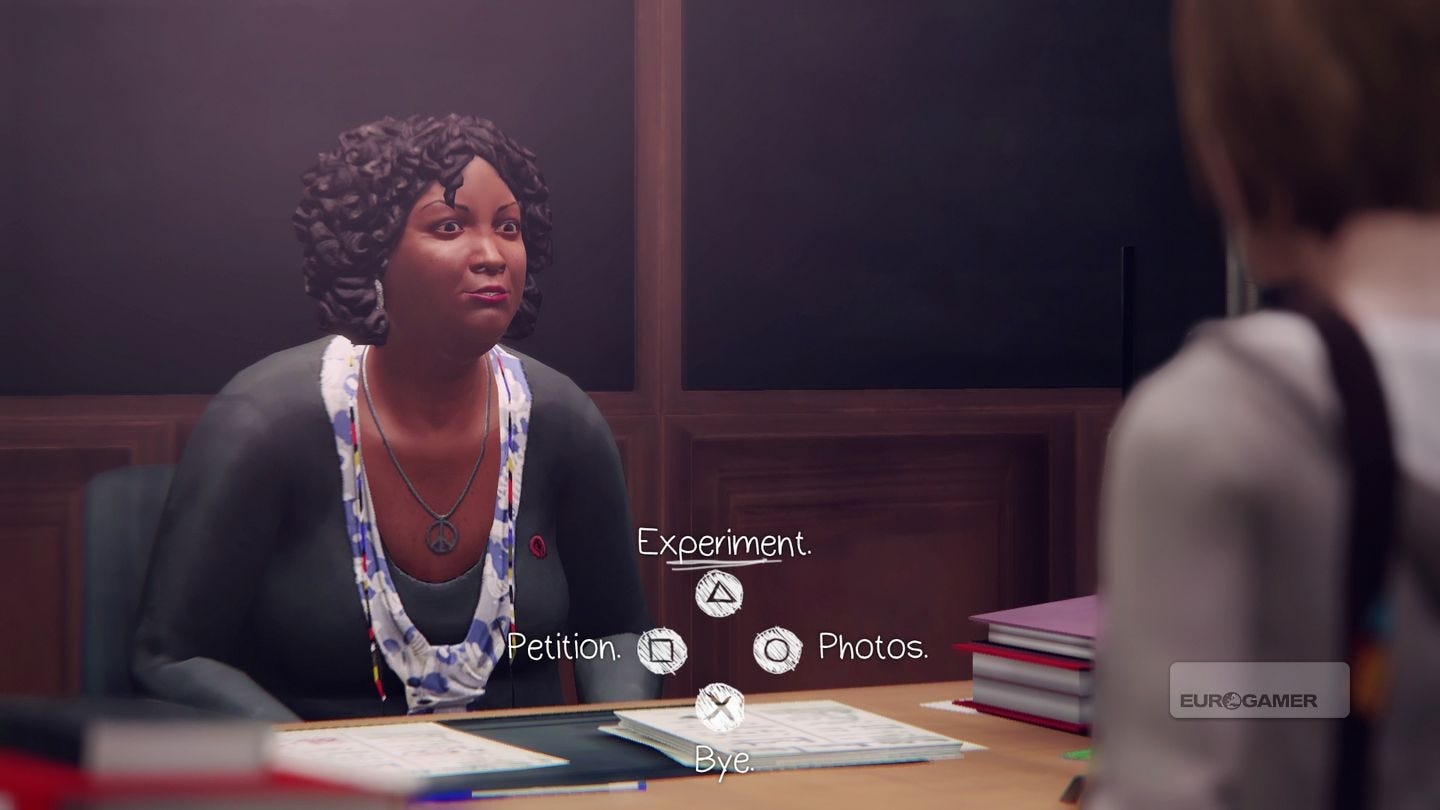
Though the game has choices that impact the story, a dedicated 'collectible mode' allows you to go back to previous areas without changing your decisions. You can access it easily from the main menu after you've finished a chapter.
To make things easier, the game marks which areas have photos left to collect, and how many, narrowing down your search. As you play through again, remember to use the right bumper / R1 to speed through previous discussions to get to the point you need.
Note the only exception to the above is the game's final photo, which seemingly cannot be completed in the collectible mode, requiring a regular playthrough or previous save to get it. If you want to avoid spoilers but would like a clue so you know which it is, then it's in the final Chapter and involves (another) search for bottles.
Otherwise, play the game without fear or missing anything easily.
Life Is Strange photo locations guide for Chapter 1
As described in the game's collectibles mode, this chapter's photos are in the following locations:
- High School (1 photo)
- Main Campus (2 photos)
- Dormitories (1 photo)
- Girls' Dormitories (2 photos)
- Dormitories - with the flash drive (1 photo)
- Parking Lot (1 photo)
- Cliff (2 photos)
High School (1 photo)
After the classroom discussion at the start of the game, walk over to the desk ahead of yours and investigate the markings on the desk. You can take a picture here.
Main Campus (2 photos)
From where you emerge there is a statue right ahead. Walk around to the front and look up at it, and the photo prompt should appear.

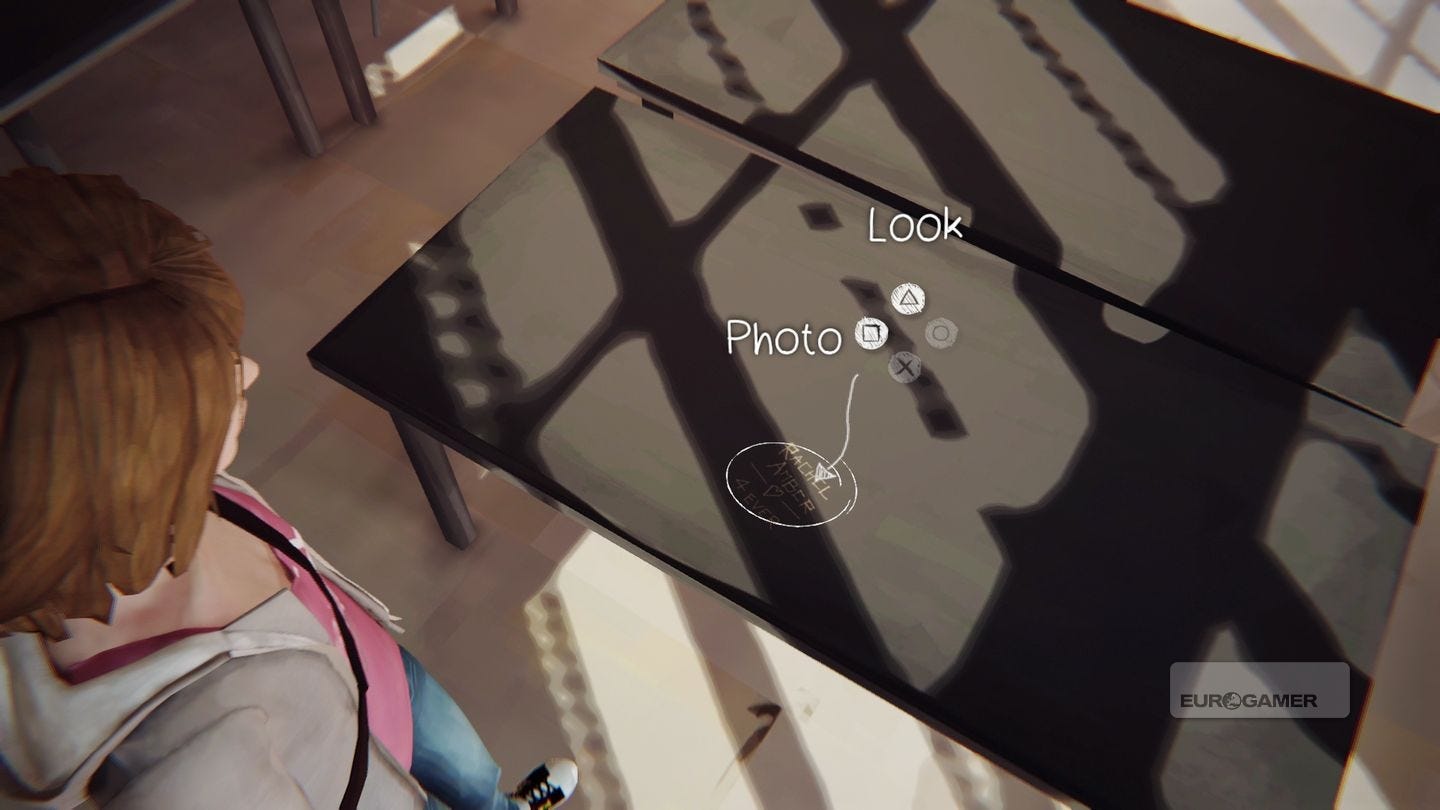
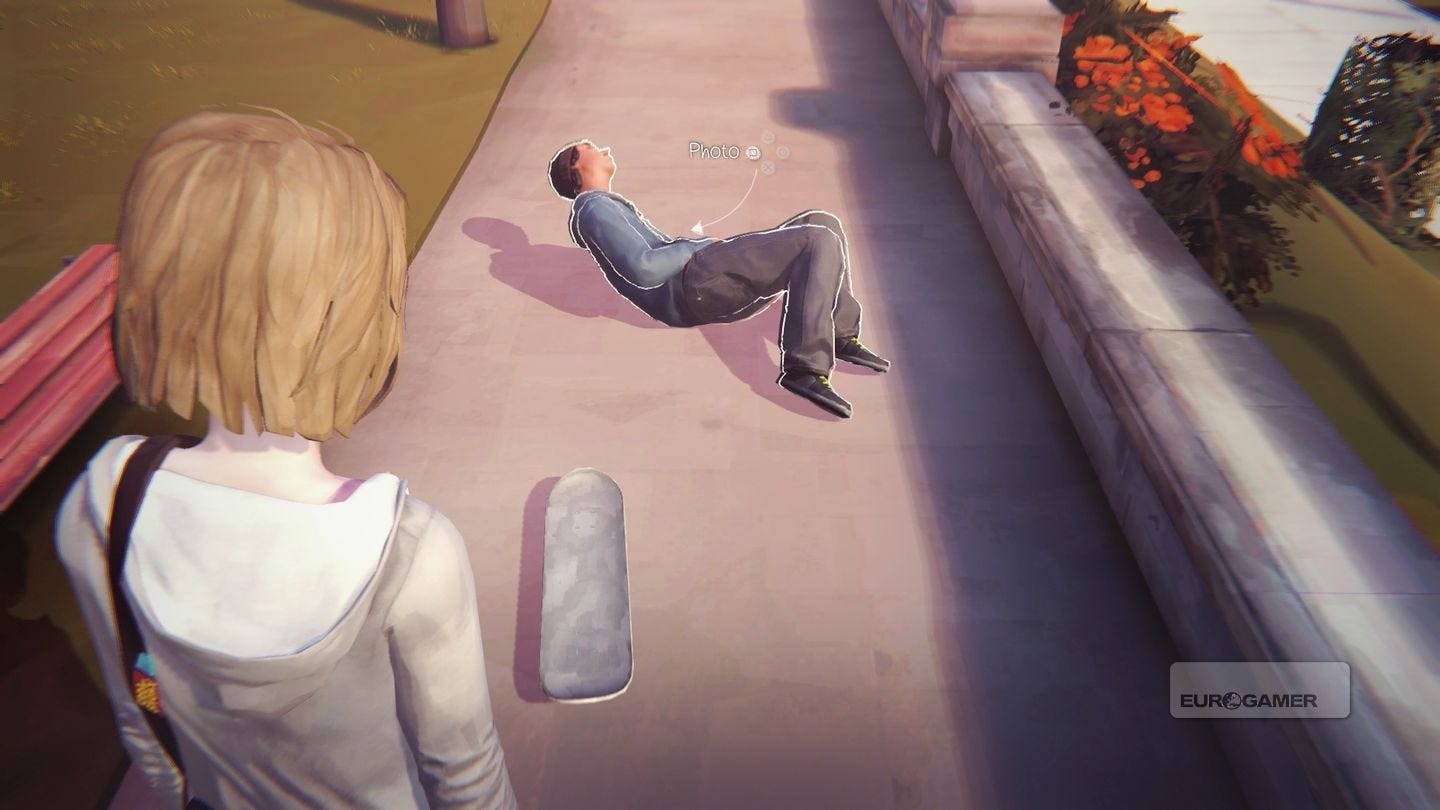
This one takes a little work. Head to the group of skaters sitting on the wall opposite the statue in the middle of the campus, and chat to Justin.
Whatever your response requires you to rewind. Now select 'I came to Noseslide', then Tre Flip.
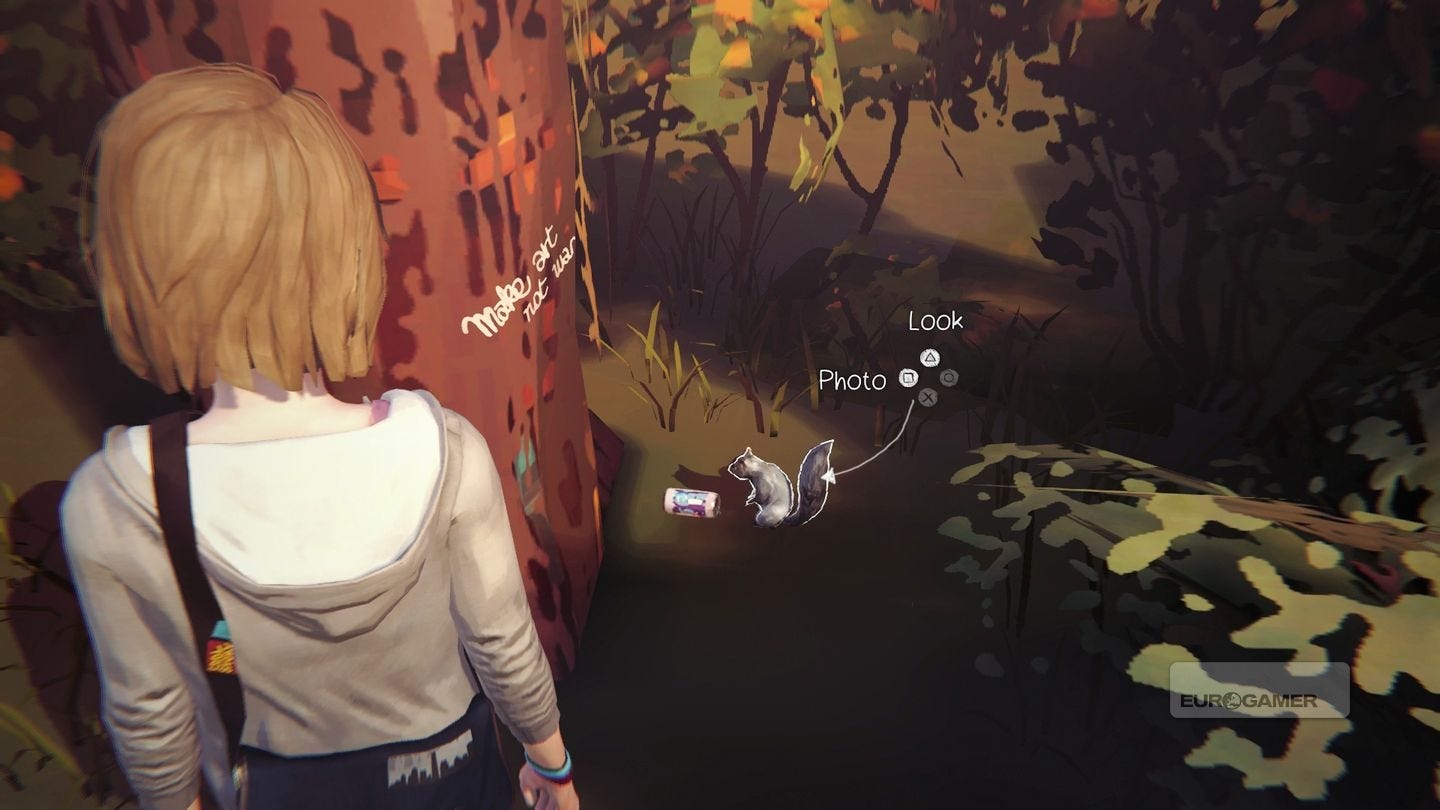
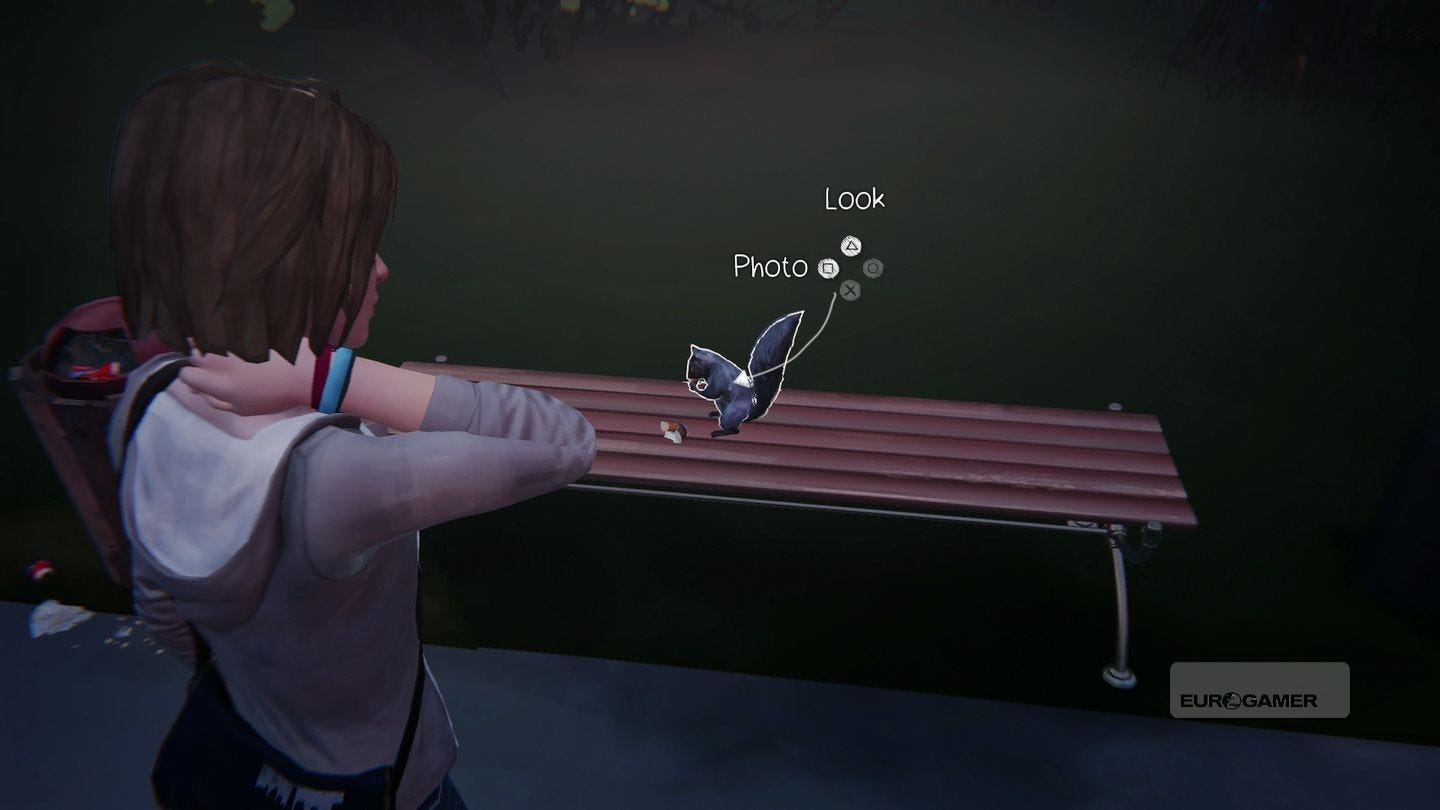
Dormitories (1 photo)
Run to the far end, where you'll see Kate sitting on the bench, facing out towards the trees. To the right of the near tree is a squirrel and a beer can - take the photo.
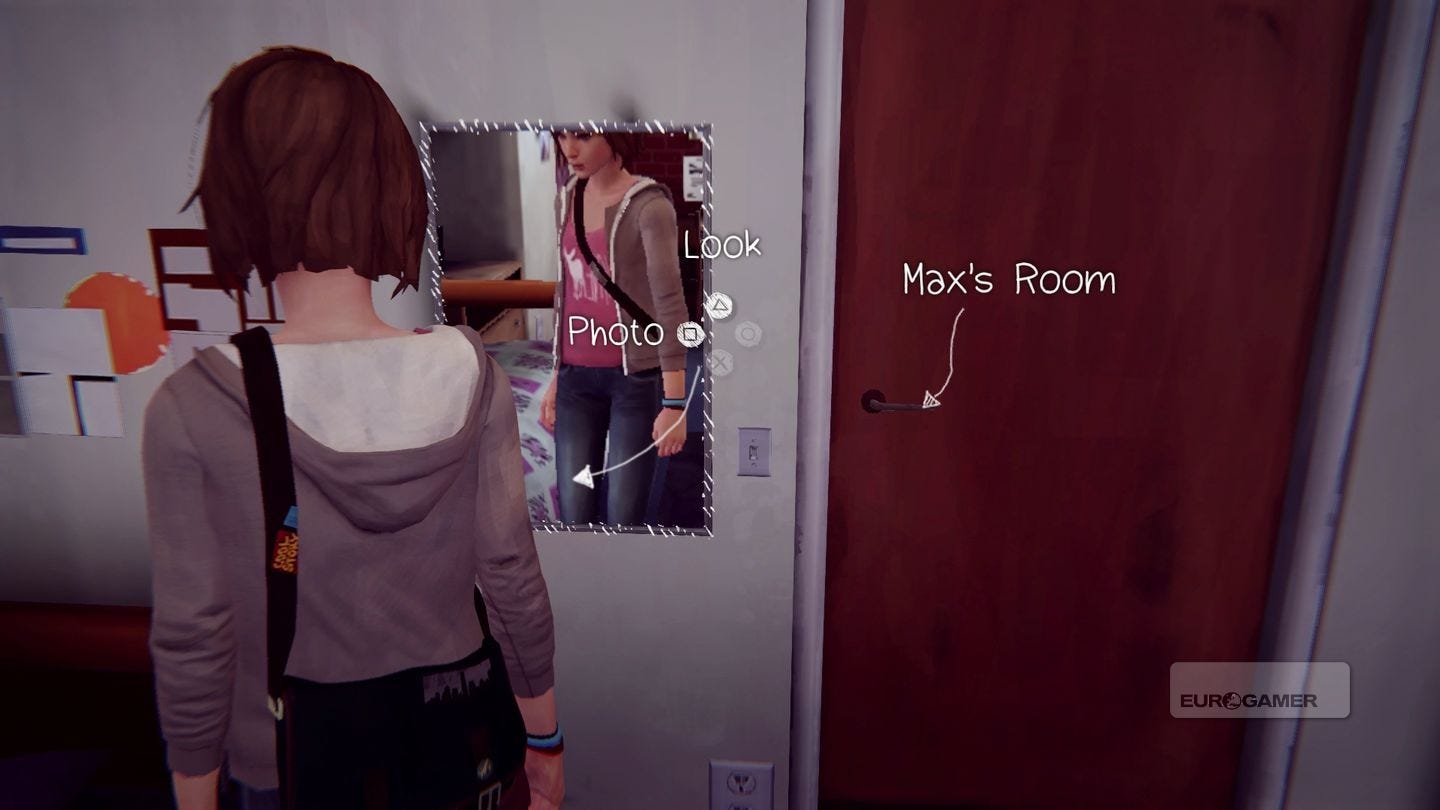
Girls' Dormitories (2 photos)
Enter Max's room (it's on the right towards the end) and look in the mirror next to the door.
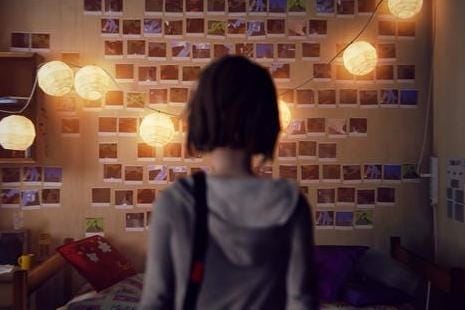
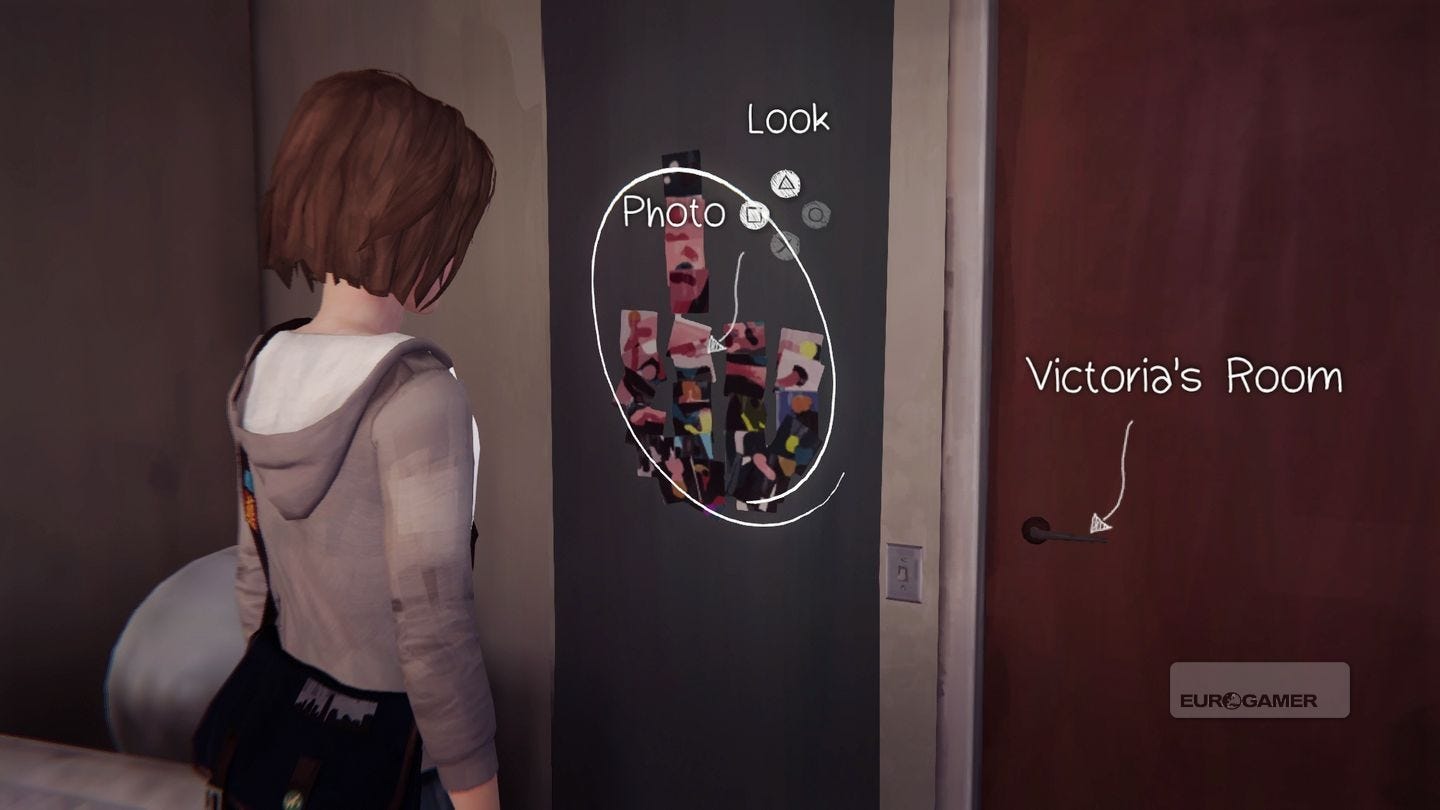
Continue playing this section until you enter Victoria's Room (go to Max's room, read the sticky note on the desk, talk to Juliet in the corridor and respond with Juliet Watson, then go to the room) and you see a collage of photos on the wall. Select Mess Up, then Photo.
Dormitories - with the flash drive (1 photo)
As soon as you begin, rewind to stop the football from hitting Alyssa.
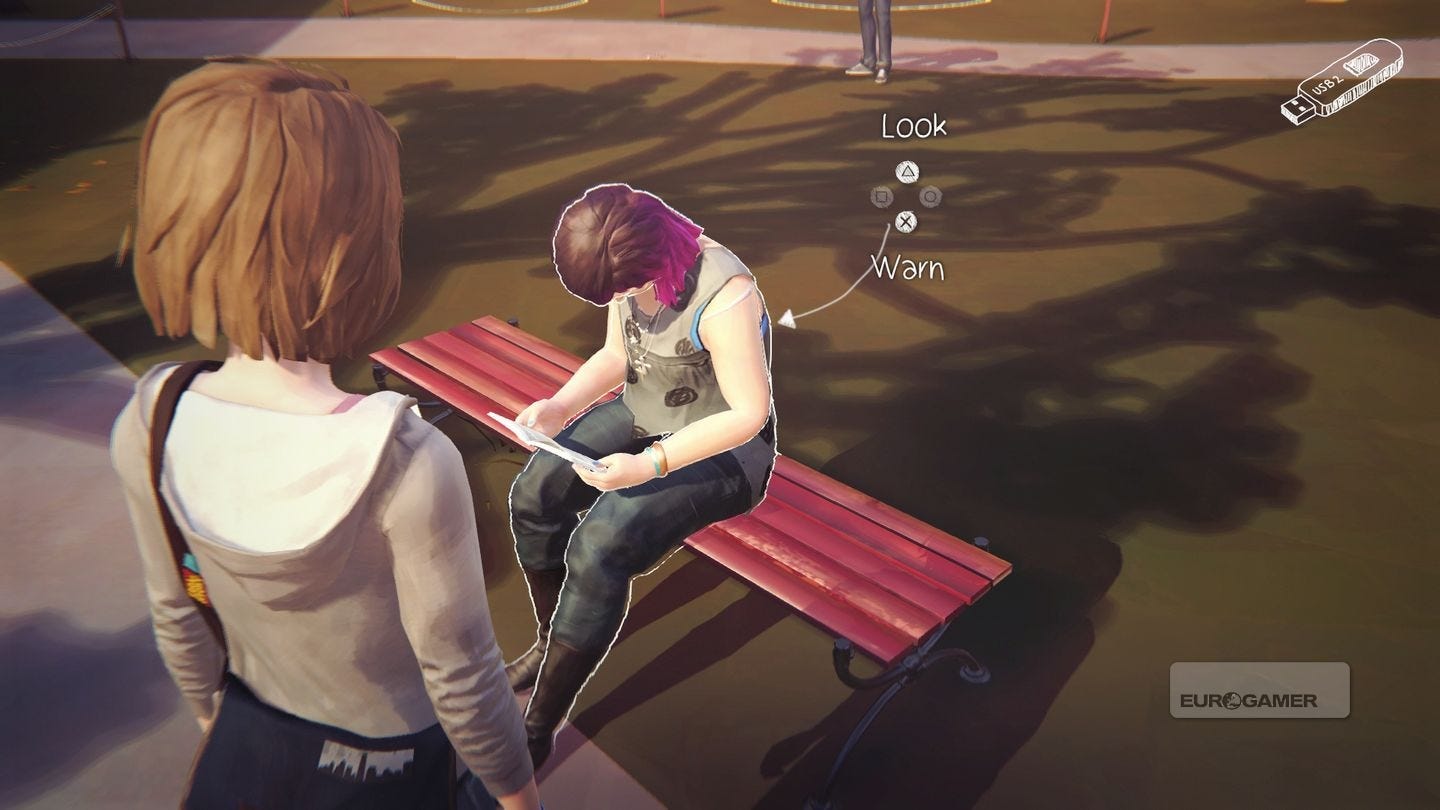
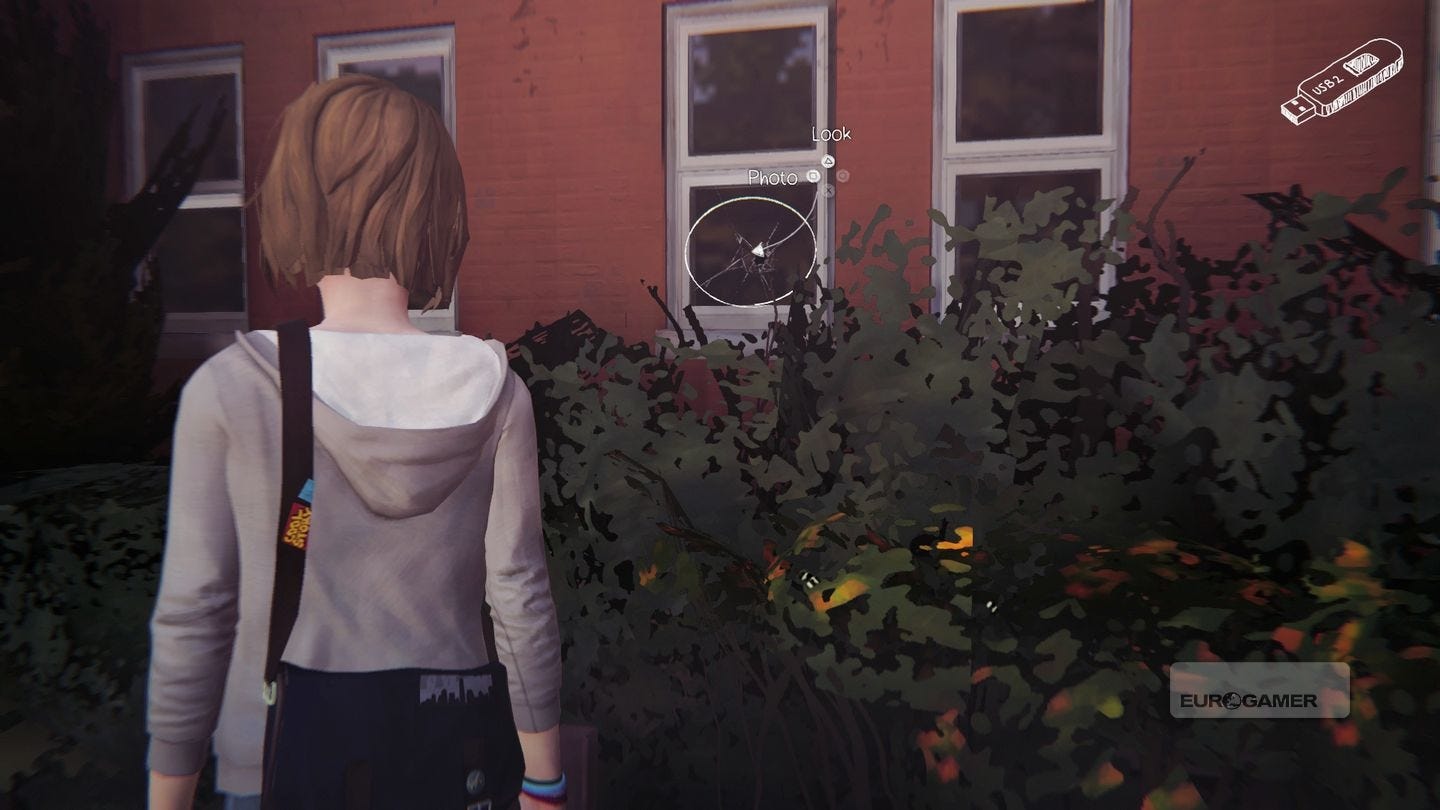
Run up, warn her, then take a photo of the window that just got smashed.
Parking Lot (1 photo)
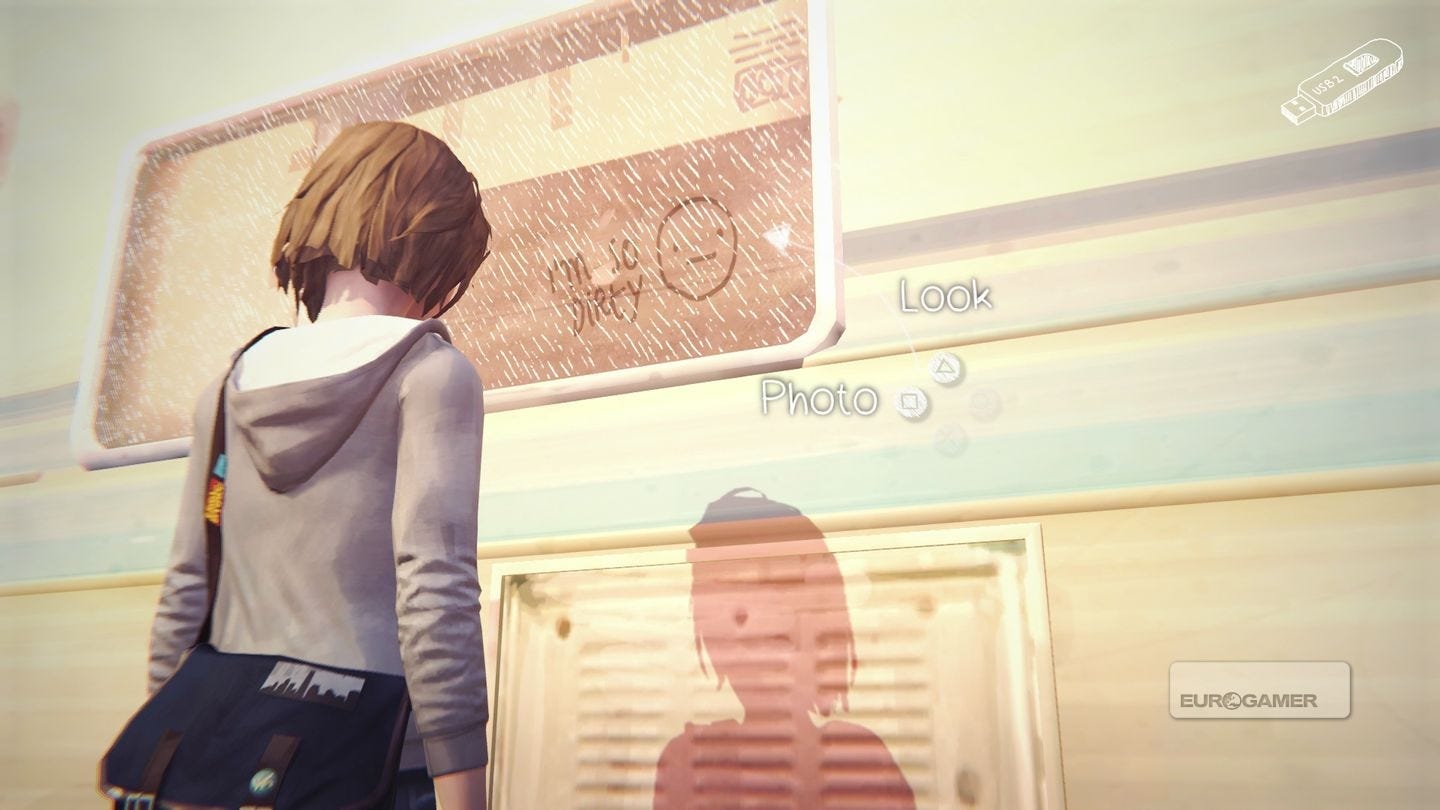
In the corner of the parking lot is a white RV. On the side, you can choose to draw on the window. Do so, then take a picture of your creation.
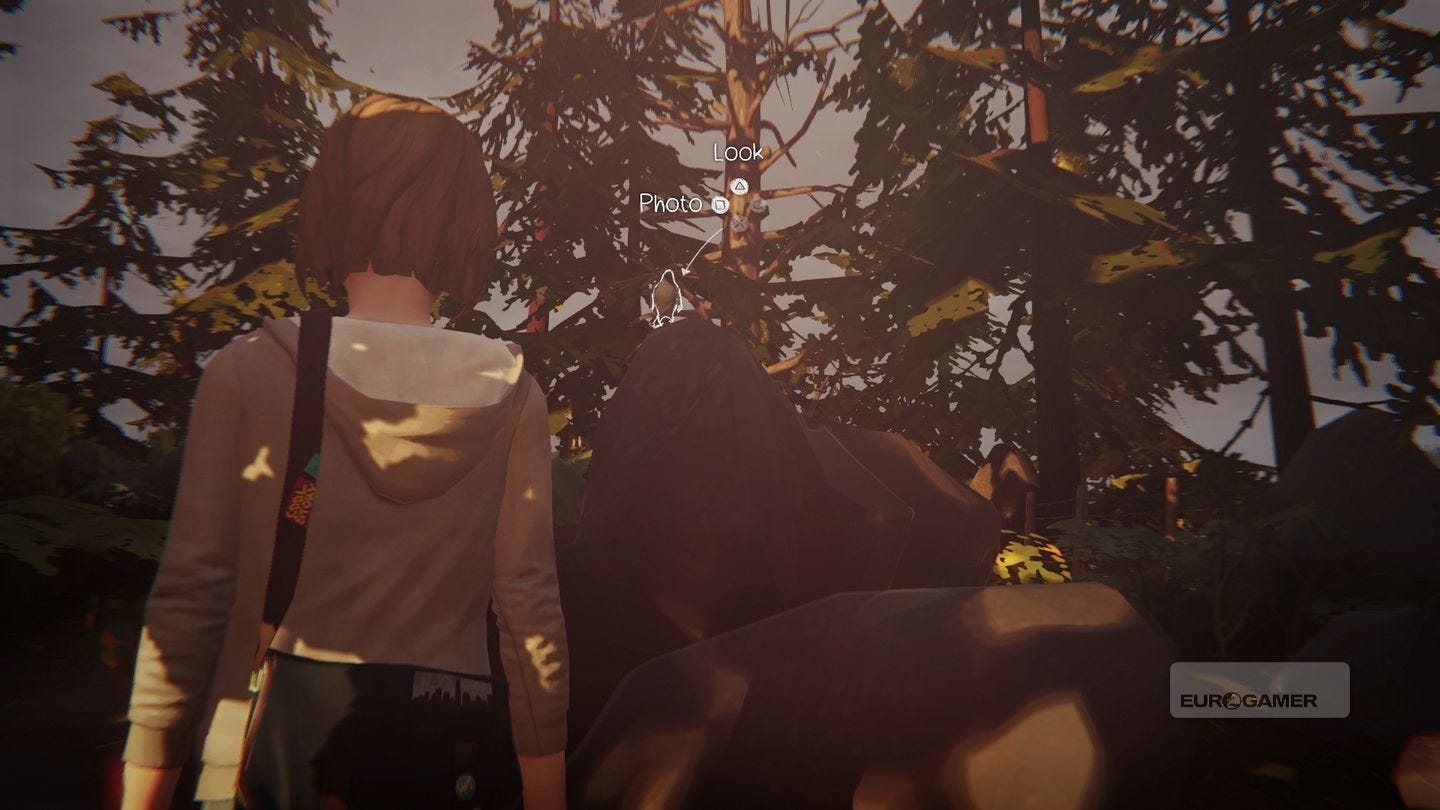
Cliff (2 photos)
As soon as you enter, turn around and you'll see a path going down on the right.
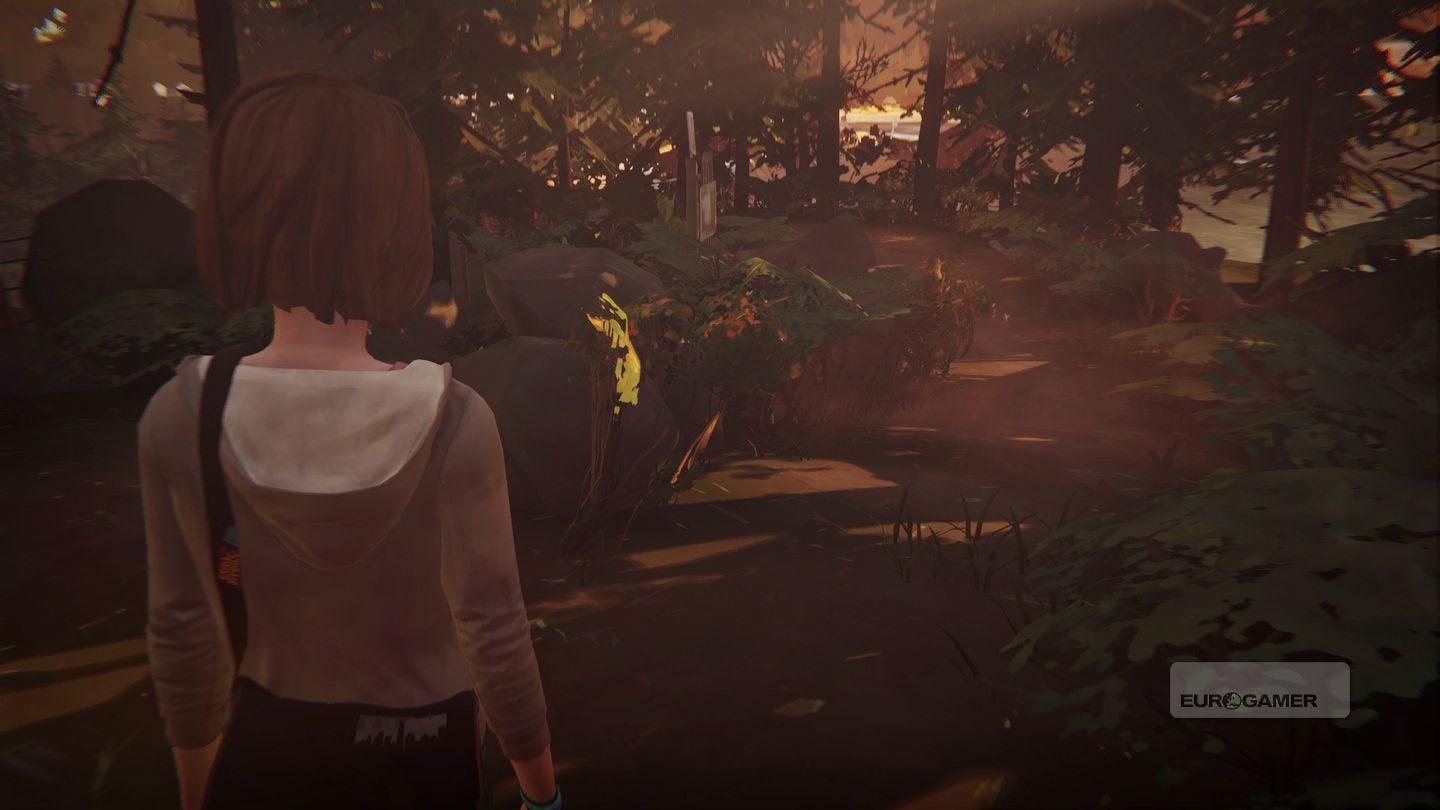
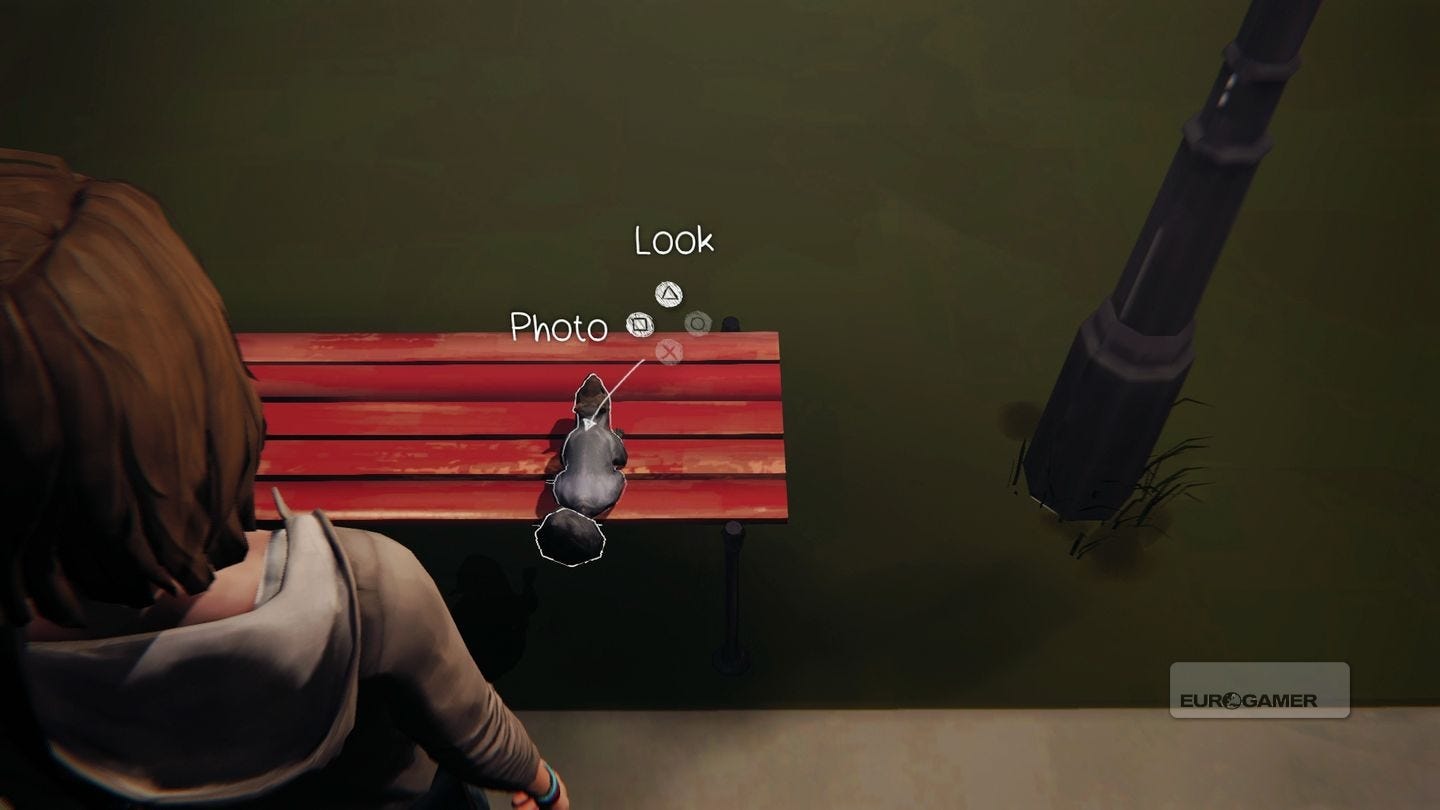
Walk down, and you'll see a boulder on the left, with a bird on top. This is your photo.
Continue up the hill as you would usually to meet with Chloe. Before talking to her, approach from behind, where you will get the prompt.
Life Is Strange photo locations guide for Chapter 2
As described in the game's collectibles mode, this chapter's photos are in the following locations:
- Girls' Dormitories (1 photo)
- Dormitories - Morning (1 photo)
- Diner (3 photos)
- Junkyard (3 photos)
- High School (2 photos)
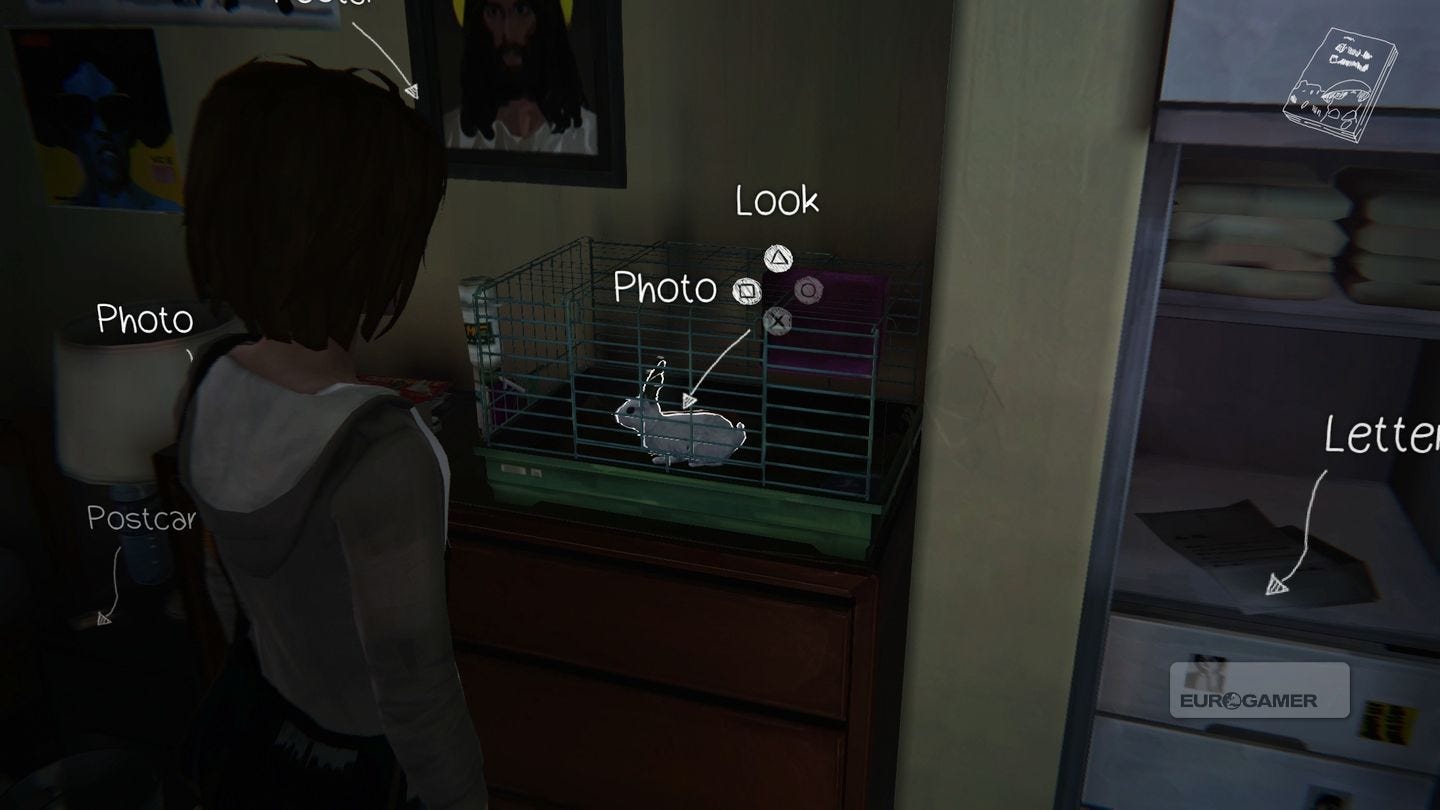
Girls' Dormitories (1 photo)
Start the chapter as usual (get the shower supplies from the wardrobe, leave the room and use the showers on the left, back to your room, get dressed, get the book under the mess next to the sofa) then head to Kate's room that's opposite Max's and to the left. Inside, take a photo of the rabbit in a cage.
Dormitories - Morning (1 photo)
Turn right and head to the bench at the far end - the same near where you snapped the squirrel in the first chapter.
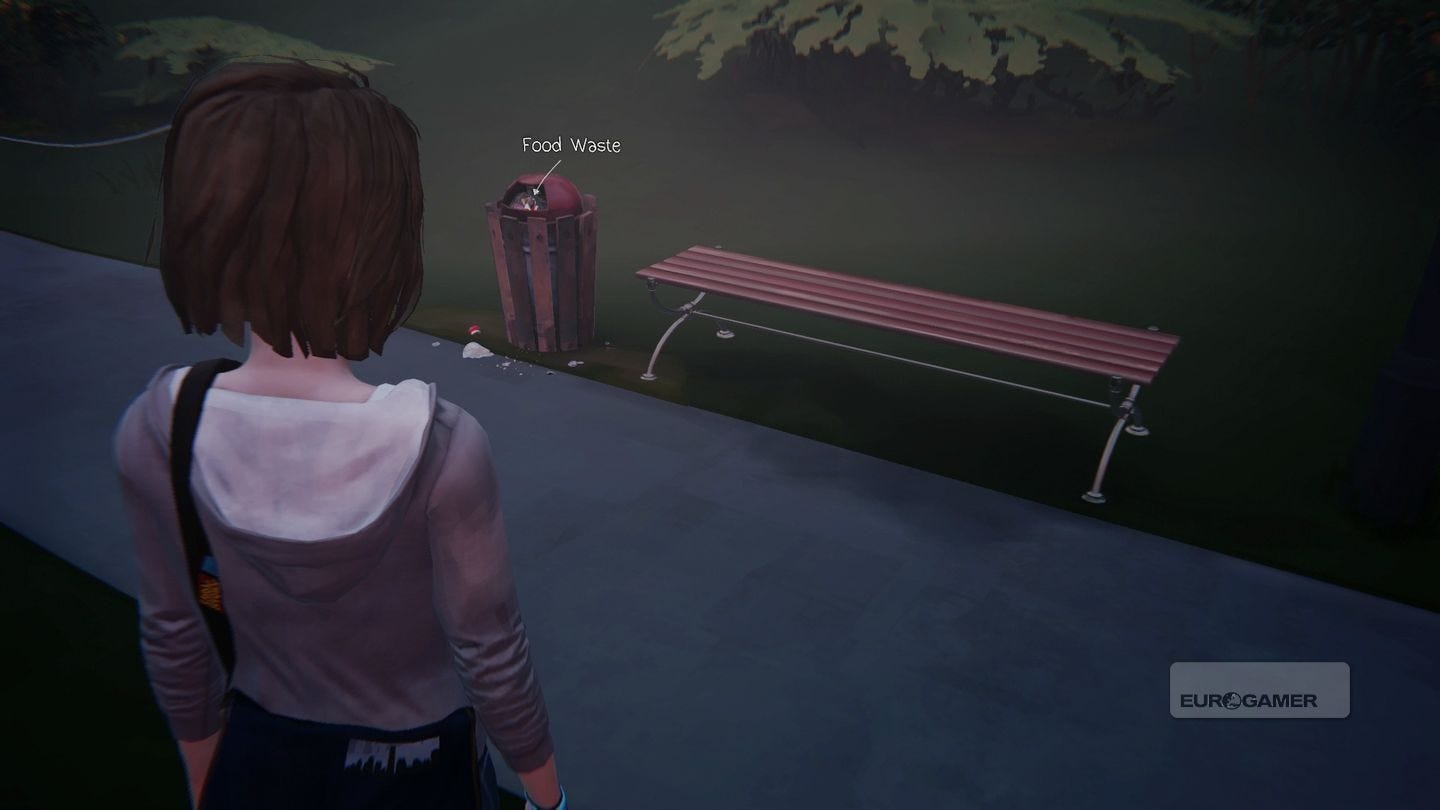
Investigate the bin, and place the rubbish on the bench. Step back until the squirrel jumps up, then approach it and snap.
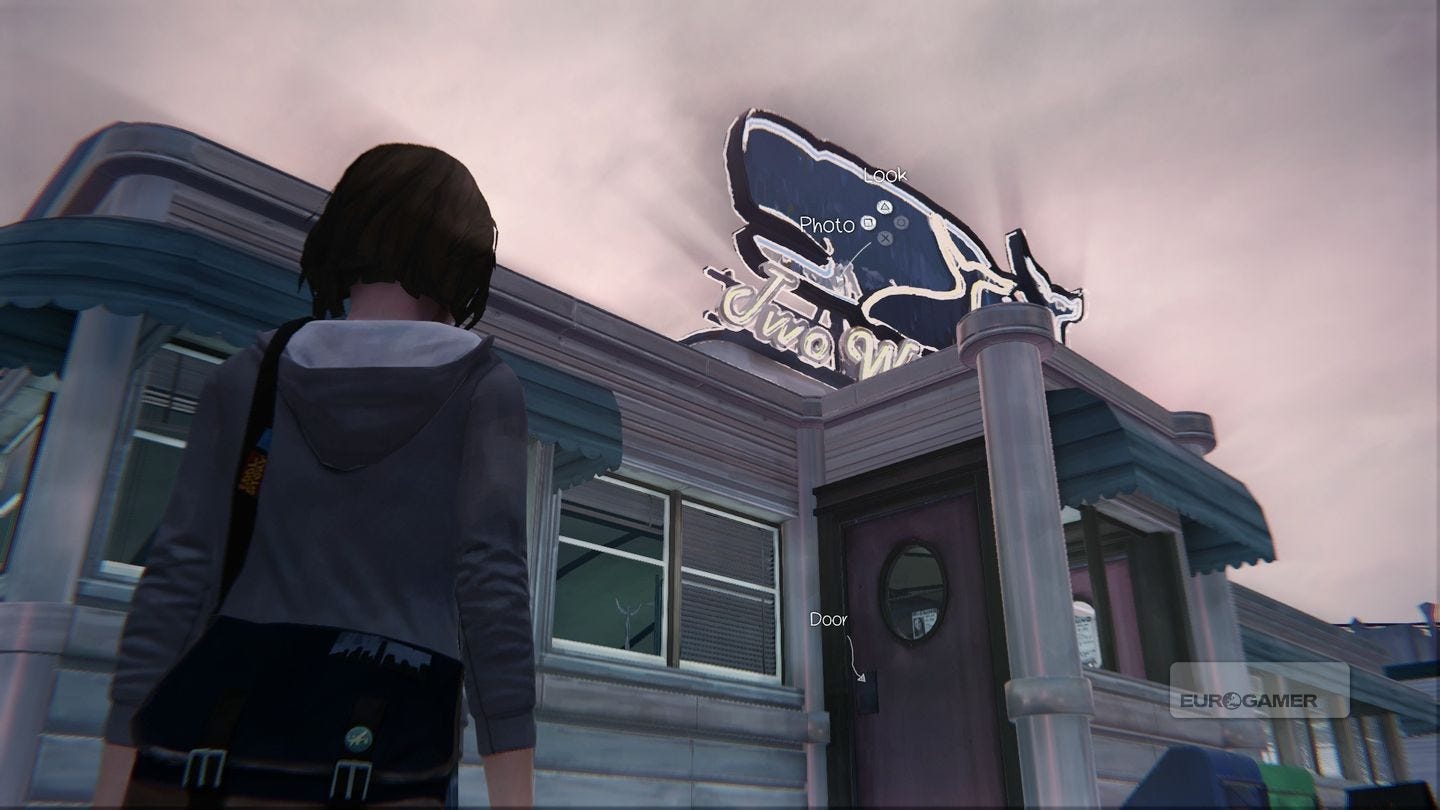
Diner (3 photos)
You can get all three of these in relatively quick succession.
From where you begin, look up to the whale sign above the diner, and walk ahead. At the right angle, you'll be able to take a picture.
Next, run ahead along the street, take a left and past the homeless round the back of the diner.
At the end is a chainlink fence, and you can see the RV and the dog. Look at the dog, and take the picture.
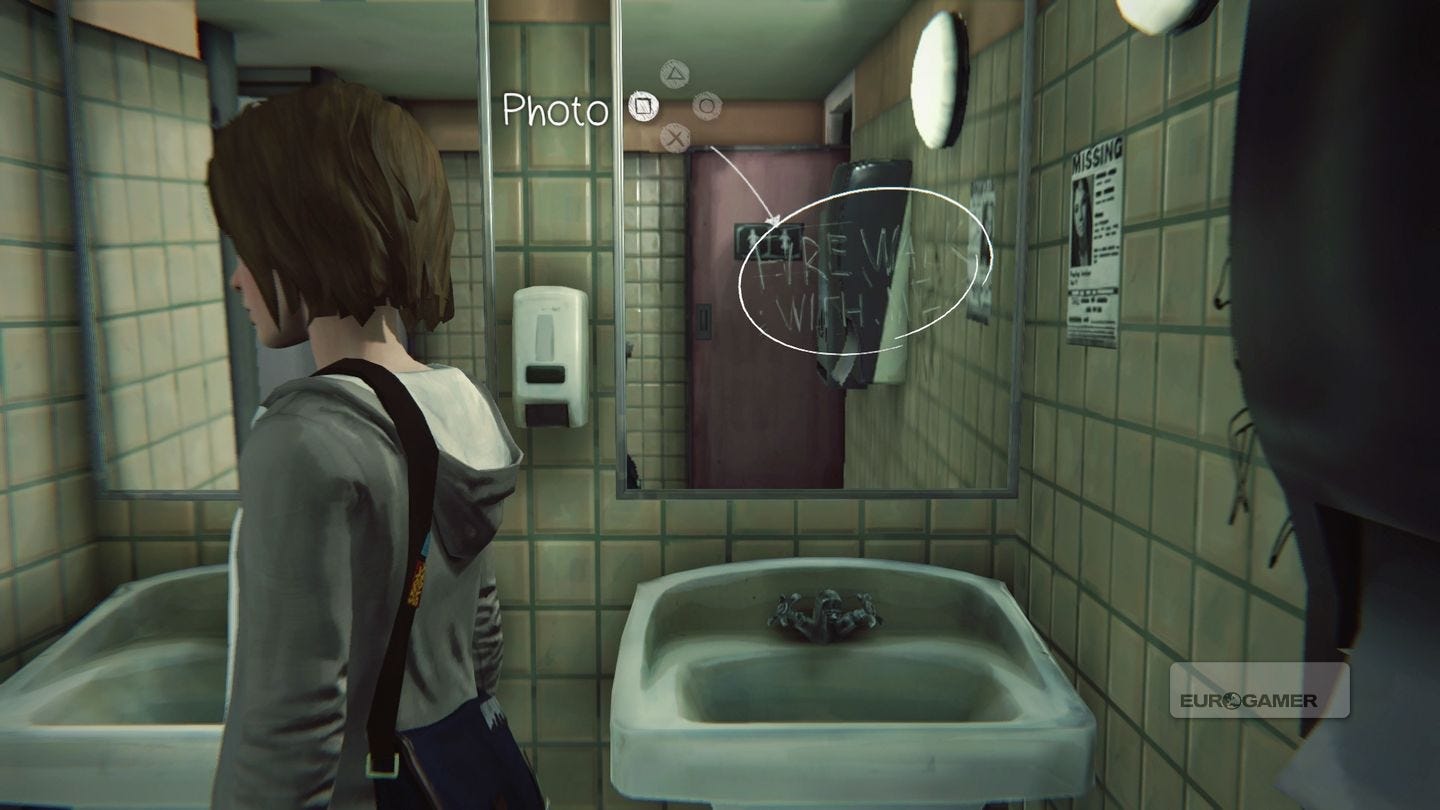
Finally, head into the diner, and go to the far left corner and into the washroom. On the right mirror is some graffetti - take a picture.
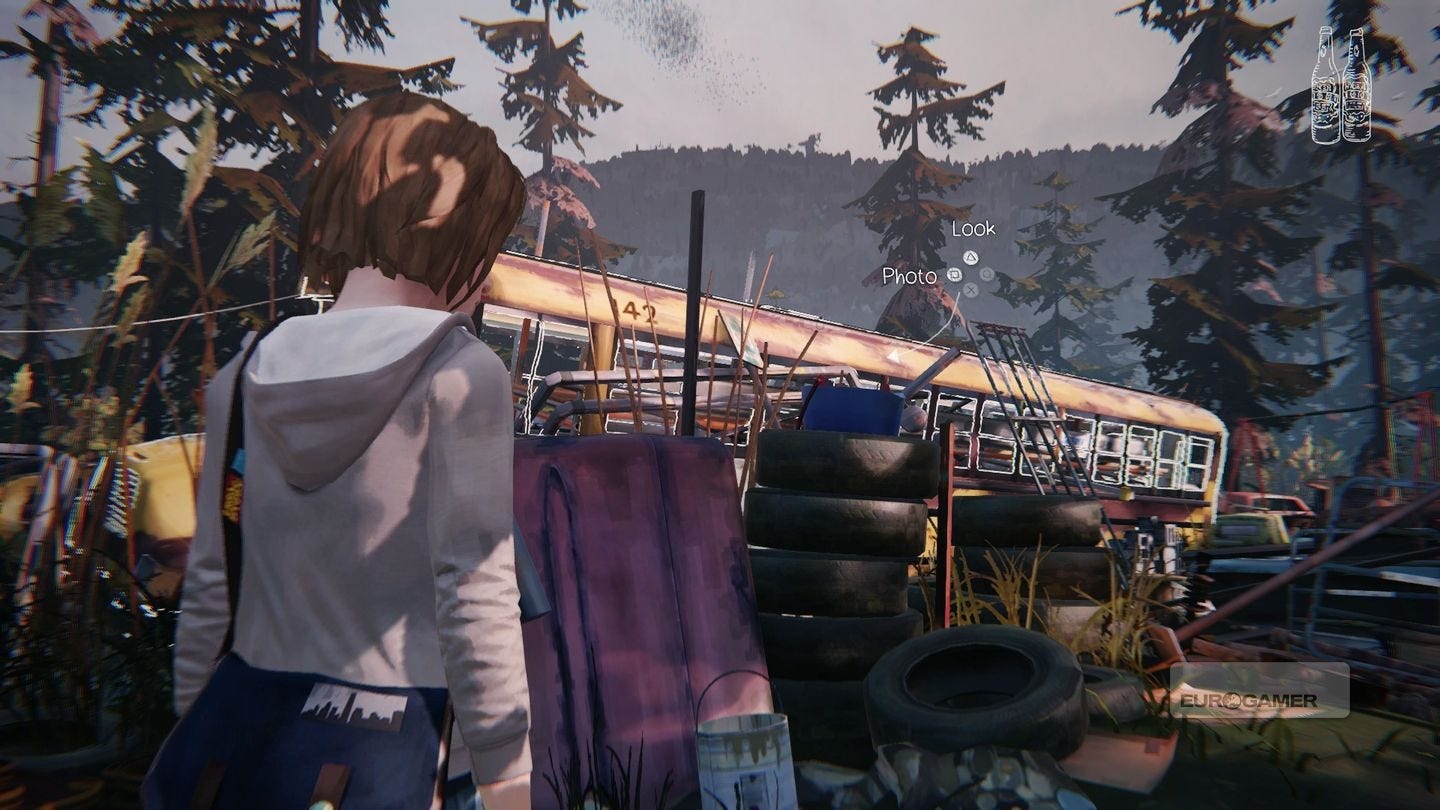
Junkyard (3 photos)
From where you begin, turn around and you'll see a school bus. Stand to the left (the same side as the front) and look at it. At the right angle, the photo prompt will appear. There's also one of the bottle locations near here, while you're at it.
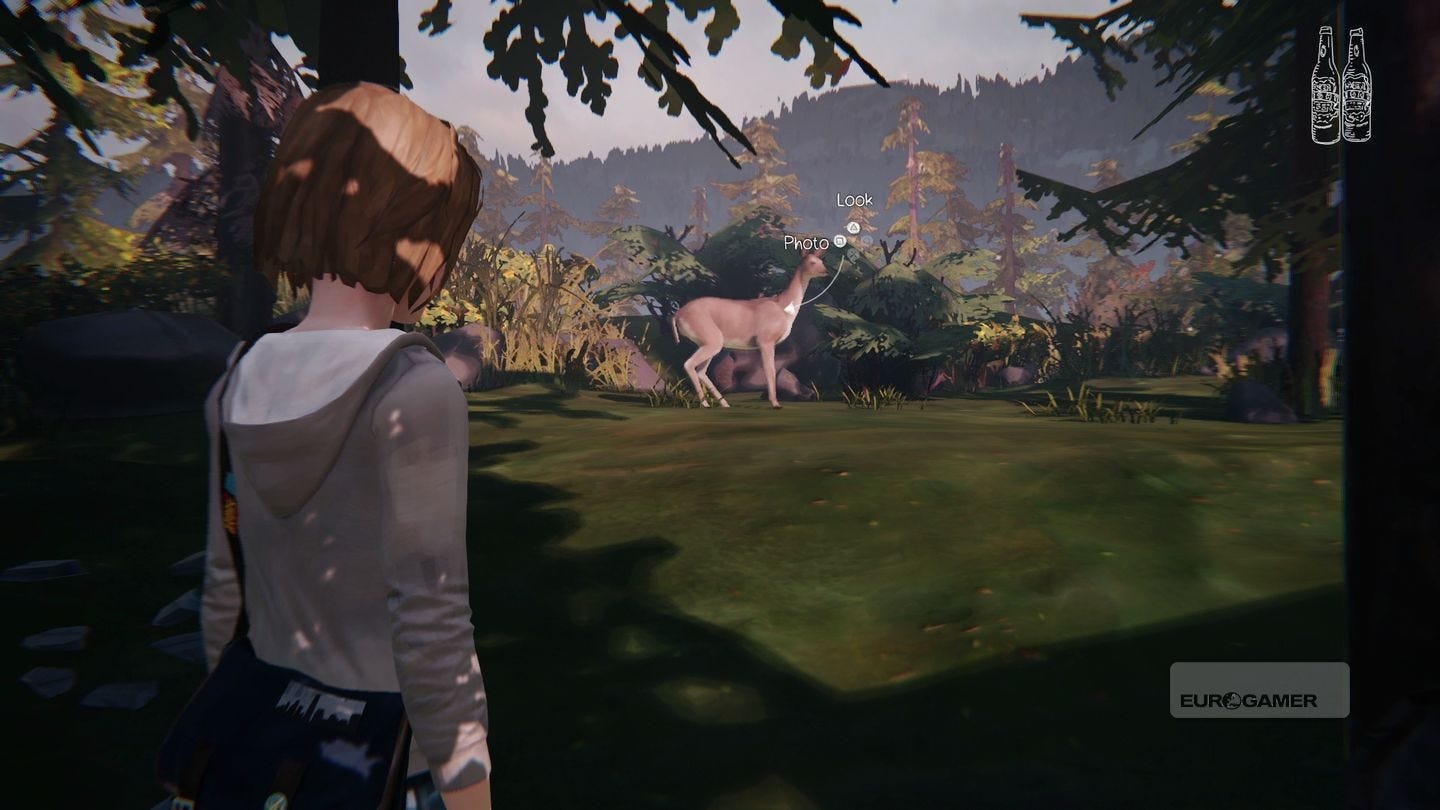
Turn right and go through the junkyard until you are on the other side of the bus. As you go, you'll notice a deer (Max will call it out, so you won't miss it) which runs to the right. Follow it and take a picture.
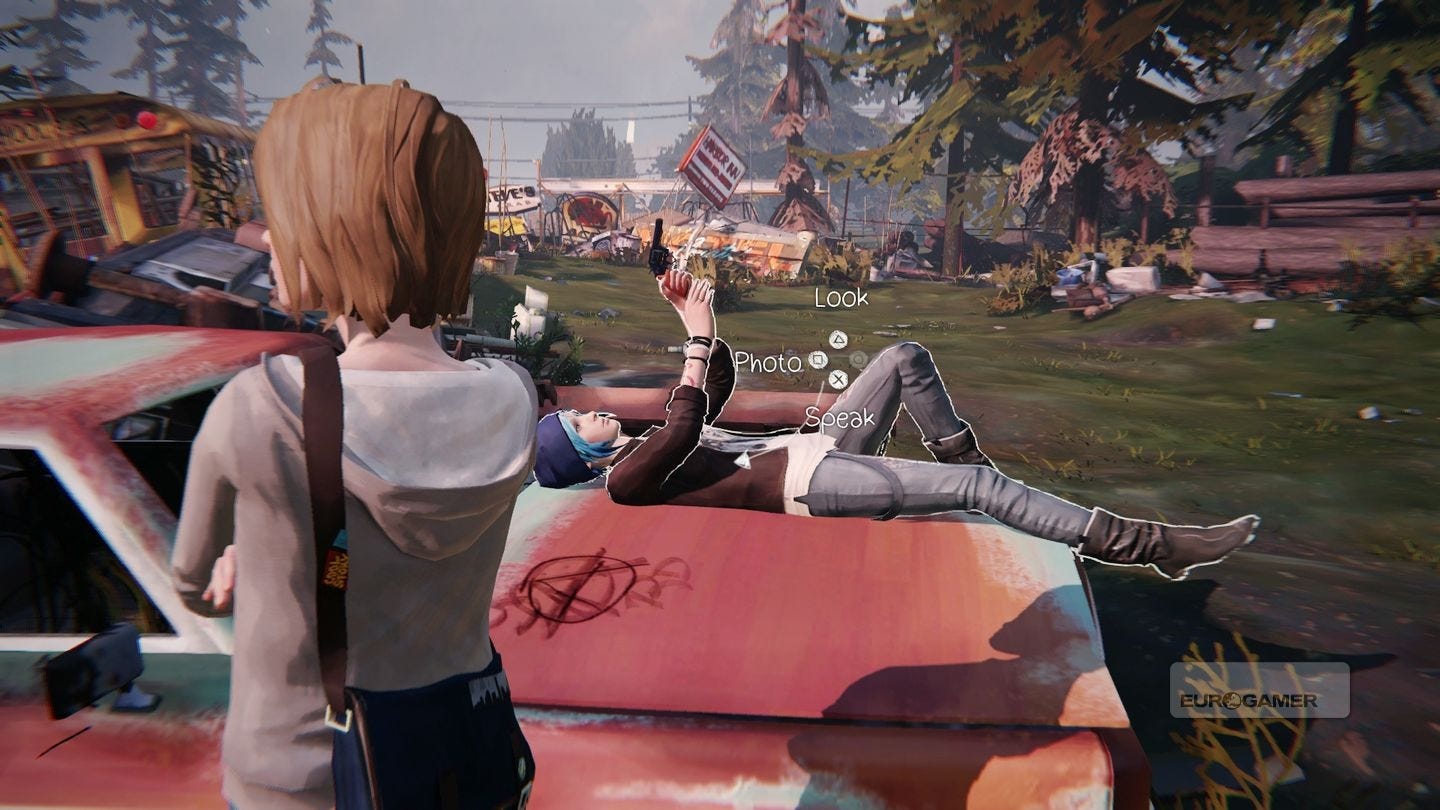
Now explore the junkyard and find all five bottles, play the gun-shooting section. Once it's over, Chloe will be lying on the car with the gun in the air. Approach from the side and you'll get your third picture.
High School (2 photos)
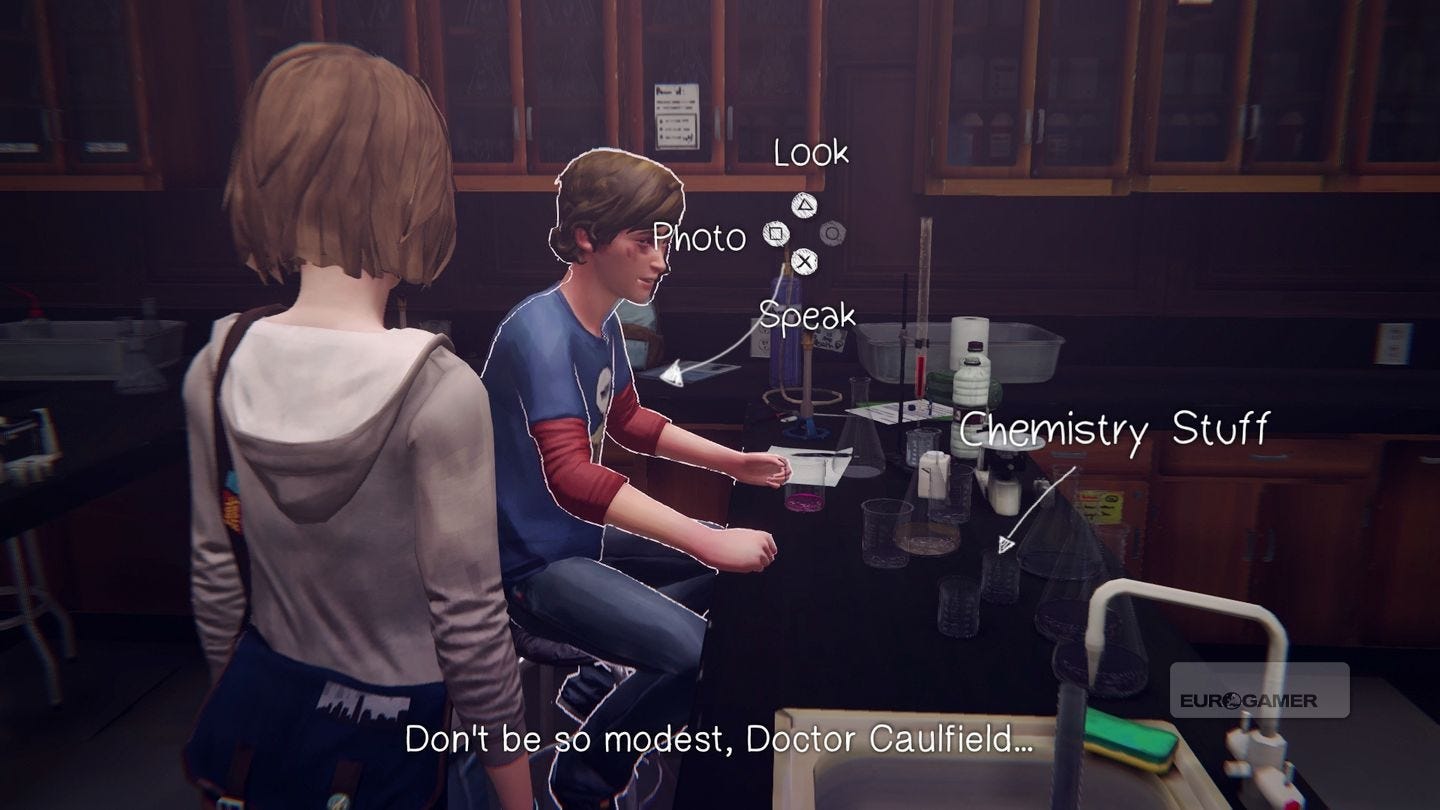
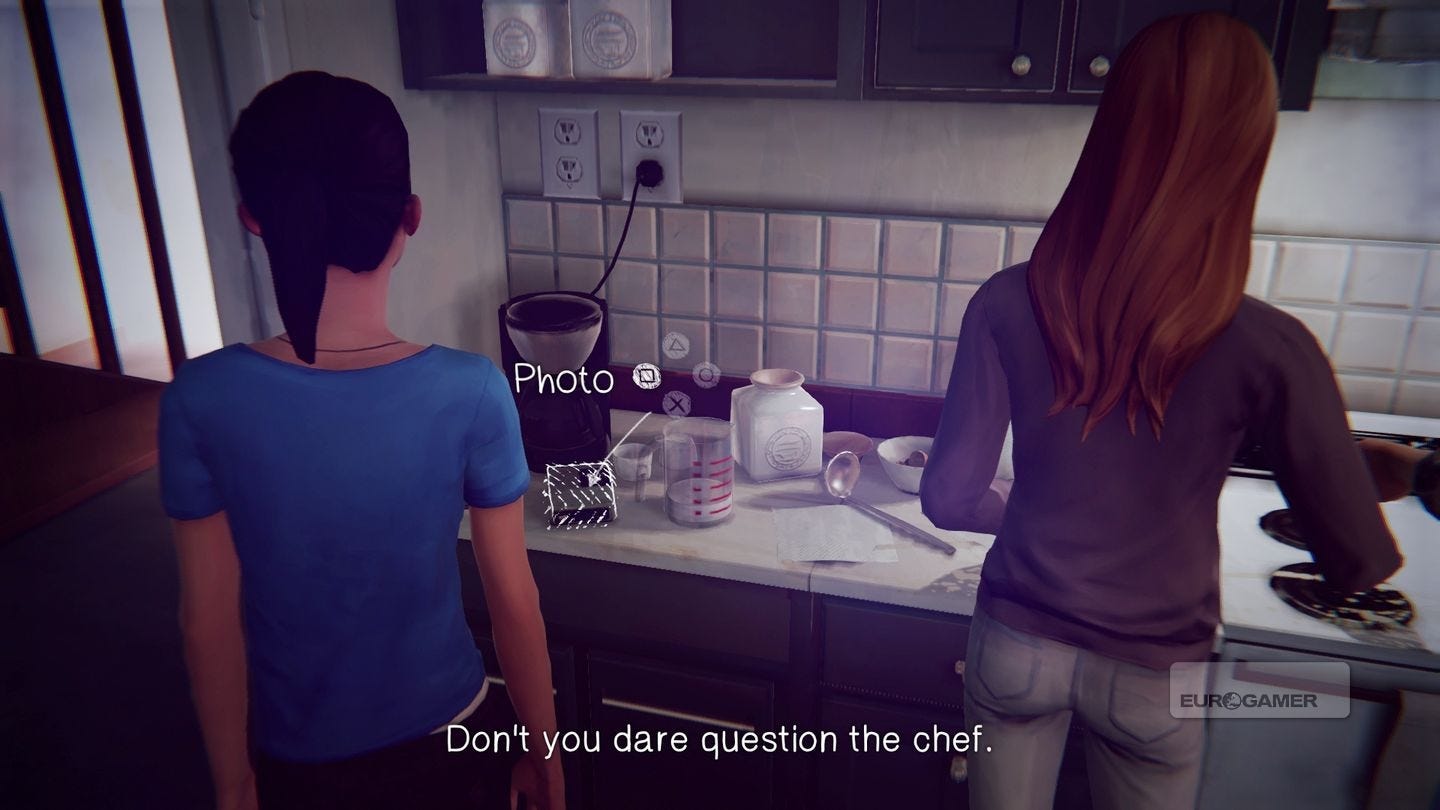
First, meet with Warren in the science lab (take a right from where you enter, past David, and it's on the left). Talk to him and suggest one of the compounds - it doesn't matter which, as the experiment will fail. Talk to the teacher and she'll tell you it's actually Chlorine you need.
Rewind time and suggest that to Warren instead, then take his picture once it's done.
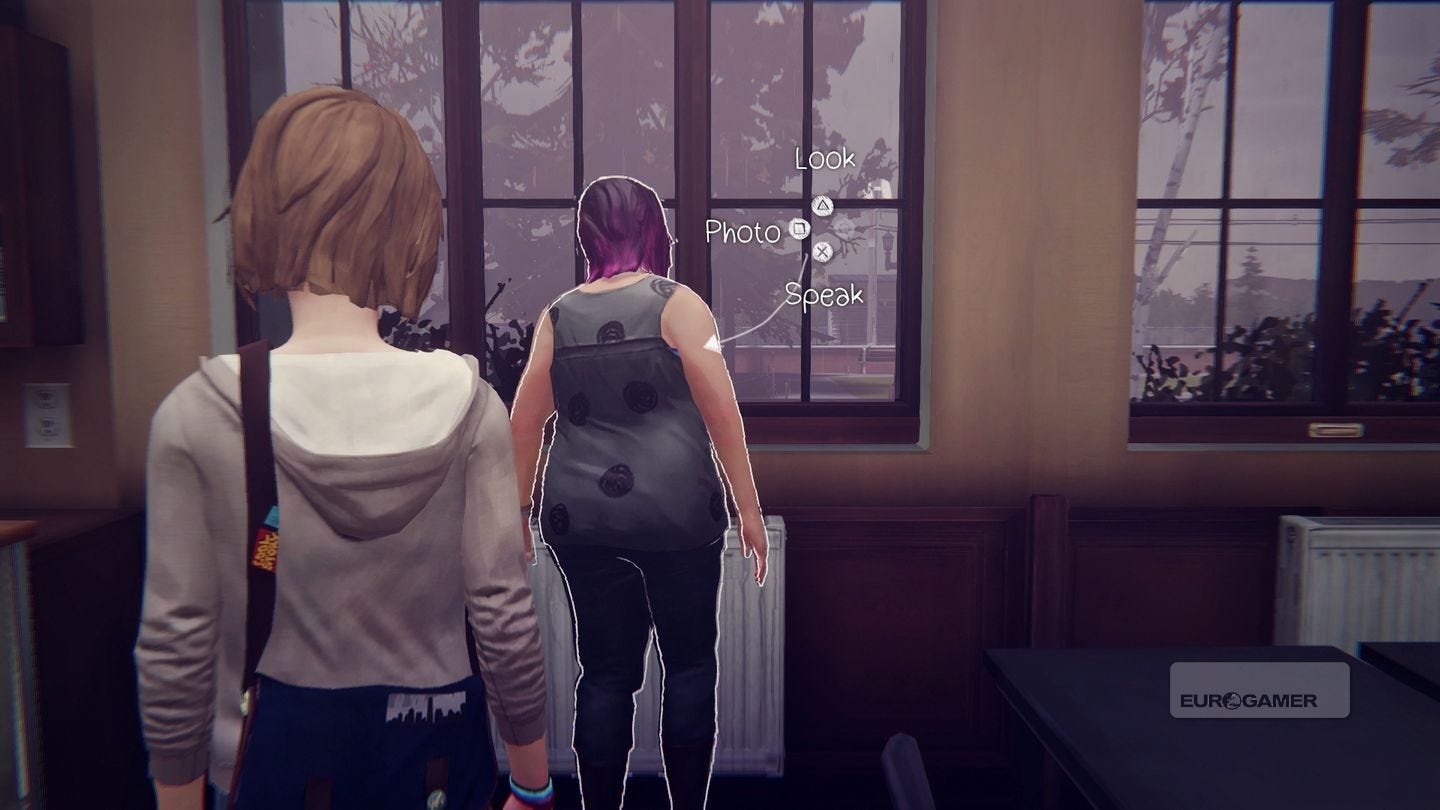
Continue playing by heading to art class (from the science lab, continue down the corridor and it's on the right) and after the chat with Jefferson outside, approach Alyssa by the window for the photo prompt.
Life Is Strange photo locations guide for Chapter 3
As described in the game's collectibles mode, this chapter's photos are in the following locations:
- Girls' Dormitories (1 photo)
- Dormitories (1 photo)
- High School - Evening (3 Photos)
- Chloe's House - Upstairs (1 Photo)
- Chloe's House - Downstairs (1 photo)
- Diner (2 photos)
- Chloe's House - Focus (1 photo)
Girls' Dormitories (1 photo)
Start the chapter as normal and play until you reach Victoria's Room (leave your room, speak to Dana in her room, then head over) and on the opposite wall of where you enter, on the left, is a glow in the dark figure.

This is what you need to snap. The prompt won't appear straight away, so look at it with your light to make it glow in the dark; keep focusing on it and walk around the room a little until it appears. (Thanks to Stephan, a.k.a. de_machine_ for the tip!)
Dormitories (1 photo)
Time to take a picture of our squirrel friend again. Head to the same bench as usual (it's on the right, near the edge of the campus) and you'll notice the squirrel flees when you get close. Stand next to the bench, rewind time so the squirrel appears again, then take the picture.
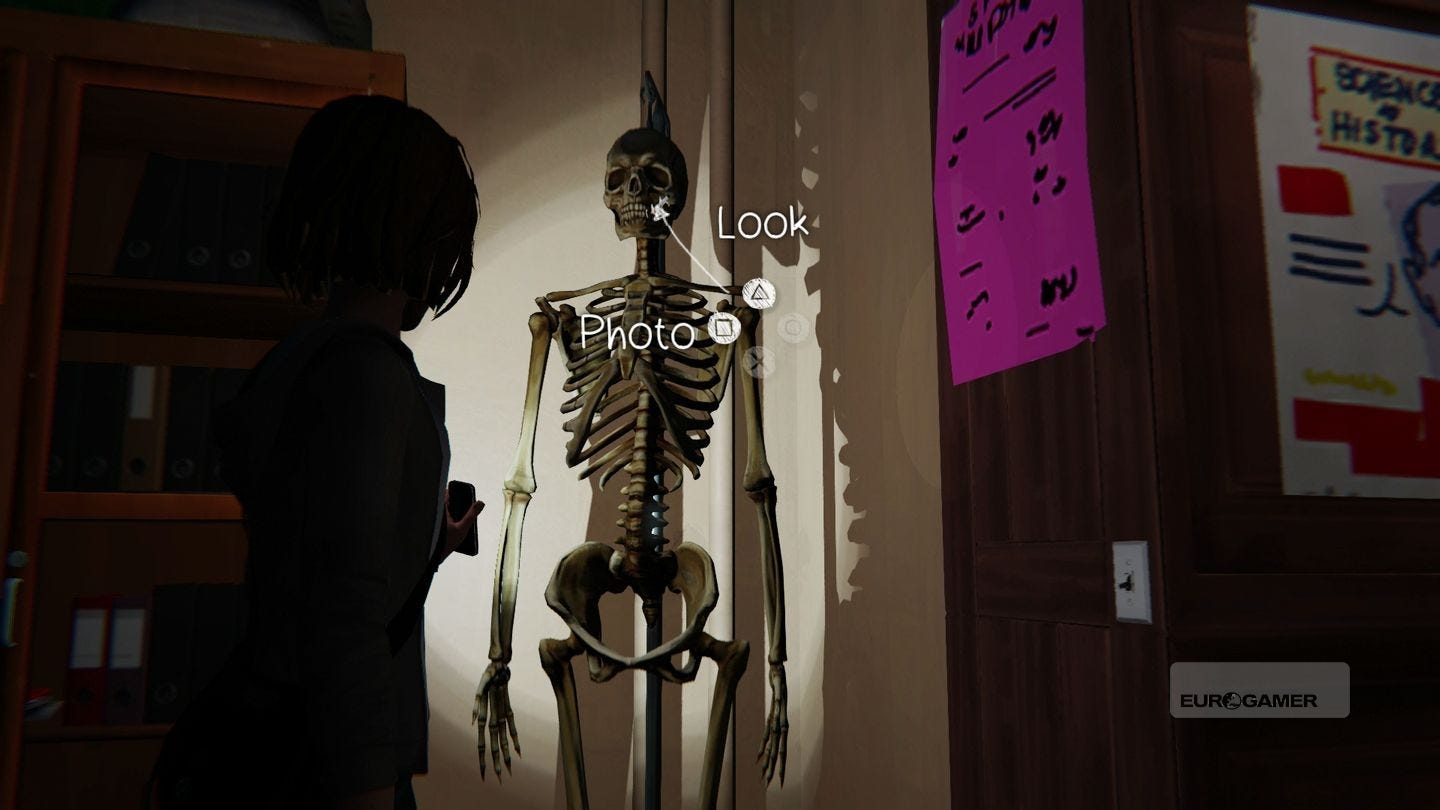
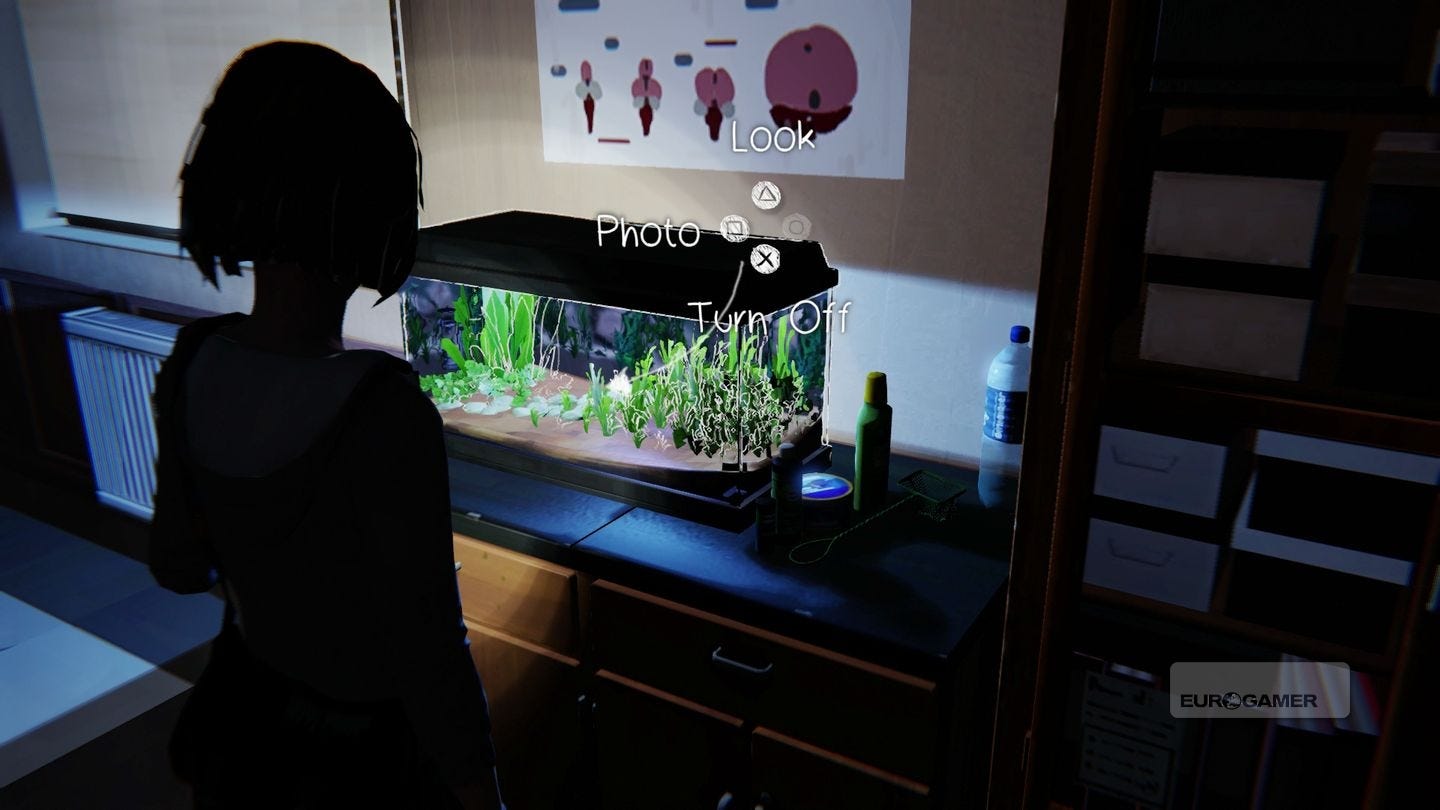
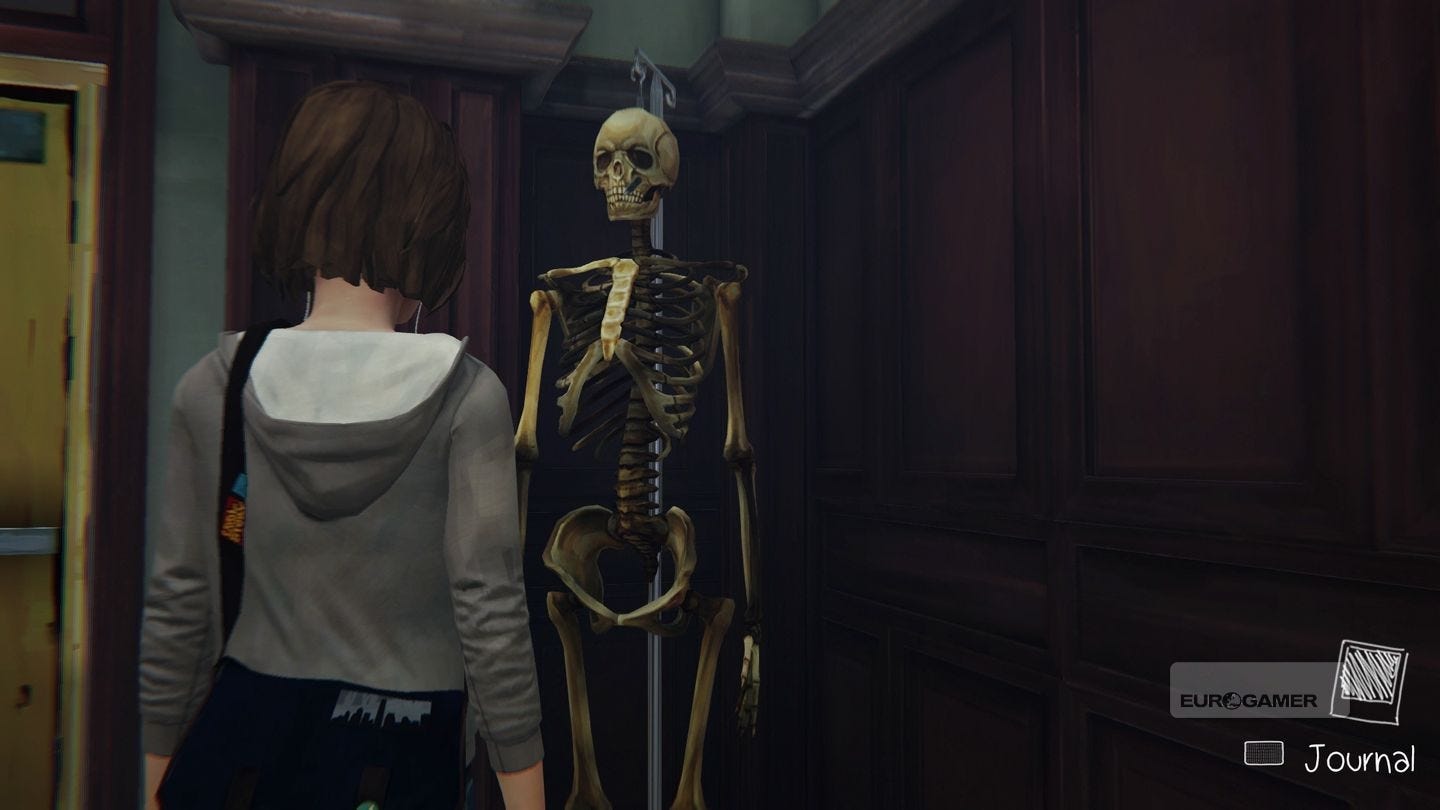
High School - Evening (3 photos)
Play as normal (speak to Chloe outside the principal's office, search the office until it says there's no key, and you text Warren) then head to the science lab. Go to the far right corner, where there's a skeleton with a cigarette in its mouth (this is next to where the weedkiller is found). Take the picture.
Before you leave the lab, head to the fish tank on the long wall opposite where you come in. Investigate the tank, turn on the light, then take a picture.
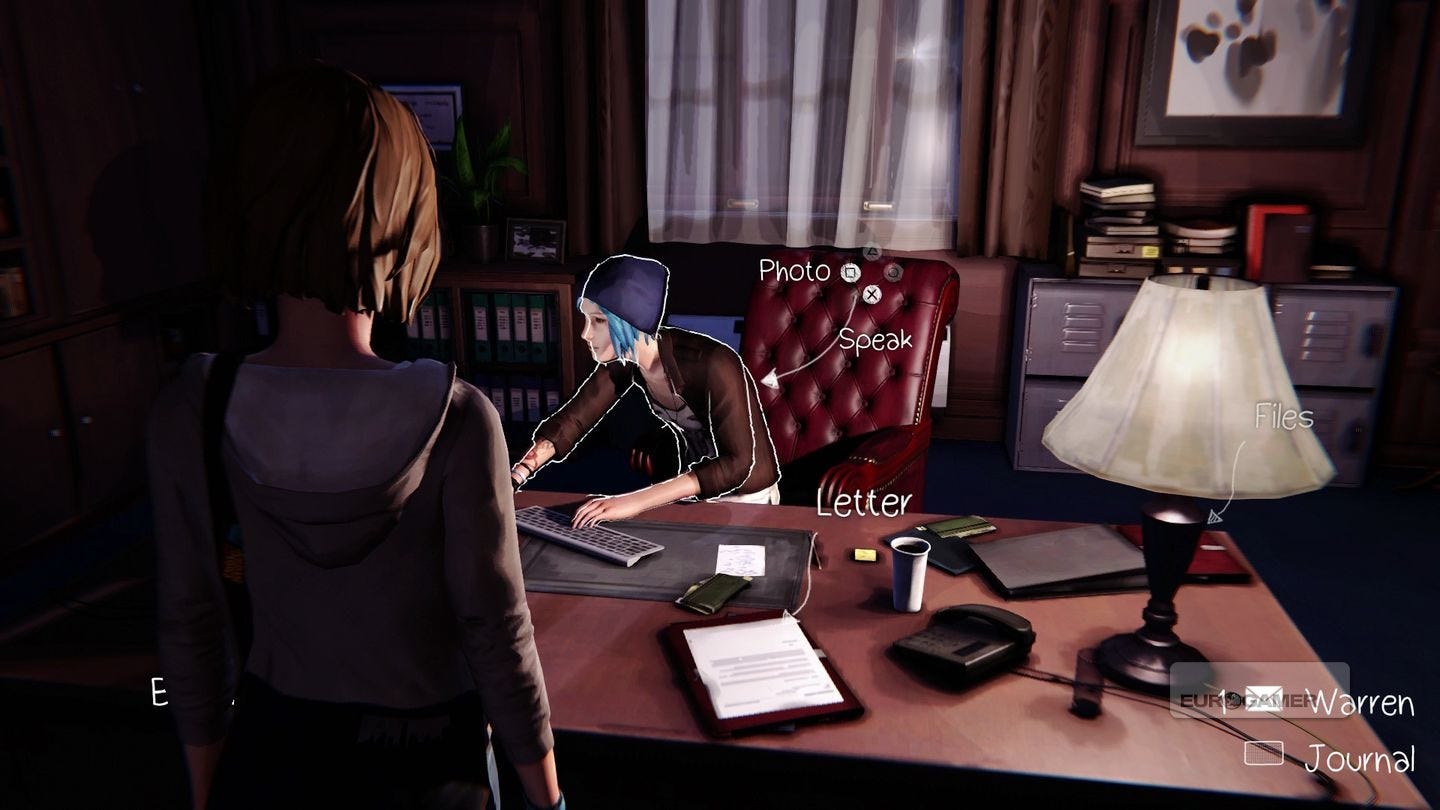
Continue playing (get sugar from the teacher's desk and weed killer next to the skeleton in the science lab, duct tape from the corner of the art room, and a soda can from the vending machine in the corridor; talk to Chloe, then stand inside the room and rewind) until Chloe is in the Principal's Office.
The photo is of her at the desk, with you standing on the other side.
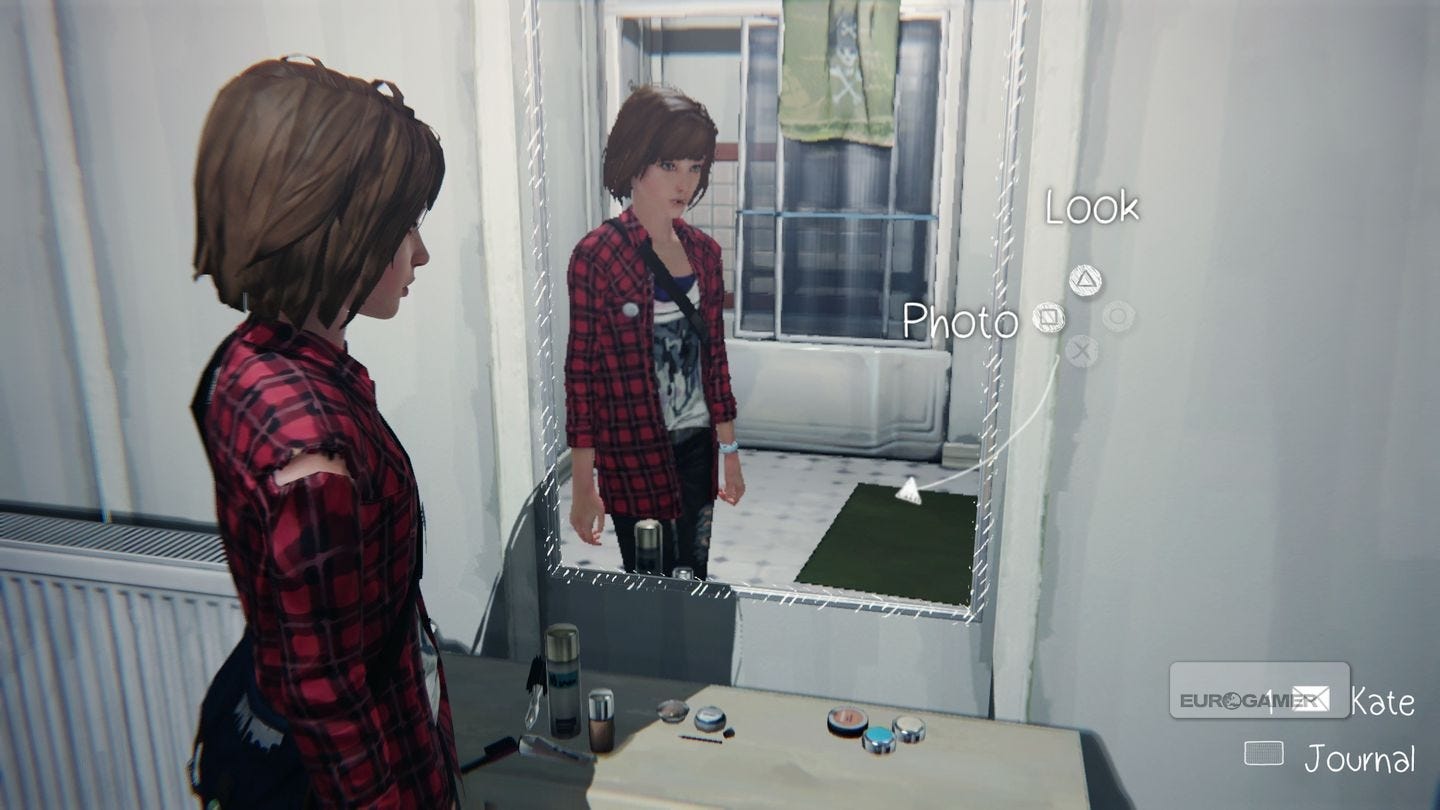
Chloe's House - Upstairs (1 photo)
Play the section as usual (investigate clothes on the chair, investigate the wardrobe) then head to the bathroom outside the room. Face the mirror and take a picture.
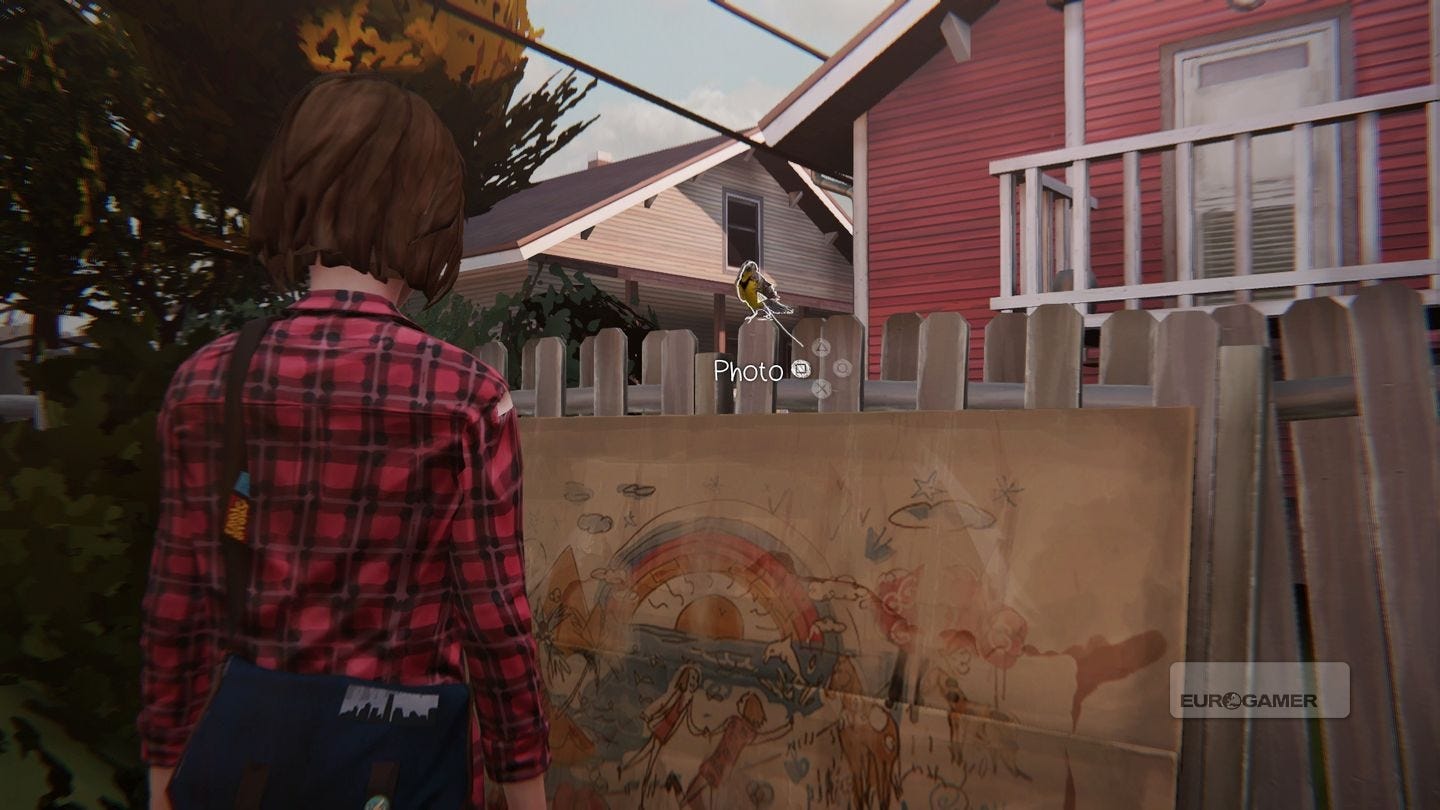
Chloe's House - Downstairs (1 photo)
Head to the corner of the living room, where there is a bird high up on the cabinet - it's easy to miss. Approach until you can scare it.
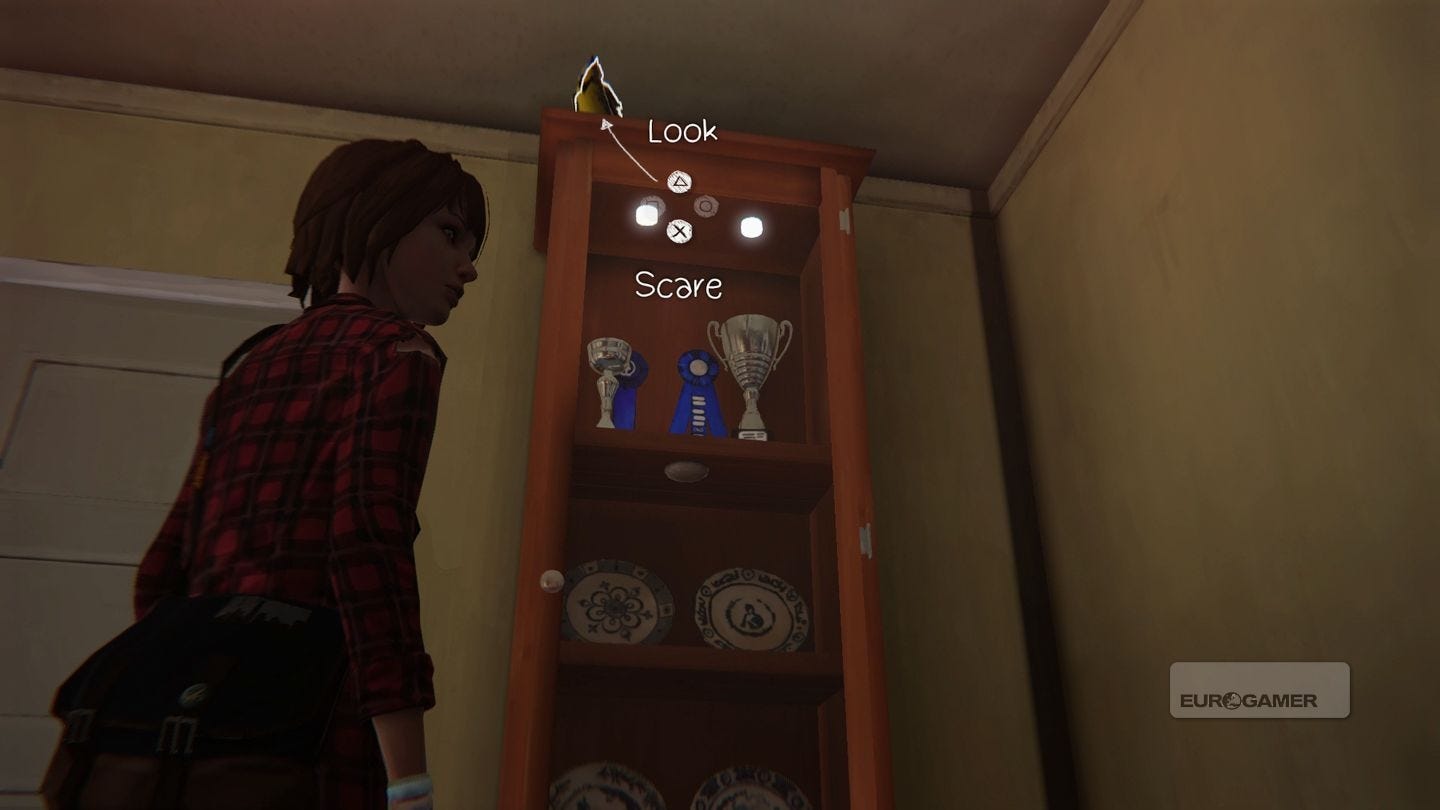
It'll then fly to above the fire. Before you do anything, open the window to the left, then scare it, so it goes outside.
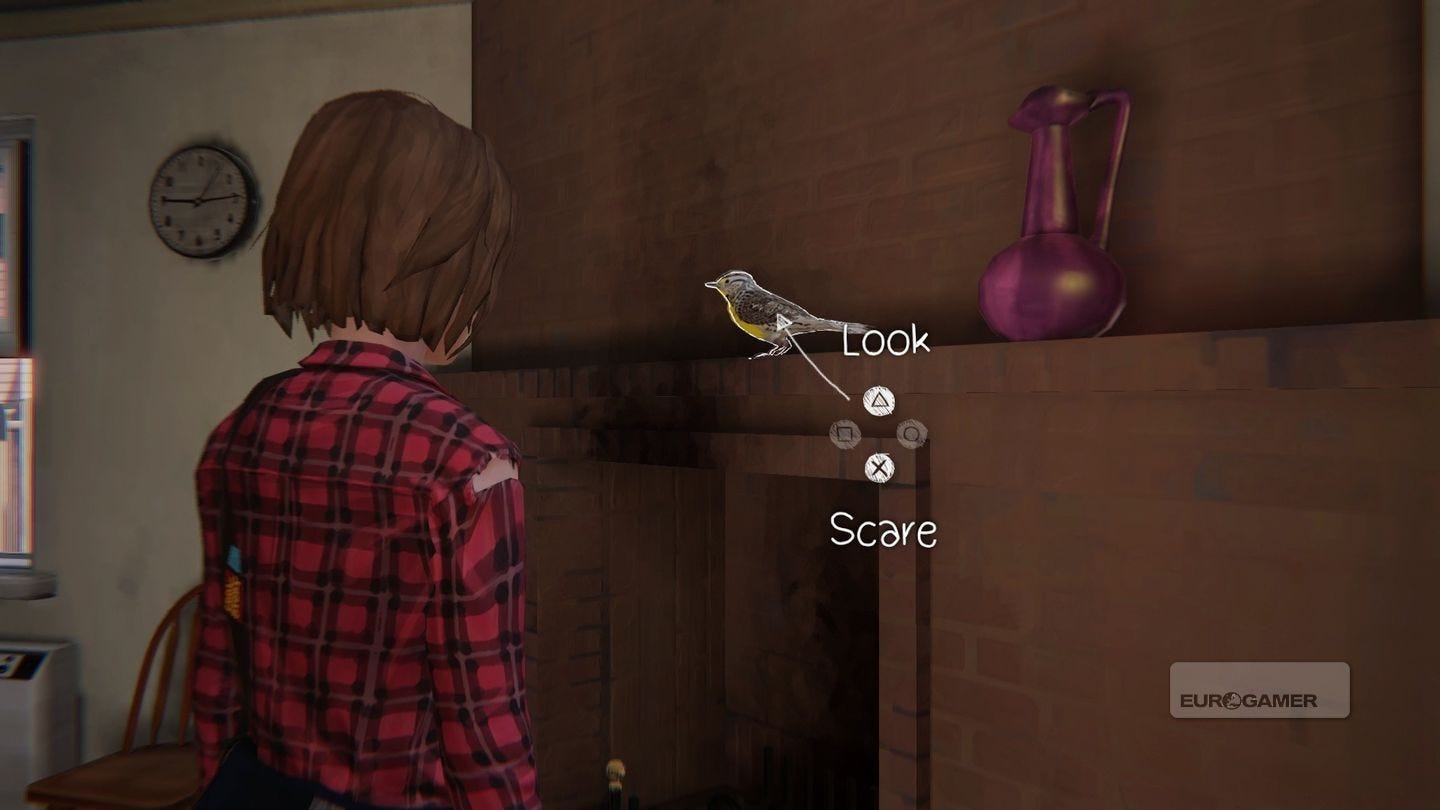
Finally, head outside using the sliding door, then approach the fence on the far left where the bird is now waiting for you to take its picture.
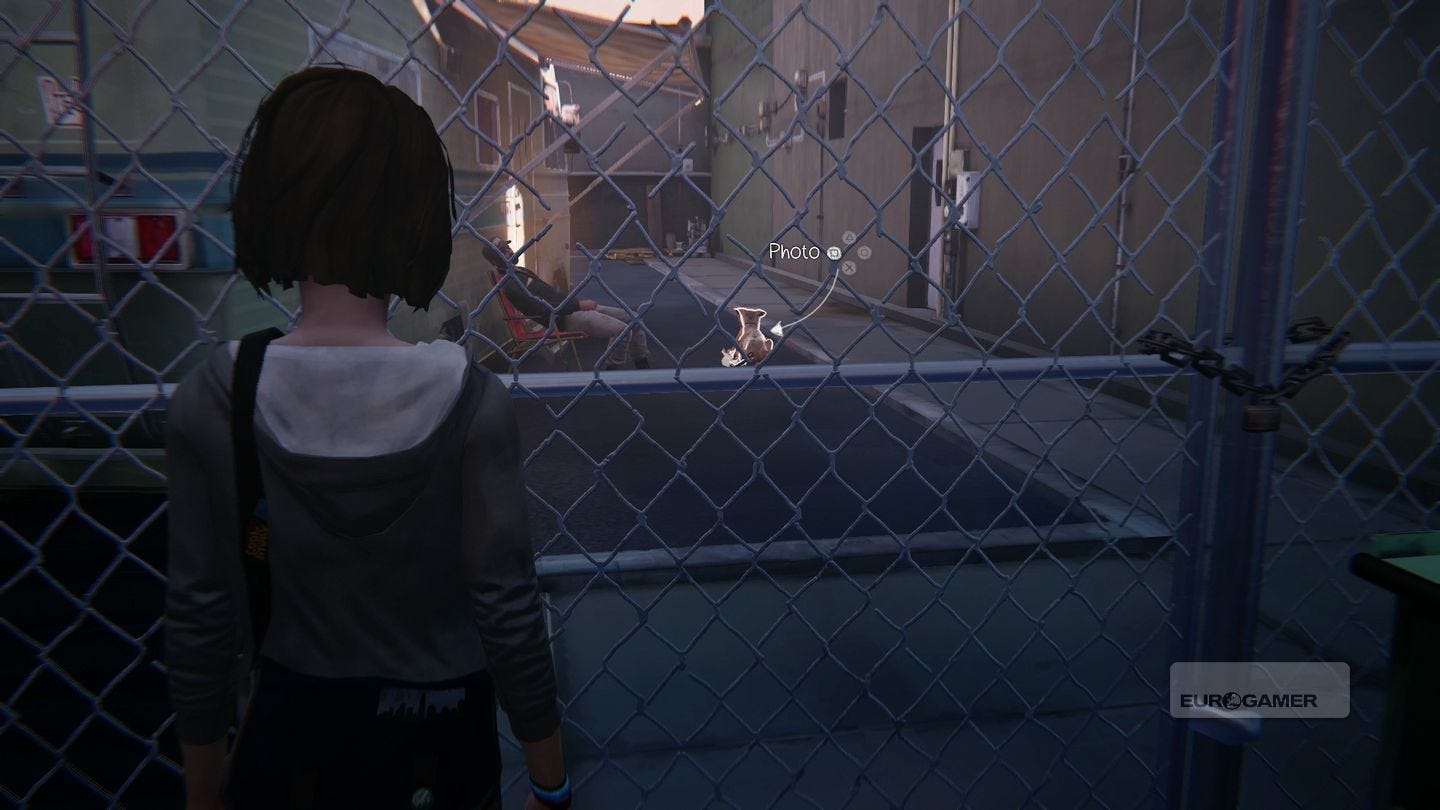
Diner (2 photos)
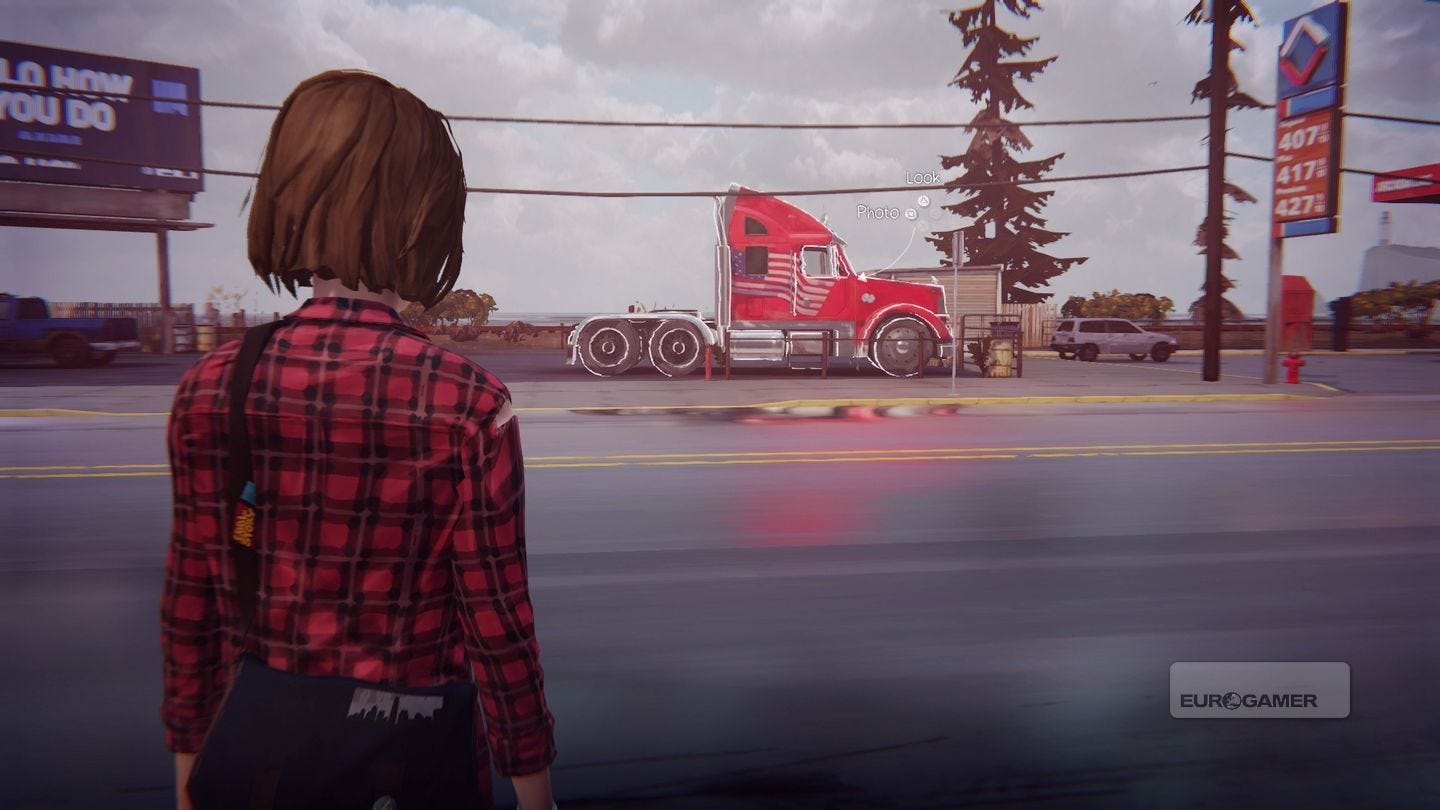
Head to the diner entrance and speaker to the trucker. Strike a conversation, then rewind to reveal the response '1977 Needham'.
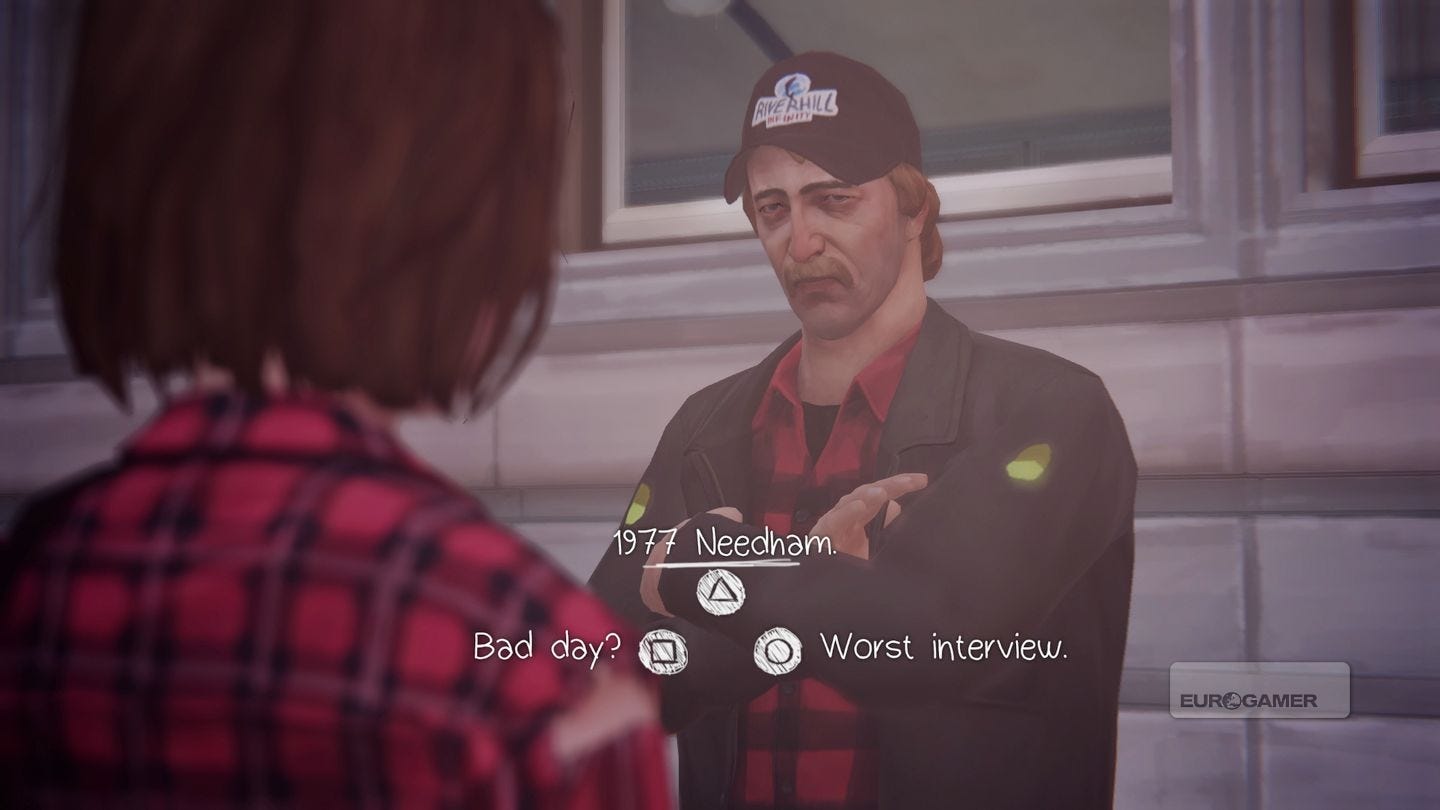
Then respond Rachel Amber. You can now take the photo of the red truck opposite.
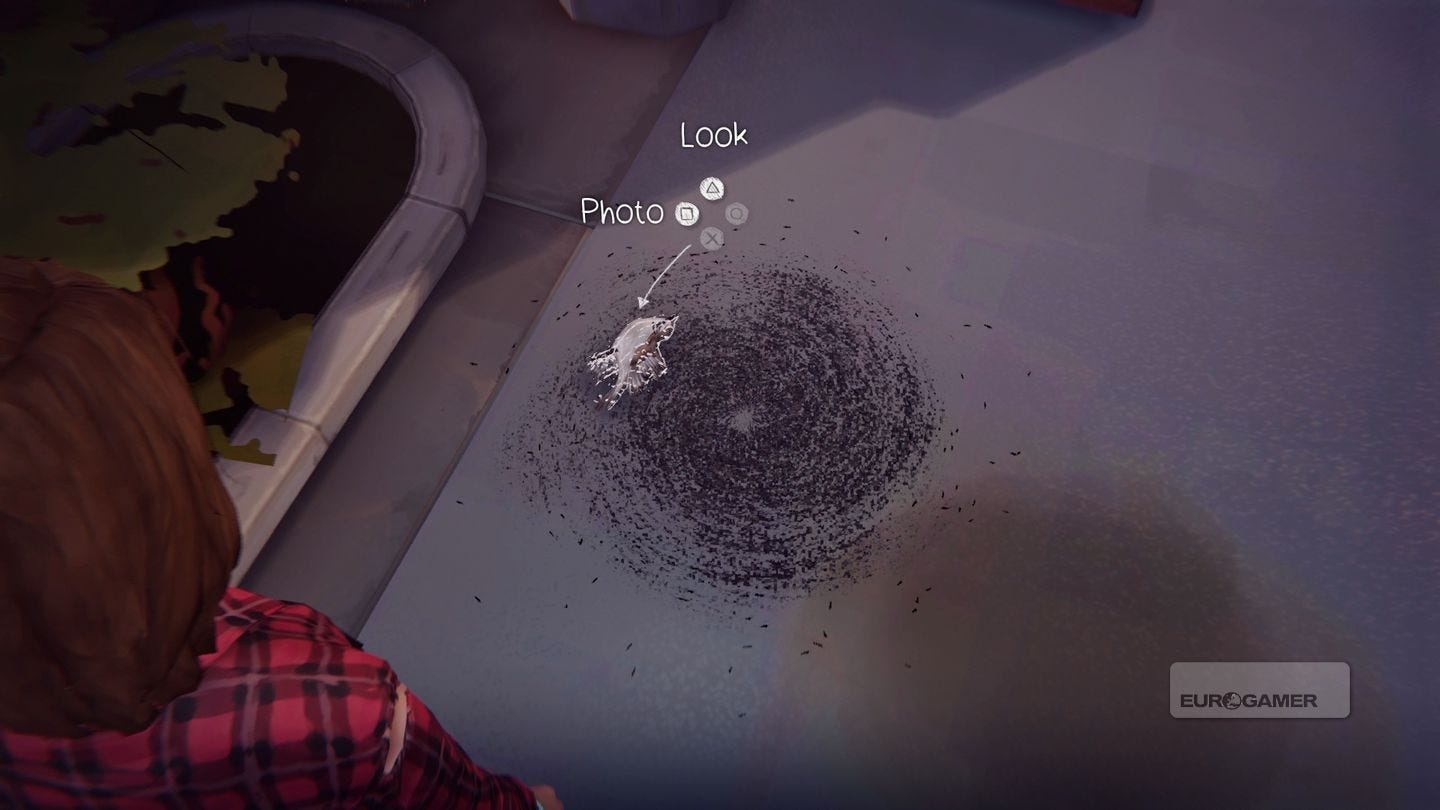
Before you head inside, continue round the outside of the diner towards the back alley. Before you reach the homeless person is a dead bird on the left, surrounded by a mass of ants - this is the second photo.
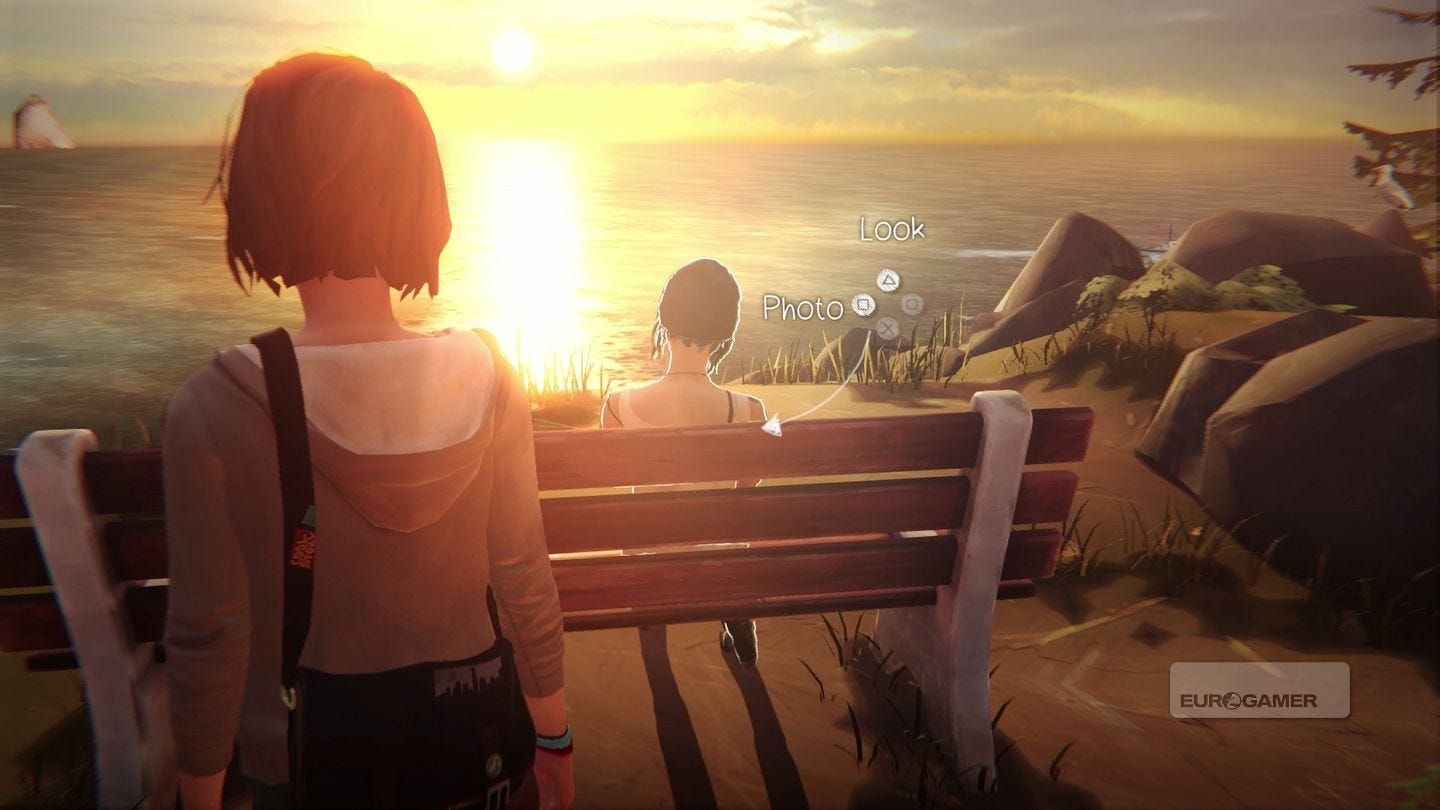
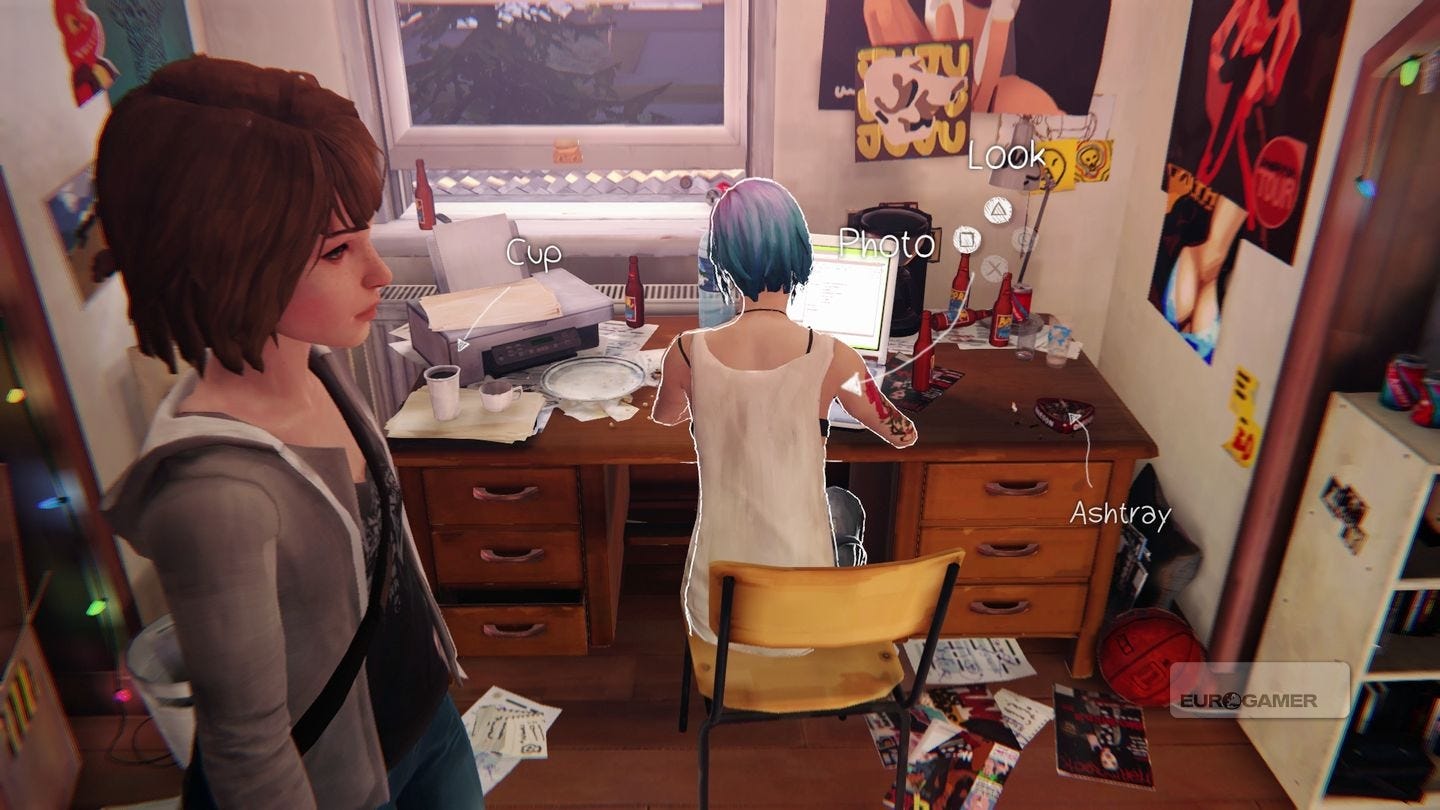
Chloe's House - Focus (1 photo)
As soon as this segment starts, walk to the counter to the left of Chloe to find a camera. Get close enough to it and the photo prompt will be visible.
Life Is Strange photo locations guide for Chapter 4
As described in the game's collectibles mode, this chapter's photos are in the following locations:
- Chloe's House - Upstairs (1 photo)
- Chloe's House - Downstairs (1 photo)
- Dormitories (2 photos)
- Boys' Dormitories (1 photo)
- Beach (1 photo)
- Old Barn (2 photos)
- Swimming Pool - Party (2 photos)
Chloe's House - Upstairs (1 photo)
As soon as the segment starts (it's when you're back in the present day) and you get off the bed, turn left to see Chloe at the desk. Take a picture of her from where you are standing.
Chloe's House - Downstairs (1 photo)
Head into the garage, and to the left of the door is a bird's nest tucked behind a plank. Look at the nest, then you'll be able to move the plank, allowing you to take a photo.
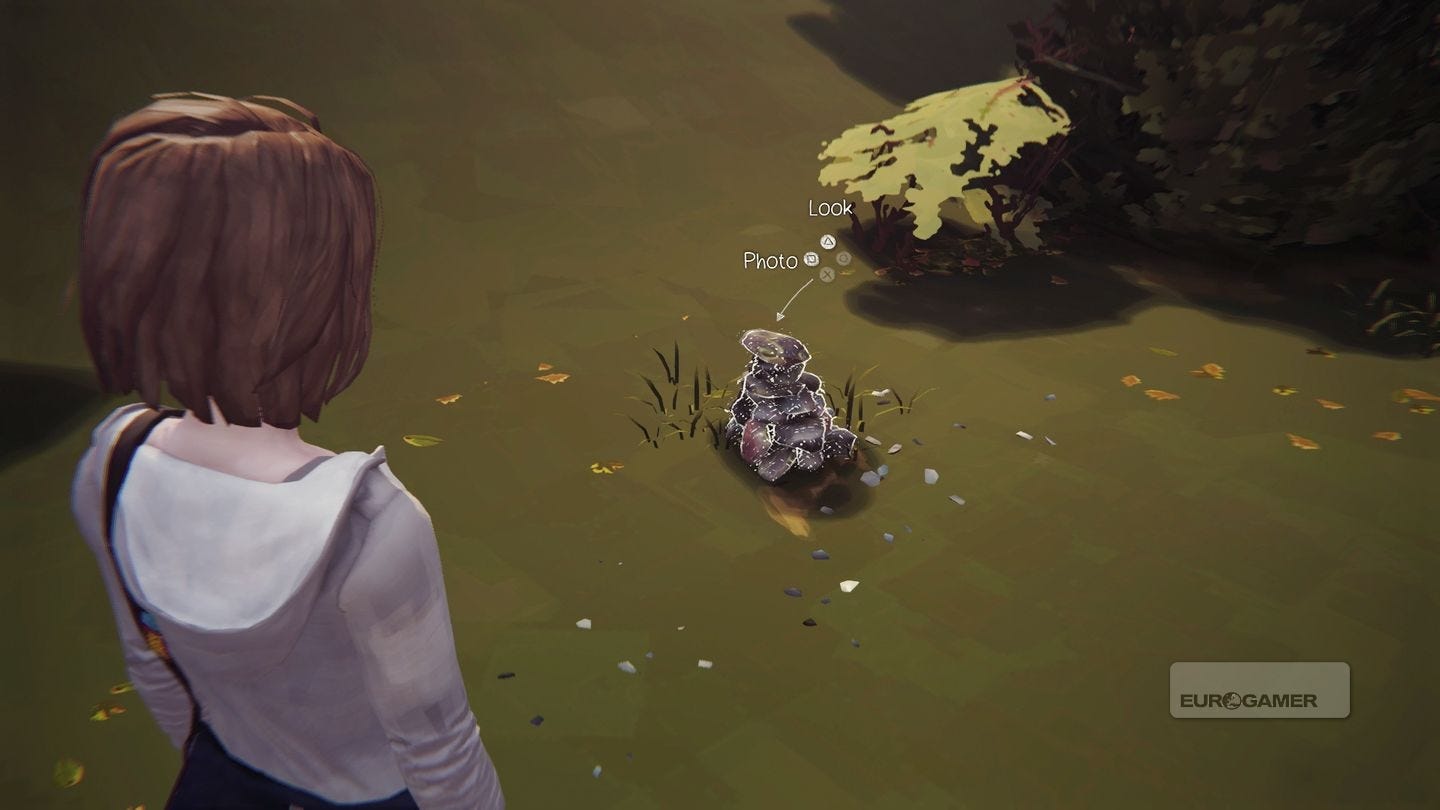
Dormitories (2 photos)
When you begin, run down the path, and cut left onto the grass where there's a Cairn. Get close enough to take a picture.
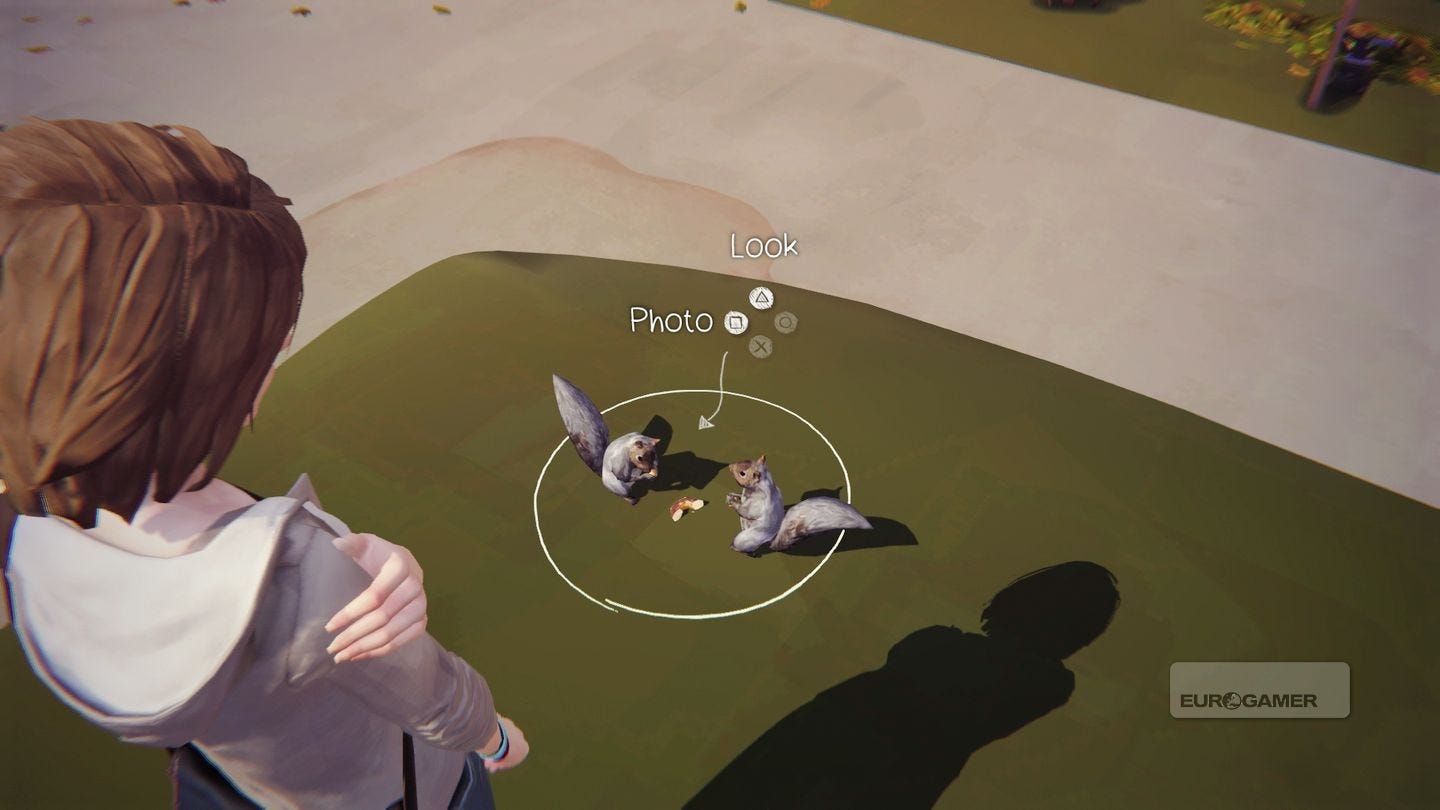
Next, chat to Samuel (who is sat on a bench next to Ms. Grant) and chat to him about Animals, then Squirrels, which sees him beckon one over with food.
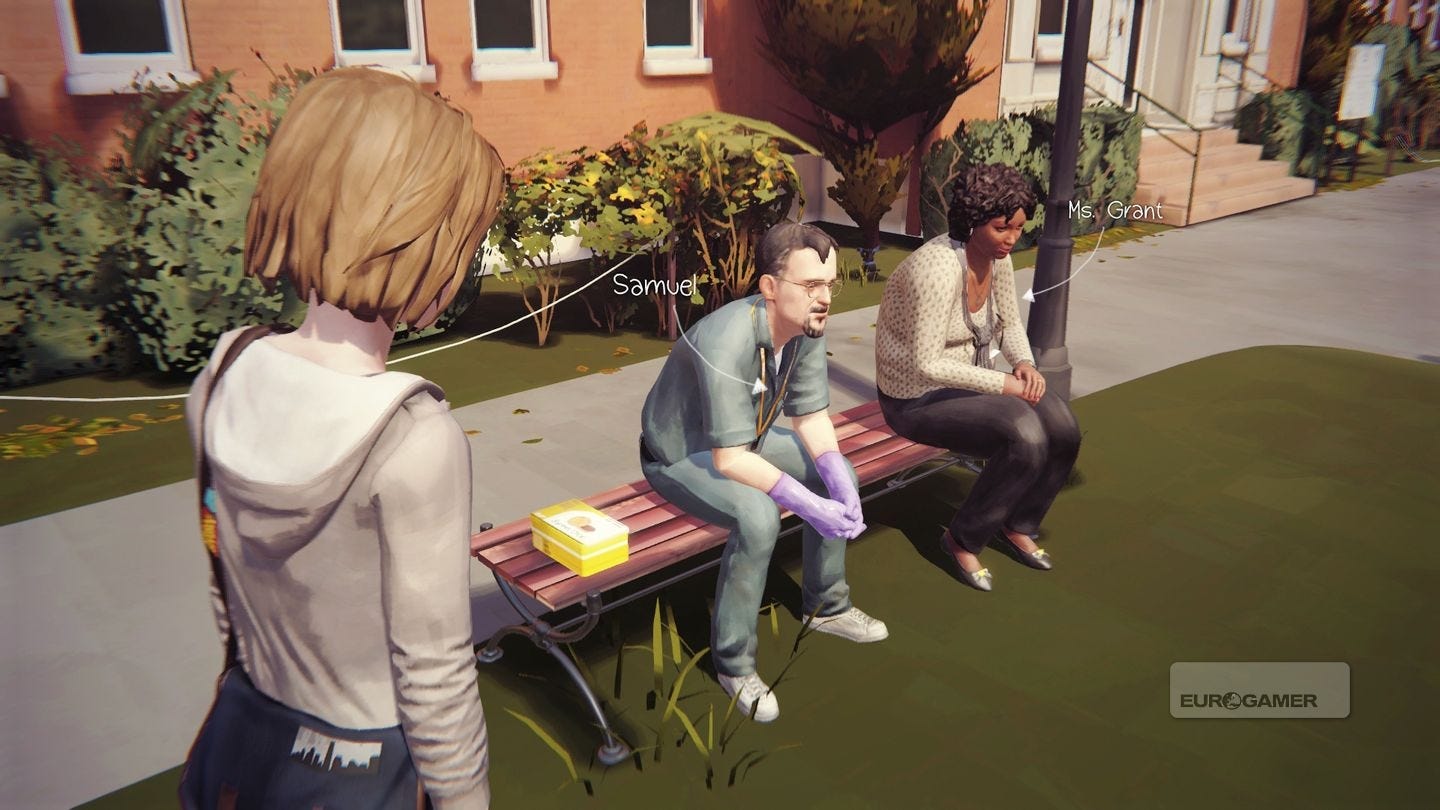
Do the same by interacting with the box of food sat next to him, and wait for another squirrel to come over. Take a picture of the two together.
Boys' Dormitories (1 photo)
Turn right as soon as you begin, past the toilet roll on the floor, and to the window. You'll see footprints on the hill; getting close enough will bring up the photo prompt.
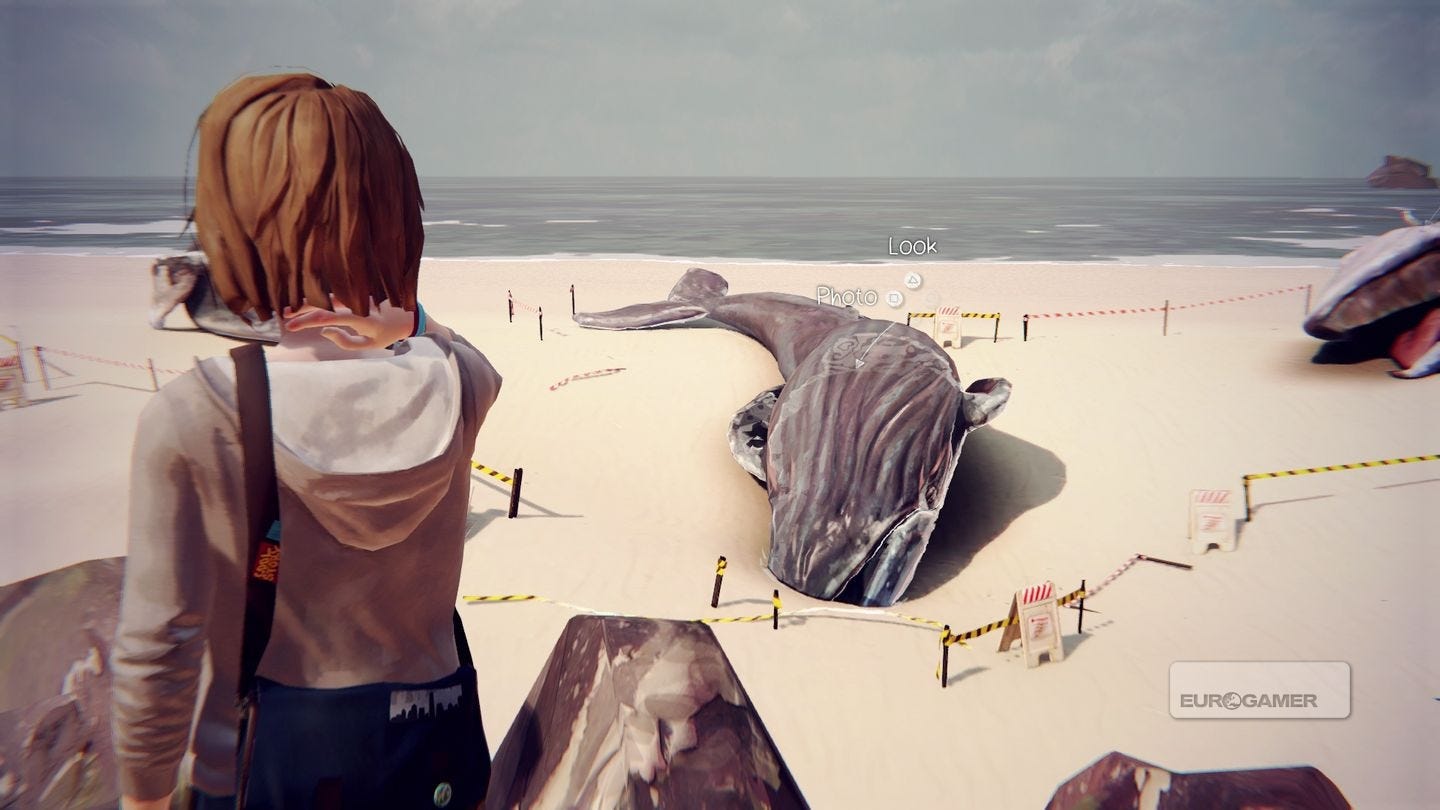
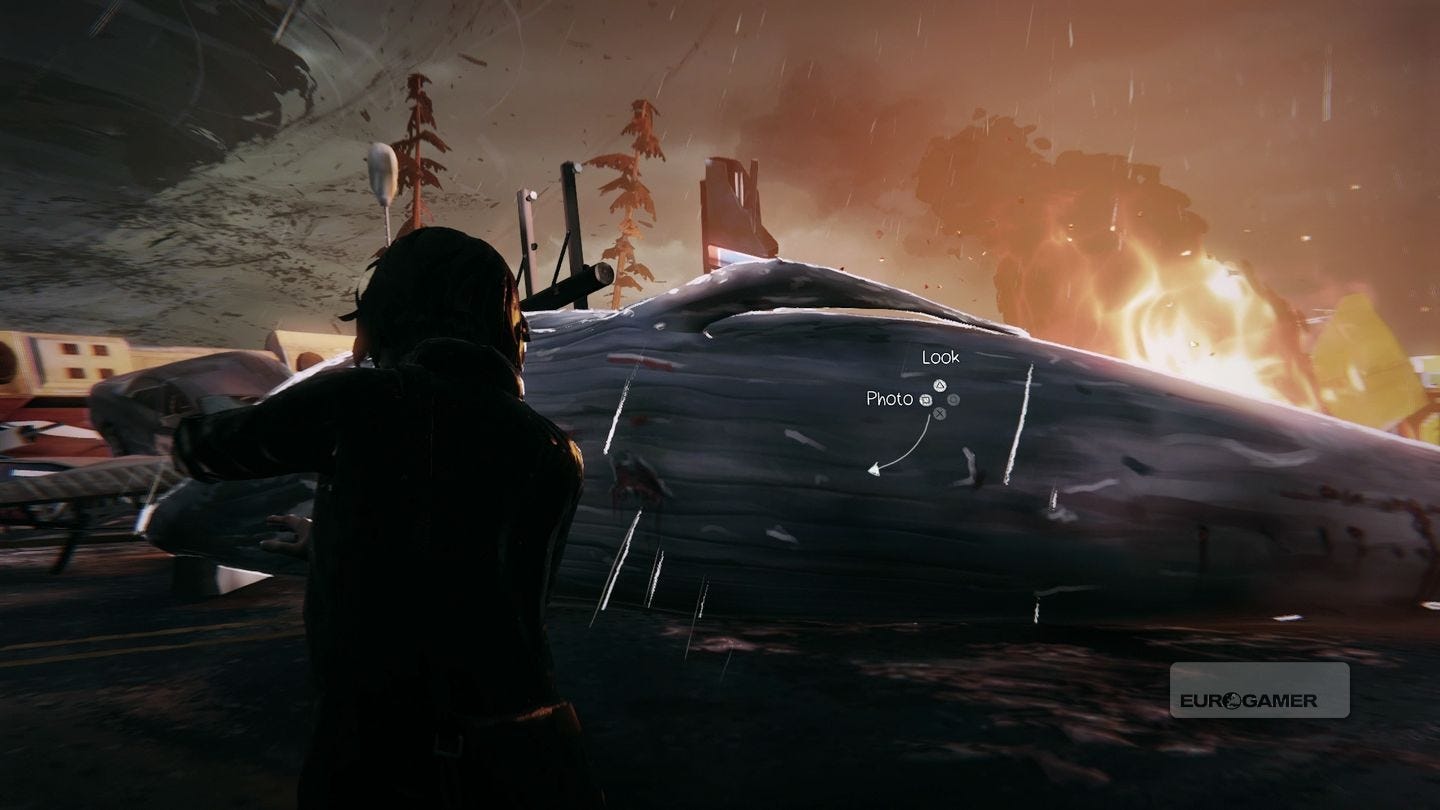
Beach (1 photo)
As soon as you begin, run to the right and look out to the beached whales. The one closest to the RV can be photographed.
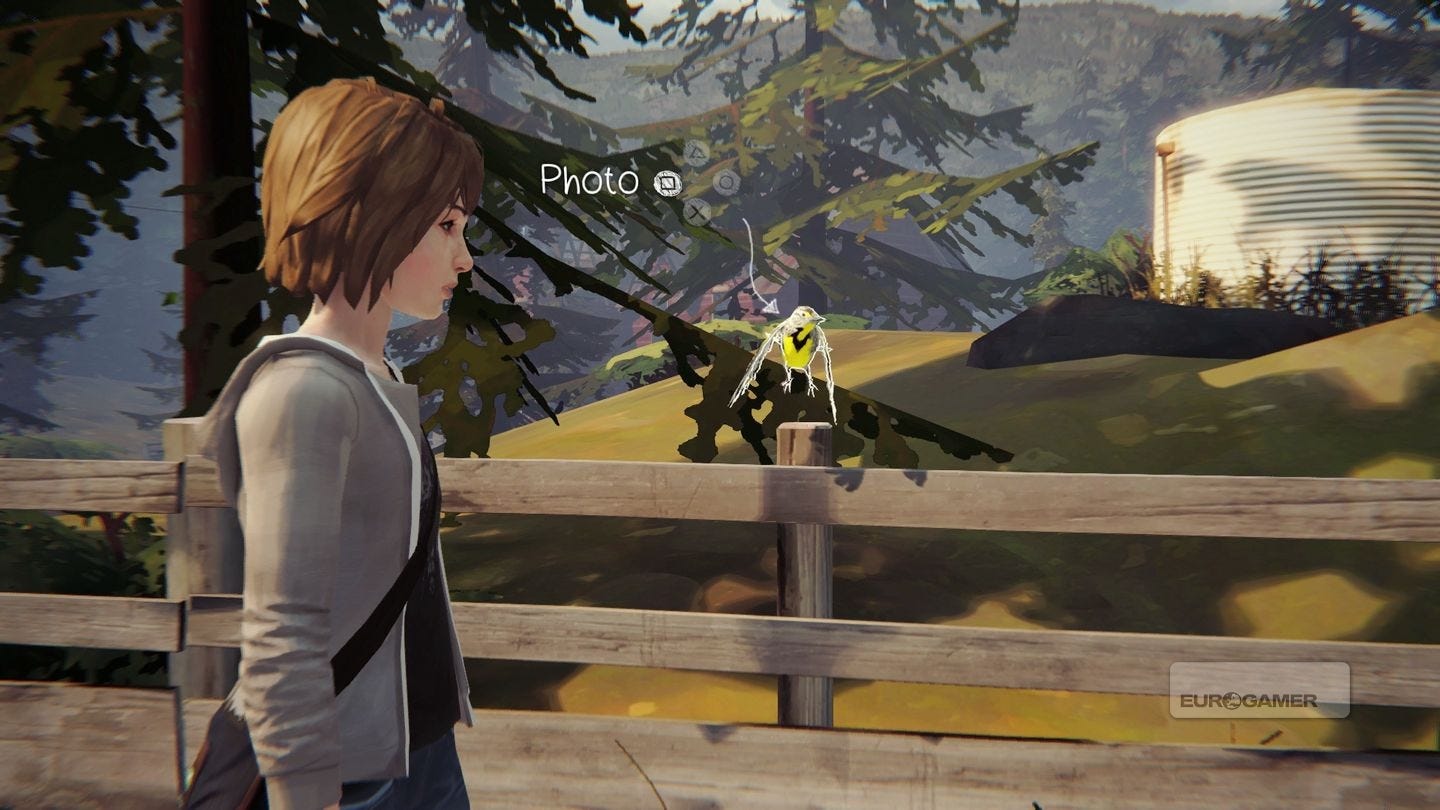
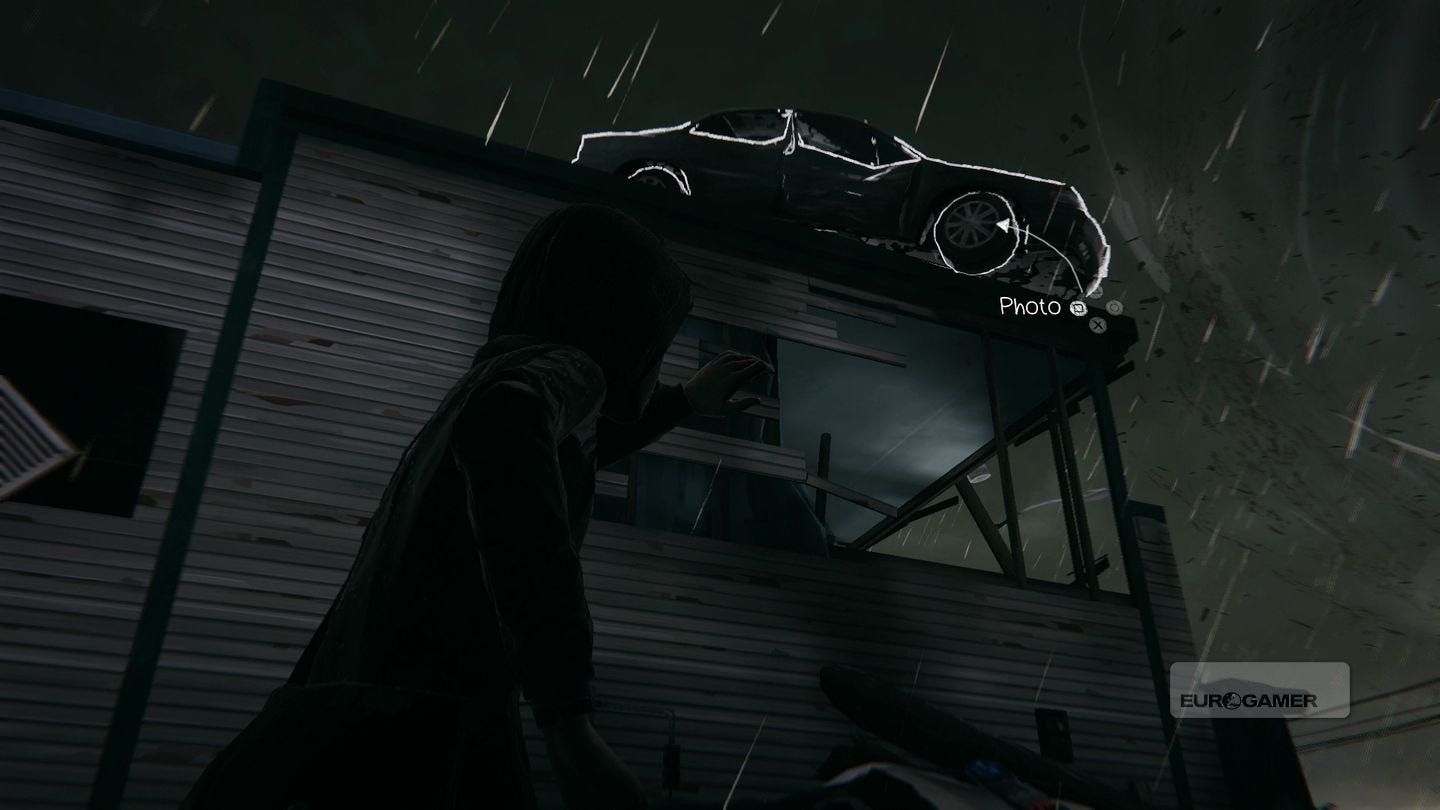
Old Barn (2 photos)
When you begin, go left along the outside of the barn, and spot the bird on the fence. If it's not there, it's flown away (and will do anyway even if you get close). Rewind time until it appears, and quickly take its picture.
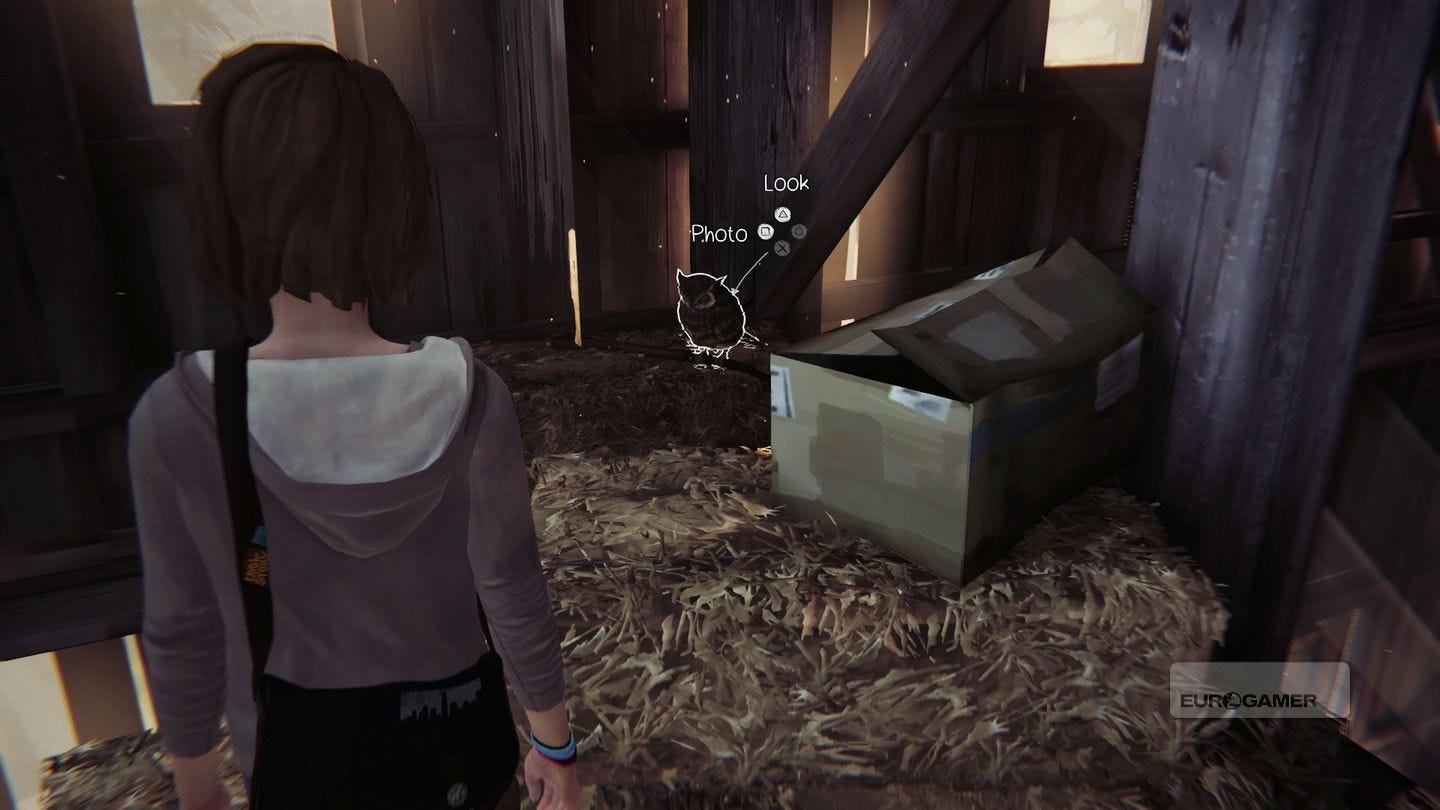
Continue playing (move the metal sheet round the side of the barn to gain access, uncover the hatch in the floor under the shelving, attach the hook nearby then climb the ledge right of Chloe, and up again) until you're in the roof of the barn. At the far end behind the hay bales is an owl - snap away.
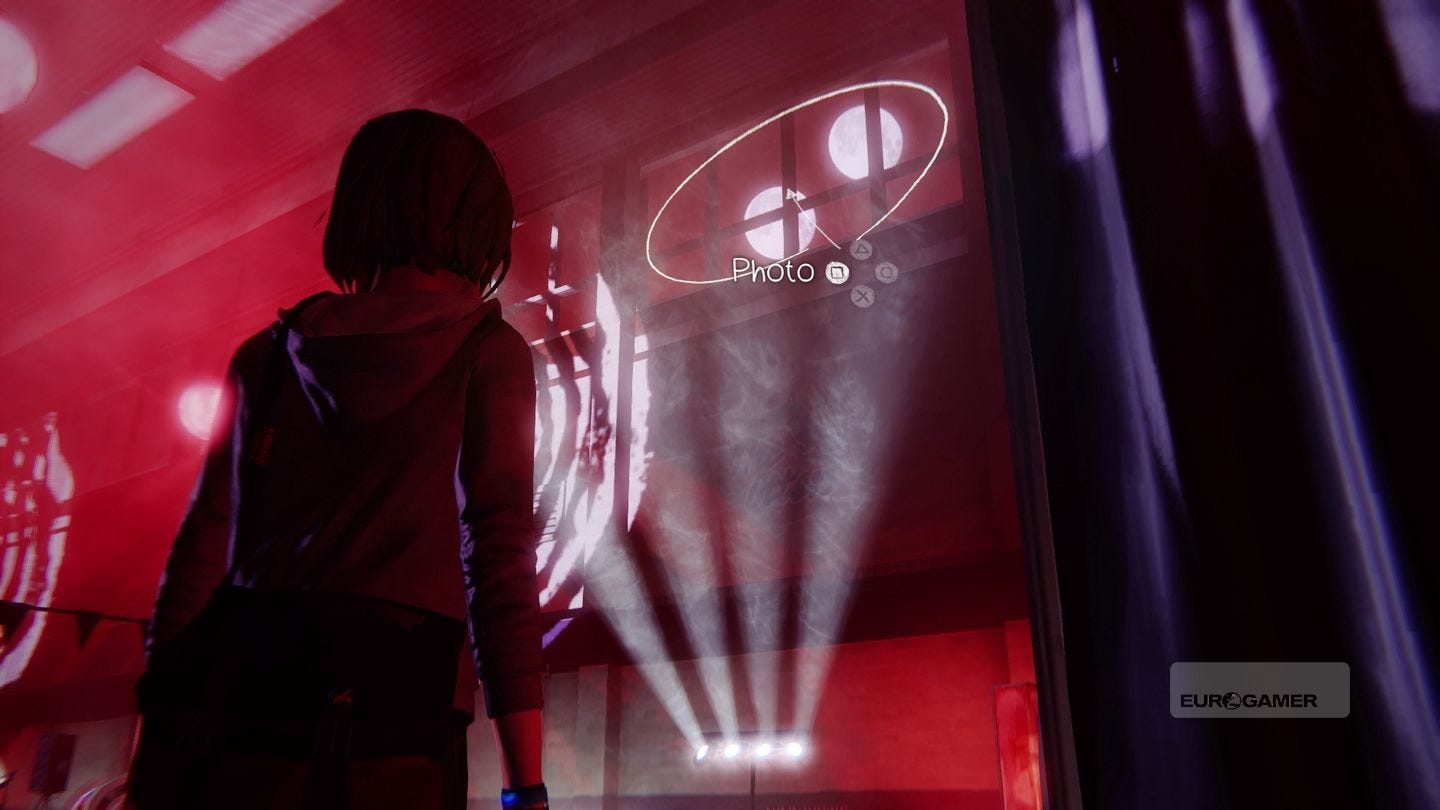
Swimming Pool - Party (2 photos)
As soon as you enter the curtain to the party, turn right and look up and right to see the two moons out the window. At the right position, you'll see the photo prompt.
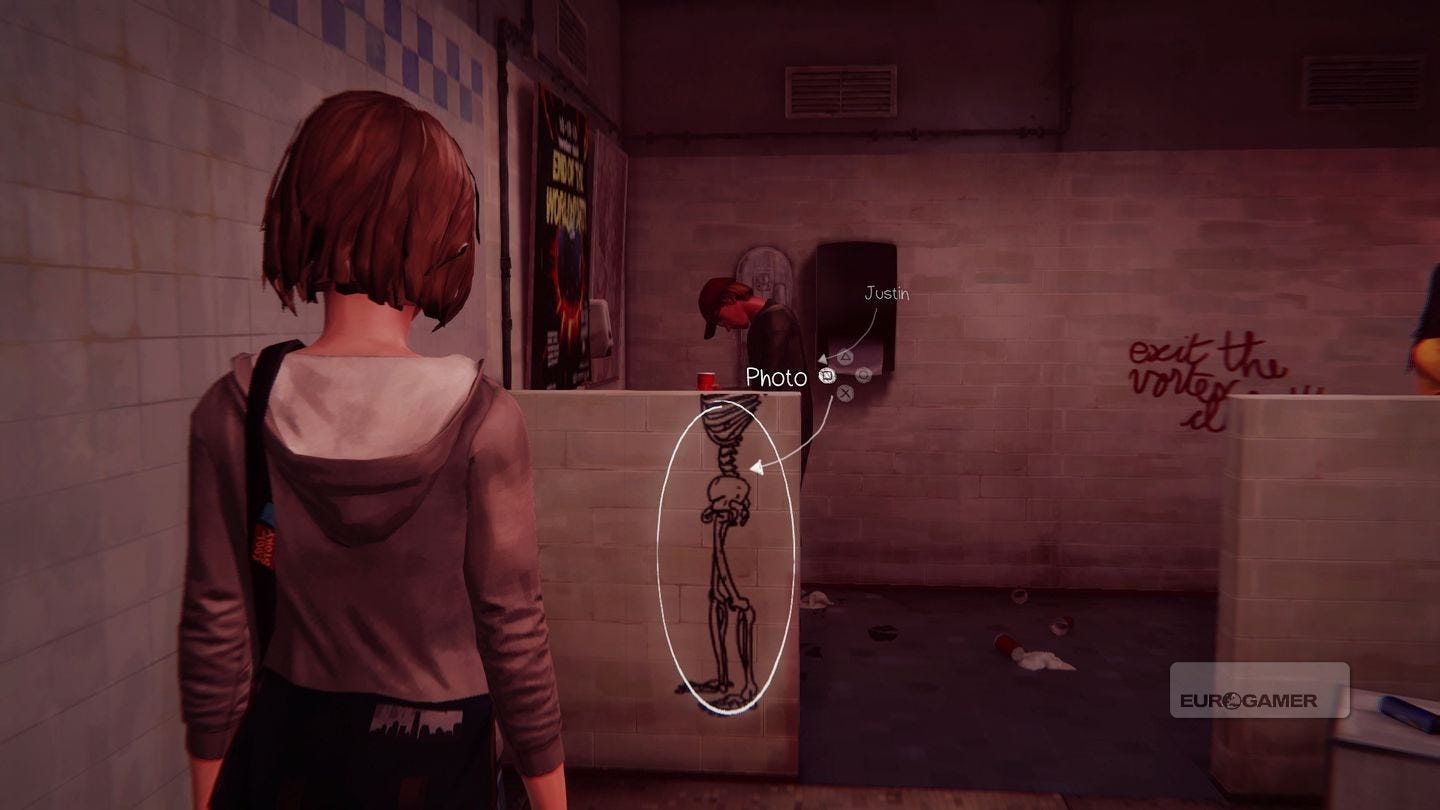
Next, head round the pool to the VIP desk, then go through the door on the left to the restroom. If you turn left again, you'll see Justin using the urinal behind a drawing of a skeleton. Get the position right and the photo prompt will appear.
Life Is Strange photo locations guide for Chapter 5
As described in the game's collectibles mode, this chapter's photos are in the following locations:
- Art Class - Focus (1 Photo)
- Art Gallery (1 photo)
- Dark Room - Confrontation (1 photo)
- Diner (2 photos)
- Nightmare (5 photos)
Art Class - Focus (1 Photo)
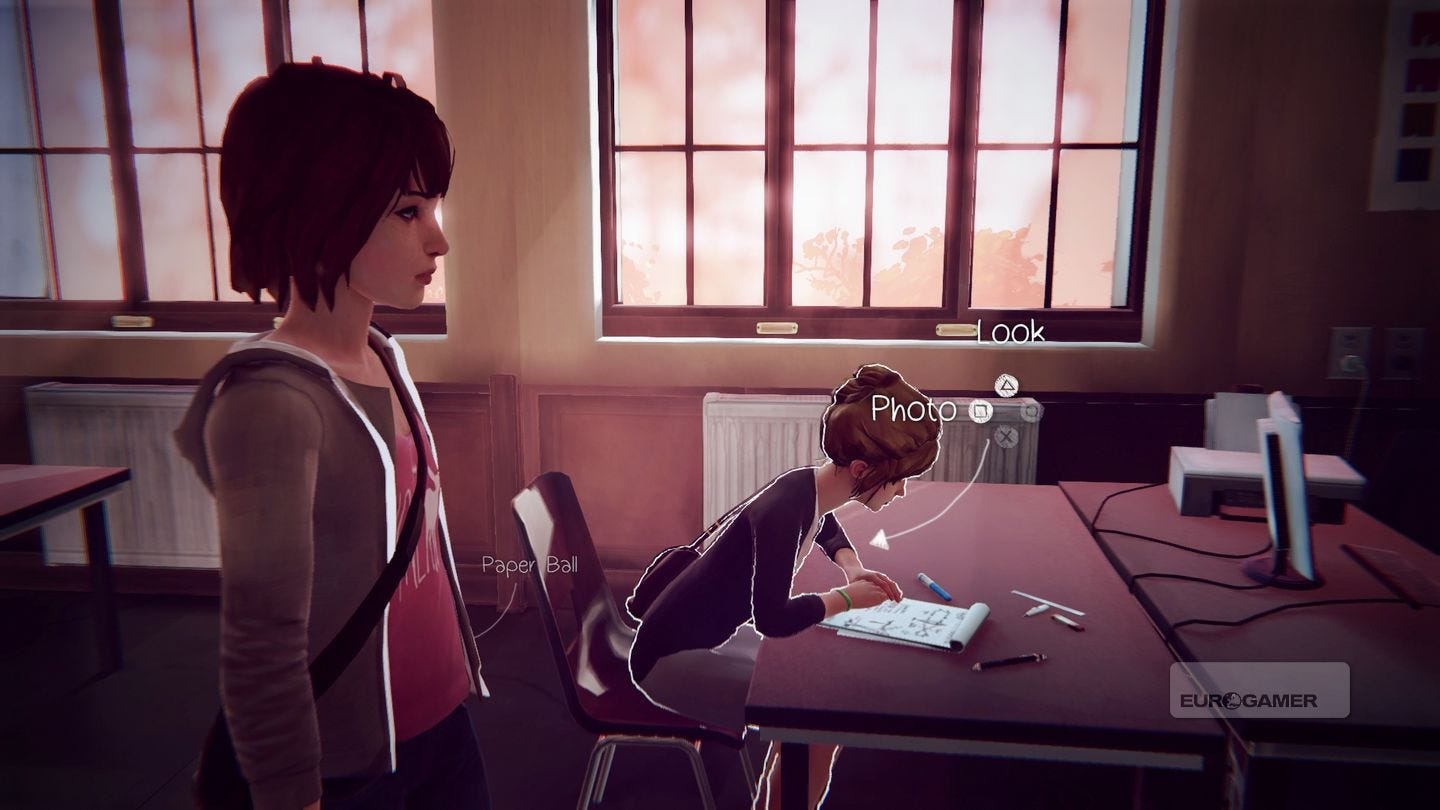
Play the section as normal (check your bag, then your phone at your desk) then approach Kate on the right. Use the comfort option, and after the chat, you can take her photo.
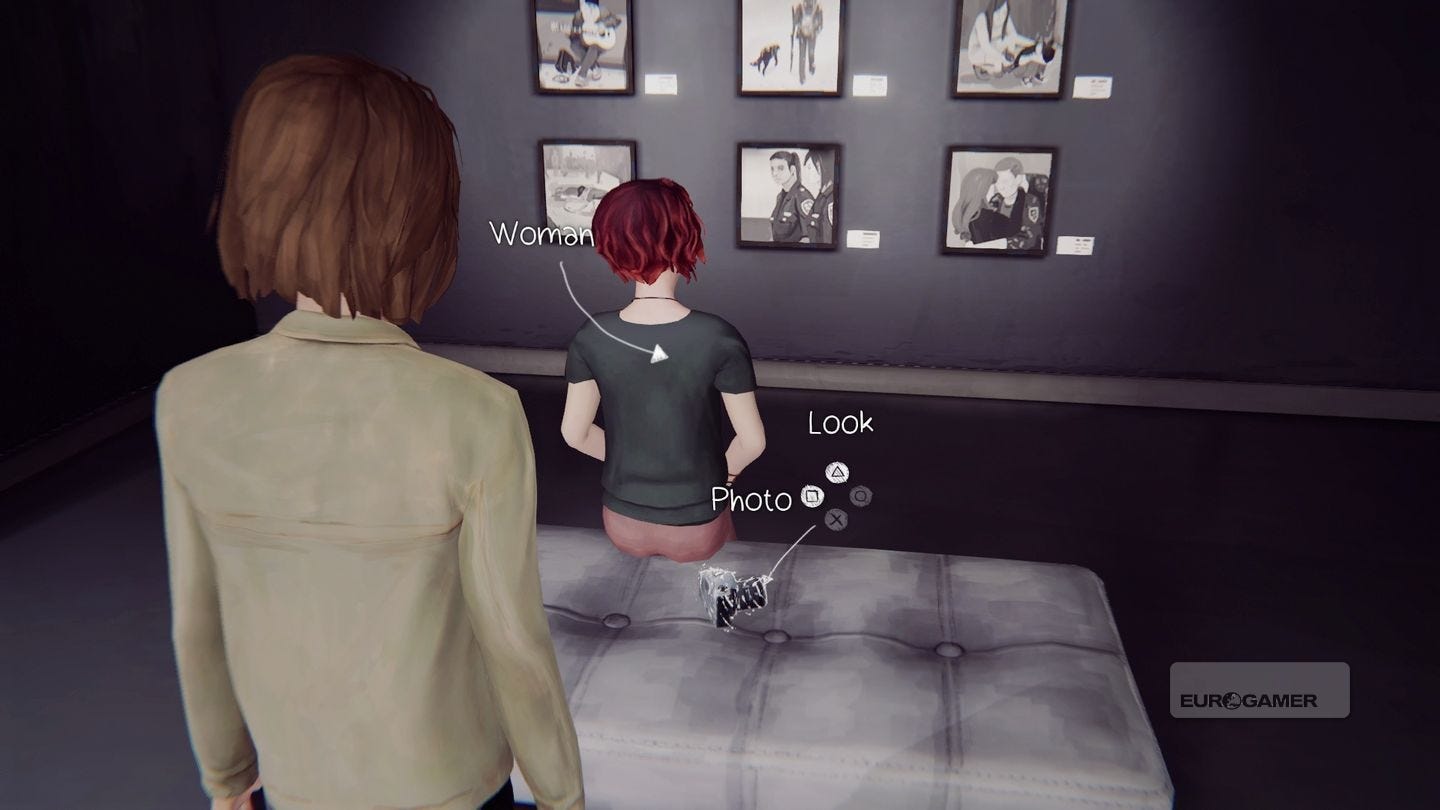
Art Gallery (1 photo)
There's an upstairs and easy to miss downstairs to the art gallery. Head down the right side, and ahead is a woman sitting in front of six pictures. Approach so the photo prompt appears by the camera.
Dark Room - Confrontation (1 photo)
No photo here for spoiler reasons, but it's pretty straightforward; load up this Dark Room segment, and after a lengthy conversation with the game's antagonist, he'll be interrupted by someone; rewind after that happens, and you'll be given a set of choices. Choose 'one last picture' to get this photograph.
Diner (2 photos)
Play the section was usual until you save the diner from exploding (enter the building on the left, use the fuse box to extinguish the fire and rewind by the body and reach through the window if you want to save the person; go outside and stop the fire using the sand out the front of the diner) then turn around to see a whale in the road.
At the right angle standing in front of the diner, the photo prompt will appear.
To the right of the diner on the opposite building is a car perched on the roof. Stand in the alley and look up at it for the prompt.
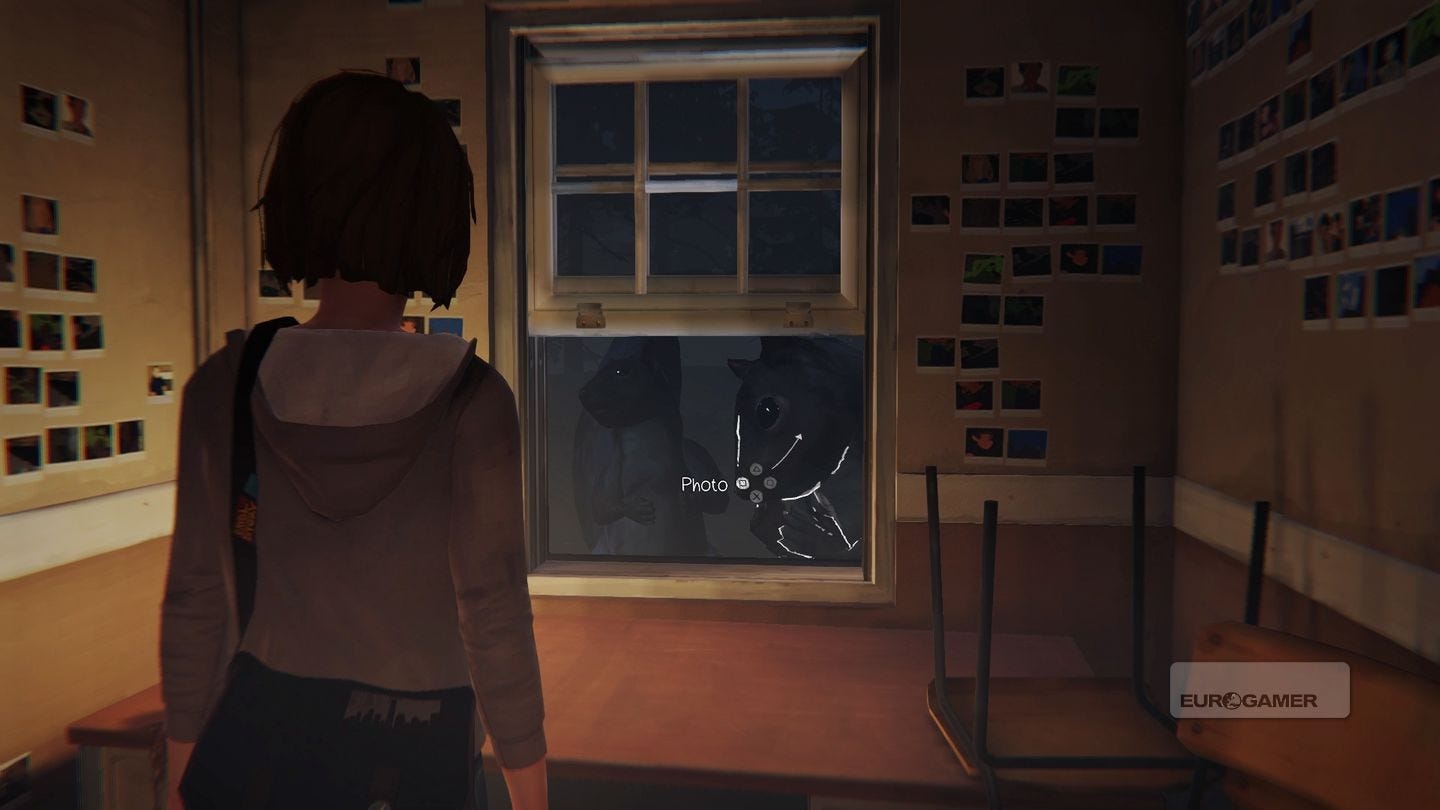
Nightmare (5 photos)
1) Start this segment by looking at the graffiti on the desk in front of you, as you did at the start of the game. Look at it Twice, and then take the photo. (Note when we replayed we only had to look once, and the writing didn't change but the prompt still showed - either way, keep messing with it until the photo opportunity appears).
2) Continue playing, whereby leaving the art room will lead to a corridor that repeats itself with subtle changes each time. Progress by:
- Speaking and following Kate
- Grabbing the key by the showers to room 218 and using that door
- The first door on the left to become Victoria
- Room 221 to become Max again
At this point, turn right to the showers and you'll notice some giant squirrels outside the window. Take a picture.
3) Keep playing (from the above, you can finish the corridor by entering Max's room at the far end on the right) to reach the backwards school lobby. Here you have to go to the cross section and following the deer into the bathroom, but don't just yet; approach the skeleton in the corner opposite and you'll be prompted to open your journal - this takes the picture for you.
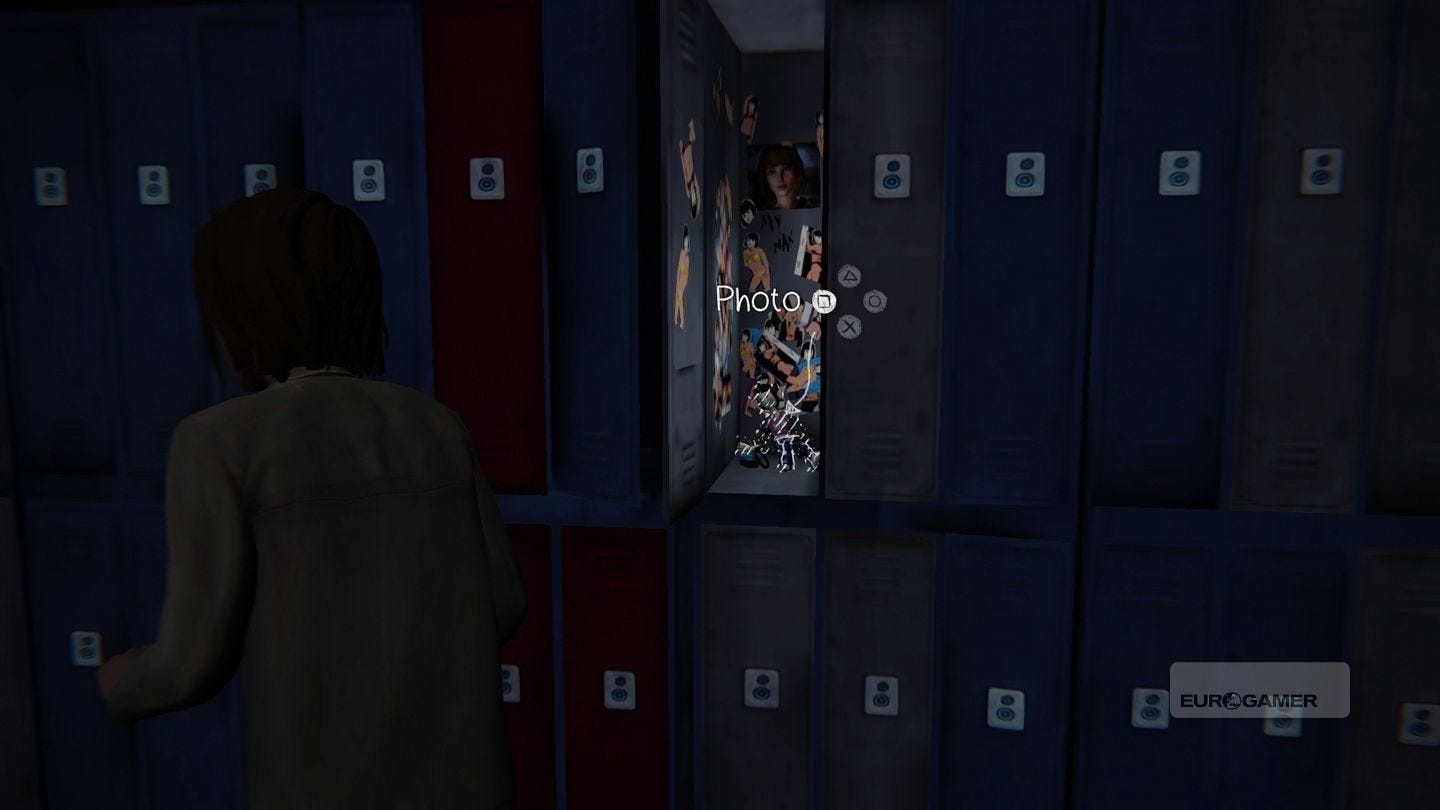
4) The follow section is a stealth area with a lighthouse in the distance. Progress past the first two areas - the art gallery and rotating statue, using your rewind feature if you get caught - to reach school lockers. There's an enclosed area to the right of where you begin; to get inside, keep turning right at every corner. Investigate the locker, then take a picture.
5) The final stealth section is around a junkyard, where you must find five bottles dotted around the school bus and cars while dodging sentries. It's a small area so the bottles should be relatively easy to find, and once you're done, head to the line of bottles on the right after and take the photograph.
If you're struggling, the following video from Satoshi ElectricShoK220 may help:

Note that if you are playing in collectible mode, then for whatever reason, the bottles won't appear. You may have to either reload a previous save or start the chapter from scratch to reach up to this point. As such, we recommend getting them the first time through if you can!
Once you're done, and assuming you've not missed any individual photos or Trophies, the Platinum is yours.