Destiny: Crota's End - How to cross the Bridge, deal with the Swordbearer, Annihilator Totem, and Gatekeeper
Our Crota's End walkthrough continue with a guide to getting your team over the bridge, and handling the Swordbearer and Gatekeeper threats.
The Bridge and Swordbearer is about splitting up and performing specific duties for the team now you worked together for the Abyss lamp maze and how to deal with Weight of Darkness. The basic idea is to form a bridge and get your whole team across it, but there are various conditions that make this rather challenging.
How to cross The Bridge
When you first arrive in this section you will be staring across a chasm towards a massive green door. That's the way that leads to Crota, but in order to get over there you will first need to work together to activate a bridge and then cross it and defeat specific enemies.
On your side of the chasm, you will see a standard bridge-activating plate in the centre and another plate off to either side of it, each of which is home to an ominous-looking dark spire. Those things are Annihilator Totems, and if you don't have someone on each of those two plates while somebody is activating the central one, your entire fireteam will be wiped out pretty quickly. If the Totems are unmanned for whatever reason, your central plate player can step off to stop the annihilation, but doing so will stop the bridge constructing.
How to kill the Swordbearer
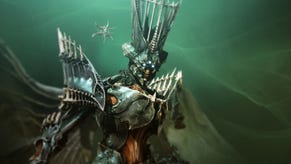
Sounds simple, right? Come on, you know better than that by now. You see, you can't just form the bridge and then cross it. To do so, you first have to take down an enemy called the Swordbearer, who drops a sword. The person who picks it up is then able to cross the bridge. On the other side, that person must slay an enemy called the Gatekeeper, who can only be killed using the sword. As with other swords in Destiny, this one expires quite quickly, so it's important to move fast or else you might end up falling through the bridge into the chasm, or being whomped by a Gatekeeper and not being able to fight back.
Fighting the Gatekeeper
On the other side there is another bridge plate and another pair of Annihilator Totems. The idea is that you each take a turn at killing the Swordbearer, picking up the sword, crossing the bridge and killing the Gatekeeper. Once enough of you have made it across, the team on the far side starts taking over the bridge plate and Annihilator Totem roles, so that the people remaining on the near side can do their sword-bridge-Gatekeeper runs.
Obviously you are not doing all these things in a vacuum. Crota's End will throw all sorts of other enemies at you while you carry out these roles. Thralls will crawl up from the chasm below and will come out of various doors in the corners. Knights and Wizards will appear on the far side. It gets pretty hairy. Perhaps it is some solace to know that you don't really have to kill any of them, providing you can avoid their attention by running around.
The coordination required to complete this section isn't too bad - the difficult thing will be staying alive while you hold down the various plates and make sure you can take down the Swordbearers while holding the bridge up.
At the start of the fight you should have enough people on the near side to handle all the enemies and the Swordbearer. Once you're down to three or less on the near side, people who have already made the crossing may need to send some shots across the void to assist taking the next Swordbearer down. The Swordbearer is powerful up close, so using weapons that will stagger him is recommended. On the far side, pay particular attention to Knights and Wizards, but don't underestimate the Thralls either. As with the lamp maze, weapons that explode enemies on death like Fatebringer are very helpful.
Using the sword in Crota's End
When you have the sword, you should find it works much the same as the others in the game, and that dealing with the Gatekeeper isn't too treacherous. R1/R1/R2 or RB/RB/RT, depending on your console, is the optimal attack combo. Other players can help by distracting the Gatekeeper so that the person with the sword can attack him from behind. Just don't waste any useful ammo on him - it won't make a dent.
Once everyone has made it across, a pair of Ogres will join the party, and these two you do have to kill. As soon as you do, it's all over - their deaths trigger the next checkpoint and slew of rewards, including armour pieces and Radiant materials. Well done!
Next up, The Thrallway and the second raid chest.
You can find the rest of our Crota's End guide from the first page of this article. You can also read the rest of our Destiny guide, or when ready to play year two content, our Destiny: The Taken King guide.


