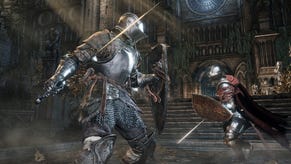
Dark Souls 3 - Profaned Capital and Yhorm the Giant
How to kill Yhorm the Giant , along with a step-by-step walkthrough for making it through the Profaned Capital section of Dark Souls 3.
When you're half way across the bridge a huge enemy will swoop in, but fighting him on the narrow structure is a recipe for disaster, so dash behind him and run for it. When you get to the end of the bridge, turn right and drop down to escape your pursuer.
Climb the ladder to find the Profaned Capital bonfire.
Pillage the corpse and collect the Undead Bone Shard. Return to Firelink to upgrade your bonfire, and then make your way back to Profaned Capital.
Descend the ladder and drop through the hole opposite. Head left round the base of the tower and climb the ladder to find some crumbling coins, then drop back down and carry on around the tower.
As you approach the wooden ramp, the enemy from the bridge will drop back in. He's got a heavy flaming club that needs to be avoided, so roll under him as he falls and tackle him from behind. He drops 2500 souls, so if you can deal with him quickly he makes for a fairly efficient farming point.
Head up the ramp and take the passage to the left. Follow it round and kill the gem bug (but don't overshoot and fall down the hole at the top of the steps), then take the turning and chase down the other bug - again being careful of falling.
Follow the passage out onto the wooden walkway, turn right and loot the corpse on the end, then drop down into the poisoned mud.
Keep to dry land as much as possible and head for the building.
Alternatively, if you have a high level of poison resistance, then you can explore the area in the other direction for a few items. The creatures in the swamp deal both physical and poison damage, but they're easily staggered, so try and get in the first blow to prevent them from retaliating.
Loot the Court Sorcerer armour set
Climb the ladder and follow the roof round to the hole in the wall and tackle the creature inside. He's slow but tough, and getting behind him is safest to stay out of reach of his hand/head. Just be ready to jump away when he sits down to avoid getting squashed.
Grab the Court Sorcerer armour set from behind the pots, then head back onto the roof and carry on around.
Head up the stairs and take a right onto the top of the building. Kill the wizard and collect the scroll he drops, grab the poison arrows from the corpse on the far end, and then drop in through the circular tower to collect Wrath of the Gods from the room below.
Head back out on to the roof again, and this time carry straight up the stairs for a brief detour through Irithyll Dungeon.
Kill the giant
Follow the passage to the end to collect the keyring, then turn around and deal with the three branders that will have appeared behind you. Make sure your HP bar is back to full strength and then drop through the hole in the wall to take on the giant.
This fight is fairly straightforward - just steer clear of the stamping attacks and keep hacking at his feet when you can - really it's the rats that are likely to do most of the damage to you.
When the area is clear, head through the small archway and take the elevator to return to the Irithyll Dungeon bonfire.
Travel back to Profaned Capital. Directly in front of you in the ruined arch is another ladder. Drop down and turn 180 degrees.
Just to your left is a flight of crumbling steps leading to a bridge. Start to cross and then back up, as another of the large rock lizards will fly in. Fighting him on the bridge is unwise as not only is there a risk of falling off, there's also someone down below throwing fireballs.
Make your way across the bridge, dodging the incoming projectiles as best you can, and go through the archway ahead.
Drop from the platform onto the pile of rubbish below and fight yet another rock lizard, then head down the stairs and turn left towards the fog and prepare for another boss fight.
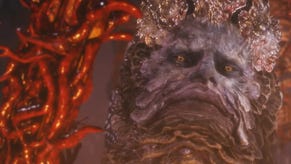
How to kill Yhorm the Giant
While it is possible to defeat this boss using your normal weapons, you'll probably find they do very little damage and it could take hours to chip away at his health as a result.
Thankfully he provides us with the weapon he's really vulnerable to, so when the fight starts make a run for the altar at the far end, grab the item, and equip it - you may want to deliberately die after grabbing the sword so you can juggle your inventory in peace.
Switch to two-handed mode (his attacks can't be blocked, so a shield is no use anyway) and hold L2/LT until the weapon fully charges. It takes around four seconds to reach that point, after which you should unleash the charged hit on him.
This will eat up all your stamina but he'll be staggered for a couple of seconds, so take the opportunity to retreat to regain stamina and recharge the sword. Repeat this process until the fight ends - it should take five blows to finish the job.
(Note that if you've completed the Siegward of Catarina questline you should already have the sword. You can also make your initial sword charge before passing through the fog.)
Light the bonfire and head back to Firelink.
- The next part of our walkthrough explains how to survive Dark Souls 3's Anor Londo and Aldritch, Devourer of Gods sections.
- You can return to the index page for more entries in our Dark Souls 3 guide.


