Titan Souls: killing Knight Elhanan, Avarice, Gol'Hevel and The Elder
Tips on beating the undead Knight Elhanan, the mimic chest boss, the animated graveyard mask and the gargantuan, benevolent Elder.
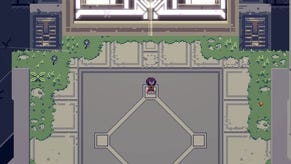
From the central elevator platform, head southeast across the sanctuary grounds until you locate the vines leading down to a ledge below. Climb down and then follow the stone staircase leading south, continuing along the path when you reach the bottom. Shortly you reach a gap in the wall leading west. Head on through and continue forwards until you reach the raised platform in the centre of the area. Step on the checkpoint glyph in the middle before proceeding.
From the checkpoint glyph, head north and climb either one of the two stone staircases immediately ahead of you. Next, make your way up either side of the blue staircase leading to the central raised platform, then make your way though the door.
How to kill Knight Elhanan, the undead archer
To begin the fight against Knight Elhanan, shoot the arrow lodged in the pillar in the north-west corner of the room. As soon as you strike it, the titan slayer awakens, knocking you over with a blast of purple lightning. Once you stagger to your feet, immediately retrieve your arrow.
Next, the knight jumps off his platform and into the centre of the room. After a short while, he fires his large white arrow at you, which then ricochets around the room. The easiest way to avoid the initial shot is to take cover behind one of the area's six pillars. Note, however, that only unbroken pillars will deflect the shot. Crumbling pillars disintegrate when hit, providing no protection from the enemy's projectiles at all.
Once the large arrow has been fired, Elhanan unleashes three smaller arrows, one by one. These can be dodged relatively easily if you're paying attention, but be warned - they're incredibly quick, and it's easy to be caught off-guard if the knight attacks from off-screen. This can happen frequently given the size of the arena, so try to keep him in your sights at all times.
After Elhanan has fired his three smaller arrows, he goes off to retrieve them. After the third one has been collected, the large arrow comes to a halt and the knight retrieves this too. Next, he returns to the centre of the room and his attack pattern starts all over again.
In case you hadn't guessed, shooting the large mobile arrow causes the knight's armour to disappear, exposing his weak spot. You can try doing this while the arrow flies around the room, but you might find it easier to wait until it comes to a halt once the knight has retrieved the third of his smaller arrows. Unfortunately, you only have a short amount of time to attack the knight's weak spot once his armour disappears, and you won't be able to strike at all if you're too far away, meaning success often comes down to luck here.
Once you hit the large arrow, wait until your character gets to their feet and then quickly retrieve your arrow. Next, turn around and launch another shot at the knight while his decaying corpse is exposed. It might take a few attempts to get this right but, once the knight is defeated, consume his soul and leave the building to continue.
How to beat Avarice, the mimic chest boss
The next titan lies in the building just west of the the ruins checkpoint glyph. To confront the creature though, you need to open the secret passage inside. Enter the building and look for the small white switch near the coin in the north-west corner of the room. Once you've located it, strike it with an arrow. This causes the small stone block in the south-eastern corner to slide back, revealing a ladder. Head down to confront the Avarice, the mimic chest boss.
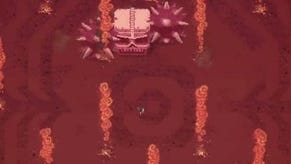
Enter the treasure room and fire your arrow at the mimic chest to begin the next battle. As soon as you do, it swings open and begins firing coins out into the centre of the room. These will kill you if they land on your head, but - more importantly - they form an impassable island in the centre of the room, creating a doughnut-shaped space for fighting.
Next, Avarice will likely use its teleport manoeuvre, causing it to disappear and then reappear almost completely on top of you. Once it materialises, it will either flick out more coins (reducing the usable floor space even more) or lunge forward, attempting to gobble you up. Finally, Avarice occasionally leaps around the room, trying to crush you beneath its hulking body. Thankfully, all of these attacks are easy to dodge if you keep moving, but it's crucial that you defeat Avarice quickly before the build up of coins on the floor prevents you from avoiding its advances.
There's one last attack to watch out for, and this is the most important of all. Occasionally, Avarice rolls onto its front, opens its lid and fires a single coin at you from inside. It's this final attack that exposes his weak spot - his tongue - and you need to dodge his coin projectile and quickly let rip with your arrow before the titan can right himself again.
Your best strategy in this fight is to remain as close as possible to the chest as it leaps up and down (without getting squashed, obviously) and then turn around and unleash your arrow the second it rolls forward. The reduced distance will make it much easier to hit your target, and you'll likely kill it before it even has chance to launch its projectile. When Avarice is defeated, consume its soul and head back outside.
Explore the graveyard
With all the area's titans defeated, begin walking east away from the checkpoint glyph. Once you pass through the gap in the wall, head south and then descend the steps. Next, follow the path around as it winds back north. Continue onwards until you reach the imposing graveyard, then step on the nearby new checkpoint glyph to activate it.
How to beat Gol'Hevel, the projectile-spewing mask boss
To find Gol'Hevel, simply head north and then pass through the large doorway once you reach it. Launch an arrow at the huge stone head in the centre of the arena to start the battle.
Once the fight begins, Gol'Hevel springs to life and begins circling around the room, stopping briefly once it reaches the west, north, east and then south sides of the arena. Each time it comes to a halt, Gol'Hevel spits out a number of deadly projectiles before moving on to its next position.
From the west side of the room, the titan launches three projectiles. From the north side it releases five, and from the east and south, it spits out six. Don't fret though: it's easy to dodge Gol'Hevel's attacks, provided that you keep your distance. Hanging back gives the projectiles time to separate, so all you need do is slip through the gaps to avoid them.
In order to kill the titan, you need to hit the weak spot that takes up the entire back side of its head. Unfortunately, the creature always orientates itself to face you, meaning that you need to use some cunning - or more specifically, your weapon's automatic retrieval function - to defeat it.
In actual fact, it's possible to do this boss in seconds. Simply stand against the titan's bottom-left corner while it's still inactive and hit it with a barely-charged arrow. Quickly retrieve your arrow and immediately launch it toward the protruding part of the wall to the west. While you're doing this, Gol'Hevel stirs and leaps toward the western wall, positioning itself right in front of your arrow.
To complete the fight, roll north-east until you're parallel with your arrow, then quickly hit your automatic retrieval button. This should give the arrow enough momentum to strike squarely into the creature's rear as it returns. Don't worry if you miss though - the same basic battle principle applies wherever you fight the creature, so simply reposition yourself and try again. Once Gol'Hevel is defeated, consume its soul and step outside.
How to kill The Elder, the sanctuary's final boss
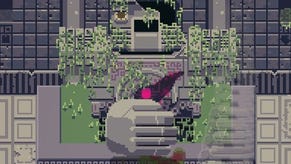
Back at the graveyard checkpoint glyph, head north-east and follow the small path leading to the east of the cliff. A little way up, you'll spot a dirt patch to the left that marks a concealed entrance in the rock. Head on in and wind your way north. Once you hit the wall, head east again. Shortly afterwards, you'll pop out onto a rocky ledge next to a large cave mouth to the north. Head inside and follow the cave as it winds around to the right. Leave via the opening to the south when you reach it.
Back outside, head east and look for the climbable rock face to the north and a little further on. Make your way up and then scale the larger wall to the north. At the top, climb the vine and marvel as a mysterious voice begins to address you. Continue heading north, climbing up and down the various vines to wind your way across the different ledges and you'll eventually reach a large stone eye. Simply fire an arrow at it to bring this mighty titan down. Easy! Consume its soul then begin your descent to earth. Finally, return to the main elevator in the heart of the sanctuary.
- The next part of our guide explains how to beat Vinethesis and Obello.
- You can find the rest of our Titan Souls guide from the first page of this article.


