Dark Souls 2 - No-Man's Wharf, ship, shortcut, Miracles, Lucatiel
We'll show you how to find No-Man's Wharf, grab some healing spells, summon the eerie ship, and prepare for the fight with the Flexile Sentry.
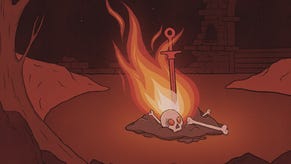
Once you've defeated the Dragonrider, go through the door that's opposite of where the mist was, and then carry on up the stairs. When you reach the top you should find a very welcome bonfire. Light it, then go and talk to Licia over on the right if you fancy making use of some Miracles - healing spells, essentially.
Oh, and make sure you talk to Licia repeatedly until she tells you she's going to move on from Heide's Tower of Flame. This will be important later on.
How to find No-Man's Wharf
When you're finished, make your way to the other side of the room, then go down the stairs and head through the doorway you eventually come to. Keep travelling down this twisting stairway, then go to the other side of the staircase to snag a Monastery Charm. There are two enemies on the other side of the door down here, but they can both be avoided if you're careful. Keep going straight when you're through the door, and pick up a bunch of handy items: Dark Torches, a Soul of a Proud Knight, an Old Knight Halbert, and a Human Effigy.
Once you've hoovered up all this lovely loot, go through the door and into the room you passed a moment ago, then go down the stairs in front of you. There's another cluster of enemies here, but you can ignore them for now. Instead, go directly through the door, then take a right and go down the hallway.
Step into the lift, then step onto the weight that's in the centre of the floor to get down to the level below. Walk through the next door, then go through the water and into the hole in the wall at the end of this section. Once you've scrambled through the rocky patch ahead, you'll come to a bonfire. Light it, talk to Lucatiel nearby, then enter the cave to get to No-Man's Wharf.
No-Man's Wharf guide
Make your way down the stairs and to the left, keeping a close eye on the archer who's lurking across from where you start - he'll fire off a constant barrage of arrows at your position until you've finished him off. Kill the enemy you come to after a short while, then get over the wooden bridge ahead of you. Dart into the room on your left, defeat the two enemies inside, then go upstairs and loot the chest for another Titanite Shard.
Go through the door and kill the enemy that's waiting for you outside. This sneaky blighter has his own Estus Flask which allows him to top up his health as you fight him. As long as you stay close though - and don't let him get enough breathing space between attacks to make use of it - you shouldn't have too much trouble taking him down.
Grab the item that's at the end of the platform to obtain another Soul of a Proud Knight, then make your way back downstairs. Head through the door and take a left, kill the two enemies you encounter, then follow the path down towards the left. Jump down into the water and loot the nearby item - you'll bag a Lifegem and a Large Soul of a Lost Undead for doing so.
Carry on down this wooden pathway until you come across an enemy. Knock him out and then enter the house on the left-hand side. Inside, you'll find another enemy waiting for you to punch his lights out. Grab the item inside the house and you'll be rewarded with a handful of Dark Pine Resins. Leave the building and carry on towards your left, then enter the rather decrepit structure in front of you. If you smash up the crates here, you'll find 10 Iron Arrows.
"Use a Pharros' Lockstone to light up the area, something that rather handily also weakens the local demons and stops them from moving around as much."
Take the staircase on your right and starting moving up it. There are a bunch of enemies at the very top who will cause you a serious headache if you attempt to take them on together in a single head-on assault. Instead, go about halfway up this staircase and then take a right. Once you've killed the dog and the pair of soldiers ahead of you, make your way into the garrison.
Find the Brigand armour and weapon items
There are three enemies on the ground floor that you'll need to eliminate, but it's well worth the effort. Over to your left is a coffer which contains the Brigand Hood, a Bandit Axe, Brigand Gauntlets, Brigand Trousers and Brigand Armor. Now go up the stairs and kill the pair of enemies who are loitering around. At the end of the room is a chest which contains a Titanite Shard, as well as some handy Repair Powder.
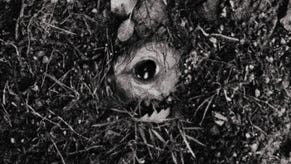
Go downstairs and walk through the door to get back out in the fresh air. Keep going straight ahead and you'll eventually come across a face embedded in the ground near the cliff's edge. Use a Pharros' Lockstone to light up the area, something that rather handily also weakens the local demons and stops them from moving around as much. Carry on forward, then go down the wooden ramp to your left to get your hands on three Small Smooth & Silky Stones, and a Large Soul of a Proud Knight.
Jump down onto the ledge below you and then go up the stairs over to your right. Avoid the temptation to go toe-to-toe with the cluster of enemies here. Instead, enter the building that's halfway up the stairs and on the left, then go upstairs until you're at the very top of the building.
Kill the lone enemy you find here, then go through the door and into the building on the opposite side from you. There's another solo enemy in here - kill it, and then wait for the enemy outside to get wind of you. As soon as it does, kite him back into the building and then go to town on it.
You've now got just a dog and a single other enemy to worry about. If you have the necessary equipment on you, you might want to think about taking them out from range while you're still in the safety of the building. If that option's not available to you, fight them in the good old-fashioned, up-close and personal way. Now take a left, go up the stairs, and then go around the corner until you can see a pack of three animals just ahead of you.
Using the Pharros' Lockstone
As you've already lit up the area with the Pharros' Lockstone, you should find it pretty easy to get past these creatures. If you're joining our walkthrough halfway through, however, then you'll need to kill all three of them before you can continue. Just deal with them one at a time, then make your way back down the stairs if you need a break to top up your health. They won't follow you down here, so it's a good opportunity to get a little respite from the frantic combat.

Over by the edge of the cliff that's just ahead of you is an Emit Force and a Large Soul of a Lost Undead. Take both of these items, then go into the building in front of you. Equip a ranged weapon if you've got one on hand, and prepare for battle as you open up the door to your left. There are two creatures inside, but as they can't fit through the door you can use your ranged attacks while they batter the walls down. The illumination effect you instigated earlier on doesn't have any effect on these creatures as they're tucked away in the shadows.
Next, make your way into the room that's adjacent to where you are now, but be mindful of another creature upstairs, as it'll make its way down towards you after a certain amount of time. Move up before that happens and deal with the two beasts upstairs on your own terms. Now go through the door and approach Gavlan in the corner of the room. Use this opportunity to sell anything you don't want or need from your inventory, and also pick up any poison weapons you fancy adding to your stash. Gavlan moves on from here after this, but you can find him again later in the game.
You can loot the two chests that are in this room, but just be aware that the chest on the right is booby-trapped with poison. Have some medicine on hand when you open it to get at the two Silver Talismans inside. You can take the Greatsword from the chest on the left without taking any damage.
"Non-magic wielders won't get much use out of [Carhillion], but it's an essential visit for any enthusiast of arcane combat."
How to summon the ship
Now head back downstairs and make your way outside again, before taking a left and entering the next building along. There's an enemy you need to kill on the ground floor before you head upstairs and kill the second guard. Now get up onto the balcony and take the stairs to your left. When you come to a lever, pull it to summon forth a ship, then jump down and grab the nearby item for a Homeward Bone and two Lifegems.
Drop down beneath the lever platform and then go inside and walk downstairs. Grab the 10 Fire Arrows located in the middle of the stairway, then kill the pair of beasts prowling around at the bottom. To make things a little easier for yourself, consider firing a few ranged attacks from the safety of the stairs, then finishing up with melee combat when they get a little closer.
There's a door in the corner of the next room. Go through it and then stick to the right and make your way down the ramp. At this point, you can choose to either carry on down the stairs on your right to make progress through this area, or go into the house next door to kill some more monsters. We'll walk you through the bonus kills first.
There's a single guard waiting at the top of the stairs in this house. Finish him, then make your way onto the third floor. Go through the door, then pull the rope on your right when you come to a gate at the end of the hallway. This will connect the area you're in right now to the area you were in previously - a handy route if you've cleared out all the enemies.
Backtrack to where the ramp was and then walk down the stairs. Be aware that there are two more demonic creatures in the building that's on your left. Keep going down the path, grab the Lifegems and the Human Effigy from the rowing boat, and then kill the guard on your right. Head towards the right-hand pier, but be careful of the pair of guards who are hiding nearby.
Keep following the pier as it heads towards the left, then go up the steps and talk to Carhillion. He's sitting on the platform above you. Non-magic wielders won't get much use out of this character, but it's an essential visit for any enthusiast of arcane combat. As soon as you've finished nattering, make your way back to the pier, and then turn right towards the ship when you come to a junction.
Board the ship
Board the ship and then kill the archer that's on your left. Doing so will alert a pair of nearby guards. Let them bring the fight to you, and use the space available to take them down one by one. If you head over to the other side of the ship, you'll find one more archer to kill on this level. As soon as he's dead, head back and go through the door.
Make your way downstairs, then go through the mist to start a ferocious fight against the game's next boss: the Flexile Sentry.
Don't miss out on any of the Dark Souls 2 bonfire locations. Check the first page of our walkthrough for regional guides to finding each one.


