Dark Souls 2 - Sinner's Rise, key, Estus Flask Shard
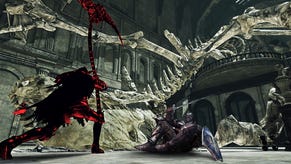
At the end of Sinner's Rise lies one of the toughest fights we've encountered in Dark Souls 2 so far. We'll help you get to it in one piece.
If you've been following our walkthrough up until this point, and have finished tying up loose ends in Majula, you'll now be ready to make your way towards Sinner's Rise. The next section shouldn't pose you too many problems, but you'll want to make sure you grab the Human Effigy that's tucked away.
How to find Sinner's Rise
Make your way down the ladder that's near the bonfire you lit at the end of the Ruin Sentinels fight. Kill the dog you come across in the corner, then grab the item it was guarding to get hold of a Large Club. You'll also find a coffer in this room which contains a Priest's Chime.
Once you've looted everything, go back up into the room you were in, then head up the stairs at the far end. When you get to the top, carry on through the doorway and then open the door at the very end of the hall.
Keep an eye out for a lance-wielding enemy who's hovering around to your left as you pass through. Make your way towards the far left-hand section of the walkway, then roll into the crates and the barrels on your right - just make sure you don't roll right over the edge of the ledge, eh? Grab the item by the debris to get a Human Effigy, then make your way through the door over on the opposite side to where you are.
As you go through the door you'll need to kill an enemy to your left, before going all the way to the end of this walkway and slipping through the crack in the wall on your right. Get down onto the roof below you, and then go all the way over to the right-hand side to get hold of a trio of Flame Butterflies.
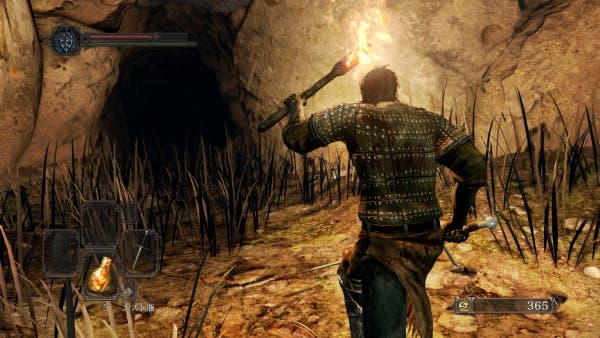
Make your way back until you're in the room you were just in, and then climb upstairs and go through the door when you reach the very top. Watch out for the exploding barrels nearby, and get ready to kill the enemy who's waiting for you over on the left-hand side of the room.
"To make the threat a little more manageable, run back into the previous room and kill the pair of enemies who follow you."
This annoying creature will lunge towards you, and explode with a yellow puff when it does so, showering you with a not-insignificant amount of damage. Make use of any ranged attacks you have to eliminate the threat, and be prepared to dodge backwards if it gets too close before you've had a chance to finish it off.
After you've killed the enemy, ignore the nearby door and instead make your way upstairs. There's a lever at the top that you can pull to open up the gate in front of you. Just be aware that there are three enemies waiting to attack you here. To make the threat a little more manageable, run back into the previous room and kill the pair of enemies who follow you. Kill the third remaining enemy who stayed behind, then go into the next room along, and smash up all the pottery to expose two more enemies.
Once you've killed these newcomers, go up the stairs and then use a ranged attack to kill the enemy near the exploding barrel. Now go up the stairs again and kill the two enemies you come across, before opening the door and grabbing the Skeptic's Spice inside. There's a cage just over to your right - climb in it to get down to the next level below, and take the Wilted Dusk Herb from the coffer in this room.
Get back in the cage, then exit the room and either open up the gate using the lever, or make your way upstairs. You can't do an awful lot upstairs yet, except kill the half-dozen enemies. Even then you won't be able to access the bonfire for a little while, but at least you've taken out some local danger. Once they're all dead, go back downstairs and walk through the gate.
Take the path that's on your right, then kill the guard lurking in the corner. Grab the item nearby to get hold of a whopping eight - count 'em - Lifegems, then run down the path and head through the mist. And when we say 'run', we're not kidding. There's a pack of archers who'll rain unholy hell down on you as you move, and you want to get through that mist and into Sinner's Rise without undue delay.
Sinner's Rise guide
Kill all the guards that drop down on you as soon as you enter Sinner's Rise, then make your way through the door nearby. Just over to your right is a ladder which leads to a handy bonfire. Over to your left is a set of stairs that leads to a room containing a few archers. If you're feeling a little feisty, run up the stairs and kill those archers straight away. If you'd rather take a more cautious approach, light the bonfire first, then come back and kill those arrow-firing foes.
While you're lighting the bonfire, pop your head around the doorway on your right (just before you get to the bonfire), and grab the Large Soul of a Lost Undead. Just be careful you don't take a nasty tumble when you do so, as it lies right on the edge of a small ledge. Once you've lit the bonfire and got this item, go back down the ladder, take the path all around the corner, and grab the Human Effigy that's just past the room where the archers are (or were!).
Once you're in the archers' room, walk onto the lift that's in the centre of the room and take it all the way to the bottom floor. Just before you reach ground level, you can actually jump off to grab a handful of very useful Lacerating Knives.
"Get the timing just right here, and the creature will plunge into the water, and rather handily die in the process."
Your next task is to make it safely down the ramp and into the water. The best way of dealing with the monster to your left is to lead it back into the lift room, and then jump on the lift and head back up. Get the timing just right here, and the creature will plunge into the water, and rather handily die in the process. If you'd rather go head-to-head with the enemy, stick to ranged attacks whenever possible, or bait its own attacks before darting out of the way and countering.
Over on your far right, just past the spot the enemy was standing on, is a Sublime Bone Dust. Now make your way over to the opposite side, where you'll encounter another monster. Once again, lure it into the lift room and use the water trick again to send it to its rather amusing death. Behind the enemy's starting location is a Large Soul of a Nameless Soldier, just over in the corner.
How to kill the creatures in the cells
Further on you should be able to see another creature. Make sure you take it out before heading any deeper into this region, otherwise you'll find yourself dealing with a whole pack of creatures all at once. Further ahead of you, and over to the right, is a zombie beast who falls down on you to inflict its damage. Kill it, then take the stairway on your right.
Don't worry about the two cells up here as there's nothing to loot from them - a pity really. Do take out the enemy who's dozing at the end of this pathway though. Now go all the way around to the other side and kill the other napping creature, again ignoring the disappointingly empty cells nearby.
Head down the stairs towards the water and keep making your way along this waterway. You'll eventually come to a cell on your right that houses an enemy, while the left-hand cell contains a pair of ne'er-do-wells. We recommend teasing the creature out of the right-hand cell and pulling it back a little first, so you don't accidentally pull the other two enemies as you fight it.
Once the first opponent is dead, creep very lightly into the other cell, just far enough to attract the attention of one of the remaining enemies. Get this right and you should be able to pull it back into open space, then wipe it out before the final creature can get anywhere near you.
Kill this last monster, then go into the last cell on the left and loot the Pharros' Lockstone and the Soul of a Proud Knight. Pull the lever in here to open up the gate at the end of the path. There's a patch of mist coming up, but before you walk through it and into the Lost Sinner fight, make sure you pop upstairs to grab the Radiant Lifegem.
If you can't find a way to beat the Dragonrider in Dark Souls 2, take a look through our essential guide to the fight. Alternatively, head back to the first page of our Dark Souls 2 walkthrough for more guides.


