Castlevania: Lords of Shadow 2 - Downtown walkthrough, Riot Police fight, guard patrols
If you've lost your way in the Downtown area of Lords of Shadow 2, use our walkthrough to get Dracula back on the right path again.

There are plenty of winding paths to take in the Downtown area of Lords of Shadow 2, and it can be hard enough just getting to the end, let alone making sure you grab every gem along the way. Use our walkthrough to get back on the right path, hunt down every Pain Box, and deal with a handful of new enemies along the way.
Navigate Downtown walkthrough
Once you've summoned the wolf, take a left and follow the creature through the darkness until you find yourself in the game's Downtown area. Make sure you top up your magic while you have the chance, then keep moving ahead into the garage. Make sure you smash up every object you can here, just so you get a little more experience. Once you're done, head on over towards the lift door that you can see to your left.

When the lift stops travelling, you'll be treated to a cut-scene. After it ends, get out of the room and keep walking to the right. Once you reach the end of this corridor, take a left and then activate the lift. Walk out and finish off the enemy creatures ahead.
Once they're dead, use a Chaos Bomb, followed by a Void Projection at the point where they spawned. This'll clear out all of the debris and fire blocking the way ahead. One more use of your Void Projection should be enough to extinguish any flames that are still licking the walls.
Having cleared the area ahead, make your way along it and interact with the lift you eventually come to. Kill the enemies that spawn as soon as you leave the lift, then walk downstairs and carry on heading forwards. Note the Pain Box that's behind the right-hand structure, even though you can't quite reach it yet.
You should see another staircase nearby. Make your way over it, leap over any rubble blocking your way, and then keep carrying on forward. Don't worry about the hallway that's just to your left quite yet. Instead, leap over the gap in the bridge, then kill every last enemy in front of you. Once you reach the end of this path, get up the wall that's to your right, and grab the Chaos Gem from the Pain Box that's up there.
Get back down a level, then make your way back until you see the burning car over to your left. Leap over the inferno to get to the next section. Step into the shadows of the room that's just ahead, switch into your rat form, and then race towards the entrance and sneak through the vent you find.
Once you've passed along the length of the ventilation shaft, you should find yourself in a new room. Switch back into your normal form, and then use the damaged book shelf and the wall itself to get to the next floor above. Make your way over to the dumpster, grab the Memorial that's hidden just behind it, then make your way into the new section of the level.
There's an enemy you'll have to fight here. After you've killed him, go around the corner and jump down onto the floor below. Kill all the enemies you find here, then make your way upstairs, keeping to the left. There's a hole in the ground here that you'll need to jump over, before taking on yet another pack of enemies in the right-hand corner of this new environment.
Having killed every last one of them, use a Shadow Dagger on the generator you can see to the right. This stops Dracula being electrocuted when you send him over the wall behind the dumpster. When you've finished your climb, keep walking forward and through the door until you trigger another cut-scene.
When the cinematic ends, go through the doorway and keep to the right - you'll have to smash the next door you come across to get it open. If you head left and then climb up the wall, you'll end up in a new room. Use the darkness inside to transform yourself into a rat, and then pass through both vents. Fall down through the floor ahead of you, and then get into the room on your right to shift back into Dracula's usual form.
Kill all of the enemies who are in the room next to you, then top up both your Chaos and Void magic in the room on the far side from where you are. Make your way downstairs, switch over to your armour-shredding Chaos Claws, and kill the two enemies you find at the bottom of the stairs.
"As always, make sure you're smashing up everything you can as you go, so that you get your hands on all those lovely bonus experience points."
Use your Void Projections to put out the fire trap that's raging on one side of the room, then grab the Void Gem from the Pain Box that you can now safely reach. If you interact with the generator on the other side of the room, you'll switch the power back on. Head through the door you've just opened by doing so.
Keep walking straight ahead through this room, then climb up the wall when you hit a dead end. Once you're up on top, turn back around and get a Chaos Gem from the Pain Box that's at the other end of the room. Make your way into the opposite room, then keep heading to the right. Kill the enemy spawns you encounter along the way, then go upstairs. As always, make sure you're smashing up everything you can as you go, so that you get your hands on all those lovely bonus experience points.
After you've made your way up the three sets of stairs ahead, leap over the gap and grab the Memorial that's to your left, then carry on straight ahead until you come to a doorway on your left - go through it. If you leap over the gap in front of you and keep going straight on, you should eventually find yourself in the same spot you were in when you entered the building.
Make your way down the hallway to your left, killing any enemy spawns you encounter along the way. Once they're dead you should be able to grab another Memorial from the far right of the area, and the other room on the right contains a Pain Box you passed by earlier. Go over and grab the Life Gem from it.
How to kill the Riot Police
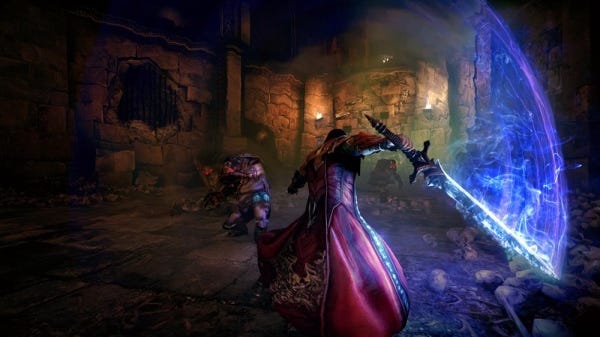
Keep moving on down the hall until you come to a lift. Use it, then go through the door ahead before leaping down onto the rooftop below. Deal with the enemies that spawn here until a single one remains. This will trigger a cut-scene which is swiftly followed by a challenging fight against three Riot Police opponents.
Predictably enough, you need to use your Chaos Claws to shred away at their armour when they move into a defensive position. If they leap up into the air, get ready to dodge very quickly if you want to avoid the massive incoming attack. Apart from these two special tactics, treat the Riot Police just as you would any other trash fight in the game.
Once they're all polished off, go through the opening that's just formed in the wall ahead of you. Take a right and climb up the wall at the very end. Now go ahead and interact with the Pole of Sacrifice on the right to get hold of a Kleidos. Make your way back down, then travel down the right-hand hallway at the far end.
You'll eventually come across a lever which you should activate to get the power back on. Now make your way downstairs and jump down towards the right. You'll face another encounter with the Riot Police here, but if you use the same tactics you should finish them off in pretty short order. Keep making your way down the street away from the main mission, then jump into the alley you eventually reach. Go up the stairs here to get hold of another Memorial.
Head back the way you came, and go through the left-hand hole at the very end of the road - this essentially brings you back to the spot where you first entered the facility. Next you need to make your way up the ramp, head left and interact with the hatch here. Keep travelling along the tunnel, then drop down into the more open region you can see below. Grab the Memorial to the left of you, then climb up the ladder to your right. You're now well on your way to your main objective in this stage.
Take the Memorial, then deal with the Riot Police who appear shortly afterwards. Make your way up the ladder, refill your magic when you reach the top of it, then pass through the tunnels until you get to the staircases. Follow the stairs up and to the right, then circle all the way around to the right until you're at a door. As always, smash up all the furniture and objects as you go to get some extra experience points.
You'll have to use Chaos Bombs when you get to the end of the left-hand corridor, then interact with the device to open up the next door. Once you've passed through it, bear right until you can jump down to the floor below. Keep heading down and to the right to get your hands on another Chaos Gem.
Keep making your way along the hallway, but watch out for any gaps that you'll need to jump over. You'll face a few fights as you go, but nothing you won't already be familiar with. Eventually you'll reach a crossroads - pick either route, as they all end up at the same destination. At the end of the corridor, veer left to find a Pain Box containing a Chaos Gem. If you've been following the guide closely up to this point, this should be your fifth such gem, and you'll be rewarded with a boost to Dracula's Chaos Magic capacity.
Now go back in the other direction, then jump over to get on the mechanical pillar up ahead. Just watch out for the gas and electricity that appears during your ascent. Always wait for both dangers to pass before making your way up, otherwise you run the risk of Dracula tumbling to the floor.
"You're not able to make use of this [Map Room] yet, but it's worth orientating yourself with its position so you can return later if necessary. "
As soon as you reach the top, make your way around this area before jumping over to the walkway ahead. If you look to the left of Dracula, you'll notice some steel bars that lead to a Map Room. You're not able to make use of this quite yet, but it's worth orientating yourself with its position so you can return later if necessary.
Keep going along this walkway right towards the end, then leap over the gap before climbing up the ladder to your left. Carry on ascending the side of this building, then make your way up the ladder on the right. Finally, you should find yourself on a new walkway.
A little further ahead you'll have to contend with another batch of Riot Police, who are also joined by some regular enemies. Destroy them all as you keep making your way to the left, then jump over the broken road and kill the last few Riot Police. You should now circle all around to the opposite side, top up your magic, then make your way up the stairs to the right. If you go past the statue, you'll find another Pain Box containing a Void Gem.
Over on the other side from this statue is a platform you can jump down onto. Leap over the railing to get down there, and then continue on to find a Memorial for your collection. To get through the door that's just ahead, use your Chaos Bombs, and then make your way through the doorway.
Riding the rail cars
There's a panel near this entrance which you should interact with to get the lift working. When you leave the lift, climb up the ladder that's just to your left. You need to wait now for a rail car to get just close enough to you, before leaping over and hanging onto it. Make your way to either the front or the rear of the car, but whatever you do, don't get on top of it or you'll be struck by the electricity. Stick around the sides too long and the rail will smash into you.
As soon as the car takes a right, drop down to another car when it appears beneath you. Again, make sure you're to the front or rear of this vehicle, and move Dracula down so he's hanging from the vehicle. Once the car's passed under the first platform, get back up on top and wait for it to pass the electricity below. Hang from the front of the vehicle again, and drop down towards the platform as soon as you can. Now make an ascent to get your hands on the Memorial that's over to the right.
Go through the doorway that's ahead of you and then drop down through the hatch. Go to the end of the corridor here and drop down again, then use the wheel you find to open the door. Go through that door, drop down, and then take cover behind the big containers. A guard will come wandering along very shortly - use a Bat Swarm to distract him, then possess the second guard who comes along to investigate.
Find the nearby switch that controls the door and activate it. Walk on through as soon as it opens, and then use another Bat Swarm to distract the guard you can see ahead of you. Dart quickly up the right-hand ladder, and keep bearing right to reach a new walkway.
Move along the walkway, but stop when you come to a ladder. You need to wait for the guard below to patrol all the way over to the right-hand gate before you drop down again. Take cover behind the pillar in the middle of this area after doing so, then possess the guard when he walks back towards you.
You're now ready to get started on the next area of Lords of Shadow 2.
Stuck on a different Lords of Shadow 2 boss fight? Head back to the first page of our guide to the game.