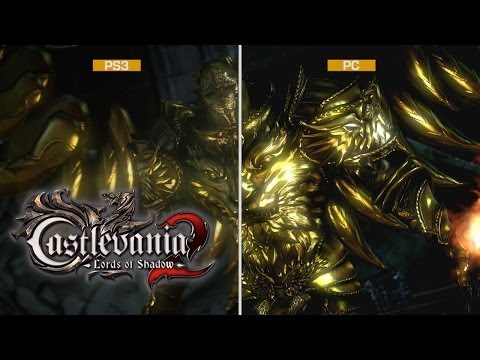
Castlevania: Lords of Shadow 2 - Bernhard's Wing walkthrough, protecting Trevor, Raisa Volkova guide
Whether you're struggling to protect Trevor, or can't quite take down Raisa Volkova, we've got an essential guide to beating Lords of Shadow 2.

The Bernhard's Wing section of Lords of Shadow 2 introduces a few new interesting ideas, from transforming waterfalls into scalable edifices, to using your rat-form to chew through electrical cables. There's another tricky boss fight waiting for you at the end of this section too, so read on for all of our essential combat tactics.
Bernhard's Wing walkthrough
Having beaten the last boss, have a good hard look at his head now lying on the floor, and get your grubby mitts on the Primordial Void Gem. Once you've got it, make your way into the room just to the side, as there's a statue in here that will provide a very welcome boost to your post-fight health and Void power.
Next, make your way back into the room you just left, and freeze the waterfall using Void Projection so you can climb it. Just be aware that you'll need to dart your way up the now-solid waterfall very quickly before the whole thing thaws out and sends you splashing back down to the ground.
When you get to the end of the hall, smash up all of the objects until you can see a door. Up ahead you should be able to see a relic - approach it to get the Tears of a Saint skill. Keep going straight ahead as far as you can, and note the location of an alcove that needs a Dungeon Key - you can come back here later on.
For now, you should see an opening just to the left that you can pass through to get to a much more open hallway. Leap over to the left and gradually descend, making use of the chandeliers and beams as you go. When you reach the end of the hall, you'll be able to get another Void Gem from a Pain Box.
Make your way back to the room that contained the relic, and this time go through the opening into the foggy mist, and then down the hallway that's to your left. Keep heading down towards the end of the hall, ignoring the pathway to your right, until you come across an item that's locked behind bars.
While you can't access this item quite yet, you can grab a Void Gem from the Pain Box to your right. Now head back the way you came and go down the left-hand turn you've yet to explore.
As soon as you reach a wide open area, make your way towards the waterfalls that are ahead of you and towards the left. Look closely and you'll find another knight lying behind the brick pillar - interact with the corpse to get a Soldier's Diary.
Just as you did a moment ago, use your Void Projections to freeze the waterfalls - left first, then right - and traverse them until you're at the very top. Keep travelling around and you should come across a structure in the centre of the area - inside is a Pain Box containing a Void Gem. If you've been following this guide from the very beginning, you'll now have five of these gems, and will receive a very welcome boost to Dracula's health.
"Use your Void Projections to freeze the waterfalls over - left first, then right - and traverse them until you're at the very top."
How to protect Trevor
Leap over the gap and keep bearing left at the end of the walkway until you trigger a cut-scene. Once the cinematic's finished playing, you'll find yourself having to deal with several enemy spawns. The enemies will come at you in pairs, but concentrate on taking on one at a time in order to gradually thin out their numbers. If any of the enemies should grab hold of Trevor, switch targets immediately in order to free him.
When you've finished off every last enemy, you'll be granted the White Wolf Medallion. Don't go walking into the glowing area in the centre of the room just yet. Instead, make your way over to the pillar that's marked with bat swarms, climb up it, leap over the gap to your left, and then grab another Void Gem from the Pain Box at the end of the walkway. Now jump back down to ground level and walk into the glowing yellow area.
Once you've ascended the pillar again, following the wolf through the darkness, and then leap down, before squeezing through the small gap to the side. Make another leap downwards to reach the lower level.
Smash every object you see down here and deal with any enemy attacks, then pass through the door to the right. Walk along the hallway until you reach the very end, then take a left down the stairs before dropping onto the level below. Grab a Life Gem from the Pain Box nearby, then climb back out and walk towards the area you just came from.
Once you're back in the room you were last attacked in, go towards the locked doorway to the right. There's water to the right of you, so use a Void Projection on it, then climb your way up before heading left. You'll see a dark area of shadow even further over to the left, where Dracula can shift into the form of a rat. Use your Void Projection to freeze the water being blown upwards, then shift into rat form and run beneath the frozen section.
Get over to the other side using the yellow vent. There are a series of flaming sections here that you need to leap over as you make your way through the ventilation system. Whatever you do, keep out of the electrified water as you pass through the flaming sections, then interact with the vent at the end of this area to reach the other side once more.
When you're in the next room, turn right to get to an area where you can shift back into your original form. There's a panel above you on the other side of the room. Use a Shadow Dagger on it, shift back into rat-form, and then go through the vent that's just to the left of the enemy.
Work your way through the ventilation shafts, but stop when you reach the electric cable. When it pops, leap over the cable on the right side of the vent. Wait for two pops to sound - a long pop, followed by a much shorter one - then chew through the wiring. Now make your way back to the other room and shape-shift out of rat-form.
To distract the guard, simply use your Shadow Bats ability, then sidle up behind the technician and possess him. Head towards the other side of the door to open it, then go through the doorway to start a cut-scene.
How to beat Raisa Volkova
Once the cut-scene's finished playing out, you'll be thrown into a boss fight. As soon as the battle begins, switch over to your Void Sword and get ready to shoot out a Void Projection. When Raisa appears, leap up, lock on to her, and fire off your weapon. If you don't manage to fire this off in time - she's extremely fast - just leap out of the way of her attack and try again.
As with the fight against the Golen, try and maintain as much range as possible throughout this battle, and focus on using the ranged whip as your main source of damage. Certain attacks are unblockable, so just dart out of the way to the sides, then approach her from behind to dish out a little counter-damage while she's recovering.
Should you find yourself being grabbed by Raisa, you'll need to press your jump button in time with the two on-screen prompts if you want to avoid being severely damaged. More importantly, make sure you stay well out of the electric lines that appear when she performs her slam attack. While the electricity's discharging, she may also fire a straight line of electricity at you, so be ready to jump out of the way of it.
After you've delivered a certain amount of damage against Raisa, she'll revert to the attacking stance she had at the beginning of the fight. Again, use a Void Projection to stop this attack, then keep repeating the tactics above until she finally falls for good.
Having trouble beating the Gorgon in Lords of Shadow 2? You can find all of our boss guides from the first page of this walkthrough.