Lightning Returns: FF13 – Luxerion quest, Lumina fight, hidden code, Canvas of Prayers, Noel Fight
Everything you need to know about beating the main quest in Lightning Returns' first chapter, set in the city of Luxerion.
Before getting on with the walkthrough proper, here's one tip to help you get started with the game: don't bother sitting through the cinematic that plays when you first fire it up. For some reason, the characters' voices are completely muted while they talk their way through this slice of the story. Rest assured you'll be treated to the full thing, with speech and everything, when you actually begin a new game.
Lightning Returns also contains some fairly dry tutorial sections, but if you're not already familiar with the basics from the demo, do try to absorb them when they appear. Very early on you'll get all the basics you need about the battle systems, how to adjust the camera to aid target selection, and also how to evade attacks, something that becomes increasingly important as you make your way through the game. If you ever need to go through any of the tutorials again, you can access them from the pause menu.
Luxerion main quest walkthrough
You'll need to clear out three enemies in the opening ballroom via these tutorials before you can get on with the first main quest of the game, entitled A Different Snow. Once these are out of the way, your next order of business is to catch up with Snow himself, who's racing his way through the ballroom.
The ground floor exit you need is located in the north-west corner of the ballroom. As you pass through it, and on up along the stairs towards the second level, you'll encounter the Black Market Dealer who stocks the basic restorative potions you'll need to keep on hand. You'll even get a tutorial on how to use these items correctly, and while you can only carry so many at once, you should definitely stock up as many of these as you can before continuing.
Keep climbing the staircase you're on until you reach the second floor balcony, then follow Snow along the left hand side. Eventually, you'll run into a handful of enemies blocking the way ahead. It's another simple fight to get through, but you'll also get a useful tutorial about switching your camera viewpoint. That may sounds primitive, but being able to track multiple enemies becomes essential later on in the game, so make sure you're comfortable with this part of the combat system before moving on.
"The key to beating the mighty Zaltys is to use the Blizzard and Thunder spells again and again, until the lizard falls down onto its haunches."
Next, you'll have to pass through a sort of warehouse section that's rather helpfully stuffed with crates that lie just below ledges, with ladders carelessly left propped up against them. Convenient though all this is, keep a close eye on Snow as he can be tricky to keep track of. Don't get left too far behind from him and you'll be fine.
Eventually, you're going to reach the first puzzle obstacle in the game, a gate blocking access to the path ahead. It's pretty easy to solve, and if you look around the room you'll spy a lever on one of the middle pillars. Simply walk up to it, interact with the device, and the gate will slide open, allowing you to move forward.
The fight against Lumina
Shortly after passing through into the next area, you'll face a fight against Lumina which - surprise, surprise - also comes with a tutorial attached. This does serve one very useful purpose though, introducing you to the Staggering mechanic, which allows you to dish out an extra special dollop of damage when an opponent's knocked off its feet.
The key to beating the mighty Zaltys is to use the Blizzard and Thunder spells again and again until the lizard falls down onto its haunches. At this point, you want to attack with everything you've got while it's weakened. Once Zaltys comes back to consciousness, repeat your spells and keep whacking away until the beast is bested.
Once you've completed the chase you'll find yourself watching another cinematic, before being transported back to the Ark where Hope awaits. Go all around the room and make sure you've interacted with each of the glowing crates, picking up a handful of important items in the process: Blizzard Level 1, the Devil's Daughter weapon, Light Guard Level 1 and the shield called Prytwen. Once you've gathered up every last item, you'll go through a quick tutorial that explains how to build your very own Schemata.
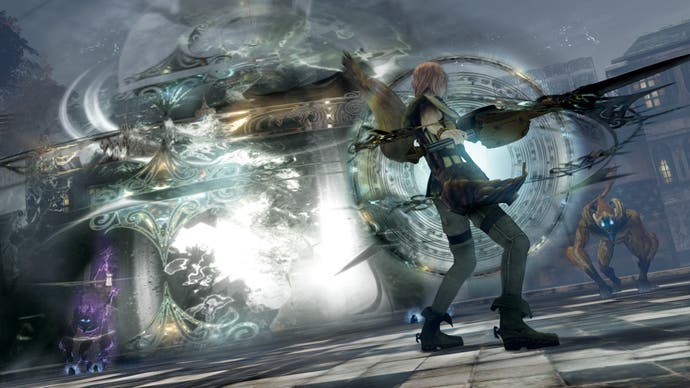
After you've had another chat with Hope, you'll need to interact with the shelf in the centre of the room to unlock a tutorial on something called The Book of Conquests. This part of the game allows you to fight previously beaten enemies once again, in order to improve your battle rating. Beating the fight in a certain amount of time, and taking as little damage as possible, are ways to improve your score here. Once you've beaten Zaltys again, Hope will give you a quick tutorial on Lightning Returns' EP system.
At this point, the Ark's warp device is unlocked, allowing you to proceed further along the main storyline. Use it to return to the surface of the world, where you'll be given the Whither Faith side quest after another introductory cinematic.
Once you've completed this simple task, you'll gain access to a handful of useful services in town. You can pick up all manner of useful potions and other items from the General Store, while the Adventuring Essential outfitter's focus is on powerful equipment. Both of these merchants are found just inside and outside of the railway station respectively.
Finding the Canvas of Prayers
Make sure you speak with the outfitter at Adventuring Essentials to go through the tutorial covering the Libra system, then stock up on any essentials you need for your adventuring. Complete the Where Are You, Holmes? side quest too while you're here. Your next port of call should then be Chocolina, who can be found standing by the message board. Once you've spoken to her, you'll unlock the Canvas of Prayers and - more importantly - get your hands on a few juicy quests to keep you busy.
When you head back to the main city square, you may notice clusters of people clad in white, standing around in groups and looking rather suspicious. These people are the key to unfolding the next part of the story, but they're a little jumpy and you need to keep a decent distance from them. As they wander around the town, hide out of their line of sight and maintain as much range as possible. Follow them for long enough, and you'll eventually trigger a new cut-scene.
Rather annoyingly, you can't progress this main quest any further until the in-game clock strikes 6am, but there's plenty to be getting on with in the meantime. Before you move on to other adventures though, you should make sure you grab the bronze and silver medals lying on the floor right around you.
How best to kill the time until 6am comes around? Well, if you just want to sharpen up your combat skills a little, you can always head to the eastern part of town and leave for a while via the exit. You should find plenty of monsters to hit in the face out there in the wilderness, and there's an item sphere just outside the gate that will give you some new loot. More enjoyable though is to get stuck into the side quests you picked up earlier, or complete some of the Canvas of Prayers content.
"Once the clock has run down a little and it's time for the dawn chorus, you'll be automatically teleported back up to the Ark."
A return to the Ark
Once the clock has run down a little and it's time for the dawn chorus, you'll be automatically teleported back up to the Ark, where you'll find a whole new swarm of pretty little parcels to unwrap. From these you'll be able to pick up the Liberator weapon, the Juno Sospita shield and the clothing of the Red Mage. To return back to the world below, talk to Hope and use the Side Quest and Main Quest options to set your destination.
Back down on terra firma, you'll want to head to the Back Alleys part of town. To find this location, open up your map, look for the text that reads The Residences, and head to the part of the world located just beneath. When you get there, take a look at the stairs where you'll find the first number you need for the access code.
Now talk to the Informative Man close by for a bit of intel on the next number, before heading to the southern railway station. Look to the west of the Canvas of Prayers there to get the next piece of code.
Having gathered this important information, you'll want to head back towards town, but as you do so you'll be approached by the Strange Man. He's got a deal for you, and he'll grant you the Centrum code number, but at a price of 500G. You can find this number in a location just between the Residences and the Centrum. You'll see a dead end by the restaurants just south of the Centrum. This is where you'll get the next number you need.
You've still got one last number to grab before you're done with this part of the main quest, however. To get hold of it, head over to the part of town that's marked on the map as The Warren. Just be aware that you might have to wait a little while before you can access this part of the map - complete some more side quests if you need to kill a little time before midnight comes around.
If midnight has been and gone on the clock, make your way over to The Warren via the path that begins near the northern railway station. After snaking your way around this path, you'll eventually have to choose whether to turn left, turn right or carry straight on ahead - keep straight on. When you finally reach the General Store, take a look around the corner to find the last piece of the code.
Using the code
So, you're all set with the code now, and ready to continue your investigation into the strange goings-on in town. Return to the location of the phone box back in the Forsaken Graveyard, and interact with it to enter the code you collected. Once you've entered the code successfully, you'll be given another cut-scene that carries the story forward.
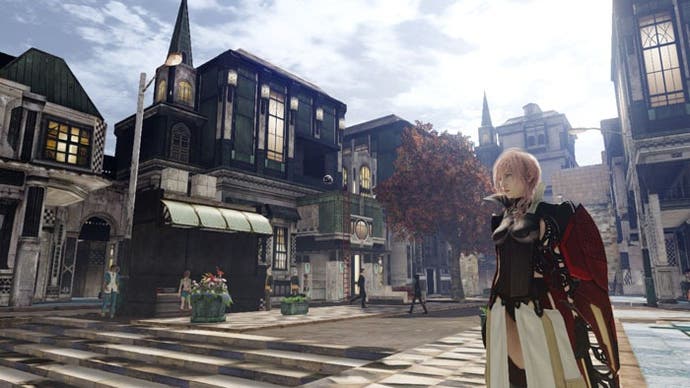
You'll notice a new marker has appeared on your map to the west, so pass through the nearby gate and then head towards it. On the way to your new destination, you'll notice there are a few item spheres littered about here and there. Make sure you interact with all of them to pick up some much-needed new equipment. When you finally reach the marker on your map, you'll trigger a new cut-scene, after which you should take a close look at the glowing part of the ground to get your hands on the Crest of Etro.
Having done that, you'll find a new location marked on your map, right by The Warren. Travel there and you'll see the Goddess's Disciple standing by the entrance to the area. Give the Crest of Etro to the Disciple, and then walk through the gate to begin another cut-scene. Next you'll need to travel to the marker placed in the Den of Shadows, which will trigger another cut-scene, followed by a juicy fight against the first boss in the game: Noel.
The fight against Noel
| Boss | Noel |
| Rewards | 10,000 Gil, Maximum EP +1, Maximum HP +240, Maximum ATB +10, Strength +84, Magic +70 |
"While the fight against Noel isn't all that tricky, you'll definitely want to have practised your guarding skills first."
While the fight against Noel isn't all that tricky, you'll definitely want to have practised your guarding skills first, and ideally done so until you can pull off a Perfect Guard fairly reliably. His attacks can be pretty strong and you'll want to avoid as many of them as possible. Note also that he makes great use of Wind-based attacks, so any defensive abilities, gear or spells that favour Wind protection should certainly be equipped before battle.
When it comes to your offensive skills, keep in mind that he's particularly vulnerable when it comes to lightning, so make sure you've packed as many Thunder-based attacks as possible into your arsenal too.
There are a couple of phases to this fight, although they're both pretty simple. In the first half you'll want to get a Perfect Guard off against as many of his attacks as you can, so you can then throw loads of damage back at him while he's Staggered. Be very conscious of when he triggers his ATB Charge effect though. When this happens, he's capable of throwing out a massive flurry of attacks that need to be guarded against one by one.
Once he's reached 50% of his health, things heat up a little bit, but only in the increased severity of his attacks. The tactics don't get any more complicated than they are at the start of the fight, but you will need to be on top of your game to avoid taking devastating damage.
Congratulations! If you've made it this far, then you've completed the first part of the main quest line, and you should also notice you can now begin The Saint's Stone side quest. Make sure you investigate the glowing red area just ahead of you to get your hands on the Deadly Shadow Hunter weapon.
There's plenty more to our Lightning Returns walkthrough if you head back to the first page.


