Lightning Returns: FF13 – Dead Dunes quest, Grendel fight, Crux pieces, Temple Ruins
From beating Grendel to hunting down quest items, our Dead Dunes walkthrough will help prepare you for the Final Day of Lightning Returns.

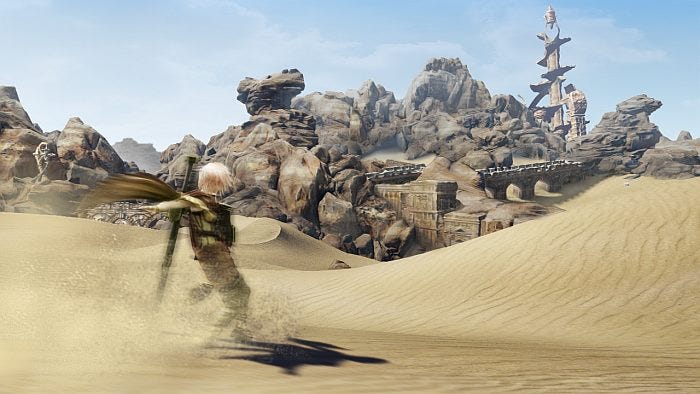
After completing the Dead Dunes section of Lightning Returns, you'll be ready to head into the game's so-called Final Day. The fourth chapter of the game isn't its longest by a long shot, but there's still plenty to be done before you fight the region's ultimate boss, the Grendel. It's worth finishing up all of the side quests in this area before starting that fight too, as your companion Fang can help take some of the sting out of the more challenging secondary content.
Dead Dunes main quest walkthrough
Once you've arrived at the Dead Dunes, go and have a chat with the nearby Lazy Station Worker who'll get you started on the next part of the main quest. You'll be given a map marker that leads you to the bandits' settlement, but don't head off there quite yet. Before you leave, go to the front of the station and investigate the Cactuar Statue, then go directly north to find another of these statues just outside the Temple Ruins North Gate. Investigate this one too.
Now keep heading north until you come across another Cactuar Statue located around the Near God's Wrath zone. If you've not already defeated the Cactair boss, you'll now need to head west and grab the Pilgrim's Crux. From here, travel in a north-westerly direction until you reach the Dry Floodlands Cactuar Statue, then activate it. You'll then need to travel east towards the storm. Interact with the nearby altar to get rid of the storm and begin the fight - the previous part of our walkthrough has a Cactair boss battle guide if you need it.
With this boss defeated, travel in a north-easterly direction, and pick up all of the item spheres that are littered around the area. Next, take a look at your map and travel to the location markers until you've spoken to Adonis who'll give you a trial. Go outside Ruffian and investigate the Cactuar Statue there, and then teleport back over to Near God's Wrath. Head to the next location marker and defeat the Gurangatch enemy, then go back to Adonis after the cut-scene has finished playing out. You'll now get a new companion by the name of Fang.
It's time to get moving once again, so head off towards the north-eastern section of the Giant's Sandbox. Once you arrive, you'll find you can take a tunnel from there into the Temple Ruins. Simply speak to the person standing to the left of the gate, then walk down the hallway in order to find and investigate the next Cactuar Statue.

The Temple Ruins
"This temple has a rather annoying timer system that you'll need to play around with if you want to get your hands on all the goodies inside."
This temple has a rather annoying timer system that you'll need to play around with if you want to get your hands on all the goodies inside. There are lots of interior doors that work on an hourly basis - put simply, they'll either open or shut after one hour of in-game time has passed. To get a feel for how this all works, go and check out the information stone next to each door to add it to your map. Note that green doors are open, and red doors are firmly shut.
In order to get hold of everything the temple has to offer, you'll need to manage your time carefully. Fortunately, you've got Chronostasis on your side, so use this ability to give yourself a little more breathing space. Get everything available from inside the first set of doors, and then do exactly the same through the other doors after one hour of game time has elapsed.
Now you've got everything, simply go down to the next level and keep your eyes peeled for an Earth Eater. It might seem like a bit of an unnecessary diversion, but it's worth fighting the enemy so you can get your hands on the two item spheres it's guarding.
Carry on running down the corridor you're in until you come across another Cactuar Statue which you should activate, then follow the location marker on your map until you come across a door - examine it. You should now make your way back towards the Chamber of Flame, and head down the south hallway. You should be able to use your Pilgrim's Crux to open up the door to the north, then walk towards the north-western room to get another Pilgrim's Crux. Continue walking in a southerly direction.
At the door to the south there's a device you can examine, after which you should head north until you reach the next room. Examine the device in the centre of this room, then find the nearest Cactuar Statue to teleport yourself out of the area entirely.
Before you can make any more real progress with this quest, you need to get your hands on another Pilgrim's Crux. You've got two ways of doing this - either purchase it from the Crux Hunter located just inside the Ruffian main hall, or complete the side quest called Life Of A Machine.
Once you've got hold of another Crux, find a Cactuar Shrine and use it to teleport to any of the shrines inside the temple. Keep walking down the corridor until you reach the door at the very end, then use the Pilgrim's Crux to open it. You'll find a tablet inside which you should grab. Just be aware that a bunch of skeleton statues will appear when you do so, and you'll have to destroy them quickly to avoid getting attacked yourself.
Finding the Crux pieces
"You're actually very close to the final fight of the region - and you won't have Fang around to help you afterwards."
You now need to repeat the above step for the other two shrines. Once you've done this, you can use Cactuar Statues to get to something called the Sacred Gate. When you're back inside the temple, make your way towards the gallery, and then interact with the pedestal inside to start a cut-scene. Grab the Crux Body found by the entrance before heading through the doorway to the south.
Before making your way down this hallway, finish off the fight with the Gurangatch who's just to your west, then make your way down to the floor below. Keep heading west until you find a Cactuar Statue to interact with, then fight the Earth Eater who can be found just to the south. Next, grab the Pilgrim's Crux and drop on down to the level below.
Keep moving down the hallway you've found yourself in, and go straight forward into a small room. Veer left here and activate the nearby device to open a door. Keep heading west towards the mural, then climb up the ladder when you see it. You can grab a side quest from Nolan here called What Rough Beast Slouches. Once you've picked it up, go up the stairs and get over the fence up ahead. Open the north-western door using a Pilgrim's Crux, and interact with the Cactuar Statue that's located outside.
Now head towards the east and look at the mural which should trigger a cut-scene. Once this is over, pick up the Crux Trip located by the entrance, and use the Cactuar Statue to return to the Sacred Gate. Now head towards the marker on your map and look at the mural there in order to get hold of the Crux Base piece.
By the time you've done all this, you're actually very close to the final fight of the region - and you won't have Fang around to help you afterwards. For that reason, we strongly recommend cleaning up every last side quest and Canvas of Prayers quest in the region before making any more progress here. Fang's a pretty mean companion, and well worth having on hand for every other challenge the Dead Dunes has to throw at you.
The Grendel fight
"The most dangerous thing about the fight with the Grendel is the sheer quantity of status ailments the enemy's capable of casting against Lightning."
Assuming you're ready to complete Lightning's adventure, go to the Sacred Gate and investigate the door found to the north. Now go to the new marker that's been placed on your map and examine the clock.You're about to start the fight with the mighty Grendel.
| Boss | Grendel |
| Rewards | Max HP +540, Max ATB +10, Strength +8, Magic +56, Recover Item Capacity +1 |
The most dangerous thing about the fight with the Grendel is the sheer quantity of status ailments the enemy's capable of casting against Lightning. For this reason, you should prioritise equipping any abilities or gear that nullifies these deadly debuffs - if you can use the Passion Rouge garb in a Schemata, you'll be at a significant advantage for coping with what's coming your way. The Grendel's weak to Wind too, so make sure your offensive capabilities are built around this school of spell-casting.
There are a few specific attacks you'll want to focus on blocking too, namely the Seance and Hellkraft assaults. You can find yourself close to death should just one of these attacks land. Keep an eye out for the Shadow Clan attack as well. You should be ready to initiate a Perfect Guard against every last element of this physical flurry.
Should you be fortunate enough to initiate a Stagger against the Grendel, switch to your most powerful wind attacks and throw everything you've got at your opponent. Do this right and you should be able to earn yourself a second Stagger. As long as you focus on delivering concentrated Wind attacks - triggering Staggers wherever possible - you should be able to make this a surprisingly short fight.
Once you've defeated the Grendel, take a look at the item just to your left to get hold of the Petra Hood. With this in hand, you're now ready to face down the final day of Lightning Returns.
Head back to the first page of our walkthrough for links to all of our Lightning Returns boss fight guides