10 years later, Mass Effect 2's Suicide Mission is BioWare at the top of its game
Assuming direct control.
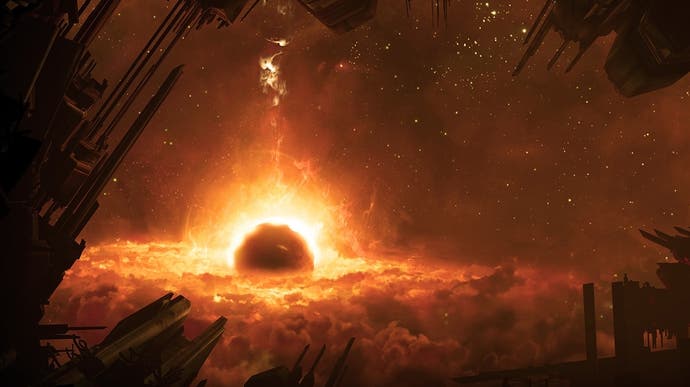
Mass Effect 2's final location - the Collector Base sat beyond its Omega-4 Relay - sits on screen from the moment you first fire up the game. In the distance, burnt debris circles a black hole's accretion disc: a graveyard of spaceship wrecks slowly being drawn toward their final deaths. It's an ominous sight - and a signpost to where you will also be drawn, pulled towards this place just as inevitably for the game's beautifully designed final moments - its Suicide Mission.
A decade on from Mass Effect 2's release, its finale stands up as some of BioWare's best ever work - and while the game's follow-up certainly competed in its emotional stakes, the Suicide Mission remains unparalleled in terms of its labyrinthine choice complexity. Not that much of this is visible to the player, of course. The best thing about the Suicide Mission is you can go into it blind, hoping you've done everything you can to protect your ship and crew - and still feel a gnawing doubt not everyone will make it out alive. But while this opaqueness makes for a nailbiting ride, it also hides some of BioWare's best decision-made gameplay, as choices here and from throughout your path through the rest of the game converge. It's why this mission fascinates me - long before I saw flowcharts being made to expose its inner workings.

Mass Effect 2 is a game about assembling your crew and earning their trust in readiness for this final mission. And what a crew - a rogues' gallery of aliens, former enemies and thinly-forged alliances, which makes for the trilogy's largest and most diverse cast. As the mission begins, it's a thrill to see this family you have spent dozens of hours with come together as the Normandy is plunged into danger - and as you realise any one of them can bite it.
This is swiftly shown in the mission's introduction sequence, which sees the Normandy jump through the Omega-4 Relay and into battle with the Collector Ship - the same one which took down the original Normandy in Mass Effect 2's opening moments. Here, sandwiched in-between sequences where Shepard fights off Collector invaders in the cargo bay, the deaths begin.
Three squadmates can die if you failed to heed your crew's earlier warnings about going into battle under-prepared - specifically, if you did not unlock and complete upgrades to the Normandy itself. The game will make a straightforward check to see if you've upgraded the ship's armour to determine whether Normandy comes through unscathed - or not, which immediately kills off Jack via an explosion in her below-deck hidey hole. Later checks depend on Normandy having upgraded shielding and cannon, and can see a further two deaths from an explosion in the engine room and from a falling bulkhead. One of these will be picked from a character in your squad at the time, the other from the rest of your team.
This is all before you touch down at the Collector Base itself. If you're under-prepared, it can feel a brutal introduction - one which sets the stage for the potential massacre that can follow. Even losing a single squadmate acts a sombre warning.
After a crash landing at the base, Shepard rounds up the remaining squadmates and you are given your first set of role options. You must choose (wisely) who on your team will be given certain jobs - the first time this mechanic has come into play - suited to their particular skills. It's something which becomes progressively harder as the mechanic recurs throughout the mission if you have already lost people: the more you lose, the narrower your chances are of success.
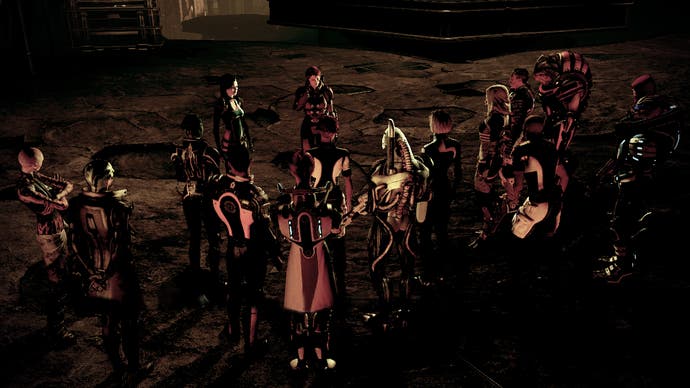
Here, the options are relatively straightforward. You must pick a specialist to sneak through a series of vents, as well as a team captain to lead a separate set of squadmates as backup. As a tech expert, Tali is the obvious choice for the ducts - though if you've failed to get to know her, you may not know this. Other options here include Legion and Kasumi - although both can be missed as squadmates entirely, and the latter was only available as post-launch DLC. Anyone else will die, but the mission will take a while to actually play this out.
As you fight your way through the Collector base, waves of enemies appearing and being upgraded by the Collector General ("ASSUMING DIRECT CONTROL"), you get constant radio chatter from those you have assigned to roles. While largely off-screen, their presence is felt - and it adds to the overall sense everyone is at risk. Your vent specialist, in particular, feels constantly in peril - you'll need to unblock their progress numerous times as they get stuck - but it is something of an illusion.
When you finally rendezvous with your vent specialist again, a door sticks and your secondary team must lay down fire to ensure everyone gets through. And it is now your choices actually come into play. Did you pick the right person (Tali/Legion/Kasumi? Then OK.) and did you earn their loyalty in the game already (If yes? Then OK.) and did you pick a good leadership candidate for the support team (Miranda/Jacob/Garrus? Then OK.) and finally was that candidate also loyal (If Yes, then OK.). All four of these checks must be passed for the vent specialist to live - otherwise they get shot at the last second, having completed their mission.
With this section complete, the action subsides and the genre changes. In a moment straight out of a sci-fi horror film, you find your previously-kidnapped ship crew encased in pods, ready to be liquefied. To be clear, these are your non-squadmate personnel - people like Doctor Chakwas, and Kelly Chambers your glorified space secretary - who were snatched when Collectors previously climbed aboard the Normandy.
Whether these people live has already been decided. It depends on how soon you headed here after they were taken - how many missions you completed in the interim. Did you storm into the Omega-4 Relay as soon as you could, or did you mess around the galaxy, ignoring their fate? This is something of a sneaky choice, as while their kidnapping counts as a soft point of no return for their survival, the game only warns you there is no going back when you ready up for the Omega-4 Relay mission itself. It's easy to get distracted from this, and instead spend time making sure you have everything else you need, everyone else's loyalty missions complete. It is the only point in the game where your urgency getting somewhere actually matters, instead of letting you indulge in side-quests without consequence. If you headed to their rescue as soon as possible then all crew will survive, otherwise some or all of them (bar Chakwas) will be liquefied in front of your eyes. (If you do save them all, you'll see one of the colonists from Horizon turned into goo instead.)
With the horror show over, the action begins to build to the middle round of choices. Here, you need to pick a biotic specialist to protect you inside a bubble forcefield while you move forward through a Seeker Swarm, with an additional team leader also needing to be chosen to head up a backup squad. Finally, you can choose a third squadmate to escort any/all remaining crew back from the pods to the Normandy - an option which sounds risky, since you're sending them off on their own and none of the crew are in any shape to fight.
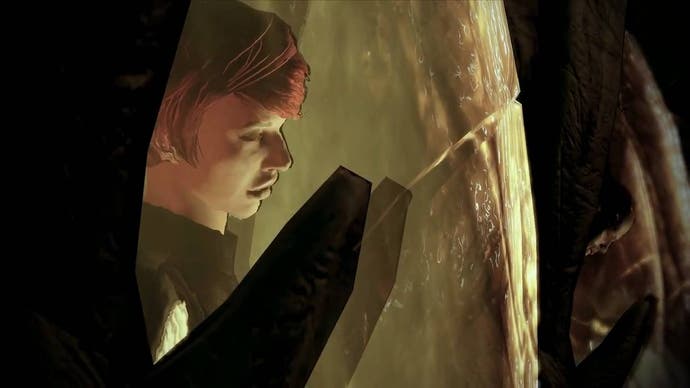
For your biotic specialist, just as with the vents, you'll want someone with the right skills. Here, it's a job for top biotics users Jack or Samara/Morinth only, with either Miranda, Jacob or Garrus your picks for a backup team leader. Miranda would seem a good pick for biotics also, but is by now so experienced a leader - and over the course of the game has hopefully warmed up to Shepard enough - that the game seems to want you to pick her for leadership tasks instead.
This all plays out in a section of combat where your biotic specialist follows you, casting a moving area of effect bubble in a radius around you and your two squadmates. Again, you rendezvous with your backup team at a doorway, with your biotic choice failing here if chosen poorly - their body picked up by Seeker Swarm flies, and lifted off into the darkness. (Did you pick Jack or Samara/Morinth? OK. Were they also loyal? OK. If not, they're dead.) As your backup team arrives, a poor choice of leader will see them also take a bullet. (Did you pick Miranda or a loyal Jacob/Garrus? OK, they will survive. If not, they're also dead.)
As you take stock on these latest potential casualties, you'll also get a check-in from Joker and EDI aboard Normandy on the status of your surviving crew. Did you send a loyal squad member back with your wounded ship personnel? If you risked compassion and did, all will survive. (This is a great place to send back a weaker squadmate such as Mordin ahead of the final section to ensure his survival.) A non-loyal squadmate, however (or no escort at all, if you were feeling particularly evil) will result in all of the escort party's deaths - which leads to a very empty-feeling Normandy afterwards even if you do still pull through.
The Suicide Mission's final section feels its most straightforward: you must simply pick, as you have done throughout the game, two squadmates to join you for one last battle, knowing that everyone else will stay back to cover your advance. But the calculations here for who survives are the most complicated in the entire series. Before all that, however, Shepard makes their big final speech - and it's worth pointing out the other type of choice available throughout this mission - the more flavourful decisions you make about whether to inspire your squad through Paragon-like heroism, or Renegade-like arrogance.
Who you pick to remain behind may now be limited by dwindling numbers, but those who stay back will need to be beefy defenders you can risk leaving to fend for themselves. These squadmates - termed by fans as those left to Hold The Line - should therefore not include weaker options such as scientist Mordin and techie Tali, but favour beefcakes such as Grunt and Zaeed who will almost always muscle through. And with that choice made, the mission's final hidden mechanics will be in place - your team and your own survival is now set in stone.
One final combat section, with floating platforms of Collectors slotting together like tessellating tiles, leads into the big reveal of the mission's er, low-point - the Human Reaper. It is the only Reaper in the series not to look like, well, a Reaper. Dialogue later in the series attempted to explain/retcon its shape as some kind of internal larvae, but its presence here still opens up more contradictions than necessary for the gain of having something big and enemy-shaped to shoot.
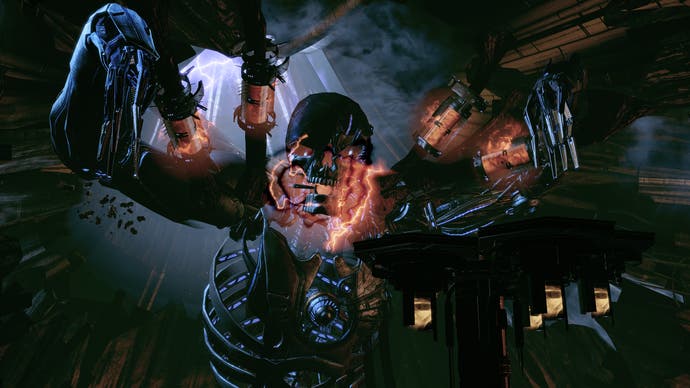
As the boss battle begins - shoot the glowing tubes! - you get a quick check-in with those left Holding The Line which will indicate whether you chose well or not (a poor, panicked Mordin telling you his position isn't safe is not a good sign) before a seemingly big plot decision to save or destroy the Collector base when all is said and done. The consequences of this were left to Mass Effect 3 to fully play out (such that they do), though it will change the dialogue between Shepard (if they survive) and The Illusive Man after the mission wraps up.
Regardless of your choice, after the human Reaper is finally offed, the consequences of your last squad decision will play out. Amongst those you took with you, the calculation is simple. If they were loyal, they live. If not then, not. As for those Holding The Line? The calculation made to determine this relies on a hidden survivability weighting of individual squadmates, boosted by their loyalty, held up against the number of squadmates left surviving at that point. This makes my head ache a little, so I'll let the right-hand column in the flowchart below show the exact maths.
My very first run through the Suicide Mission I remember getting to this point with no casualties, only to find that Tali - who I'd left Holding The Line - had perished. It was my only squad death - and one I soon ruled non-canon as I went back to an earlier save and redid the entire mission again.
With your squad's fate now sealed, the mission wraps up as the Normandy swoops in and picks up the survivors. Shepard, of course, is the last one to leave and must perform a running leap onto the ship as Joker lays down fire. (Who's driving?) It's here the game's final death can take place - startlingly, of Shepard themselves. An automatic check here will doom Shep if any fewer than two squadmates remain - causing them to fall to their death. (Yikes. Trilogy over.)
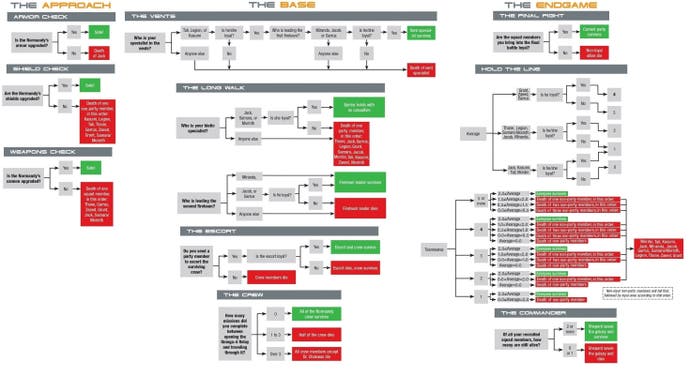
Image credit: speedemon92
You can go into Mass Effect 2's Suicide Mission with Shepard leading a team of 12 squadmates - some of them established characters from the first game in the trilogy, others new faces you've come to love over the long road to the Omega-4 Relay. It is still incredible to me that any of them - all of them, even - can perish here, mid-trilogy.
Only Shepard's death is ruled non-canon, their survival a prerequisite for your save transferring into Mass Effect 3. It's like BioWare making its own version of Empire Strikes Back which kills off Han, Leia and Chewie and still leads into Return of the Jedi. It's utterly audacious - and it's something BioWare itself later admitted had caused real headaches when planning how to pick up the pieces for the trilogy's final chapter.
But that's a different story. When it comes to Mass Effect 2, a decade on, I am still in awe at this mission, and all its variables behind the scenes. To make something this complex involving characters you care about shows a studio at the top of its game - and something I'm still hoping will one day be bettered.
