All Sage's Will locations in Zelda Tears of the Kingdom
Where to find every Sage's Will and how to use them.


Knowing all the Sage's Will locations in Zelda: Tears of the Kingdom will let you build a better and stronger bond with your allies as you explore Hyrule. Many of these collectibles can be tricky to get to, or even to simply find on the vast map.
Hyrule in Zelda: Tears of the Kingdom is huge, and there are several layers for you to explore. Many of the Sage's Wills are scattered across the Sky Islands and behind difficult enemies. We strongly advise that you complete the Wind Temple and follow it through to get a helpful ally. Also, we suggest bulding your stamina wheel to at least two full wheels or you will end up consuming a lot of meals and elixirs.
Without further ado, we're going to show you all the Sage's Will locations in Zelda: Tears of the Kingdom and how to use them.
On this page:
If you'd like to learn more about Link's adventure, visit our Zelda: Tears of the Kingdom walkthrough.
How to use Sage's Will in Zelda Tears of the Kingdom
To use a Sage's Will, you need to have unlocked at least one of the Sages in Zelda: Tears of the Kingdom.
Once you've gotten at least one Sage and four Sage's Wills, follow these simple steps:
- Go to a Goddess Statue.
- Pray at the statue.
- Select 'Strengthen Vow' - If you've not got enough Lights of Blessing to redeem, you'll automatically go on to the next step.
- Select the Sage you want to strengthen your vow with.
You can only strengthen your vow with each Sage once, and it will cost you four Sage's Will each time.
Strengthening your vow with a Sage will increase the attack power of the chosen Sage, meaning they will be more help when battling your way through enemies across Hyrule.
All Sage's Will locations in Zelda Tears of the Kingdom
Here are all of the Sage's Will locations in Zelda: Tears of the Kingdom, and how to find them amongst puzzles, enemies, and other things blocking your path.
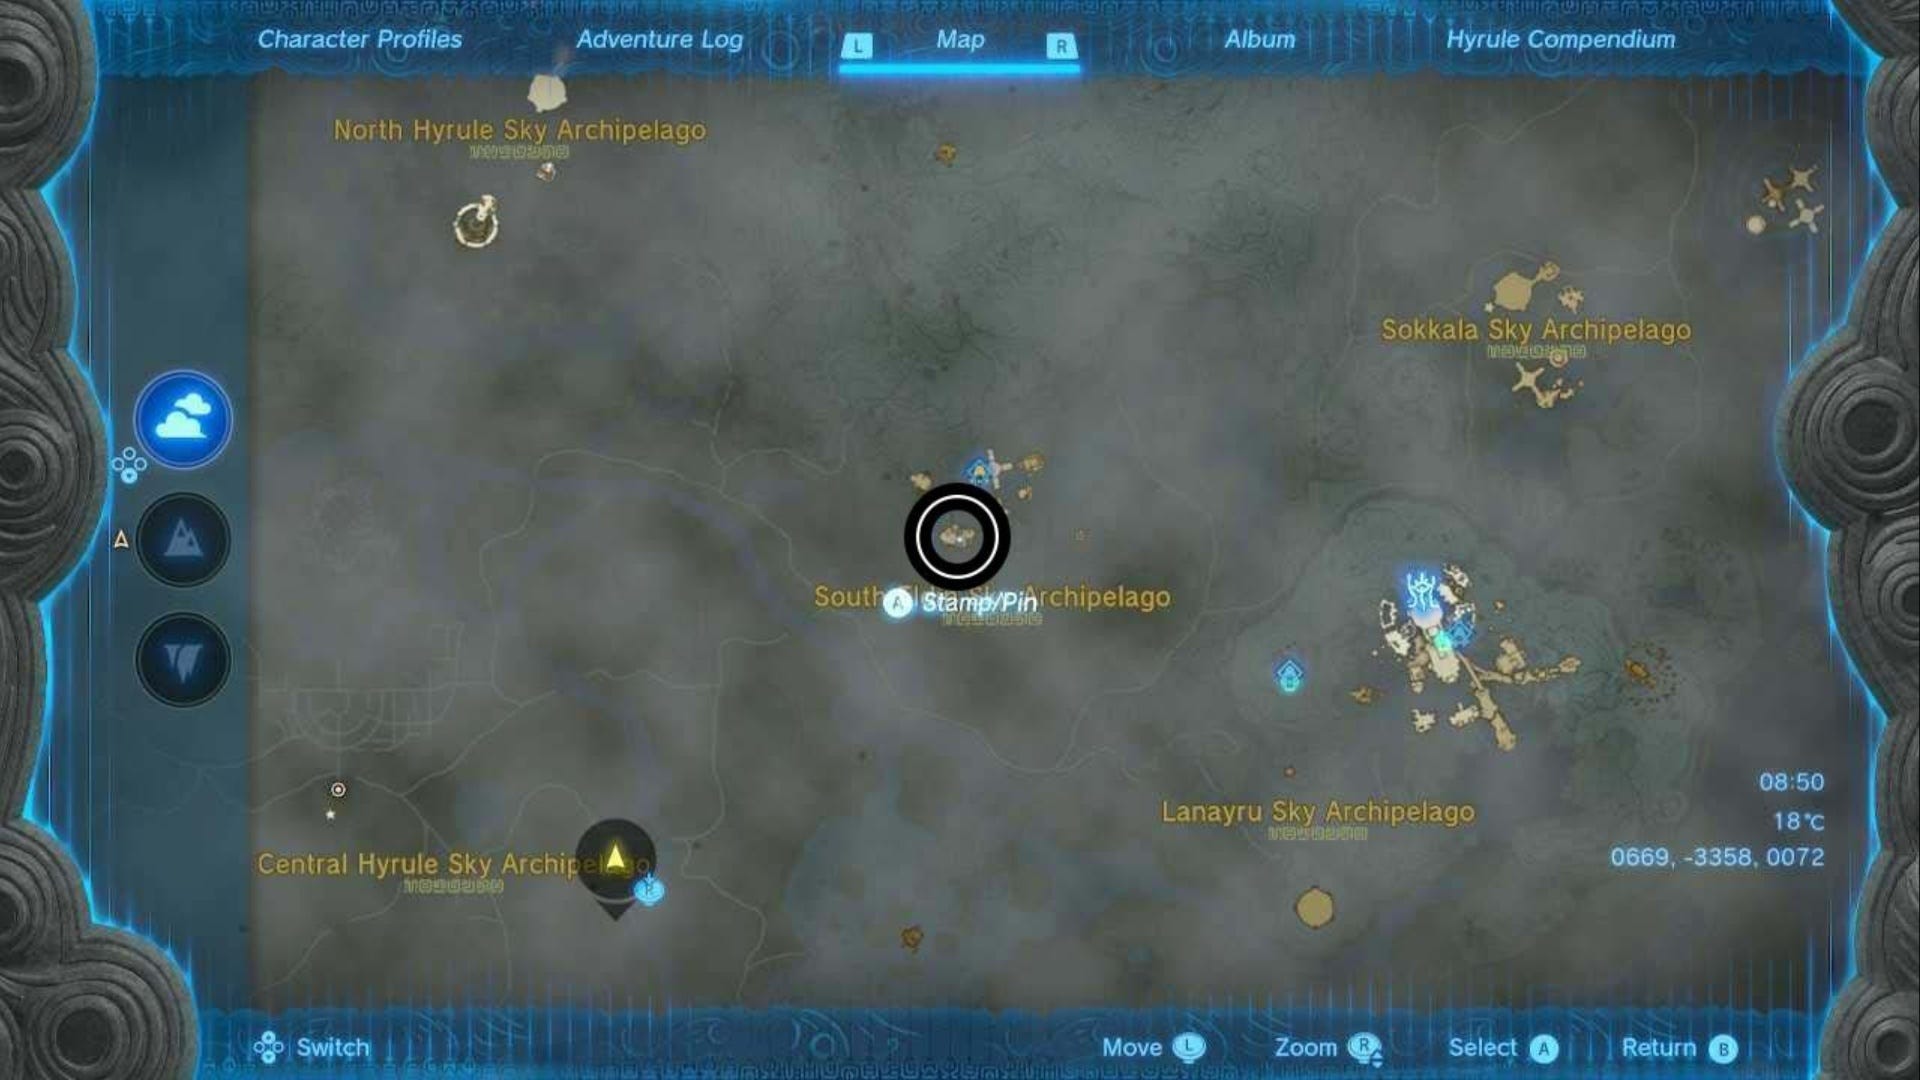
South Hyrule Sky Archipelago (-0950, -1736, 1008)
In this Archipelago you should see a sky island that consists of two ponds merged together.
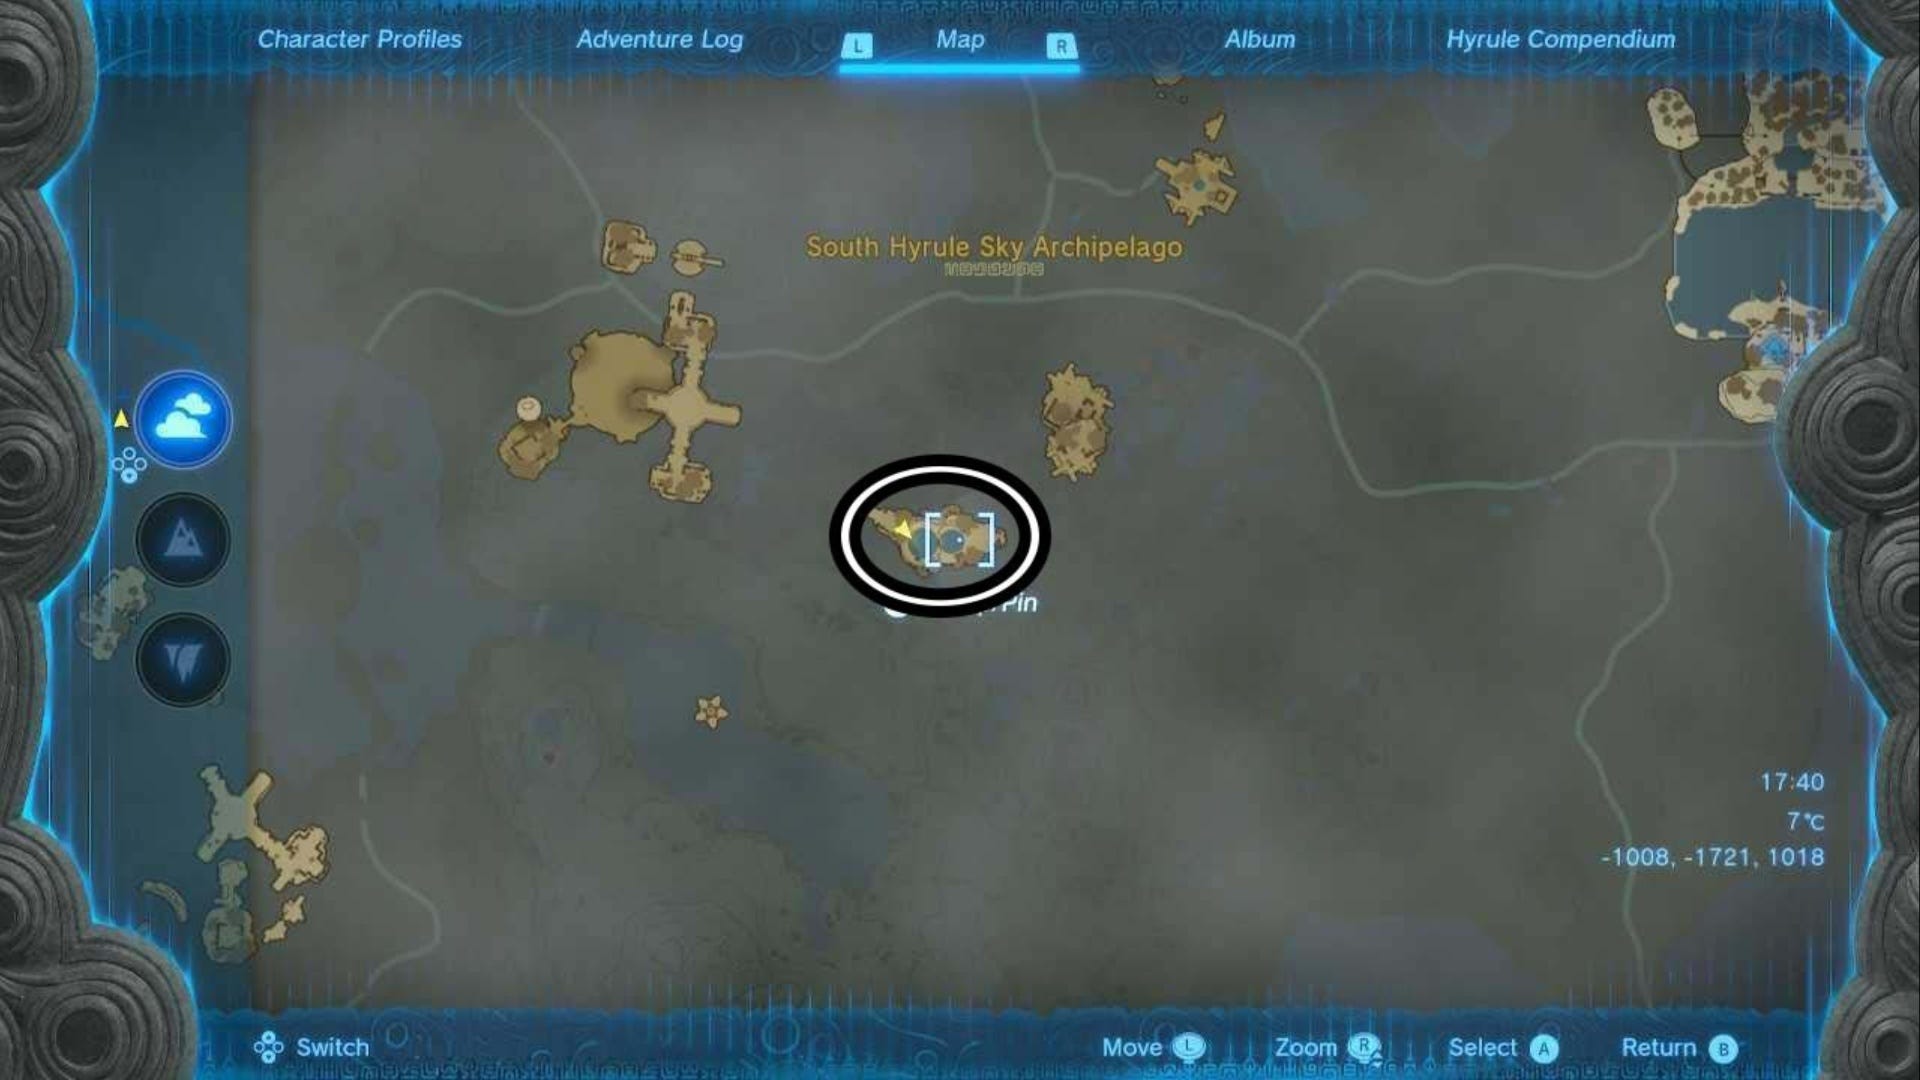
One side is the higher island, the other side is the lower island but they are connected. Head for the lower half of the island and stand on the edge of the pond here. Look around and you should see a gate that you can lift with Ultrahand.
Lift the gate up all the way and let the water drain out of the pond. Hold the gate here for a minimum of five seconds and then release it. The water will flood back into the pond but don't worry.
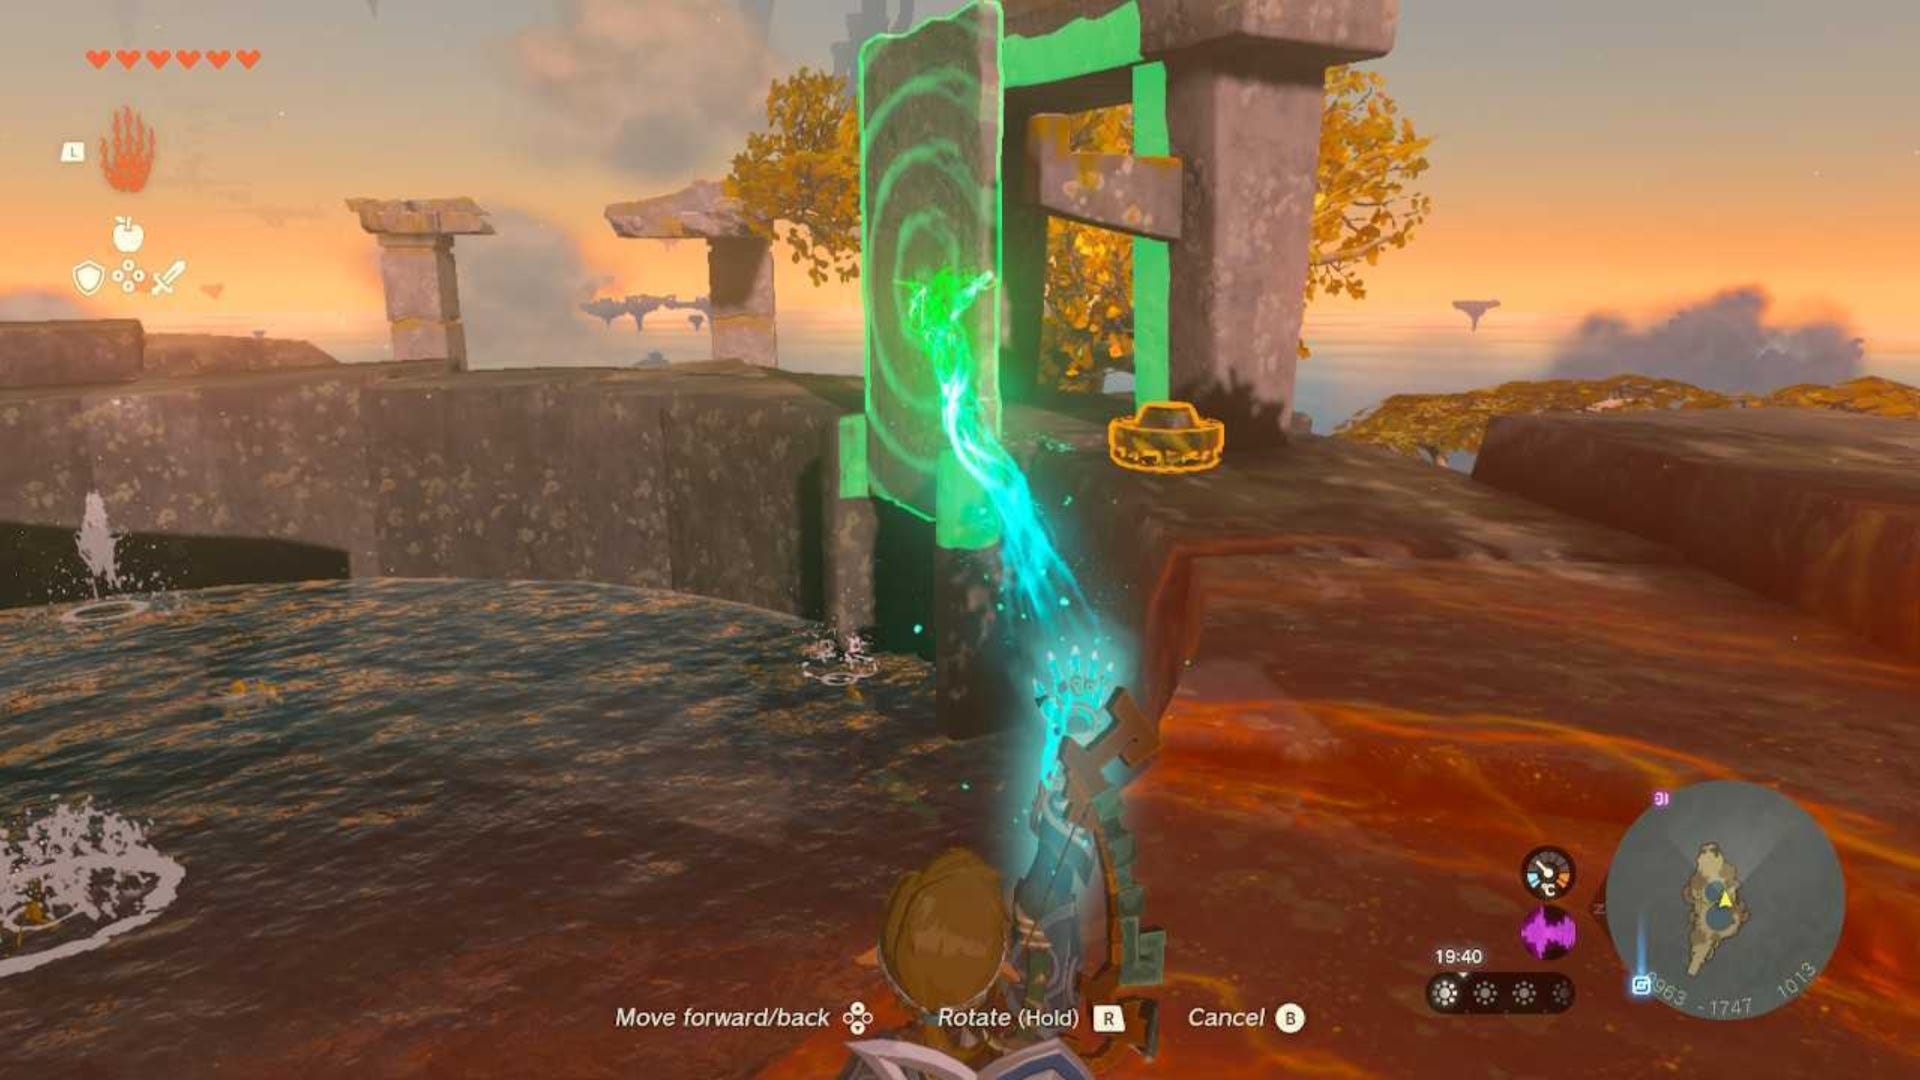
Now, use Rewind on the gate to drain the water again. As it does, quickly jump down to the bottom of the pond and collect the chest here. This chest contains the Sage's Will.
Wellspring Island in Lanayru Sky (3417, 0637, 1290)
We recommend doing the Sidon of the Zora main story quest to reach this island as this is the easiest way of doing so and you need the Zora Armor to be able to get here. When you get up to the island, the chest containing the Sage's Will is attached to the Flux Construct II boss here.
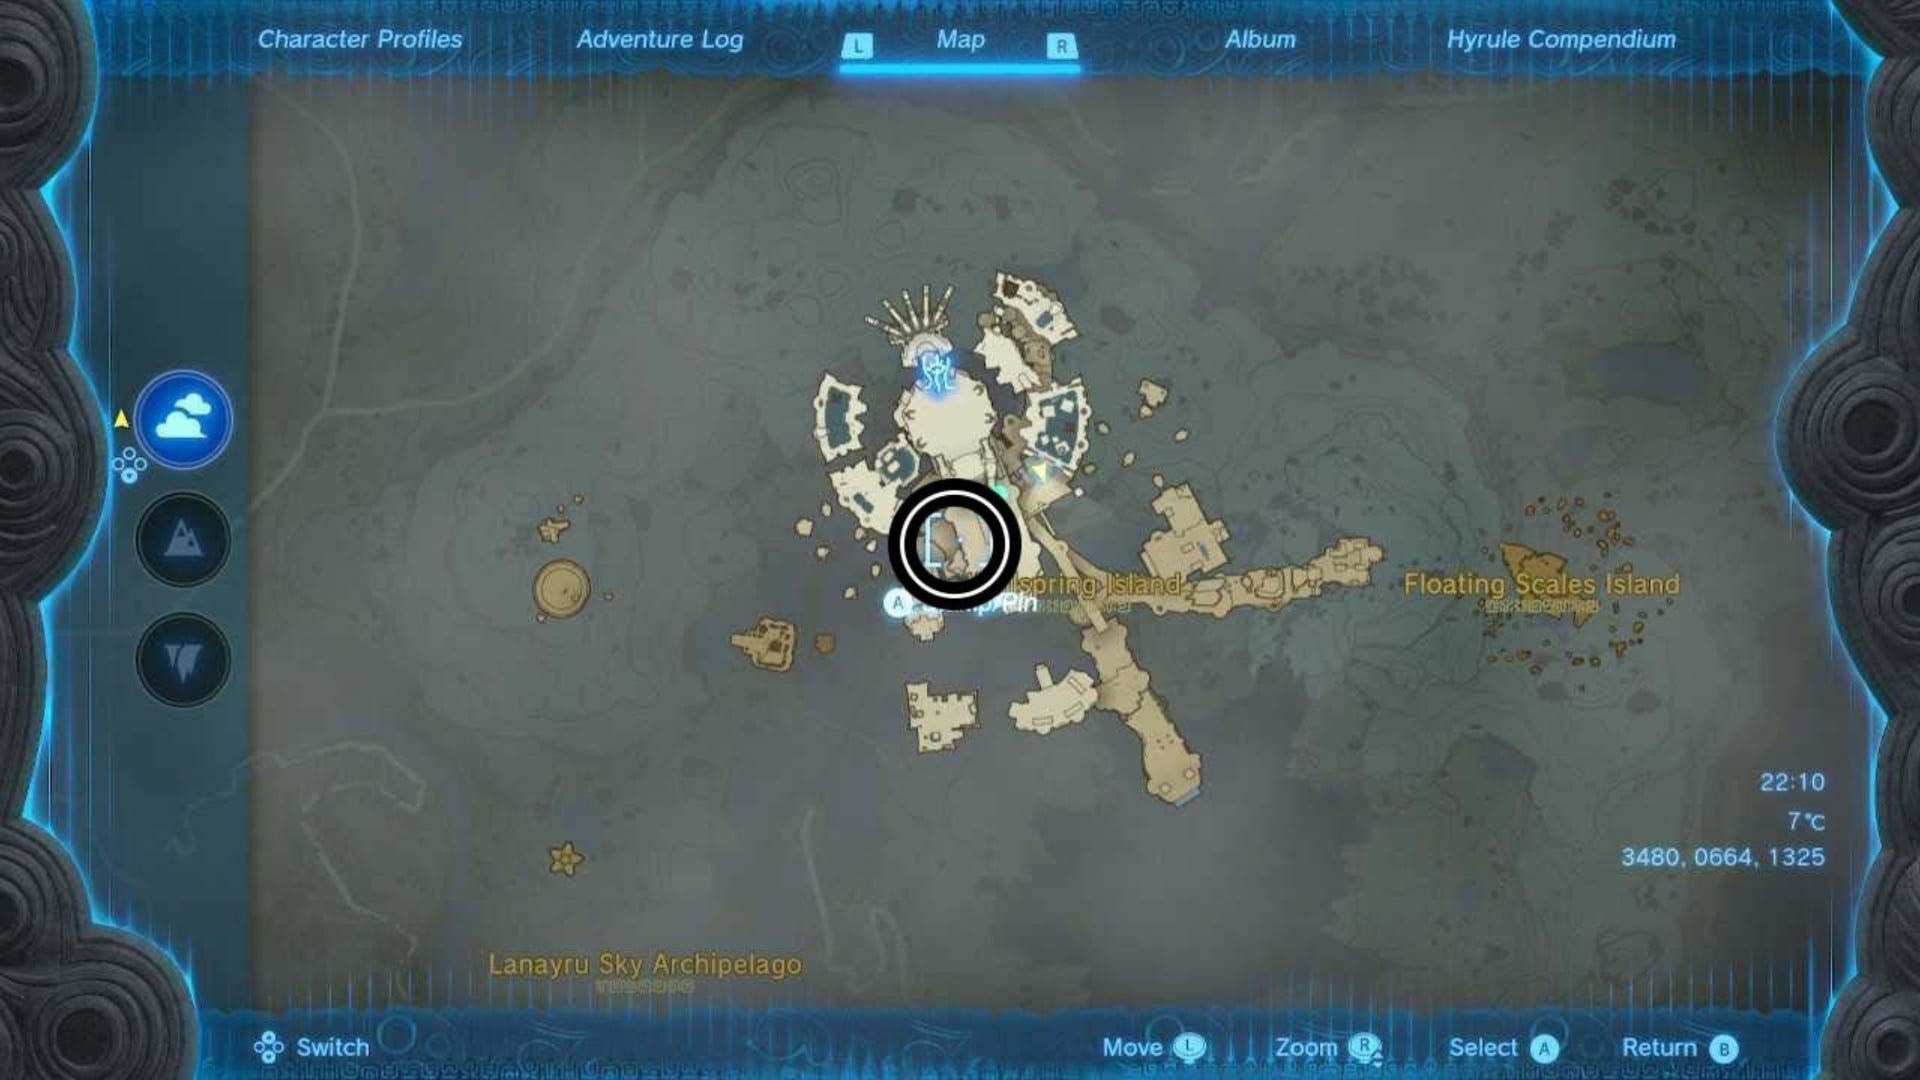
You can find the Flux Construct II on Wellspring Island near the Zonai Gacha machine. You can grab the chest from its shoulder using Ultrahand and then run away from the fight if you don’t feel like battling the boss today.
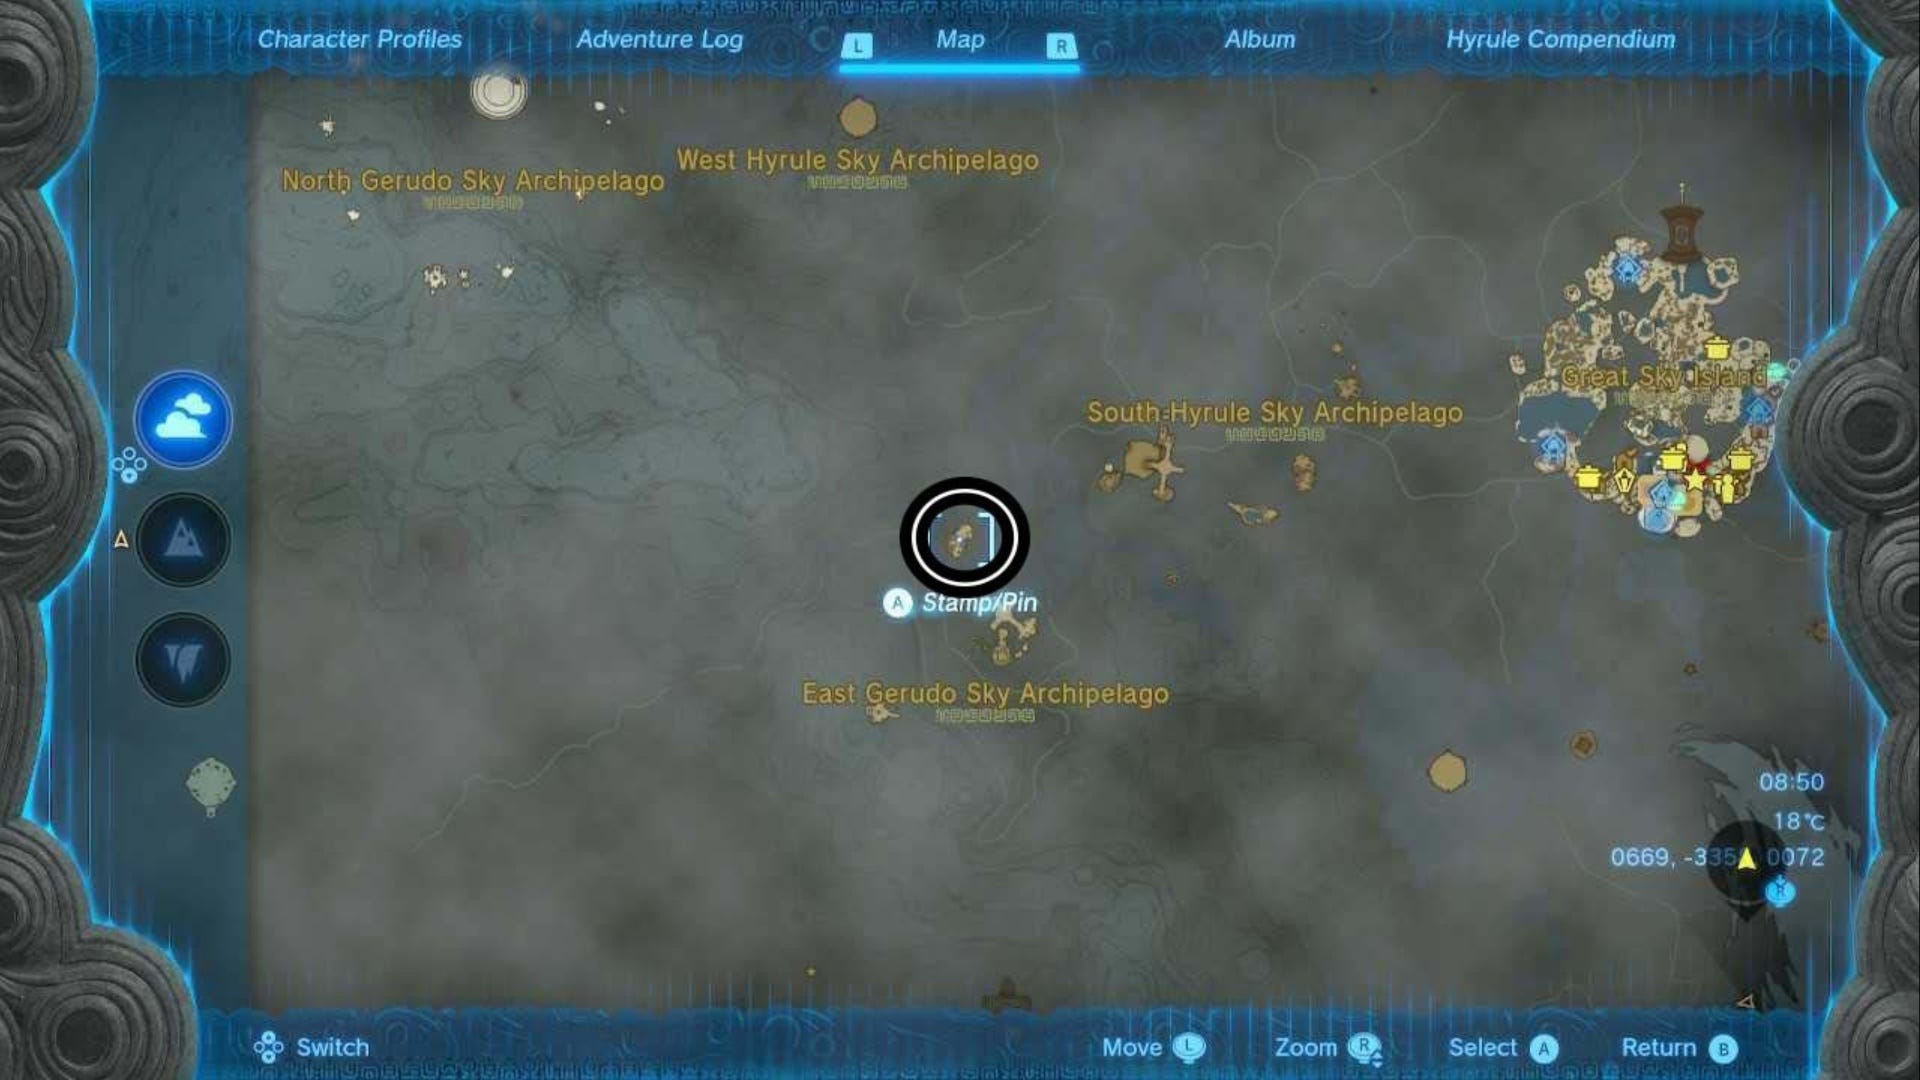
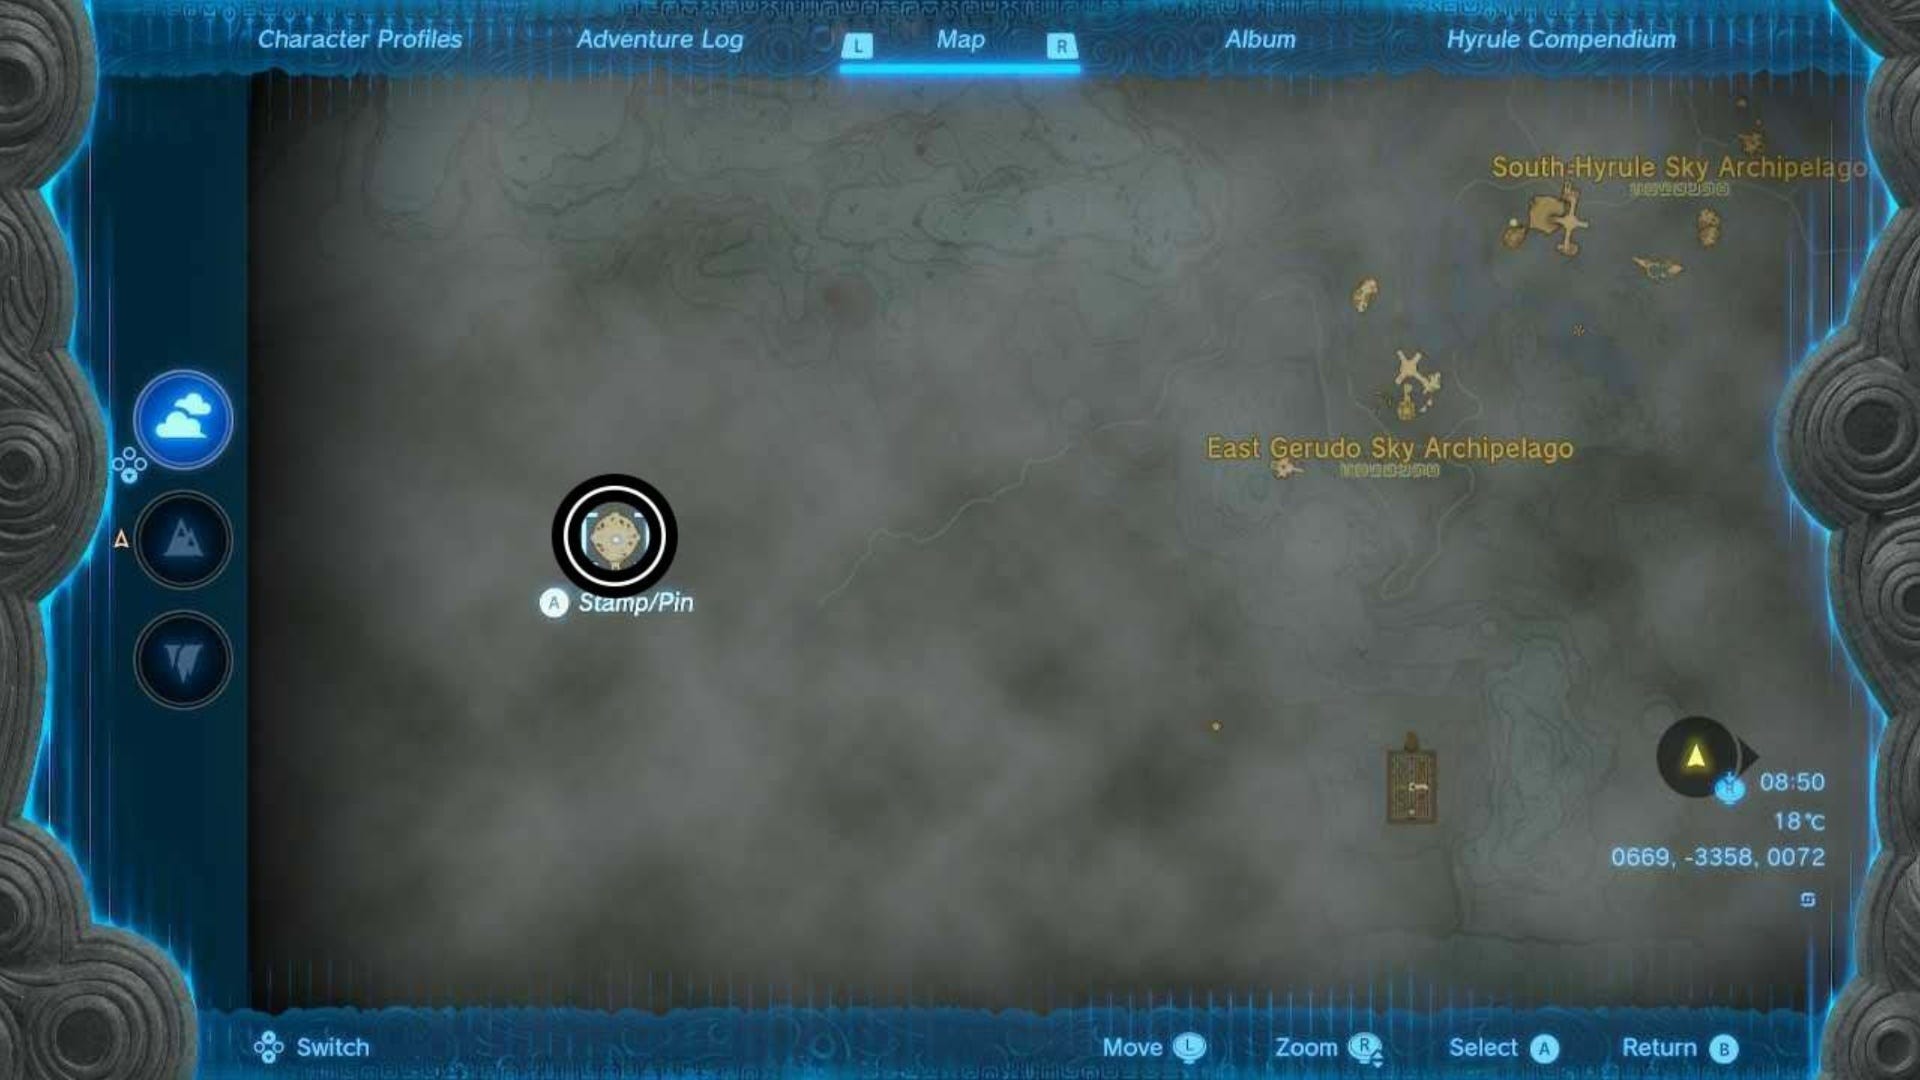
East Gerudo Sky Archipelago (-1953, -1800, 1140)
The chest here is located behind a puzzle on the bottom level of the island here. This island is made up of three tiers, and the puzzle you need to solve is on the lower tier. We found it easiest to land on the top tier of the island, then jump off and use your Paraglider to get down to the lower section.
Once you are on the bottom level, you should see the chest locked behind a gate. To solve this puzzle, stand by the locked gate and use Ascend to get up to the middle floor of the island.
On this level, you'll find the following:
- Zonai Devices inlcuding a Mirror (-1930, -1799, 1166).
- Zonai Construct with Shield (-1963, -1819, 1166).
There are two ways you can do this, you can grab a Zonai Mirror from the Zonai Devices listed above but here's the way we did it.
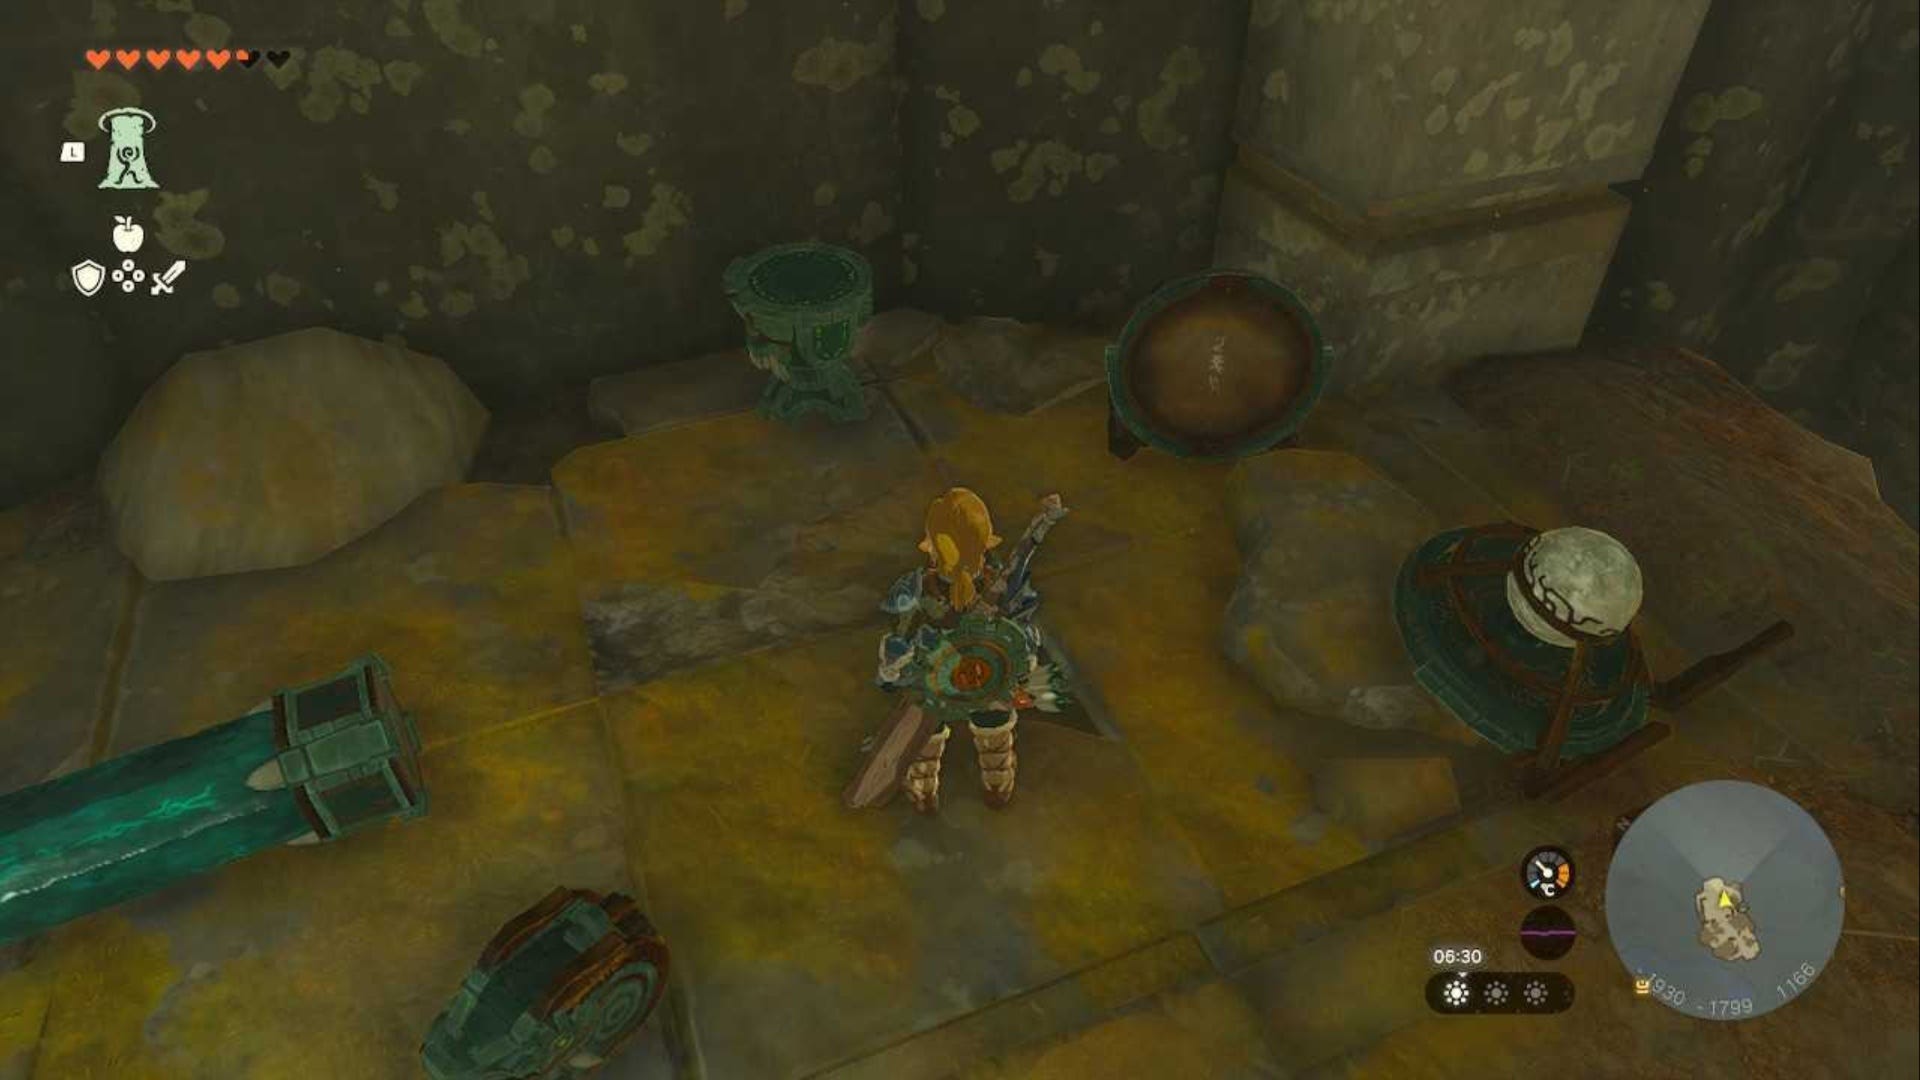
Head around to the Zonai Construct and you'll see that they have a Mirrored Shield. Get them to follow you away from the edge of the level (or they may drop the Shield when you beat them).
Then, defeat the Construct and take their Mirrored Shield. Head back down to the chest on the lower level and then wait until morning. The quickest way to do this is to build a fire and time skip.
Once it's morning, use Ultrahand to hold your Mirrored Shield out in the sunlight. You need to get the Sunlight to bounce off of the Shield and hit the lock above the locked gate in front of the chest.
There's no one specific angle for doing this, so it will be a case of trial and error until you open the gate. However, once you do, you can collect the Sage's Will in the chest.
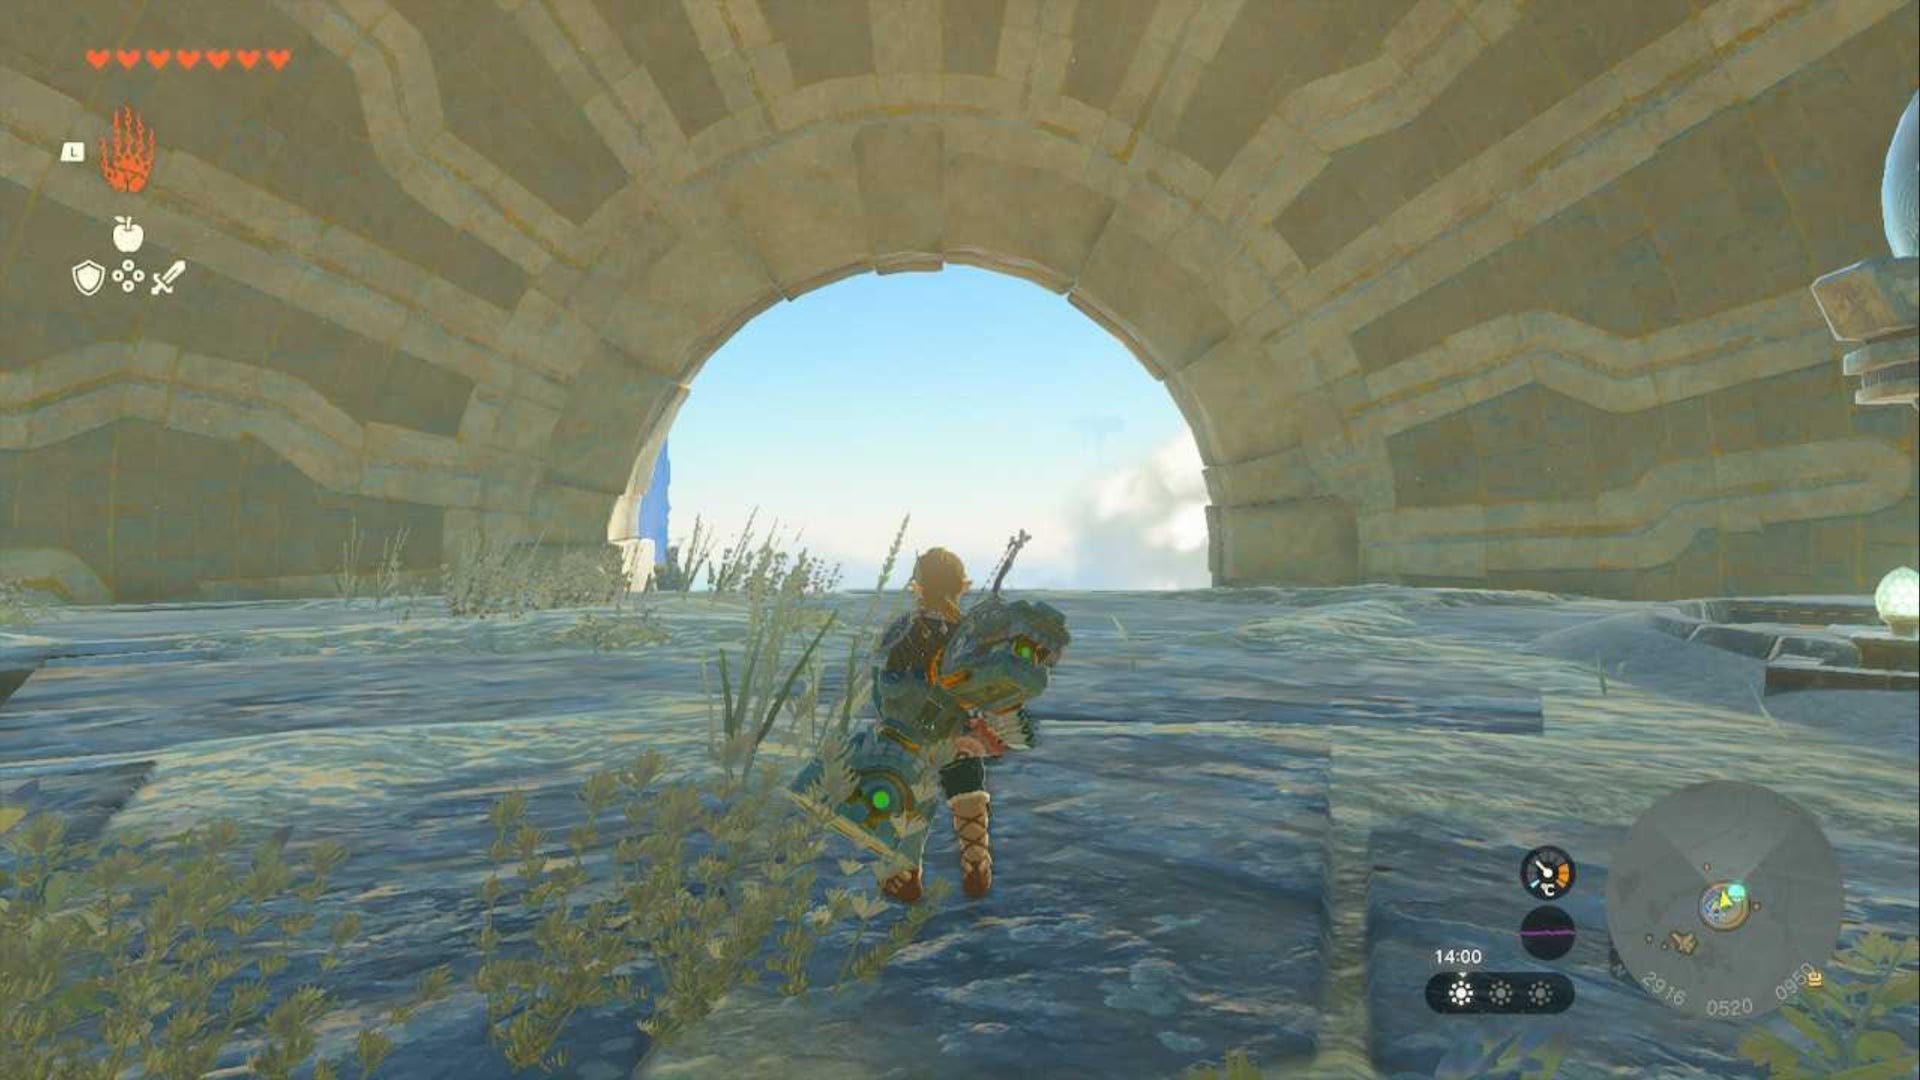
Lanayru Sky Archipelago (2917, 0528, 0950)
There’s a large floating orb in the sky here. The Jirutagumac Shrine is in the orb, and we recommend activating it as a Fast Travel point to make getting to and from the orb a lot easier.

In the middle of the orb, you should see a wheel being constantly propelled around and around by a Zonai Fan attached to the side of it. Remove the fan using Ultrahand and drop it wherever you want to (this doesn't matter.)
Now, manually push the wheel around until the gap that you entered the orb through looks like this:
Carefully climb out of here and down to the lower level of the orb. In the middle of this area is a chest and this chest contains the Sage's Will.
Lanayru Sky Archipelago (2986, -0276, 0894)
Another Sage's Will is in Lanayru Sky Archipelago. This chest is attached to a Flux Construct III.
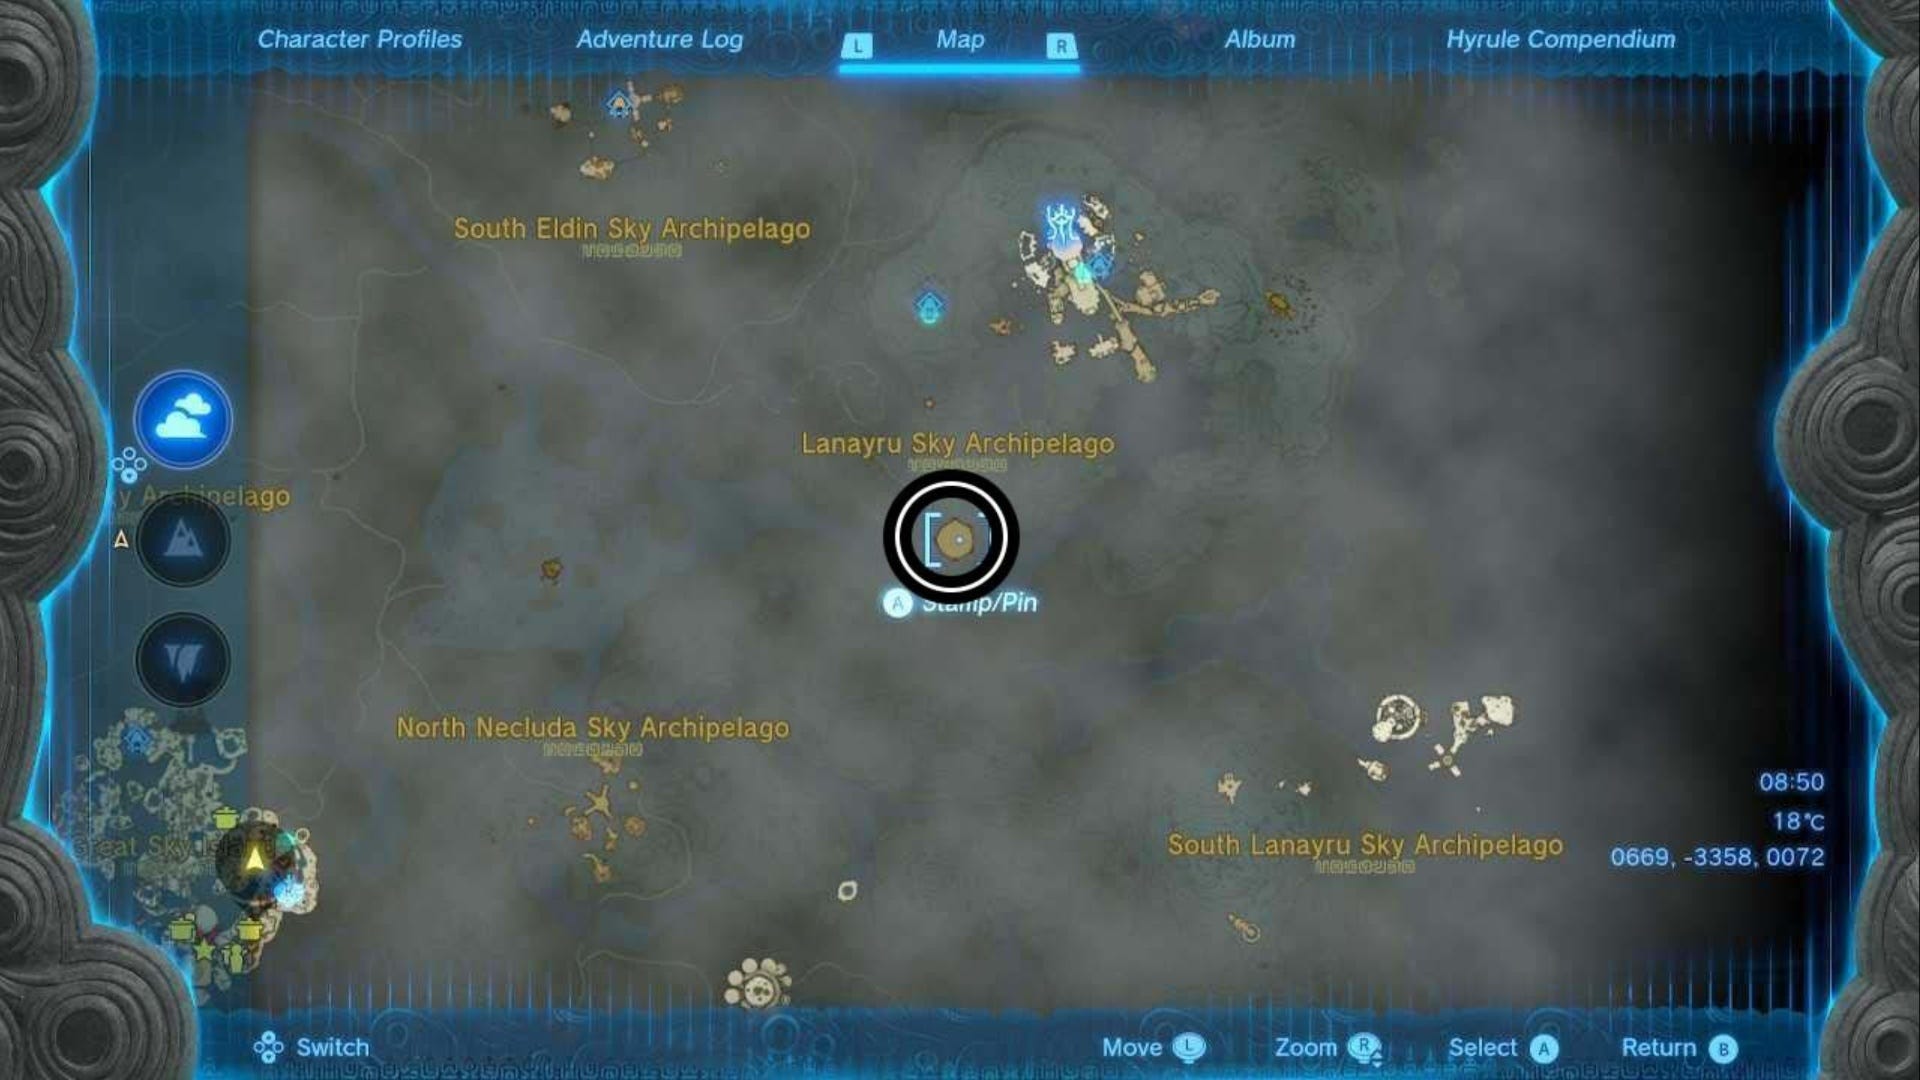
When you find the Construct, you can grab the chest and pull it off of them with Ultrahand. While the Flux Construct III is changing form, you can quickly open the chest to collect the Sage’s Will and then get out of there if you don’t want to fight it yet.
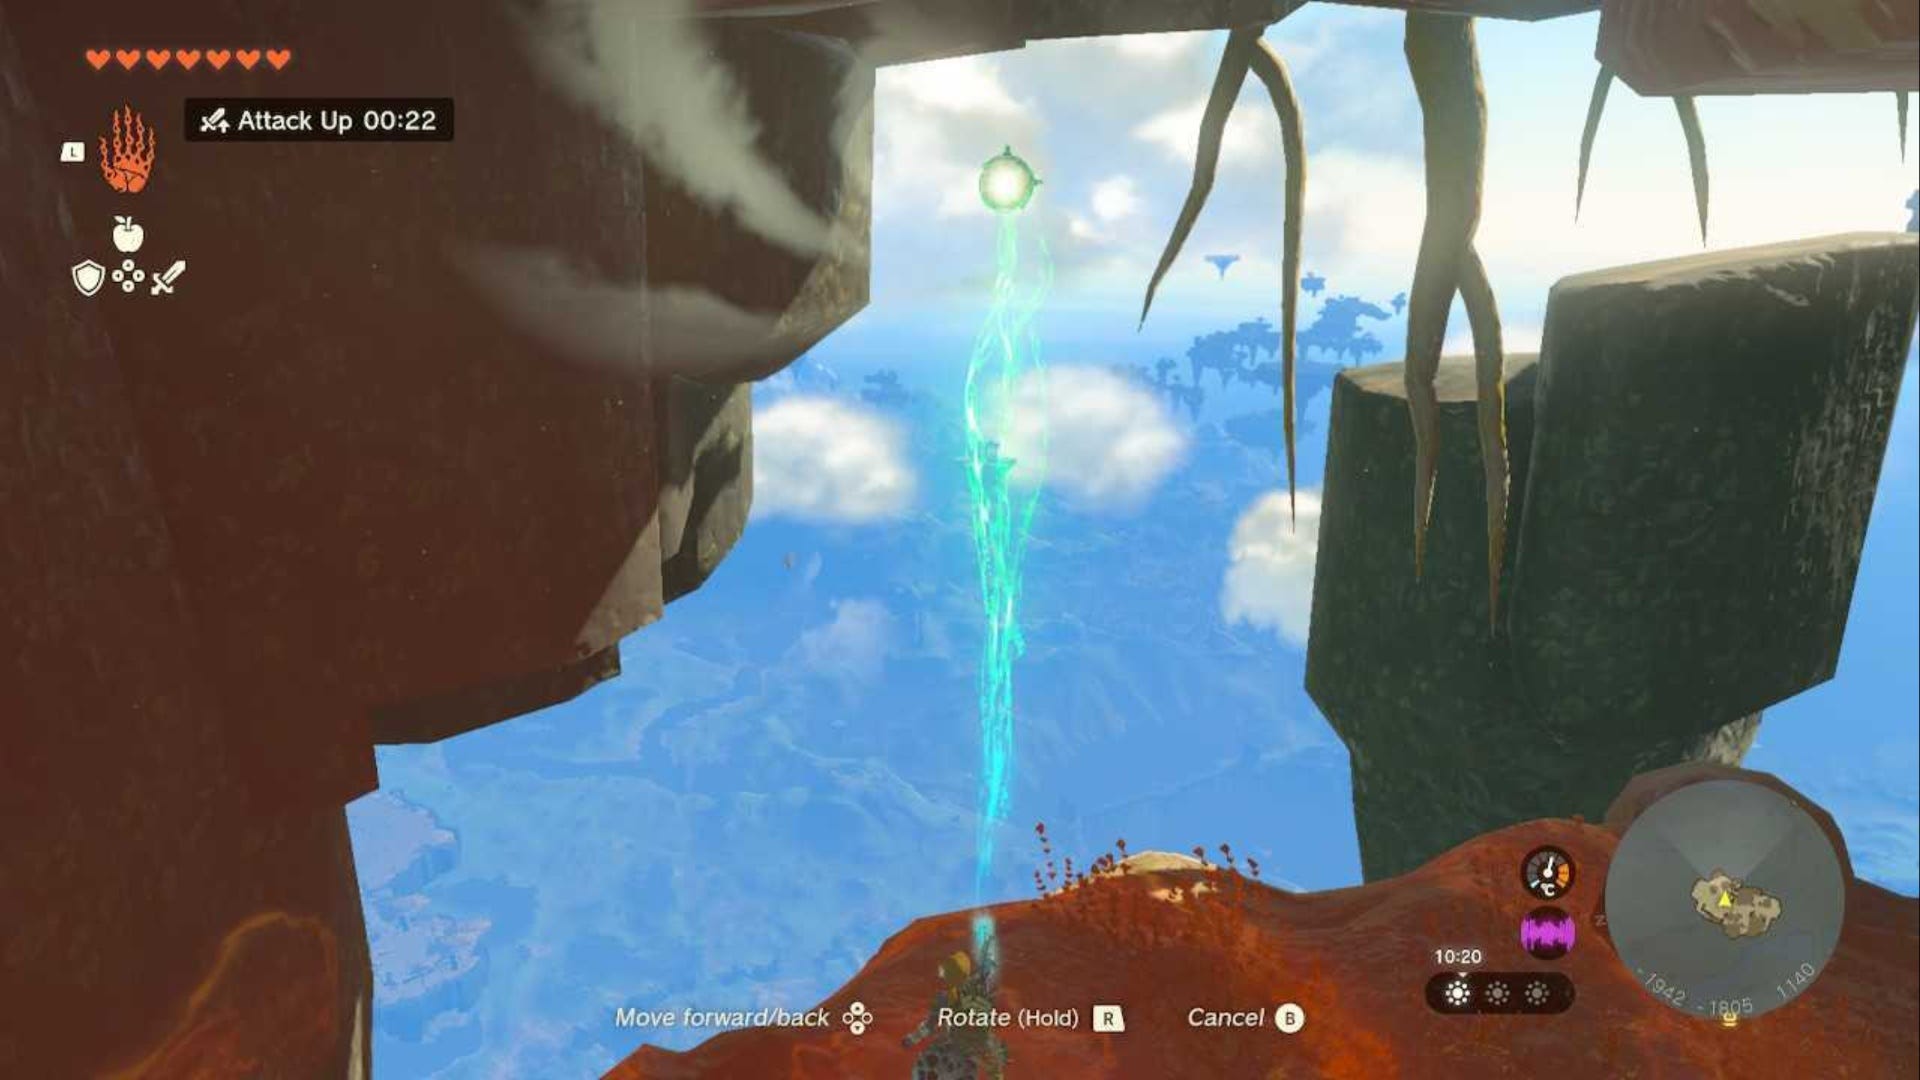
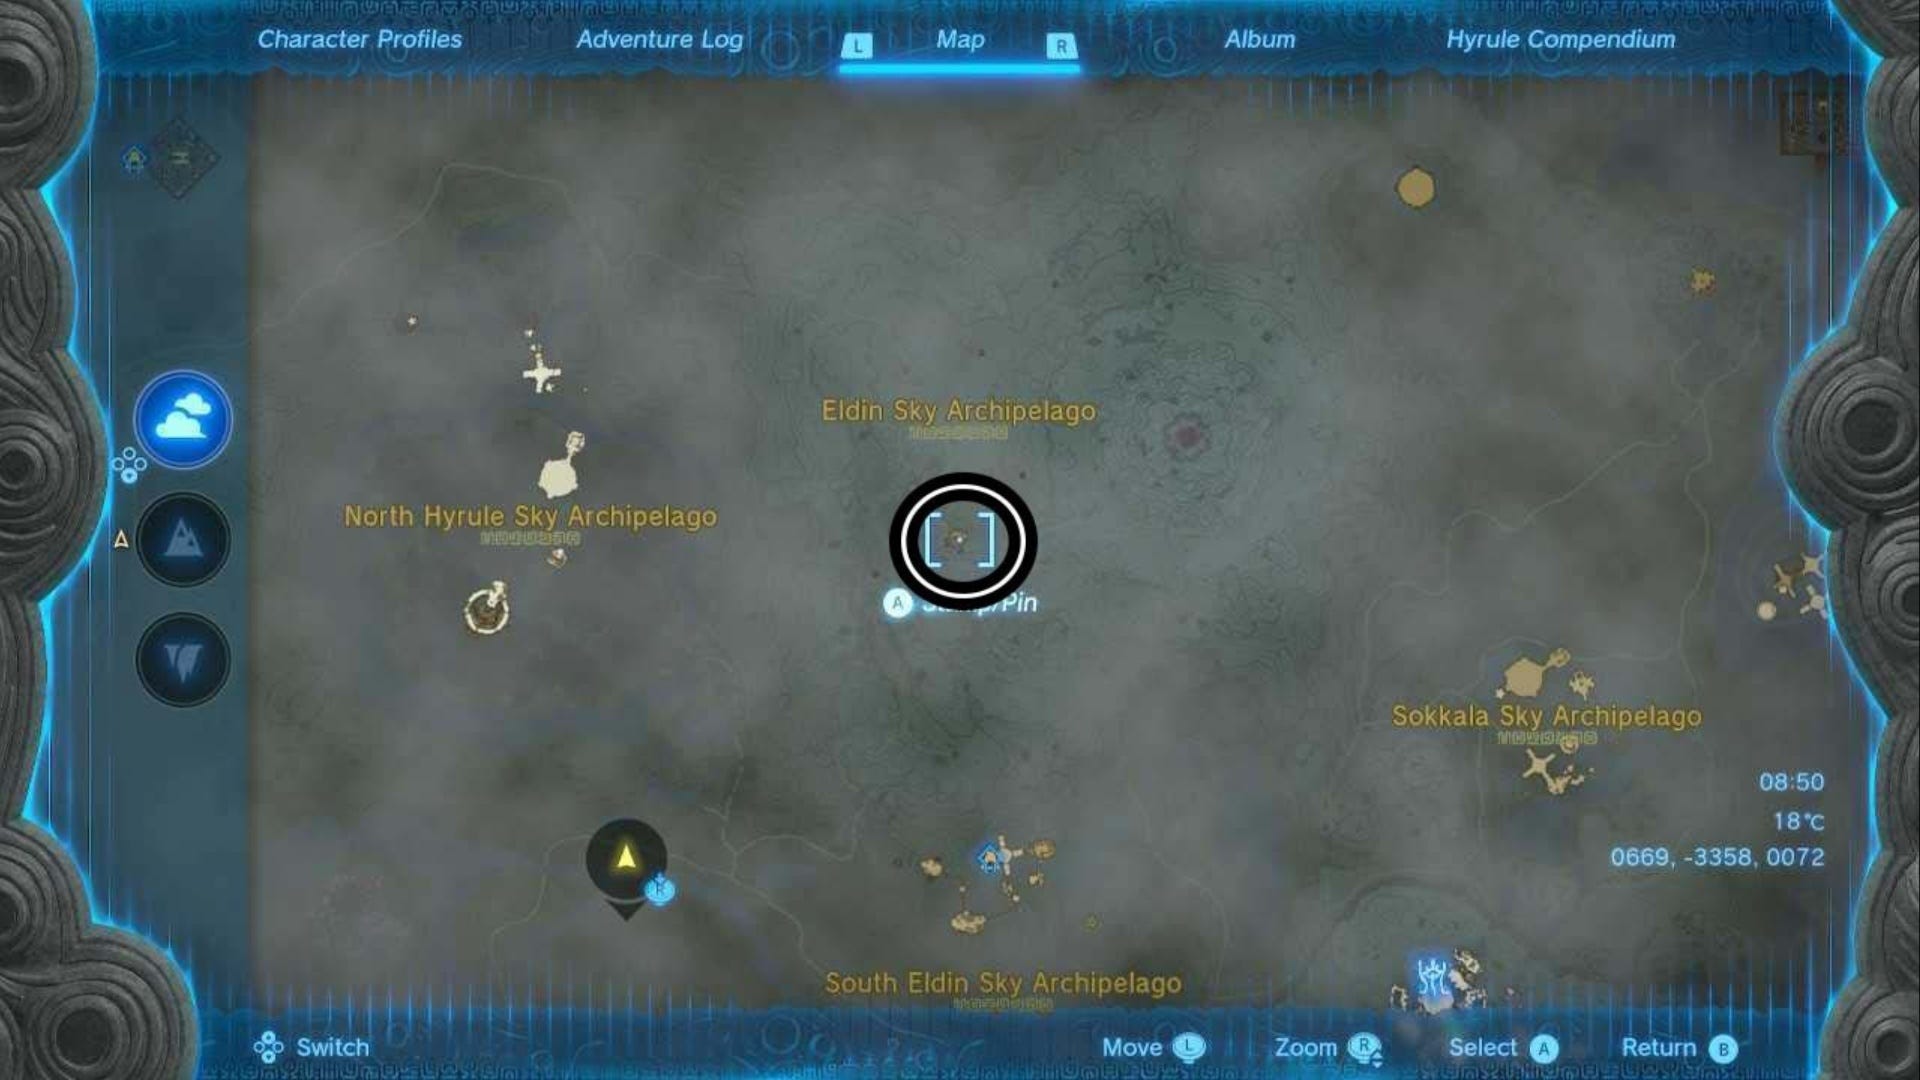
Eldin Sky Archipelago (1765, 2267, 0827)
To get to this location, we found it easiest to create a flying Wing at the top of Death Mountain and fly across to the island.
To make our flying Wing, you’ll need:
- A Wing.
- Two Zonai Fans.
- Two Zonai Batteries.
- A couple of Zonai Charges.
- A Zonai Cart.
- Some patience.
Here's our quick rundown on building a flying machine. Stick the Wing to the top of the Cart. Attach the fans to the rear of the Wing so it will propel it forward, and stick the batteries on top of each fan. You can consume some Zonai Charges if the batteries run out halfway to the island.
Also, we’ve mentioned patience because it’s possible that we built this machine and it may have slightly flown off without us on board…
Once you get to the island, however you choose to, there are a few Soldier Construct III’s here. Deal with them and you’ll find the Sage’s Will in a chest in the middle of the island.
Sokkola Sky Archipelago (3811, 1580, 1144)
You can glide to this particular island from the Water Temple, but it always helps to have some Stamina Boosting elixir in your inventory. We also found that having Tulin is extremely helpful.
From the edge of the Water Temple, you should see a large orb floating among some islands.
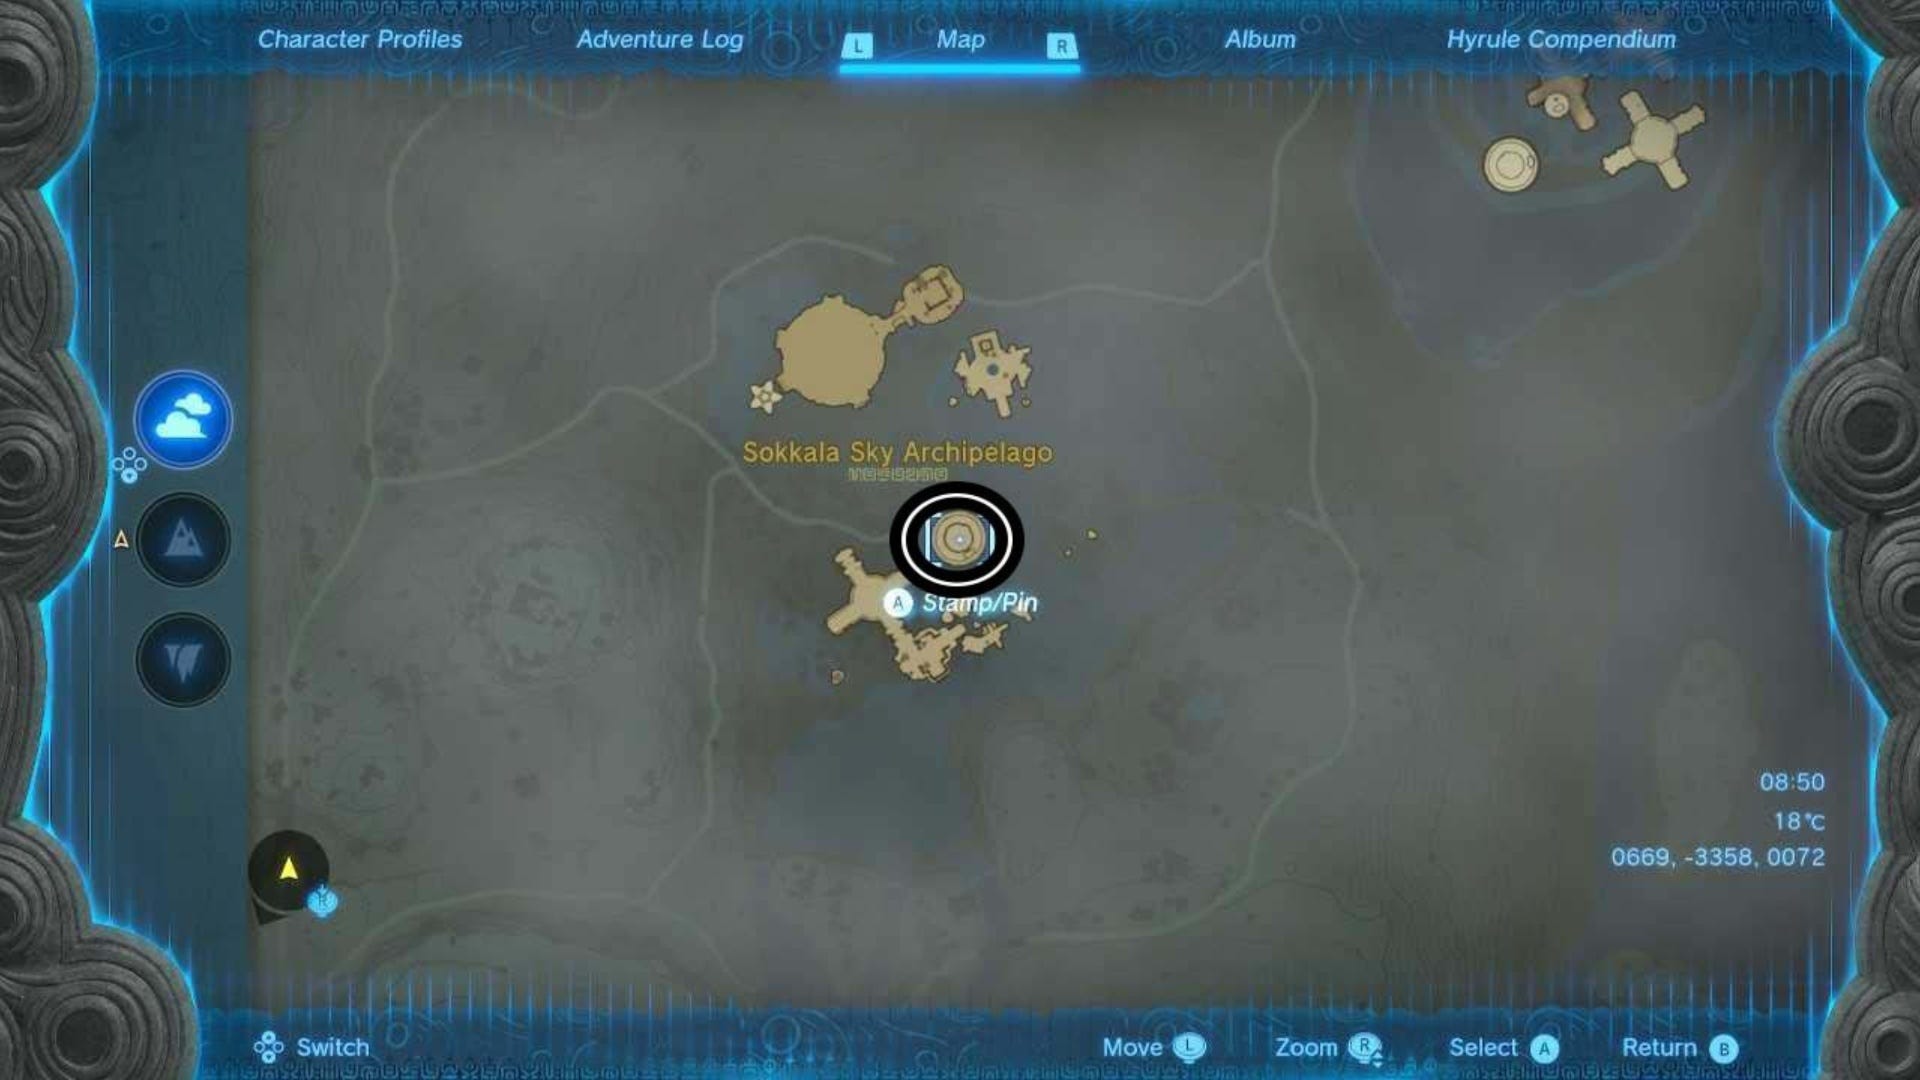
Go here and within this orb you should see another smaller orb. Use Ultrahand to rotate this orb to move the opening you used to get into the large orb so that it looks like this:
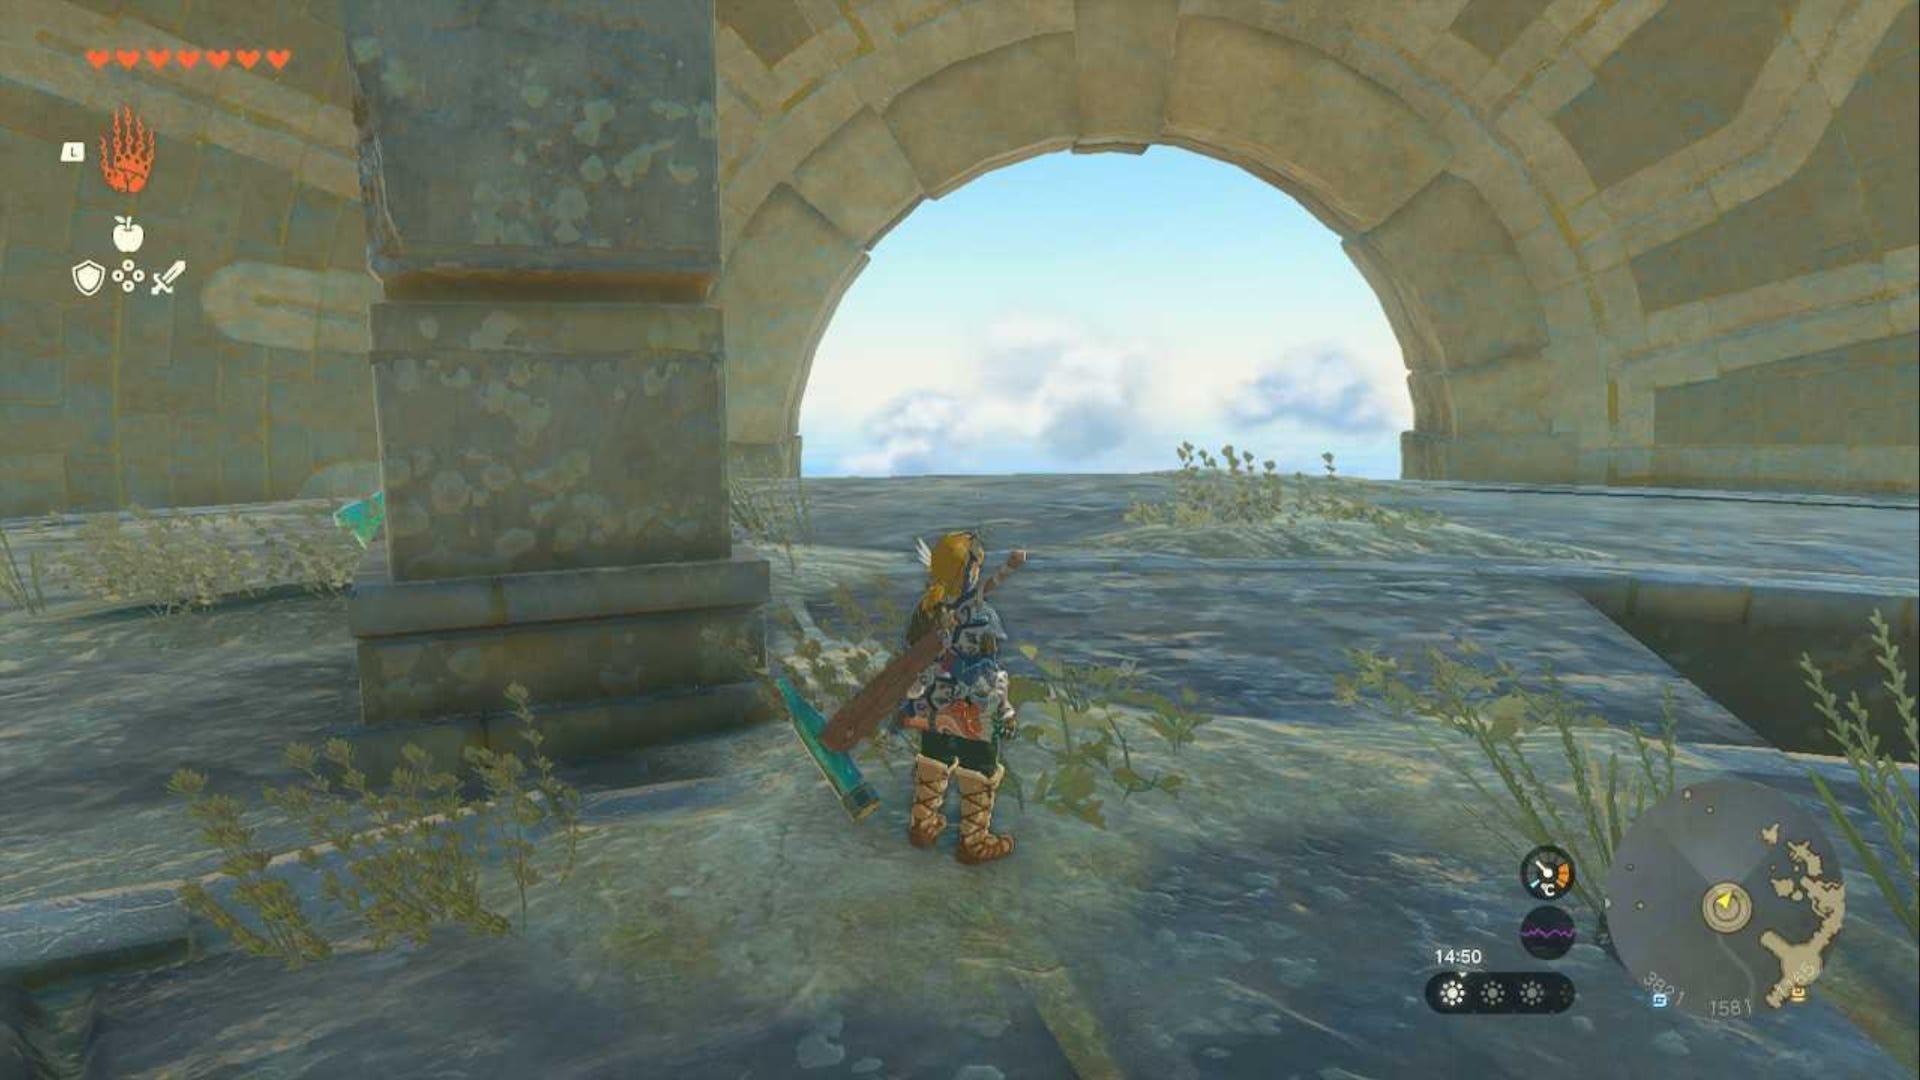
Carefully climb out and down to the lower level of the large orb to collect the Sage’s Will in the chest at the bottom.
Gerudo Sky (-4447, -2130, 1419)
This island is easy to spot as it's on its own in Gerudo Sky, separated from all of the other islands.
You can use your Paraglider to glide to this island from Gerudo Highlands Skyview Tower, but you will need a fair amount of stamina for this.
The island itself has a King Gleeok on it and you need to beat the Gleeok to get the Sage's Will here.
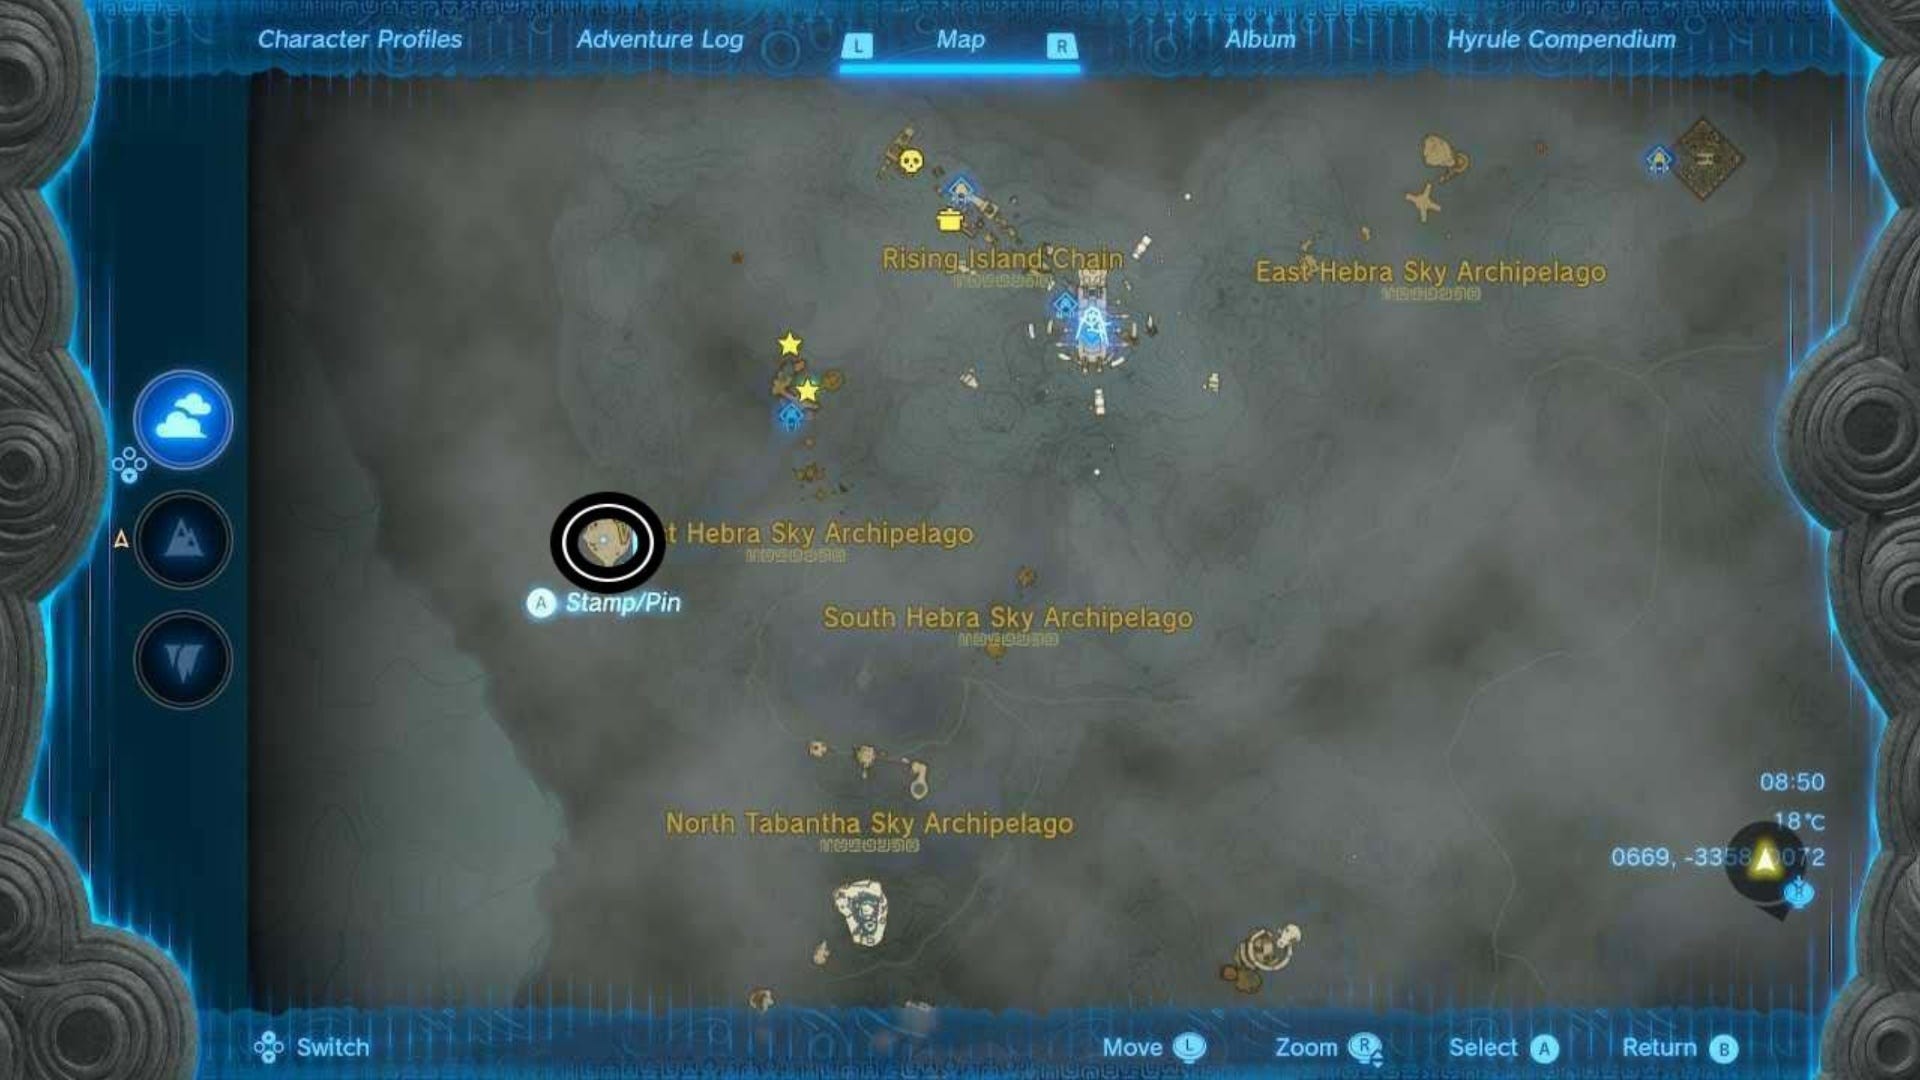
West Hebra Sky Archipelago (-4469, 2173, 1524)
Once you get to this island, yet another King Gleeok blocks your path. You need to defeat them to get the Sage's Will here.
If you're struggling to beat the King Gleeok, then we recommend taking some time to do a few Shrines to upgrade your hearts or stamina at a Goddess Statue. Also, it's worth doing some exploring around Hyrule, a few side quests, and main story quests to get allies, armor, and items to help you. One such item is an Ancient Blade that is lethal once attached to a melee weapon.
Sky Island above Koholit Rock ( 4651, -3830, 1065)
This is yet another King Gleeok situation. To get to this island, we built a flying machine.
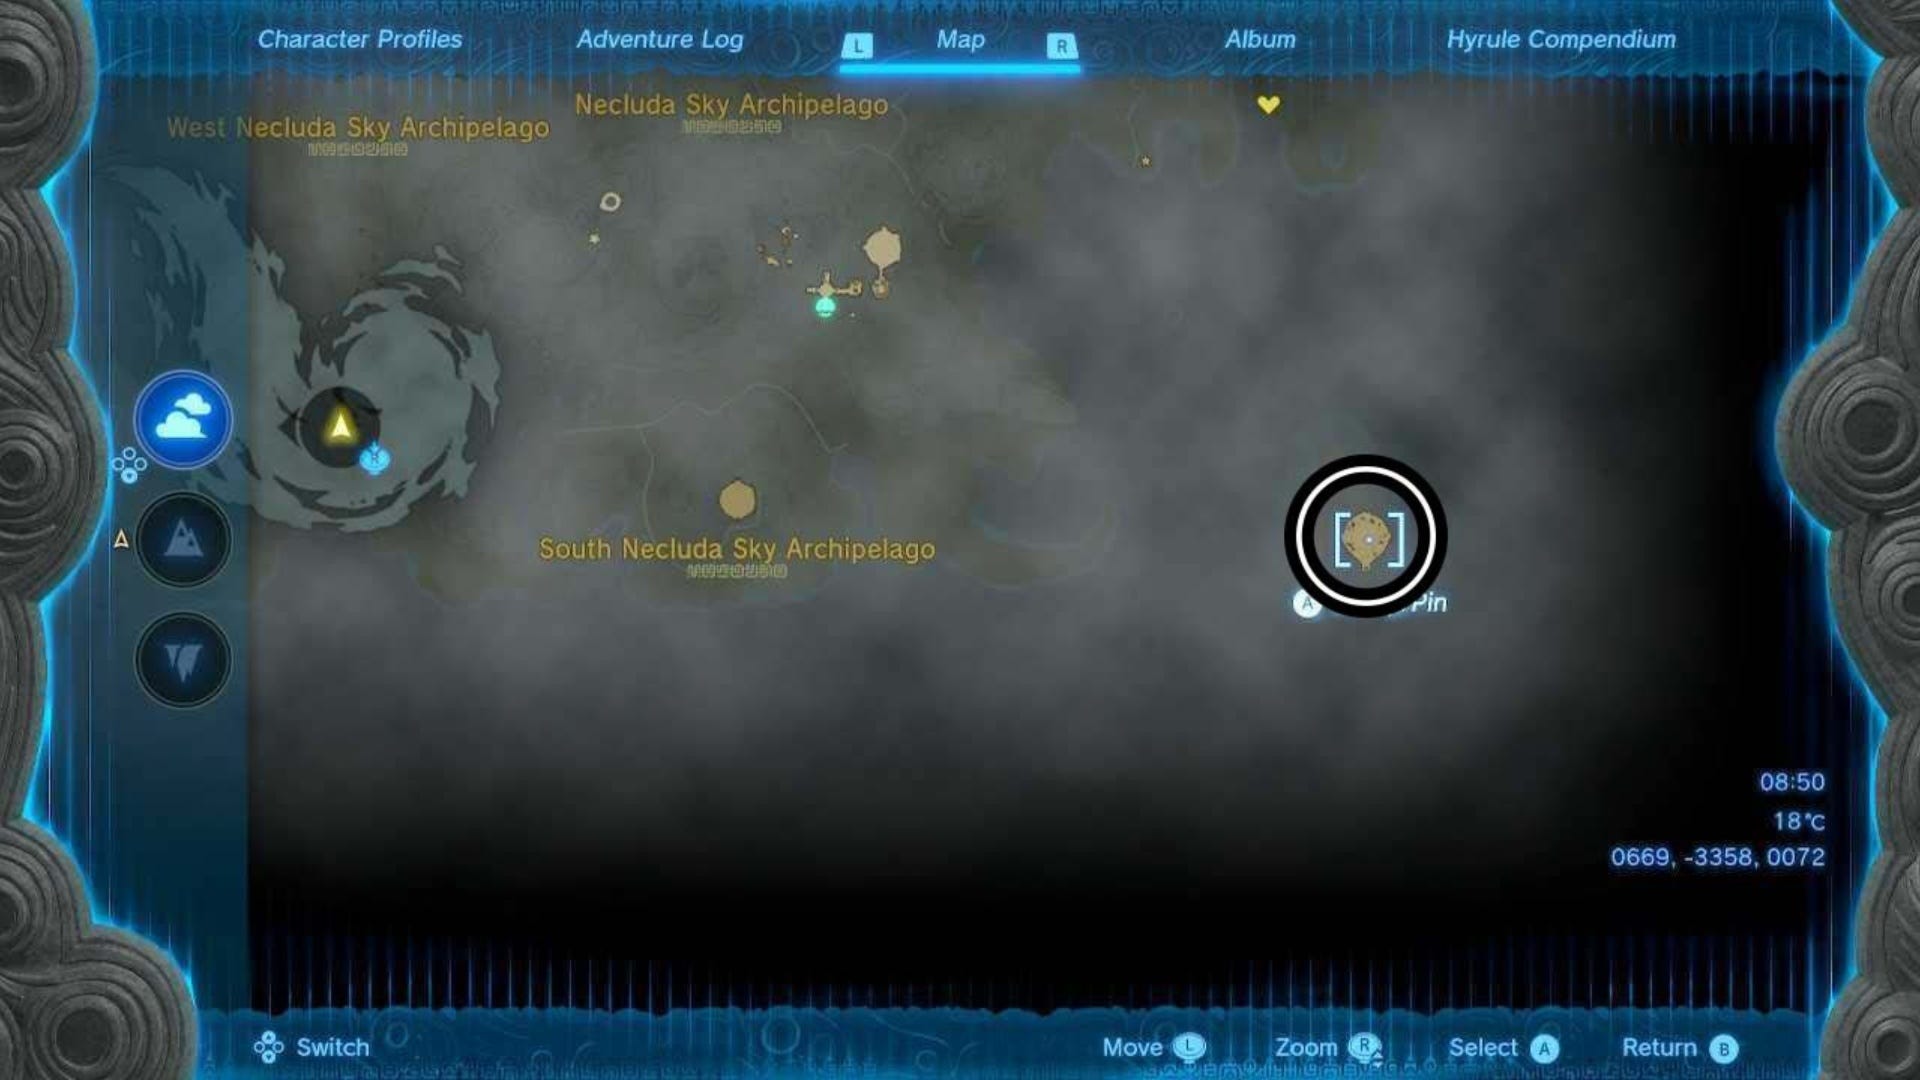
We stood and built a strong flying machine near the Flux Construct on the edge of Necluda Sky Archipelago, which is the point closest to the target island. We used the machine to fly halfway there and then used two wheels of stamina (refilled twice) to glide over to the island.
South Necluda Sky Archipelago (2563, -3555, 0895)
You can reach this sky island by launching yourself from the Rabella Wetlands Skyview Tower.
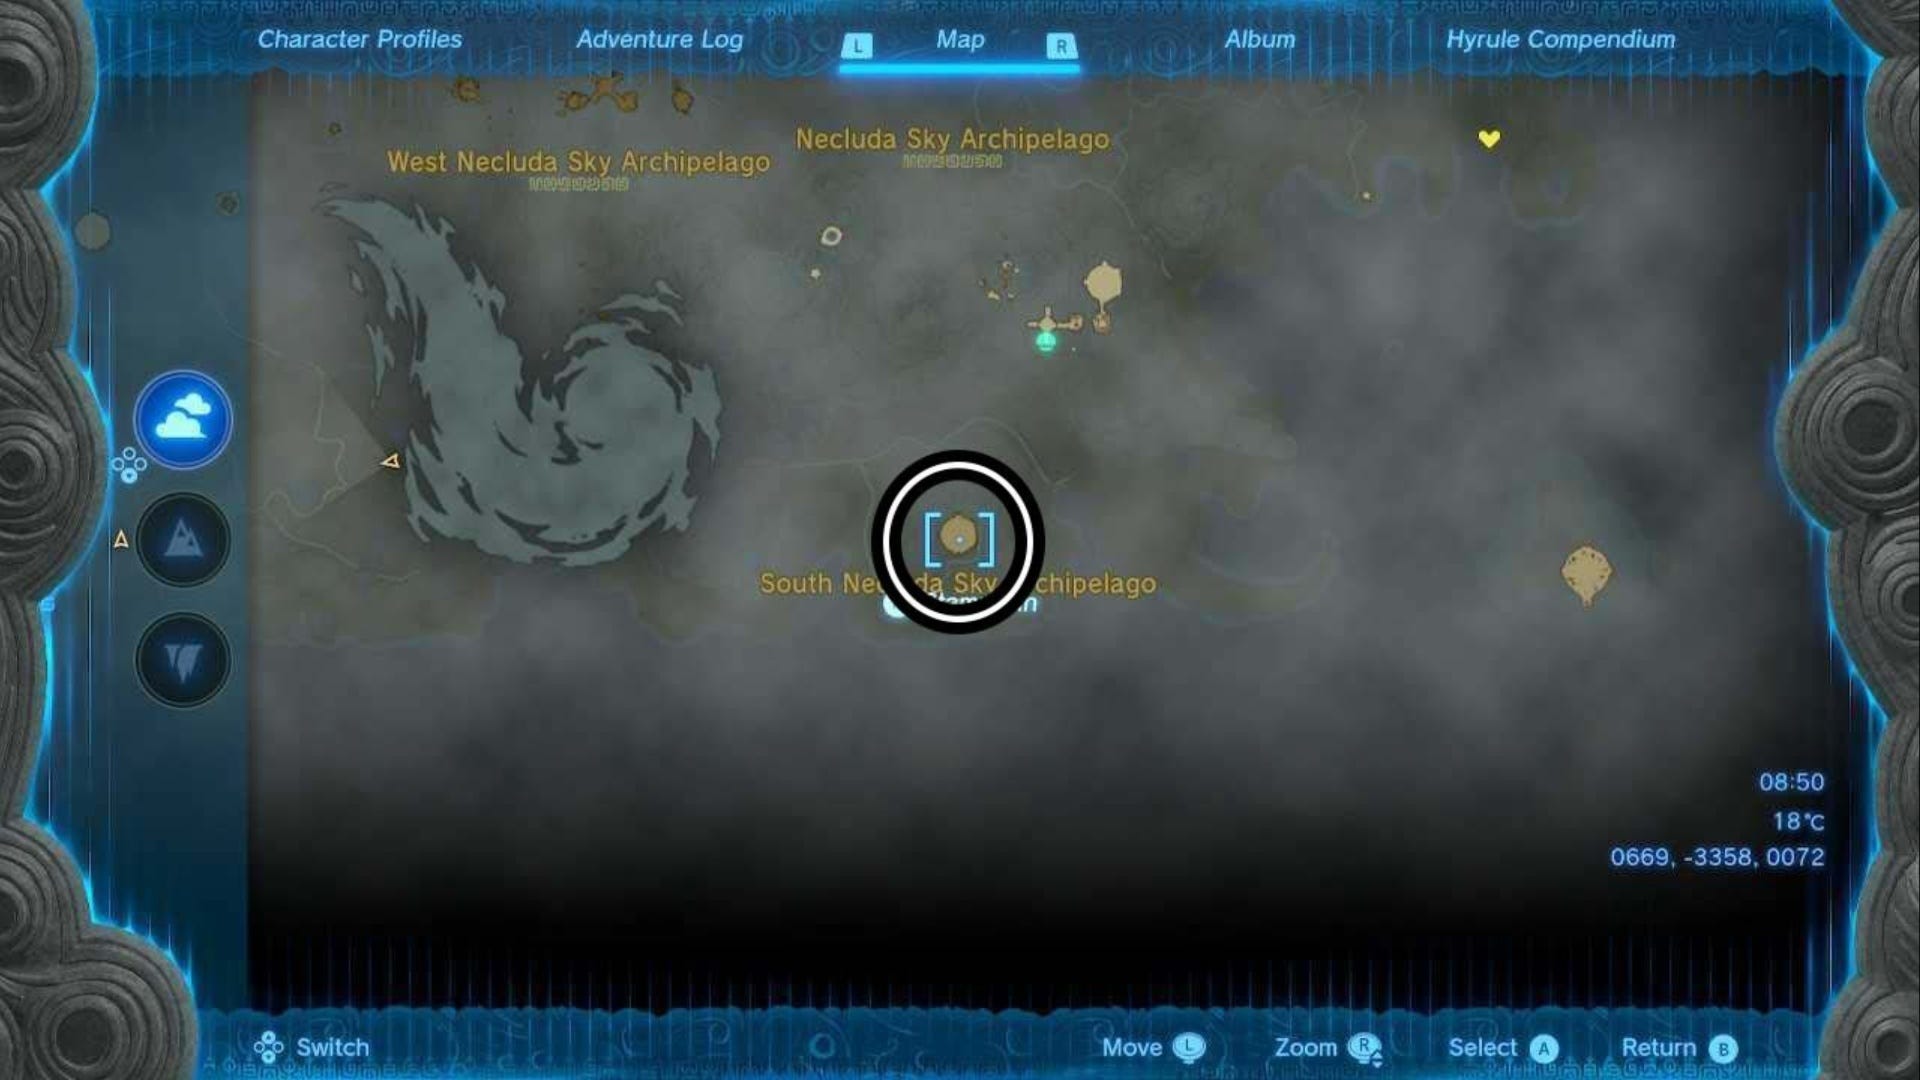
You'll need two full wheels of stamina to glide across here, we also recommend using Tulin to give yourself a couple of speed boosts.
Once you get to the island, the chest is on the back of a Flux Construct III.
North Necluda Sky Archipelago (1933, -1063, 0961)
This sky island can easily be reached by gliding from the Sahasra Slope Skyview Tower.
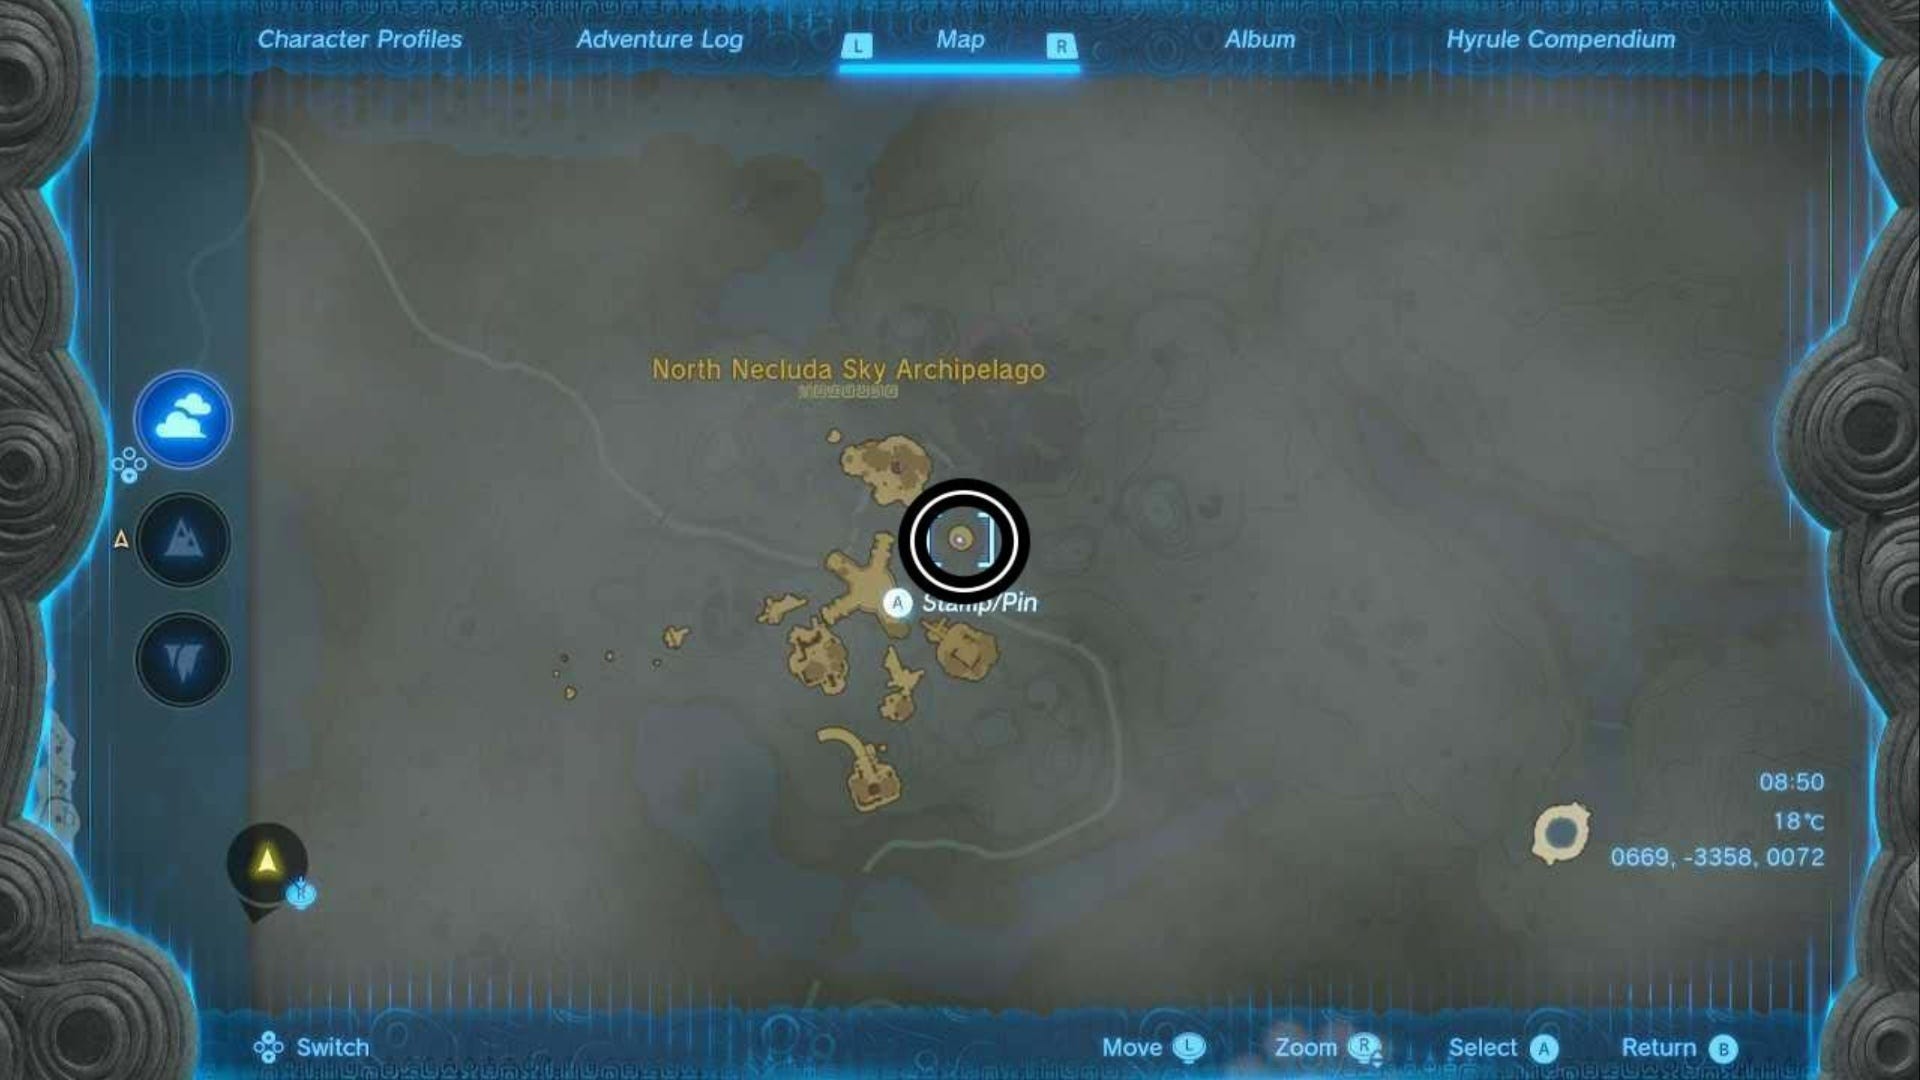
The island itself is full of luminous rock and the Sage's Will is in a chest next to the large rock formation on top.
North Tabantha Sky Archipelago (-3778, 1570, 1237)
We strongly recommend having the Zora Armor before you attempt to get to this island, it will make reaching the chest here a lot easier.
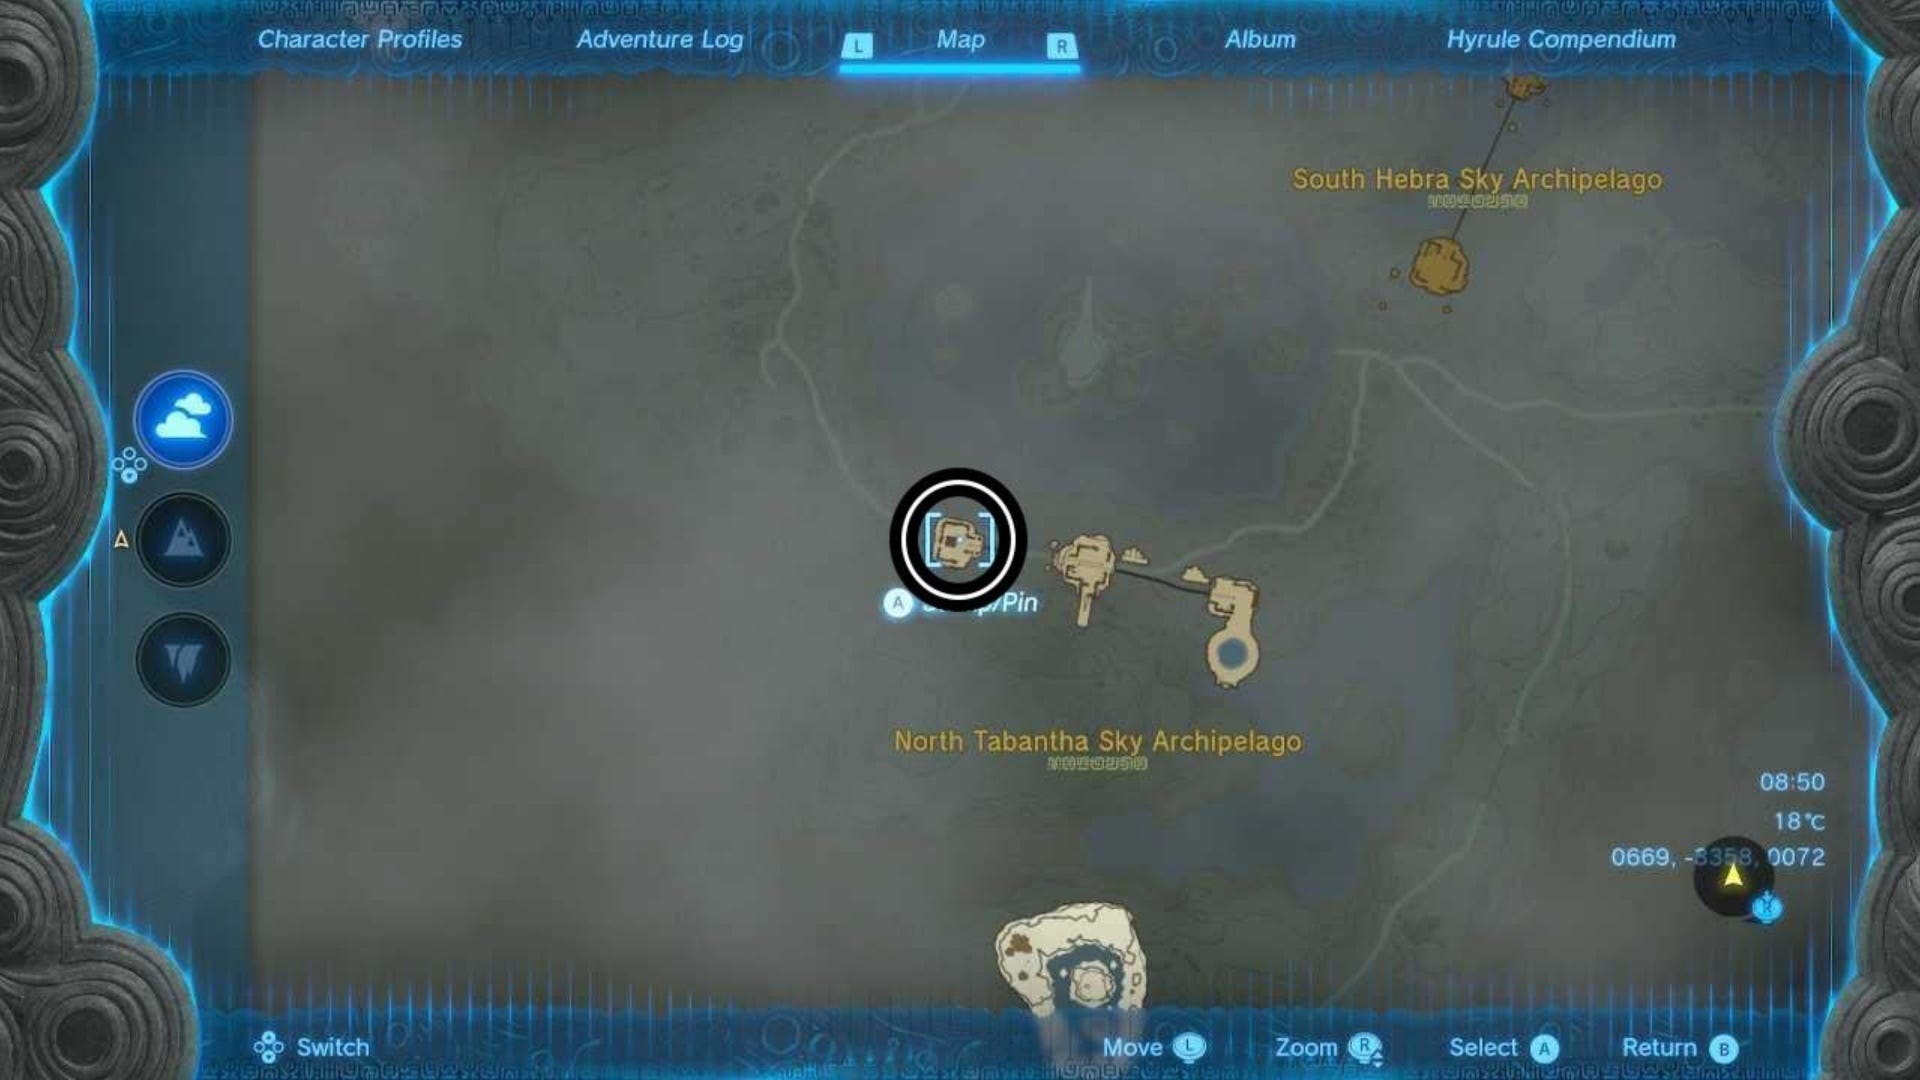
When you have the Zora Armor, you'll be able to climb up the waterfall in the northwest corner of Strock Lake near Rito Village. The waterfall is slightly in the air, so to get to it you'll need to launch yourself from Rospro Pass Skyview Tower and glide over to it.
We used Tulin for this and we used up around three and a half wheels of stamina to get here.
Once you reach the waterfall with the Zora Armor on, swim up it to the first island. You can then use the carts, rockets, and rails here to cross to the second island. On this second island, you'll notice that the track to the third one is broken. You can create a cart or make any solution to get up here.
We made another flying machine from the Wings on the second island to get up to the third, where the Sage's Will is in a chest in the center of the island.
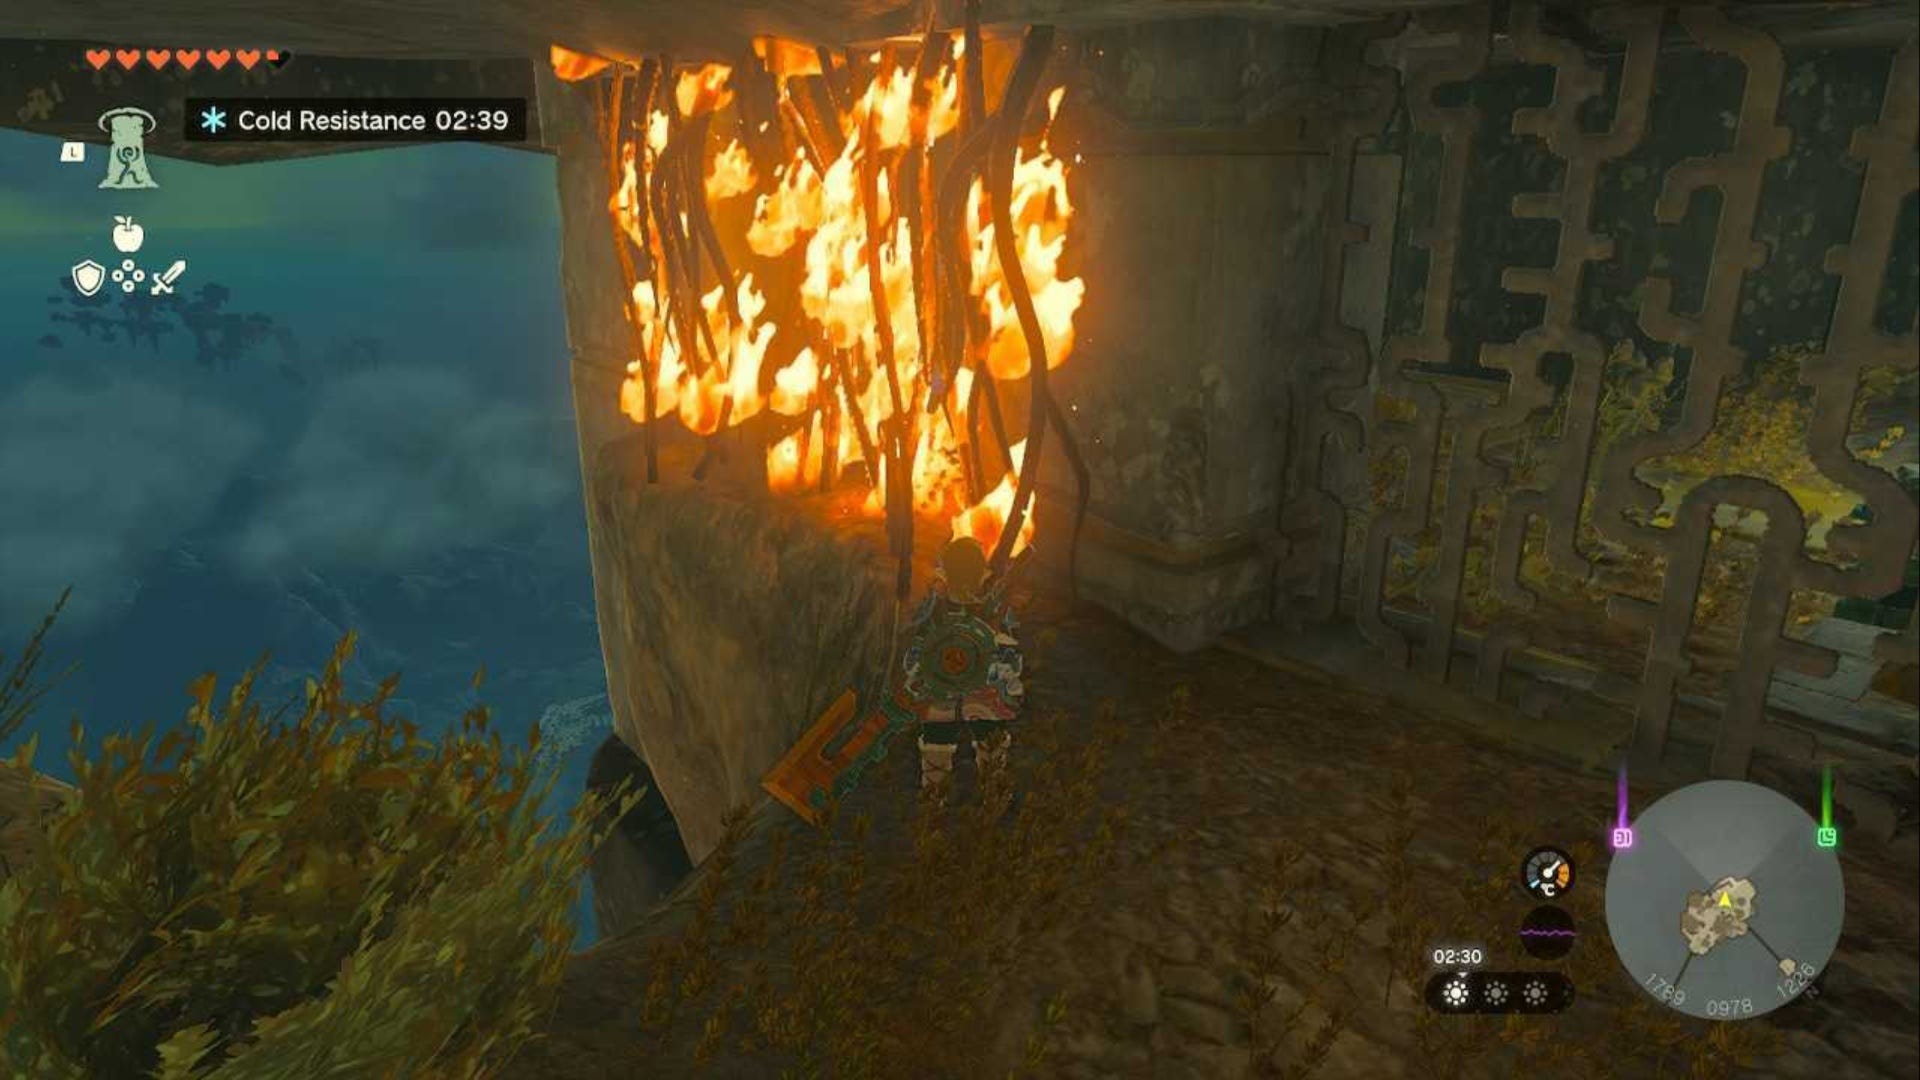
South Eldin Sky Archipelago (1786, 0984, 1239)
You can easily glide to this island by launching yourself from Eldin Canyon Skyview Tower.
There are a few layers to this island, land on the lower level and then use Ascend to get through the ceiling to the middle level.
Here, you should see some vines covering an opening on a slight overhang. Set fire to the vines to clear them, then climb into the room through the opening that appears to grab the Sage's Will in the chest.
South Hebra Sky Archipelago (-3076, 2152, 0648)
The easiest way to reach this island is to go to the tip of the Wind Temple that is facing the target island, and then glide off with Tulin and at least two wheels of stamina.
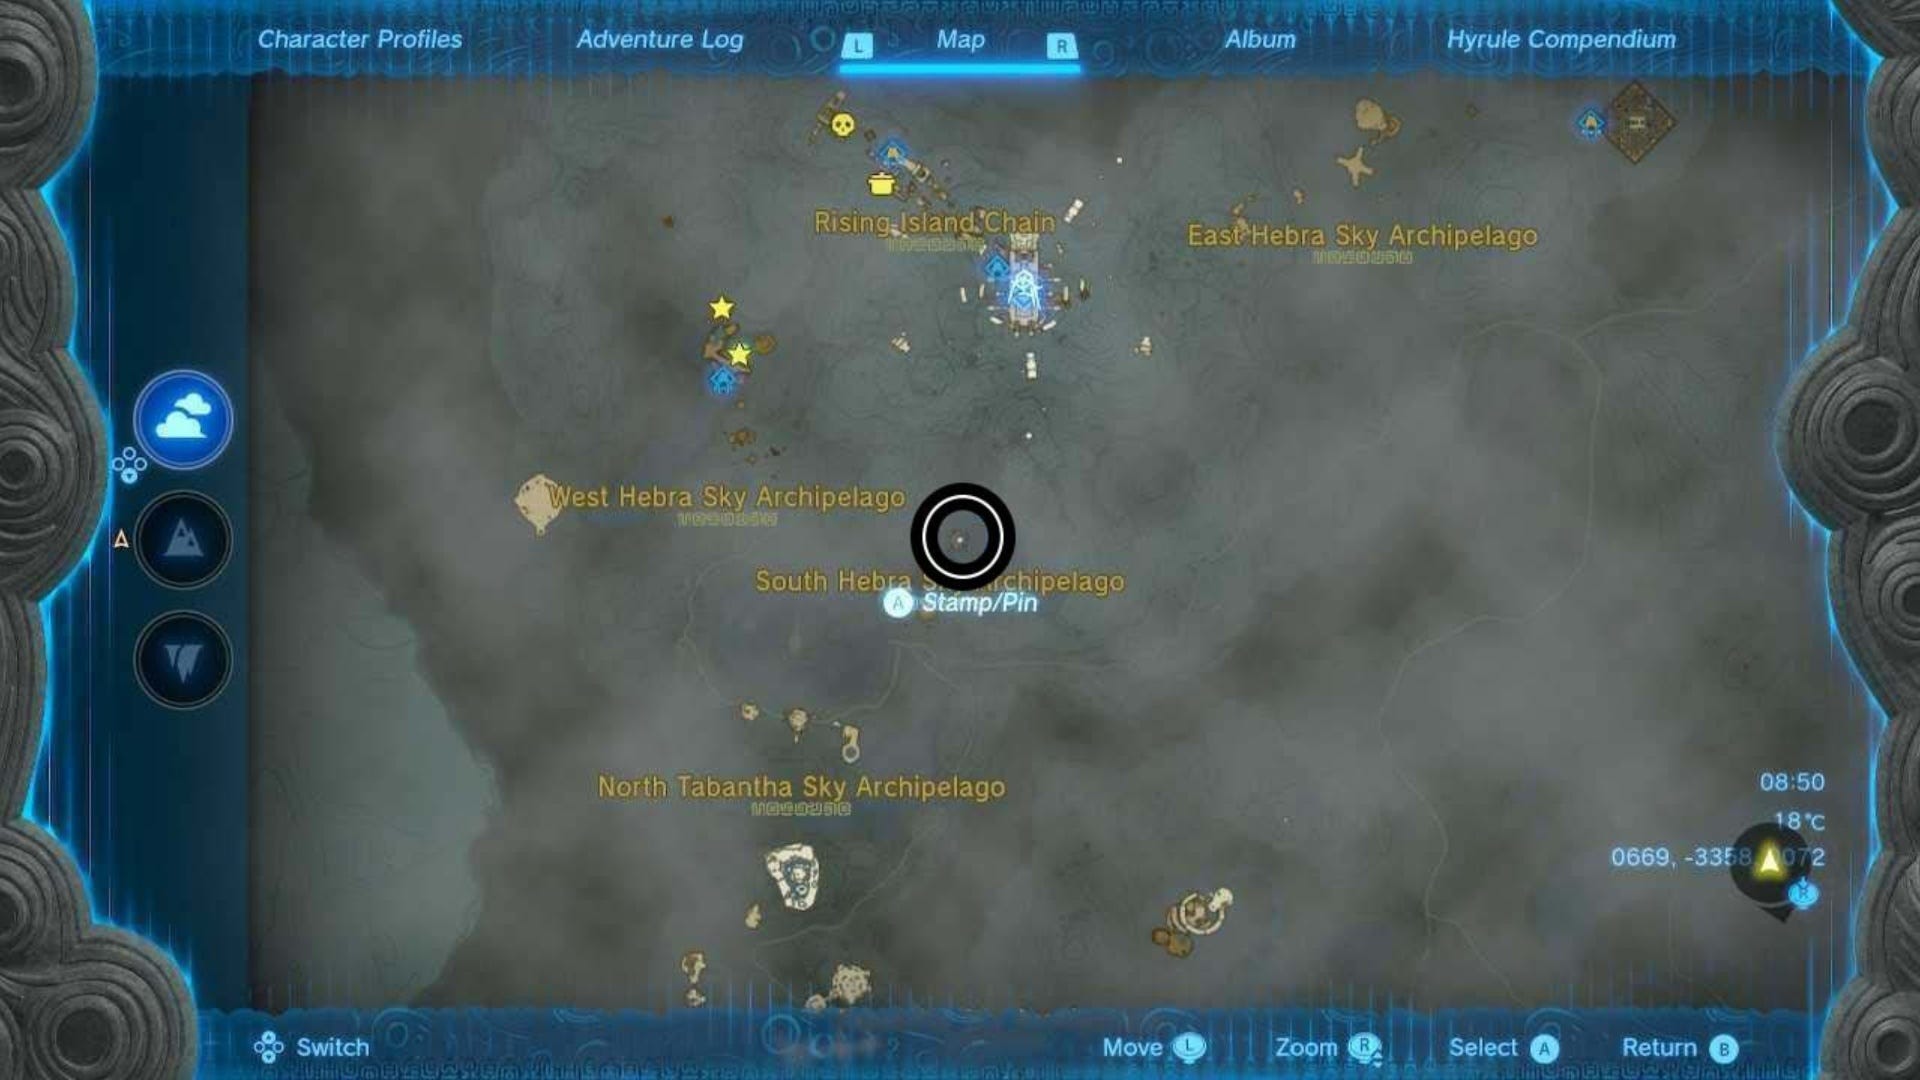
When you get to the target island, the Sage's Will is in a chest in the middle.
West Hyrule Sky Archipelago (-2300, -0380, 0894)
On this island, there is a Flux Construct III.
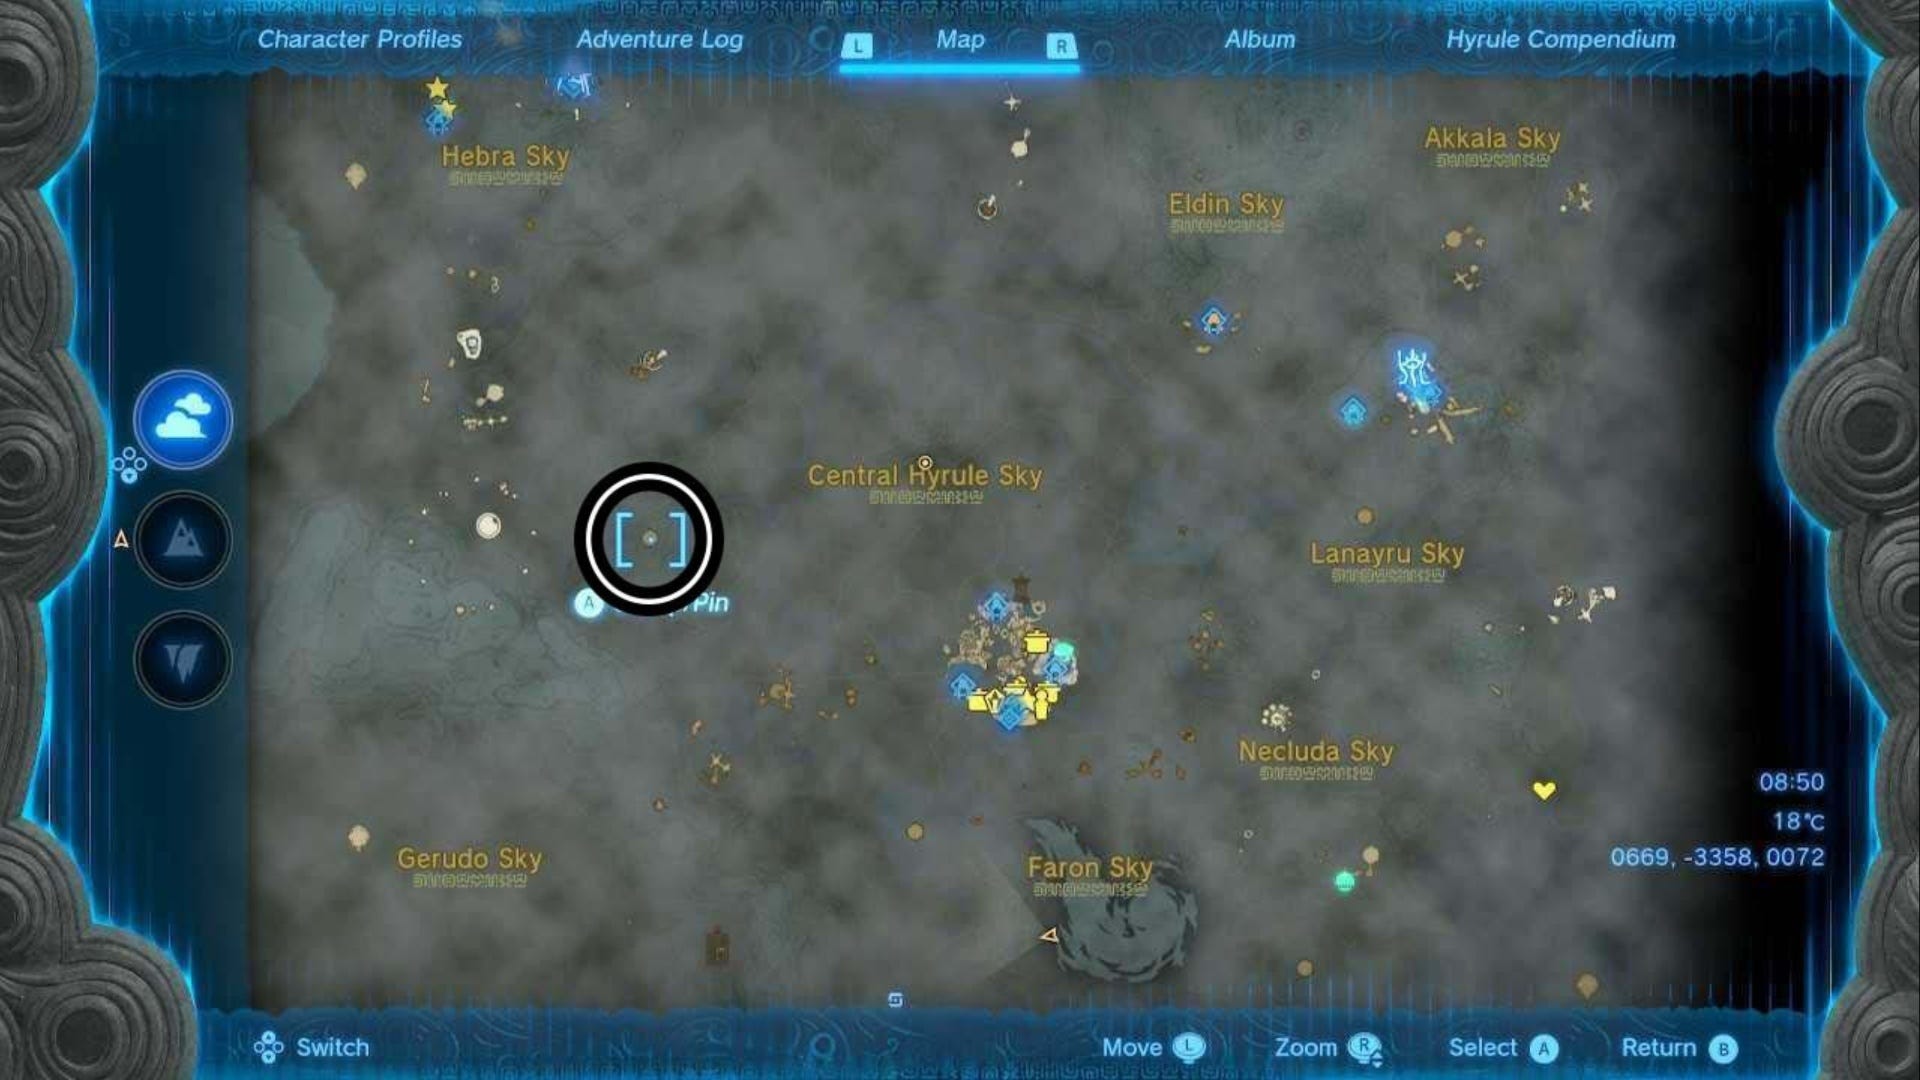
The chest that contains the Sage's Will is on the back of the Flux Construct III. You can use Ultrahand to pull it off and open it quickly, then run away if you don't feel like fighting this mini-boss just yet.
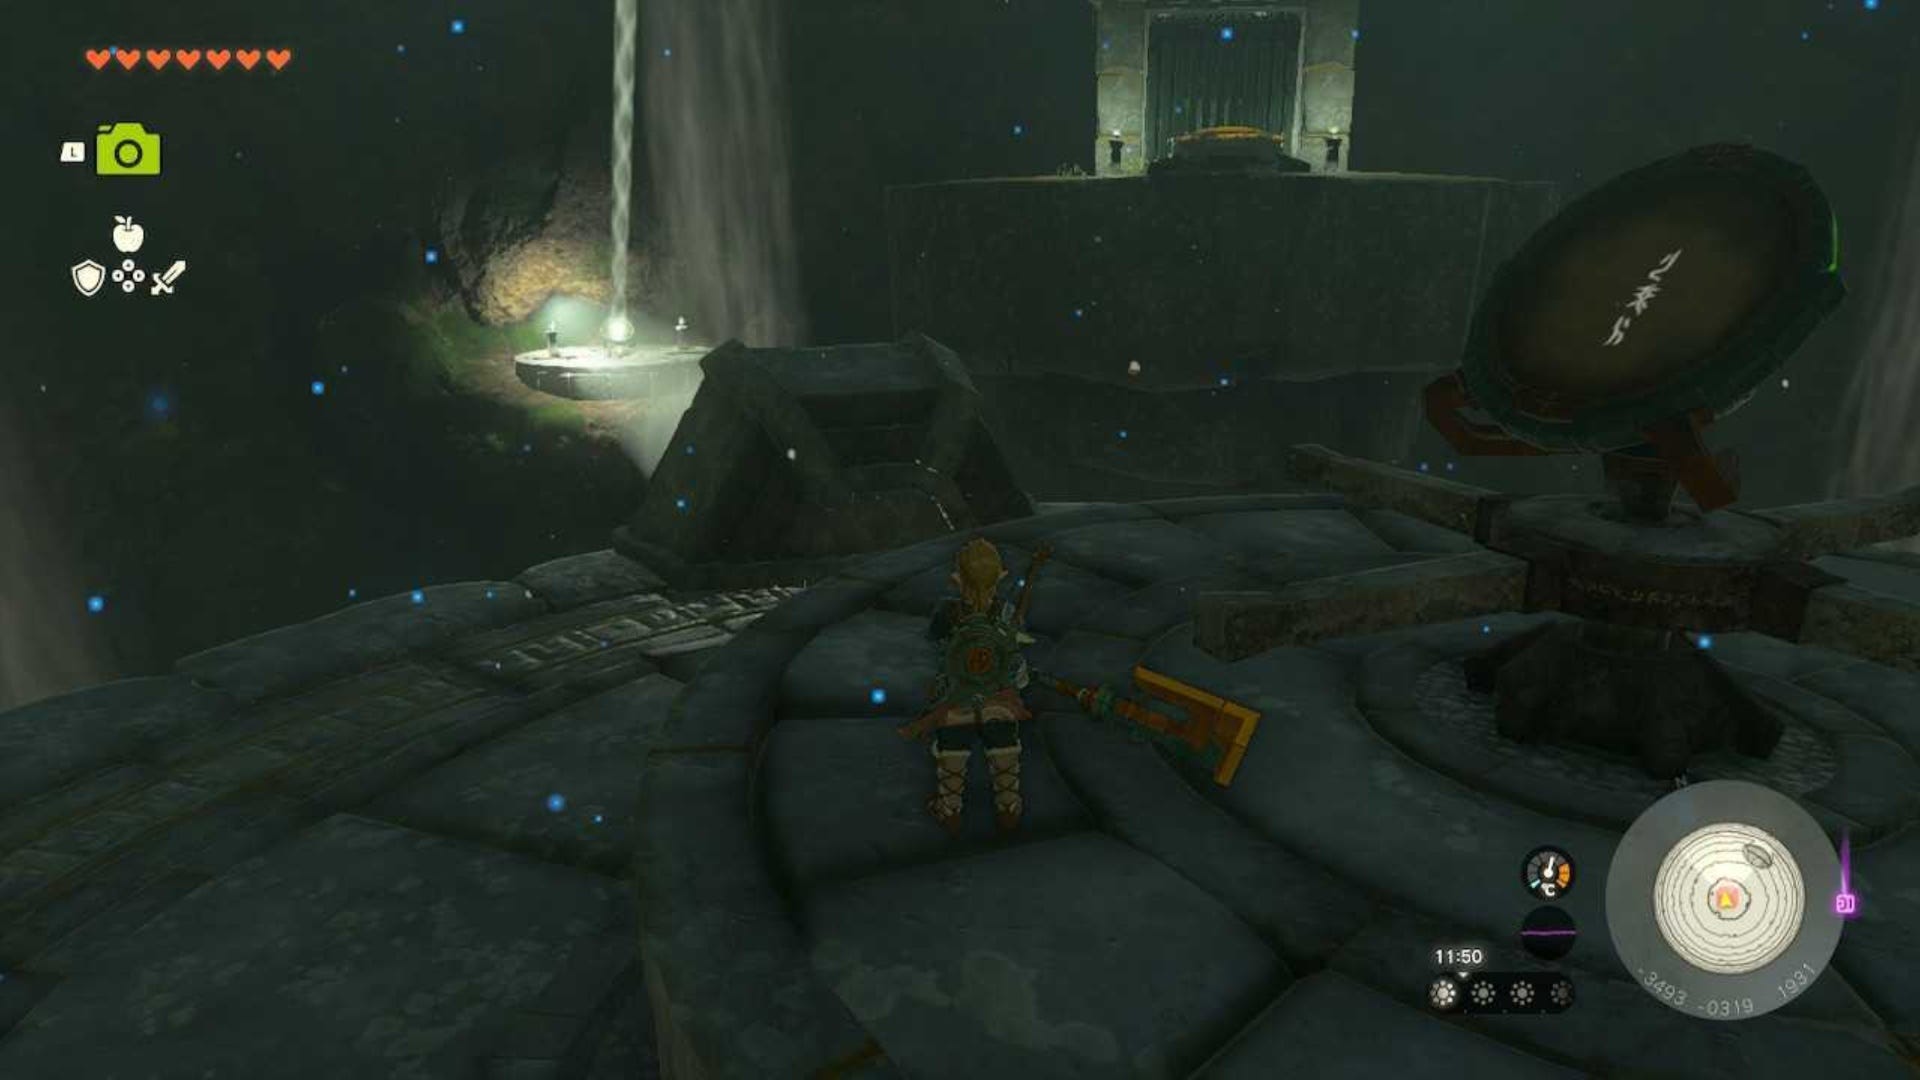
Starview Island, North Gerudo Sky (-3465, -0273, 1937)
The Sage's Will is hidden behind a light puzzle within the large orb here, also known as Starview Island.
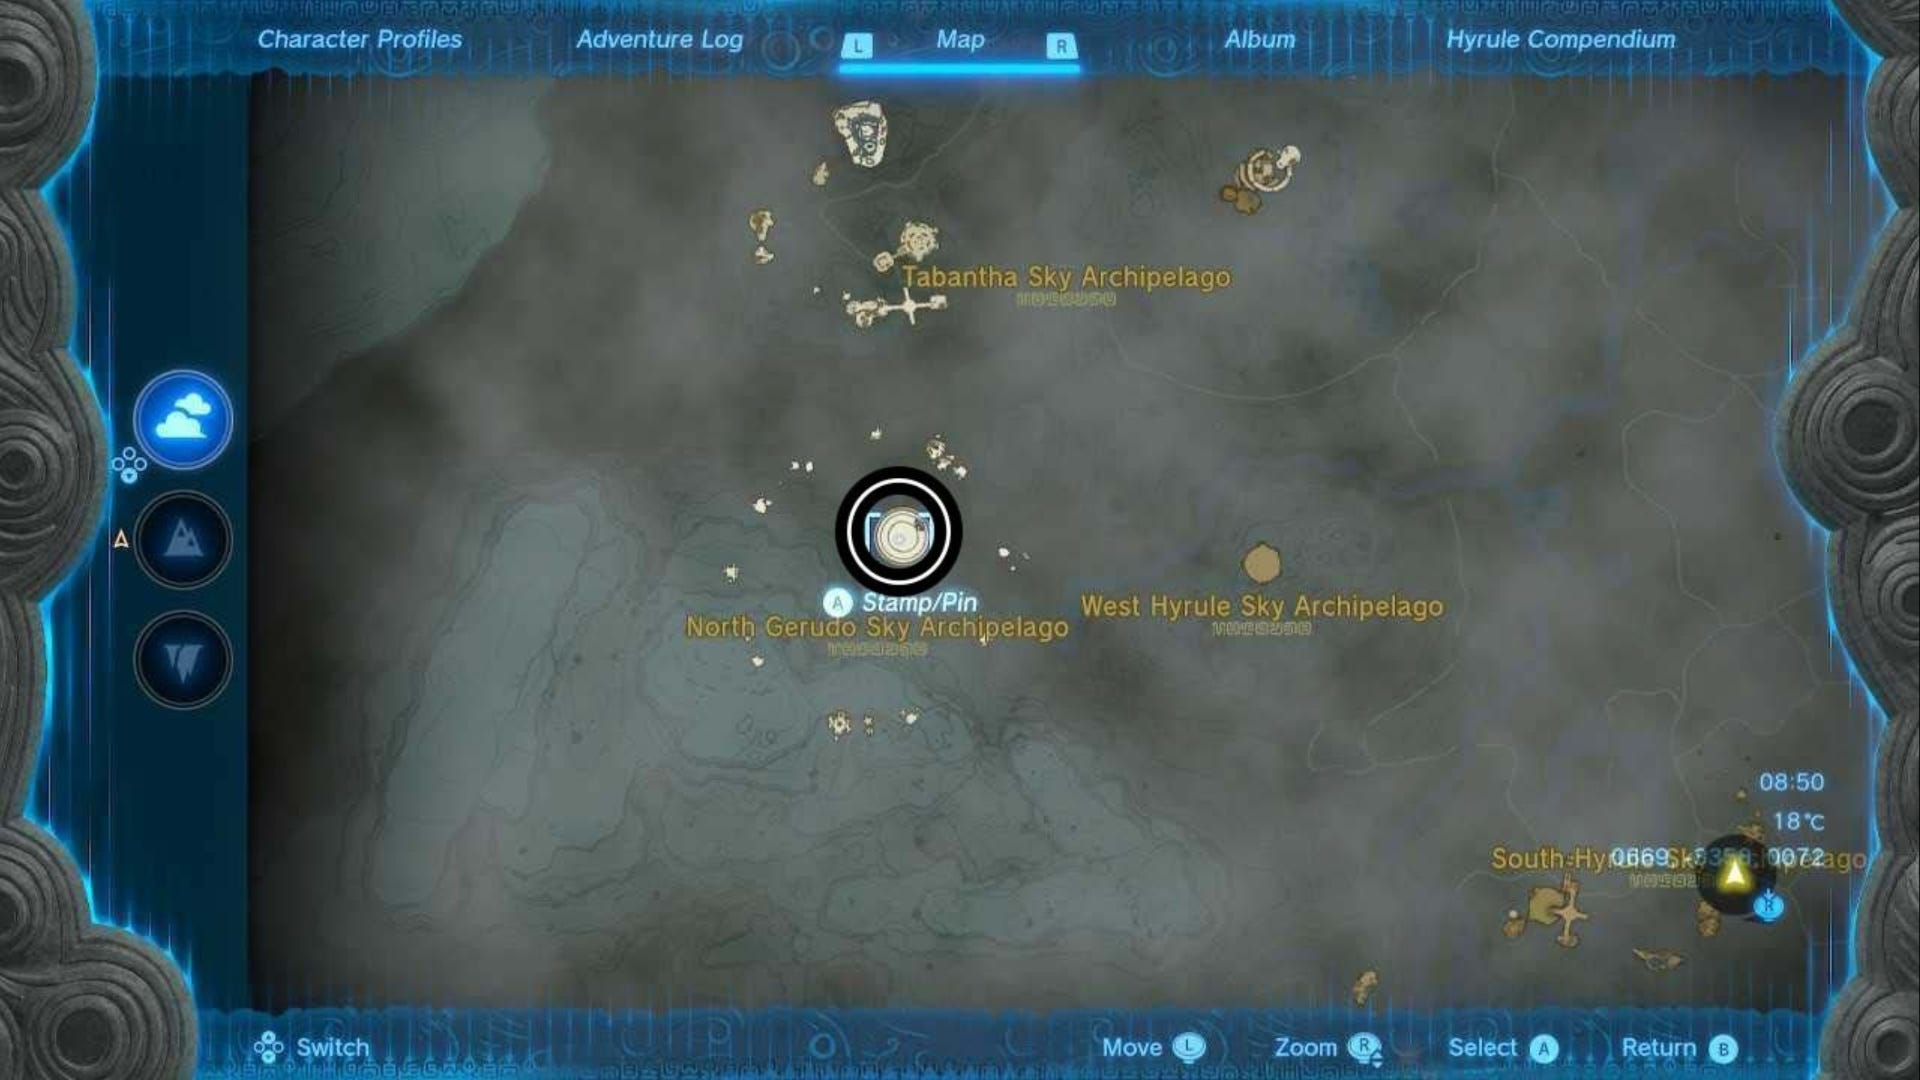
Once you get into the large orb, you should see that there's a chest locked behind a light lock and this is the Sage's Will. To get to it, you need to do the following:
- Head to the platform in the middle of the room that has beams of light shooting out from it.
- Turn the platform using the bars in the middle so that light hits and bounces off of the mirror to the left of the locked chest.
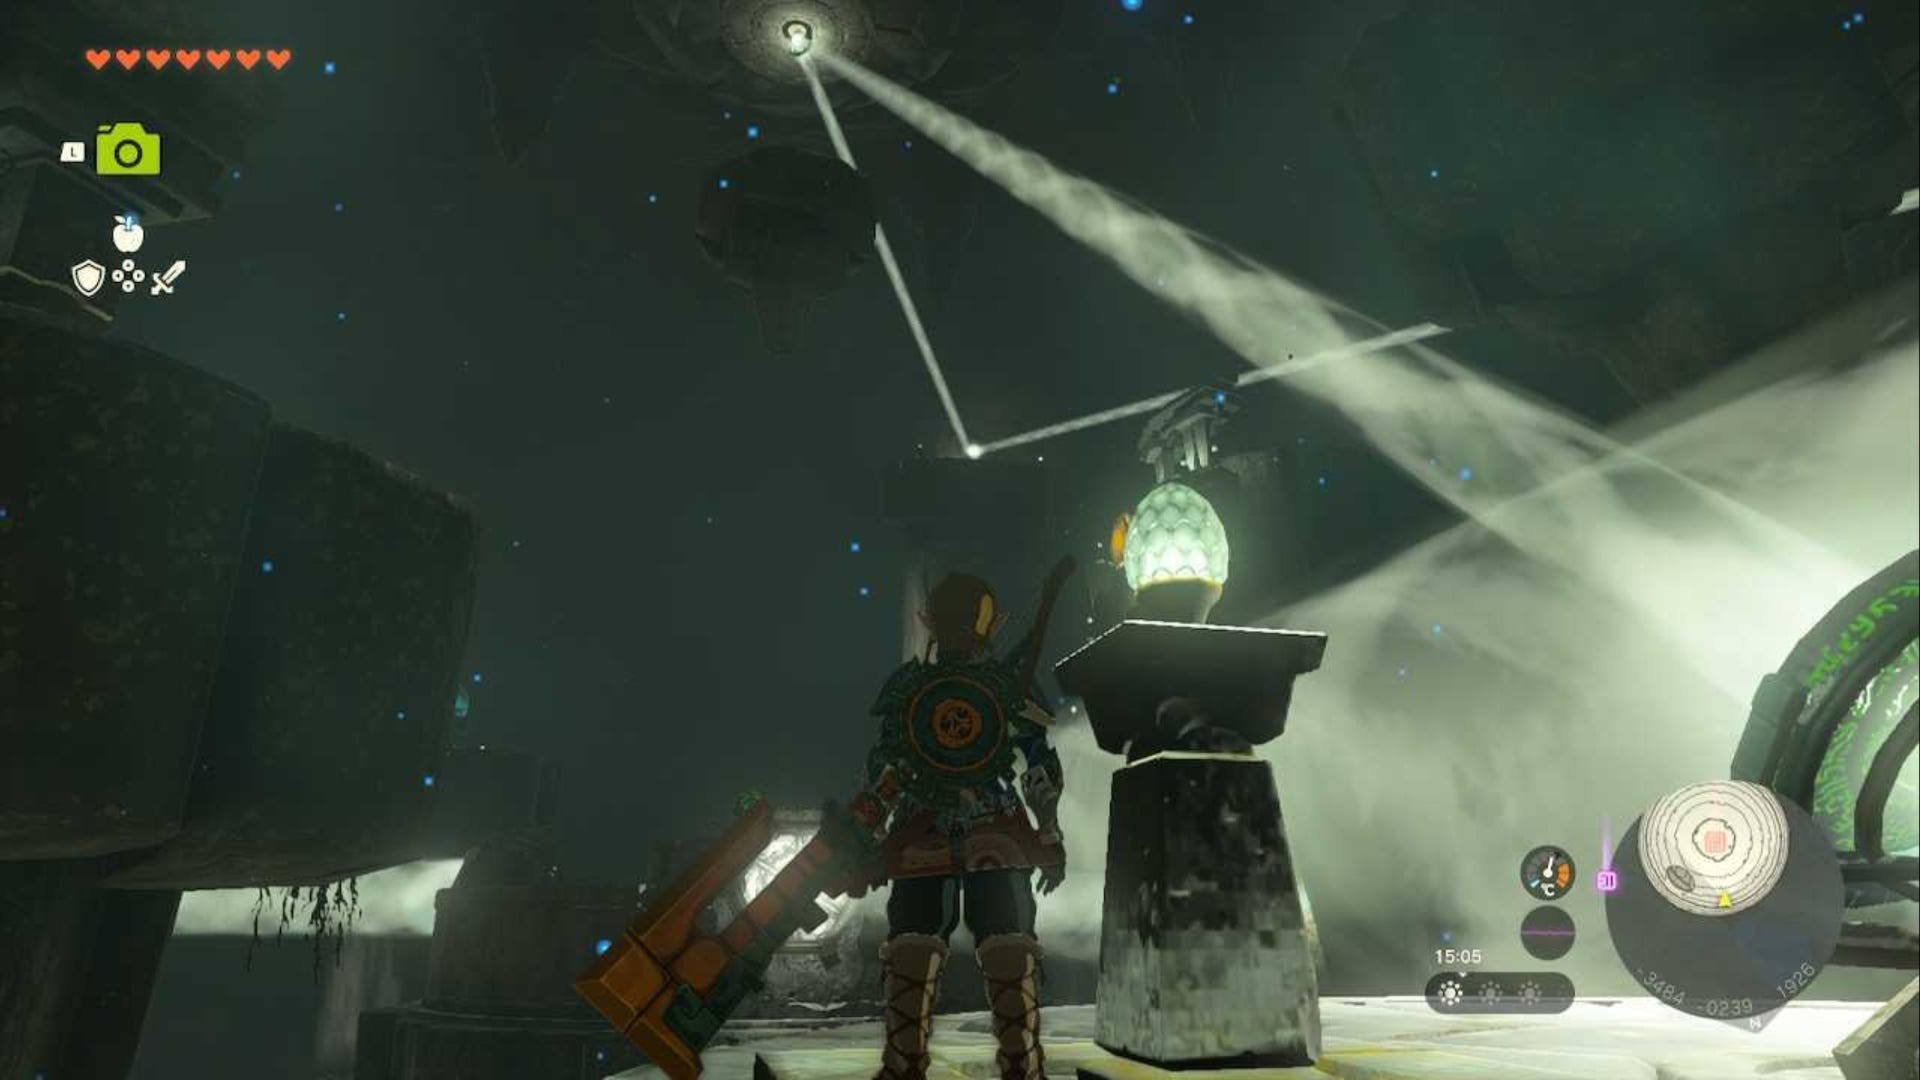
- Use the updrafts around here to get to the mirror you just hit and then turn around to follow the beam of light bouncing off of that mirror.
- You should see that it's hitting another one slightly above and opposite you. Use the updrafts around the orb room to get here.
- From here, turn the mirror here using the bars until it hits another mirror on a platform almost directly opposite you.
- Again, go across to the mirror you just hit with the beam of light and turn this mirror until it hits another mirror to the left of the Zonai Gacha Machine.
- Head over to this platform and then move the mirror here until the reflected beam of light hits the yellow switch just outside of the chest.

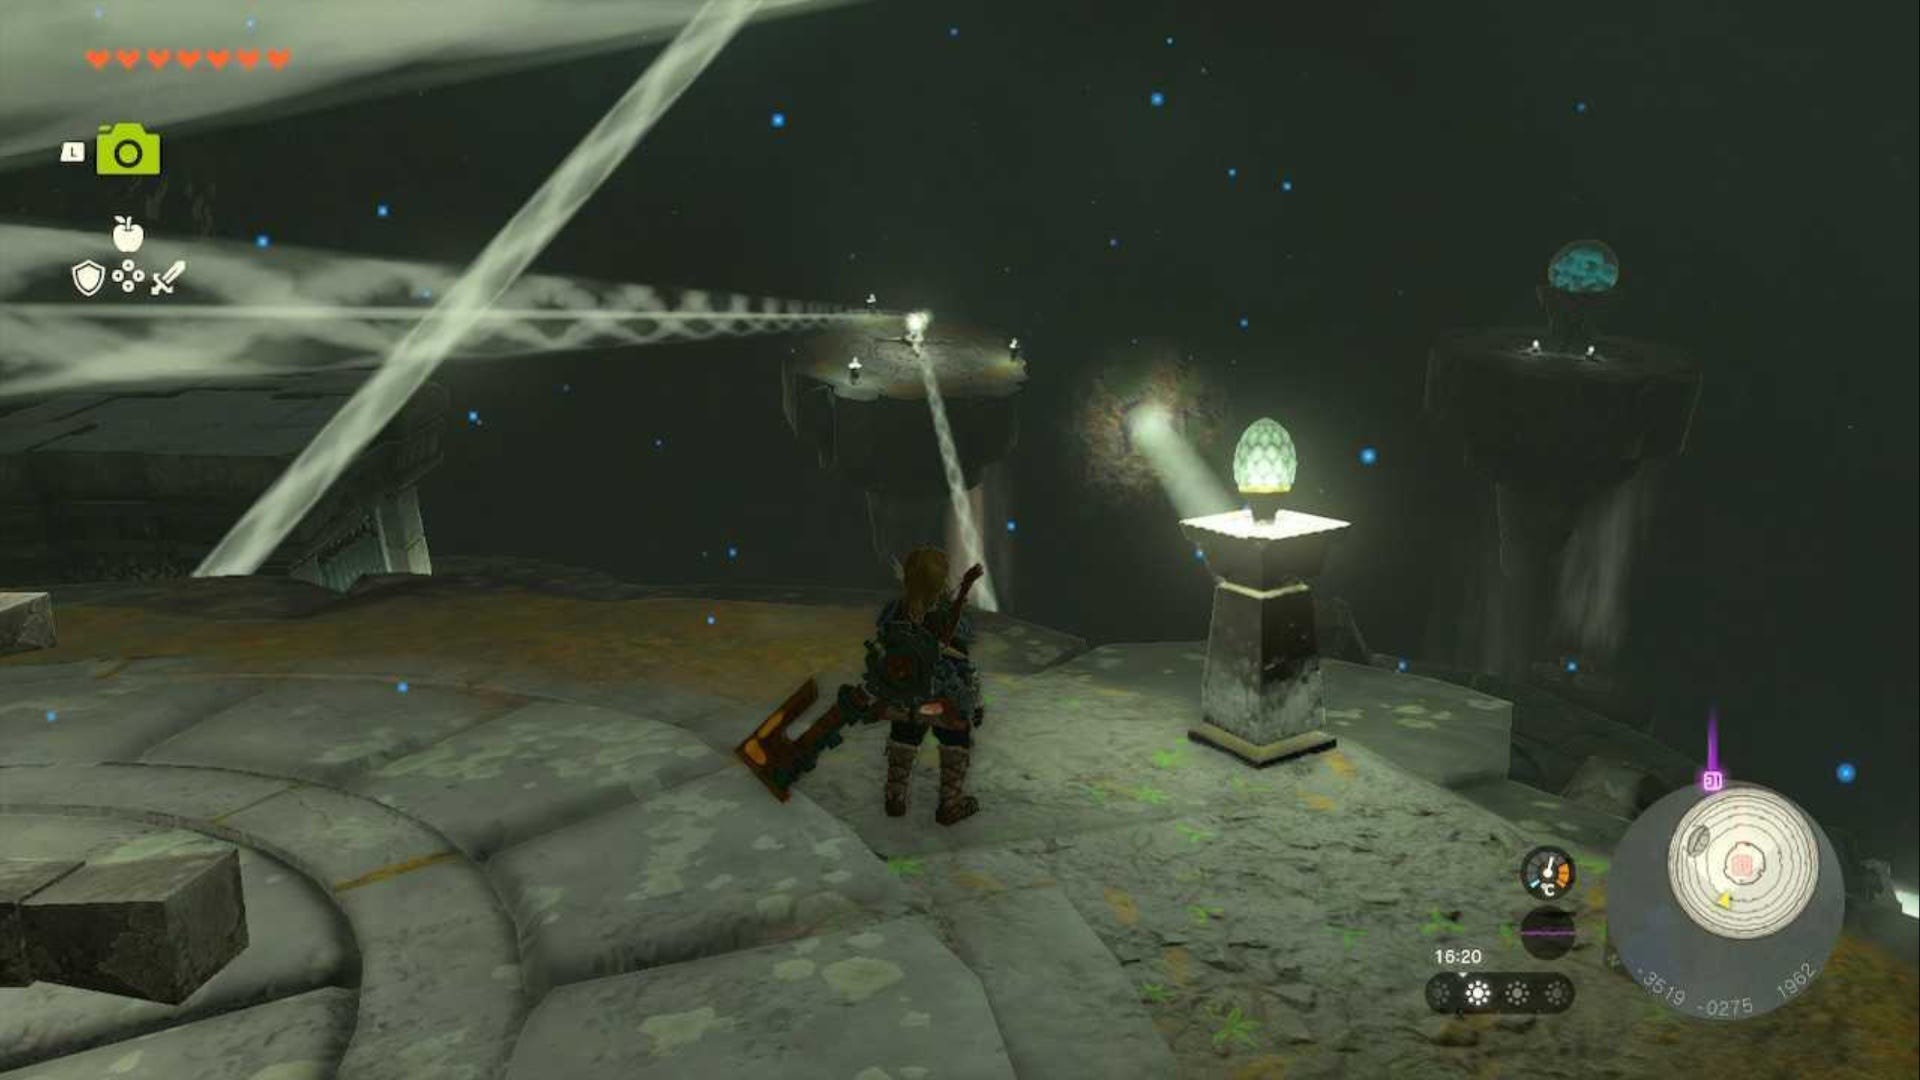
Once the light hits the lock, it will turn green and open. You can now go and collect your Sage's Will.
Faron Sky Archipelago (-0359, -2581, 0894)
You can reach this island by gliding from the roof of the Room of Awakening on the Great Sky Island. You will need at least two wheels of stamina, with stamina boosting Elixir for this. We strongly recommend using Tulin too as they make the journey a lot easier.
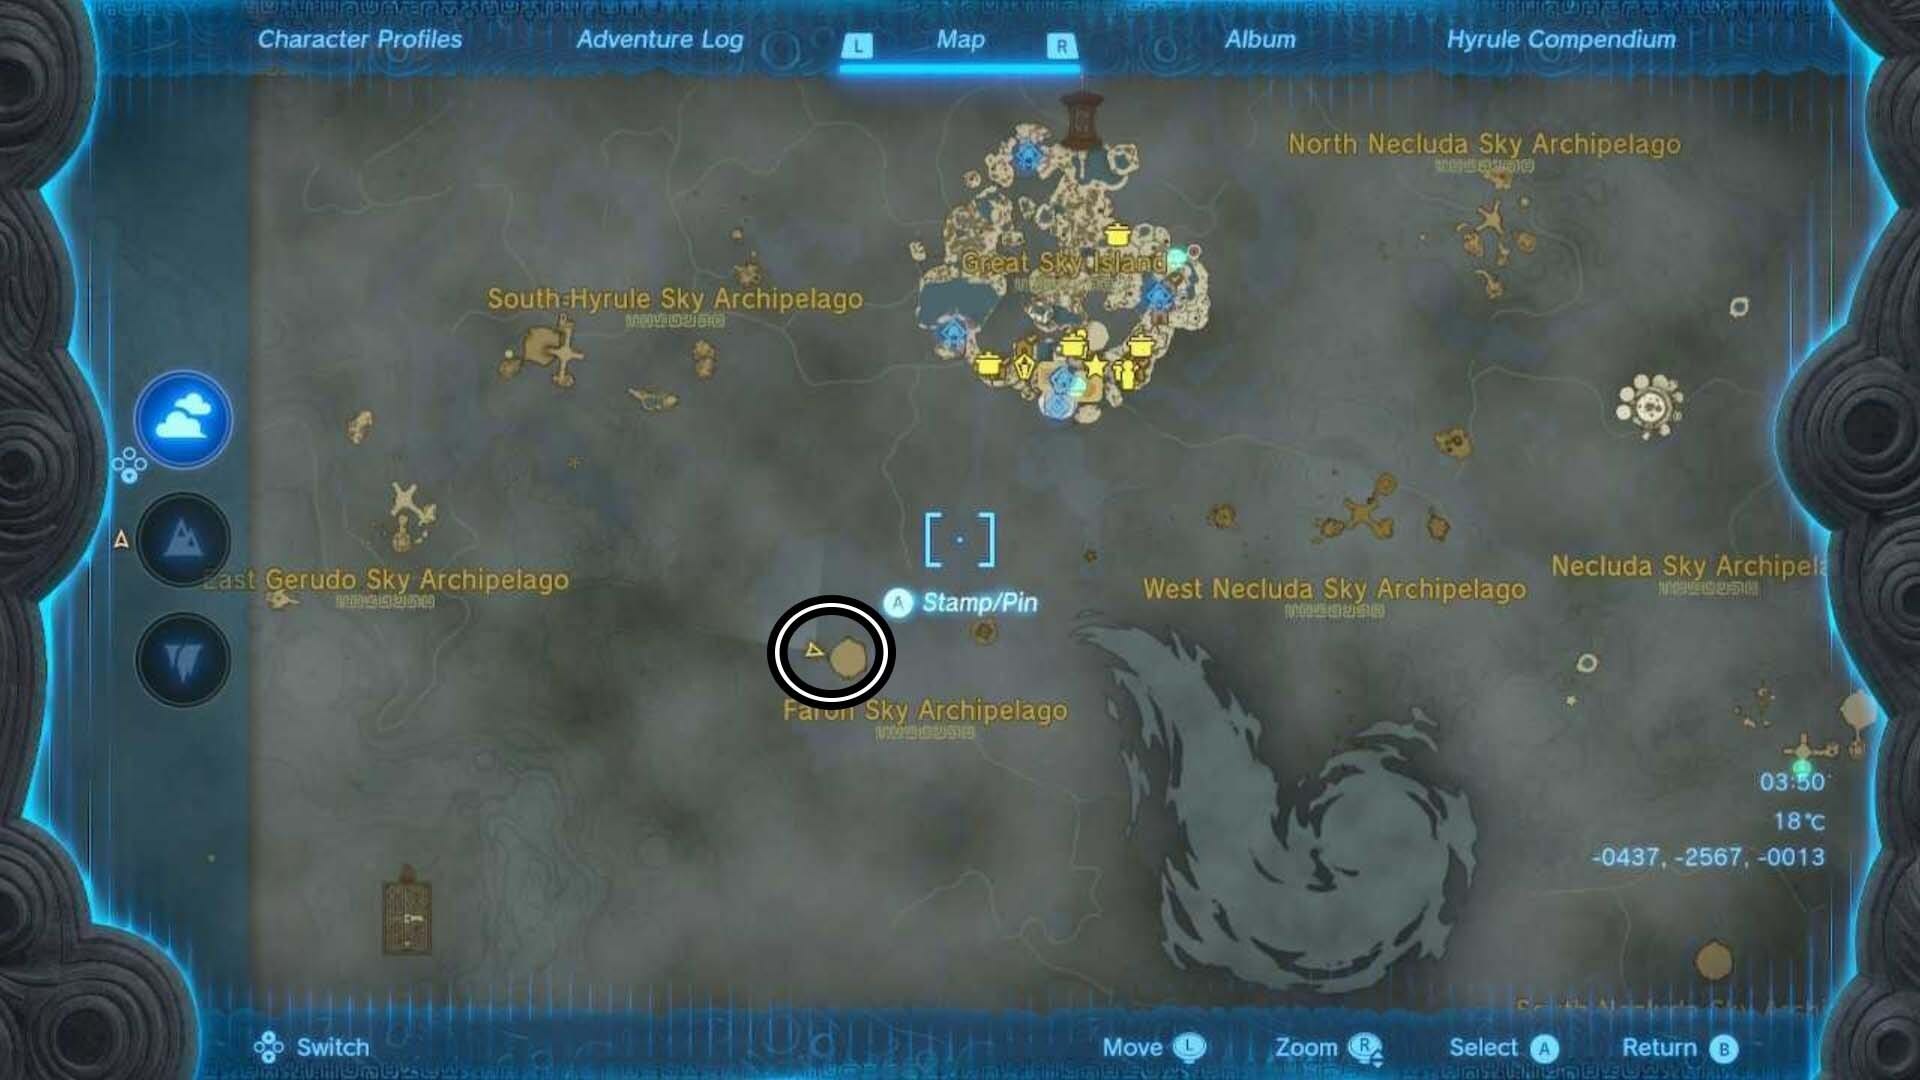
When you get to the island, the Sage's Will is in the chest on the shoulder of the Flux Construct III.
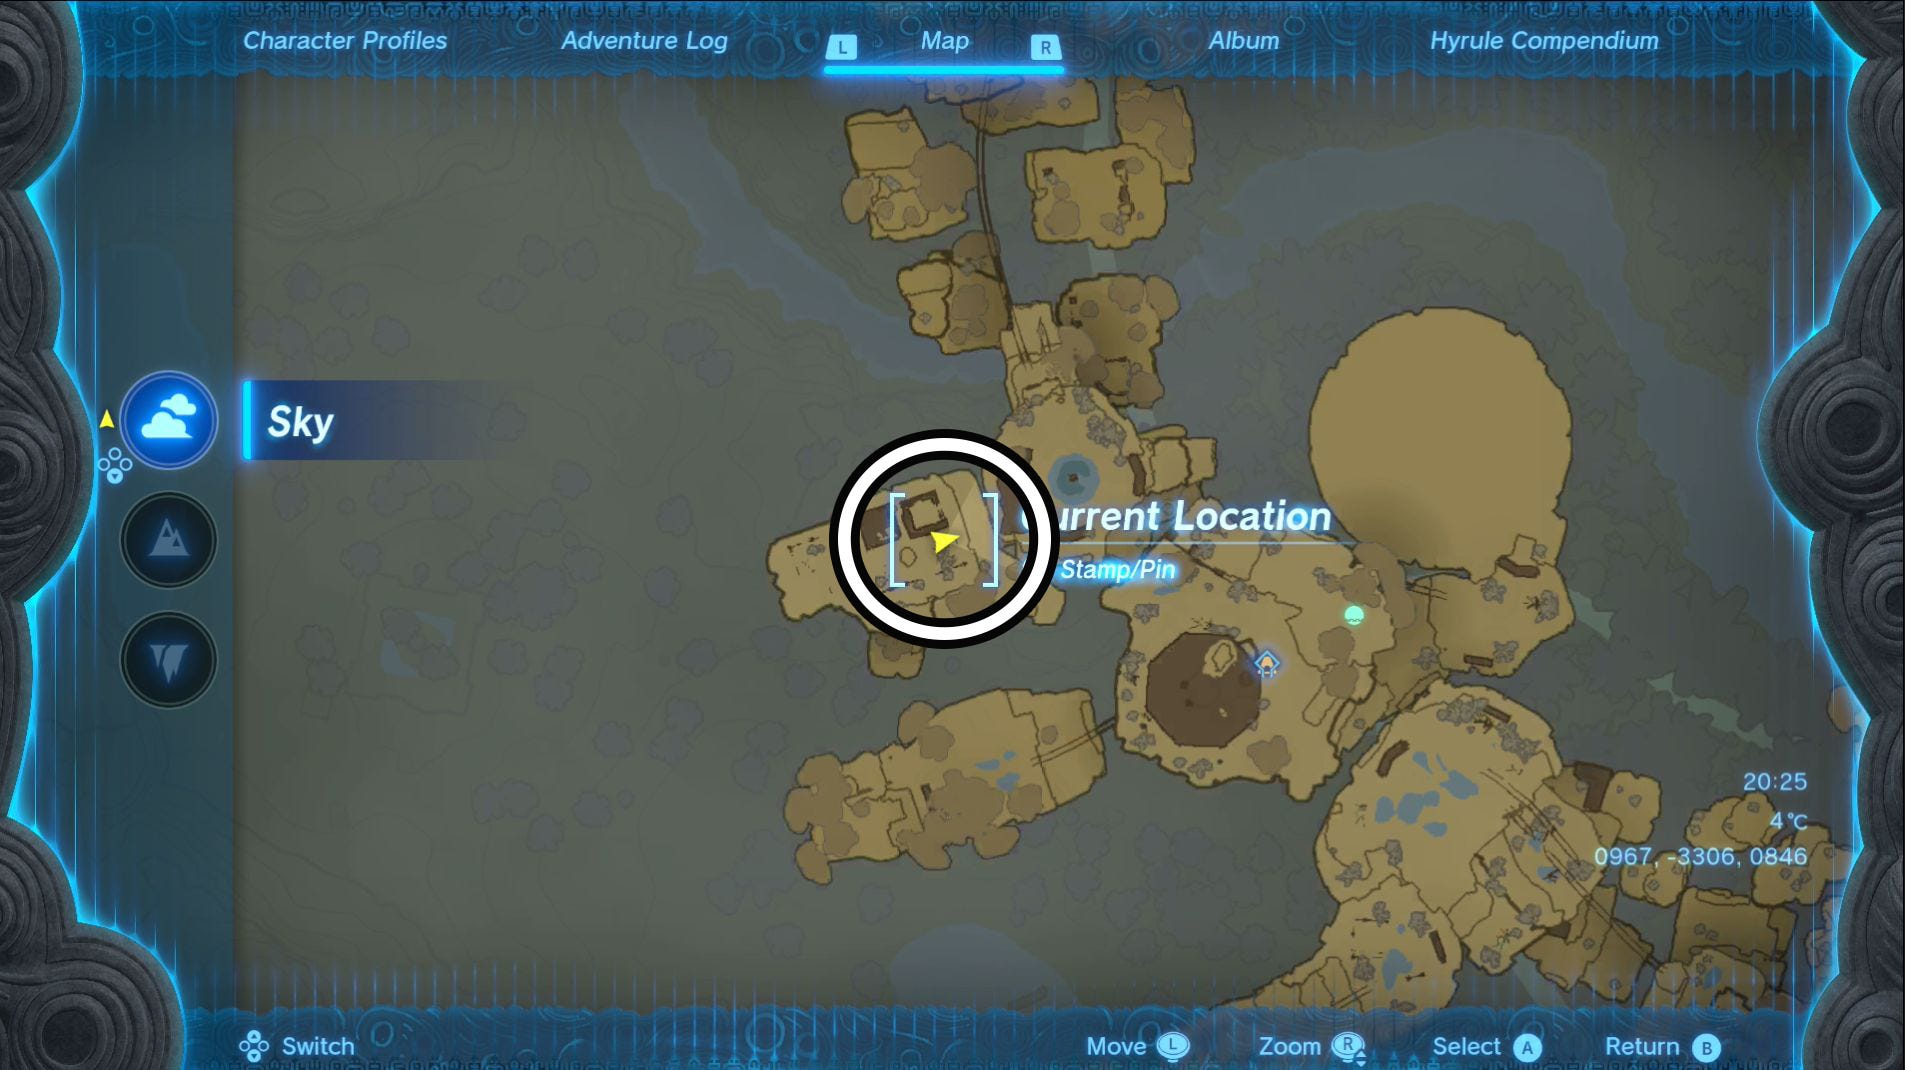
Thunderhead Isles (0967, -3306, 0846)
You can reach this island by launching from Popla Foothills Skyview Tower and then traveling across the Thunderhead Isles until you reach the island containing the Joku-usin Shrine. If you want help on your journey to and across the Thunderhead Isles, visit our Secret of the Ring Ruins walkthrough.
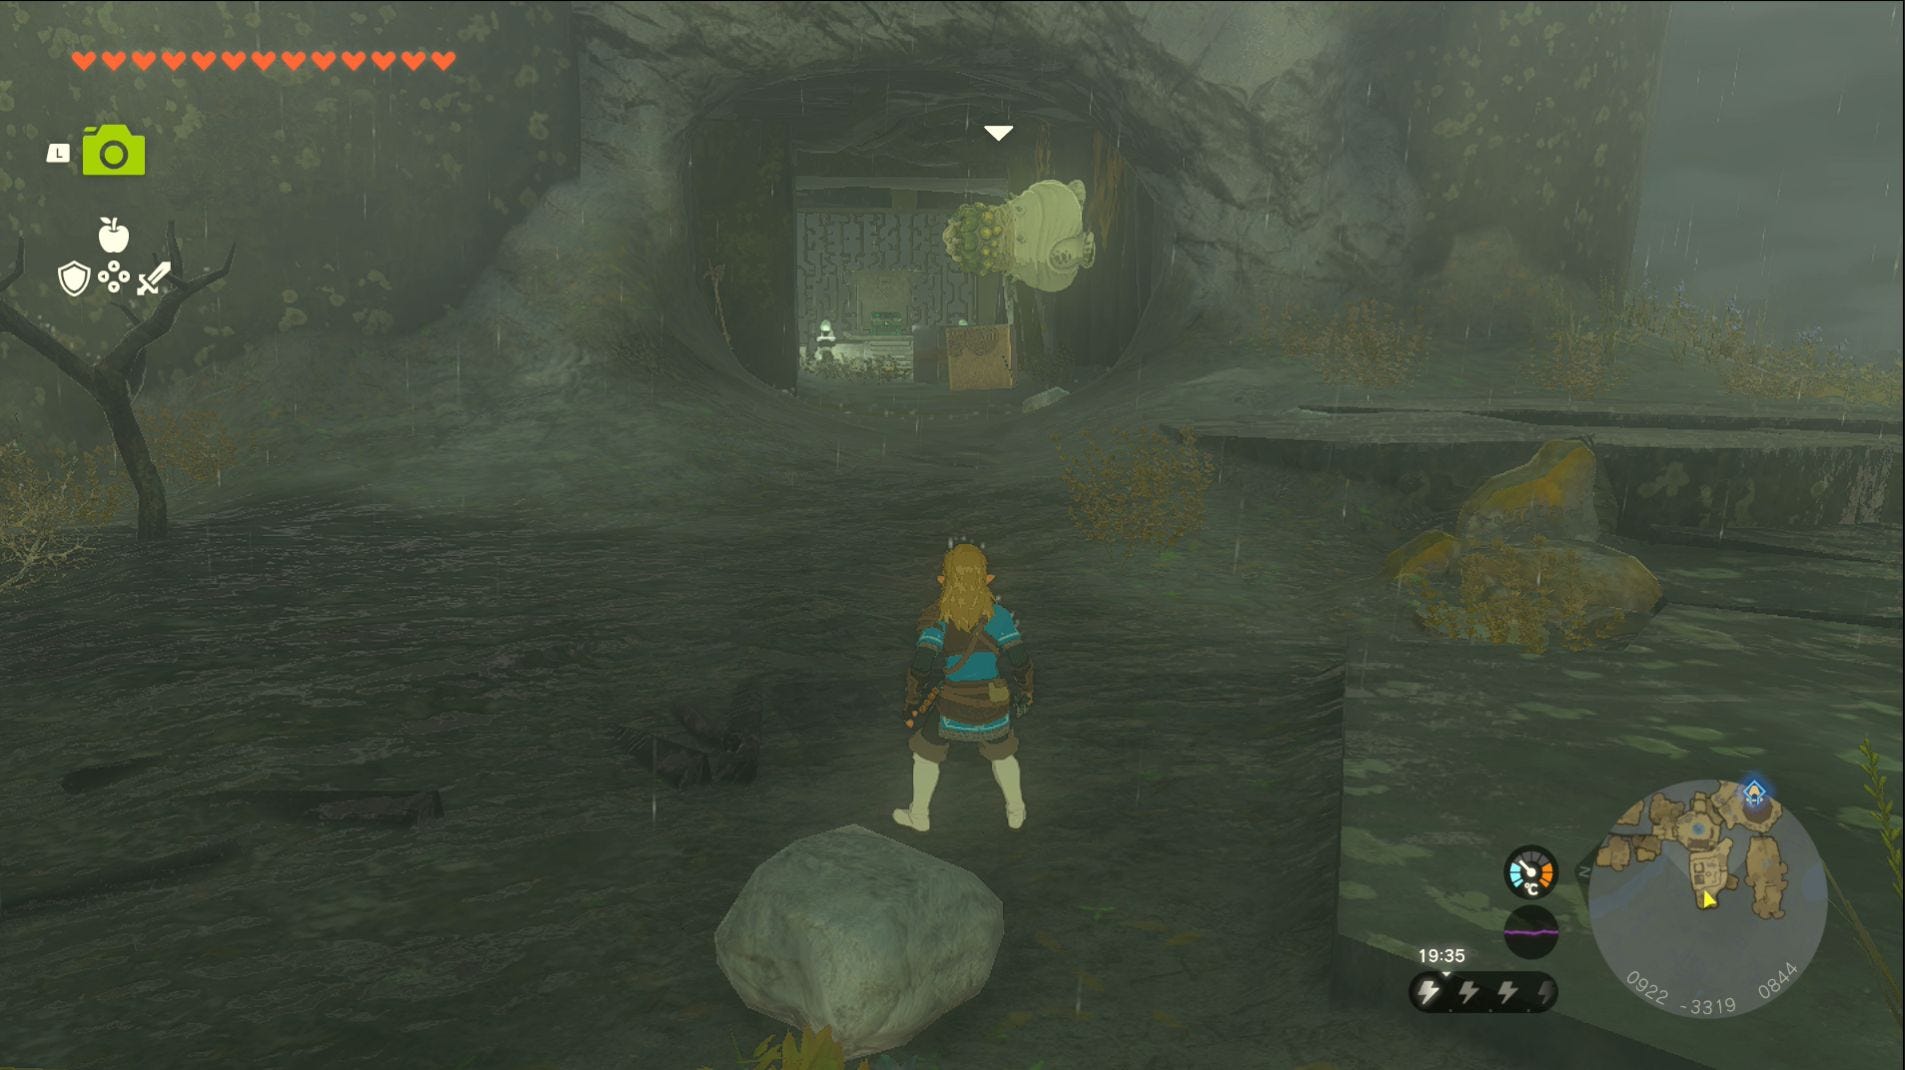
There you use Ascend to leave the room you're currently in and then again, while standing on a block, within the circular building you'll find yourself close to. You can then stand on the plinth and, when lightning strikes, it will send you across to the island.
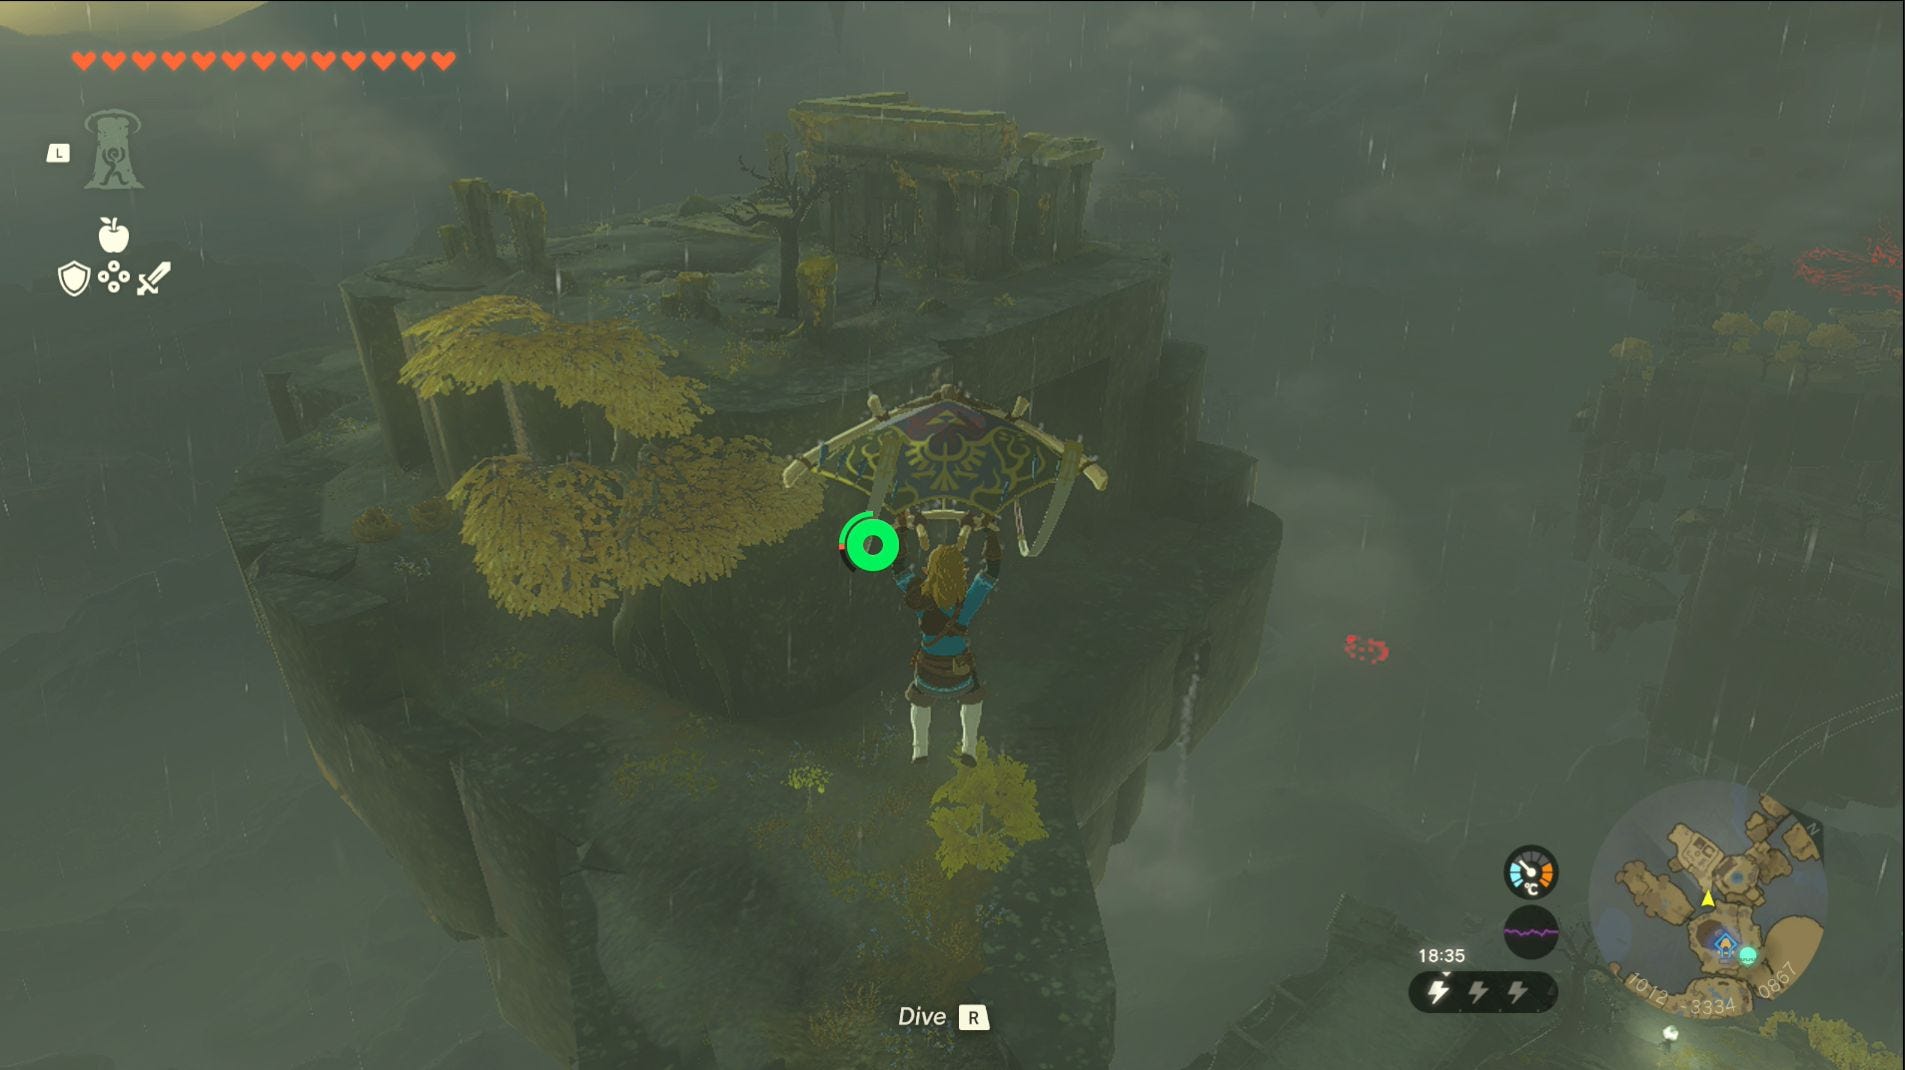
Now along the path around the island until you come to some rocks you need to destory. These rocks gone, you now need to defeat the Like Like before you can safely open the chest containing the Sage's Will.

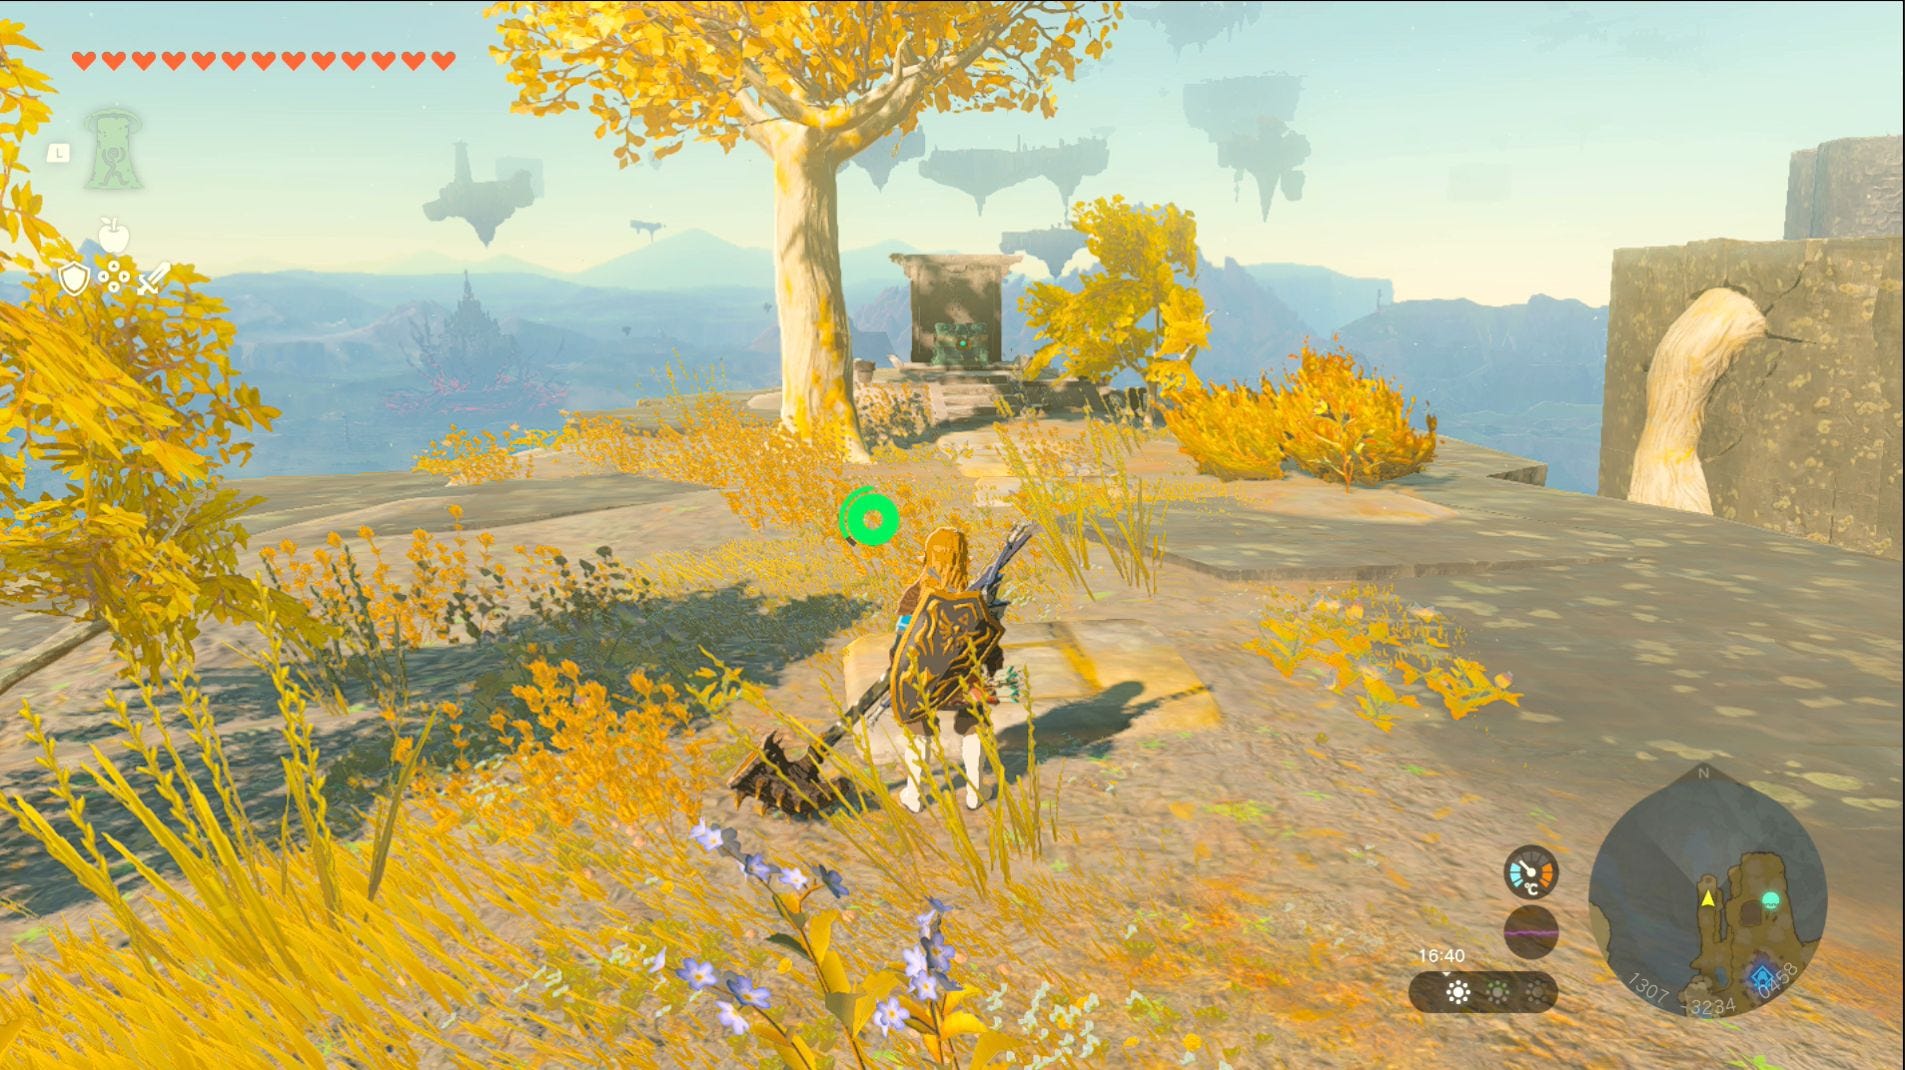
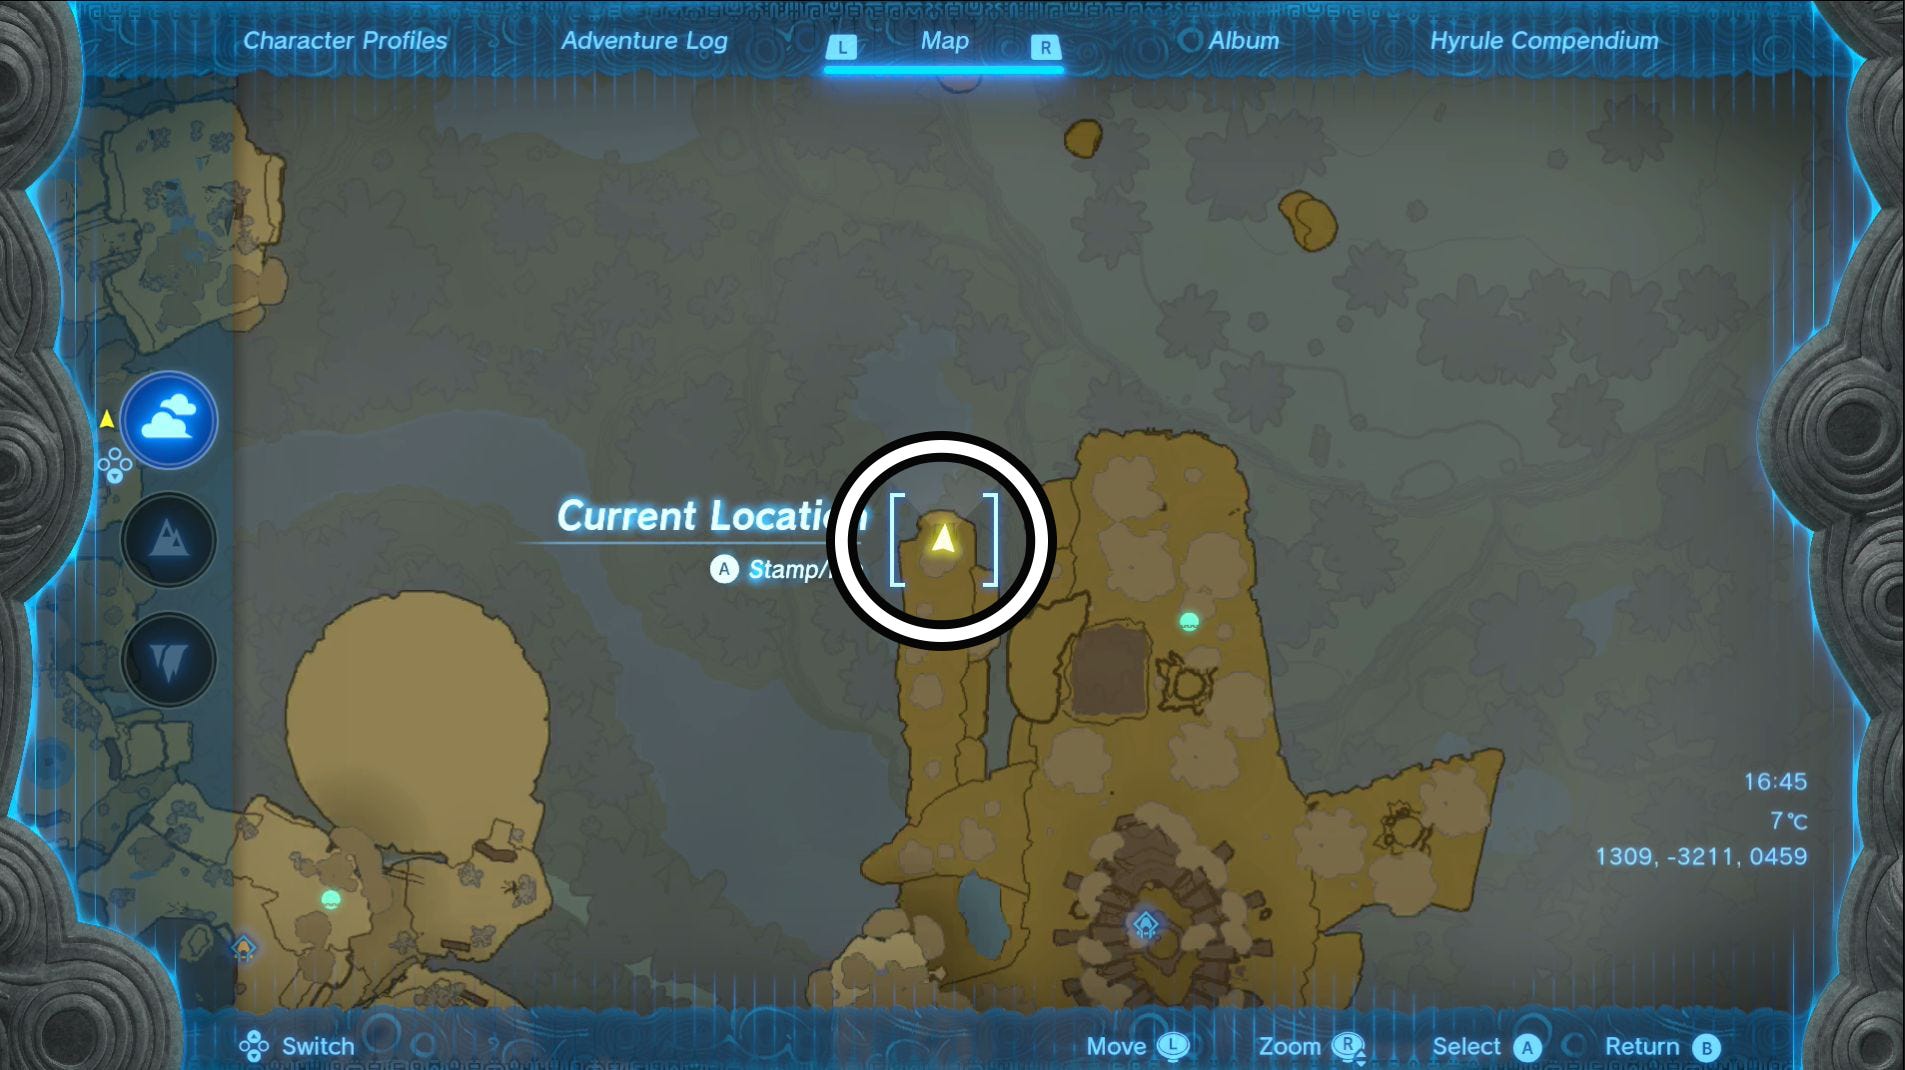
Dragonhead Island (1309, -3210, 0459)
We recommend getting this one after getting the Sage's Will listed above as you'll already be on this island chain. Head across to the part of the islands that look like a dragon head and is, in fact, called Dragonhead Island.
Once there, you'll find the chest containing the Sage's Will at the end of the section of the island that makes up the dragon's lower lip.
If you want some advice on how to reach Dragonhead Island, visit our Find the Fifth Sage and Secret of the Ring Ruins walkthrough.
Congratulations on tracking down all of the Sage's Wills in Zelda: Tears of the Kingdom! If you need more help on your adventure across Hyrule in Zelda: Tears of the Kingdom, check out our guide that shows you how to increase weapon durability and our one that shows you how to upgrade your armor.