Zelda - Ya Naga and Shatter the Heavens trial solution in Breath of the Wild
How to solve the Lake region trial.

Ya Naga is one of the many Shrines located throughout Zelda: Breath of the Wild. The challenge inside, named the Shatter the Heavens trial, is a puzzle that has you use various bombs to smash rocks and climb to a higher level. Get it right, and you'll walk out a success.
If you need help finding and solving other Shrines, our Shrine location maps page can help, while our Zelda: Breath of the Wild walkthrough and guide covers other aspects of the game.
Where to find Ya Naga
The Ya Naga shrine is located within the Lake region, specifically on a small, sunken island in the large lake to the north west of Lake Tower. To get there, you can paraglide directly onto the island from the Lake Tower itself, heading north west and looking for the largest of the small cluster.

The shrine is in the open, but hard to see until you reach the island because it's a little sunken down below surface level.
There's no puzzle to solve here in order to access the shrine, so simply dive in when you're ready.
Ya Naga and Shatter the Heavens trial solution
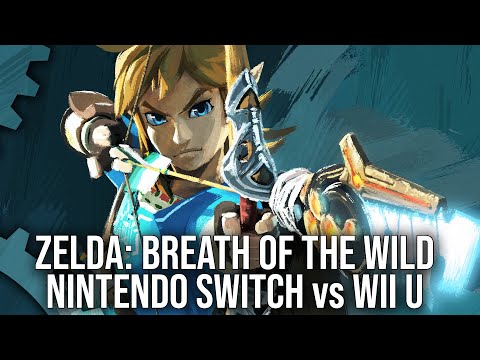
On entering the Ya Naga shrine, you'll see in front of you a large pole, with a concrete block at the bottom of it, a small chute below the block, and a podium built around it.

First, you need to lay a bomb on the top of the concrete cube - a cubic bomb works best, as it'll stay on top of it if it moves.
Then, head to the entrance of the small chute, and drop in a spherical bomb.
Thanks to a new update, it's now possible to play Zelda Breath of the Wild in VR. Want help with the main game? Our Zelda: Breath of the Wild walkthrough can help complete Divine Beasts Vah Ruta, Vah Rudiana, Vah Medoh and Vah Naboris and more. There's also how to get the Master Sword, Hylian Shield and all Zelda Captured Memories and Great Fairy Fountain locations, while our Shrines locations and Shrine maps hub explains where to find and solve every puzzle room, including dragon locations and Labyrinth solutions. We also have a DLC 1 guide and DLC 2 guide, including all Tingle, Majora's Mask, Phantom, Midna outfit locations.

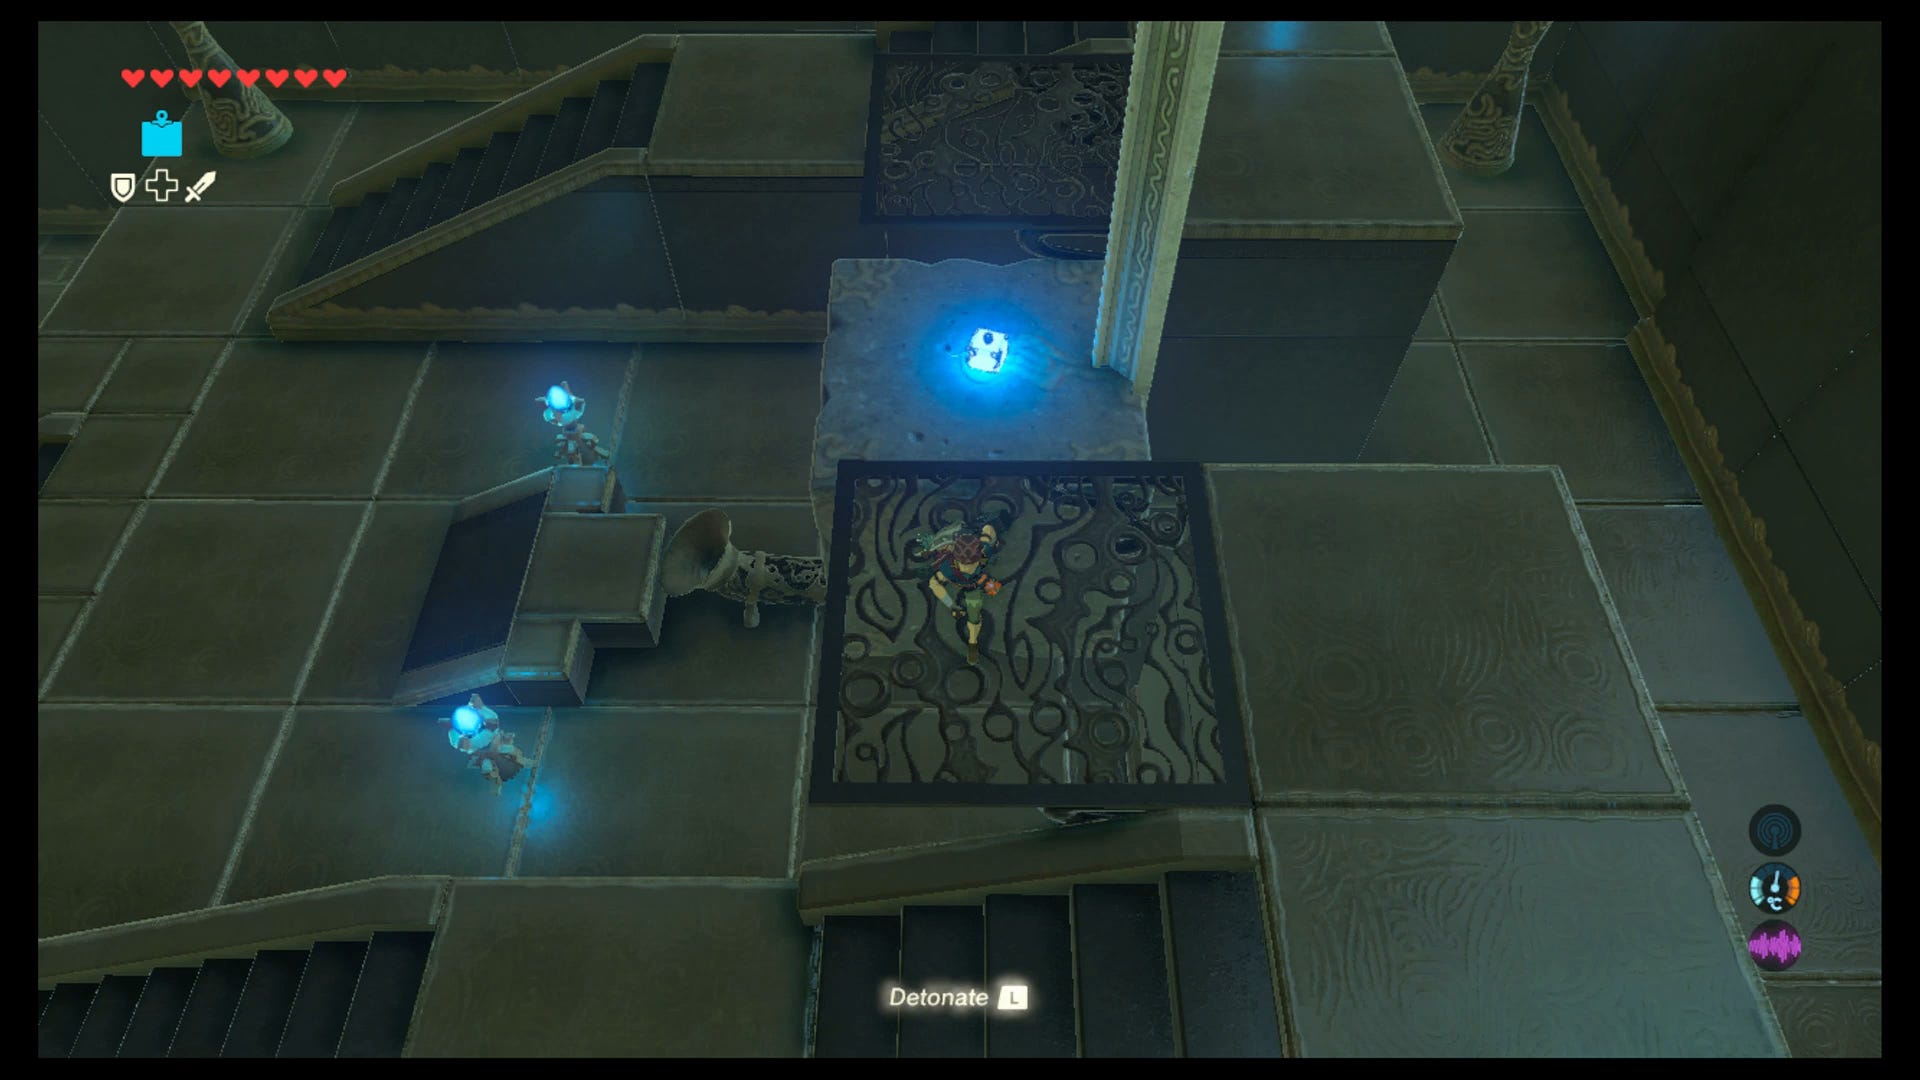
Your task here is to first detonate the spherical bomb, then, when the block reaches the top of the pole it's attached to, switch to the square bomb and detonate that, which will destroy the ceiling in turn. It takes a little timing but is quite easily done.

Then, when the block falls back down, place another spherical bomb in the chute underneath it, and go and stand on top of the block.
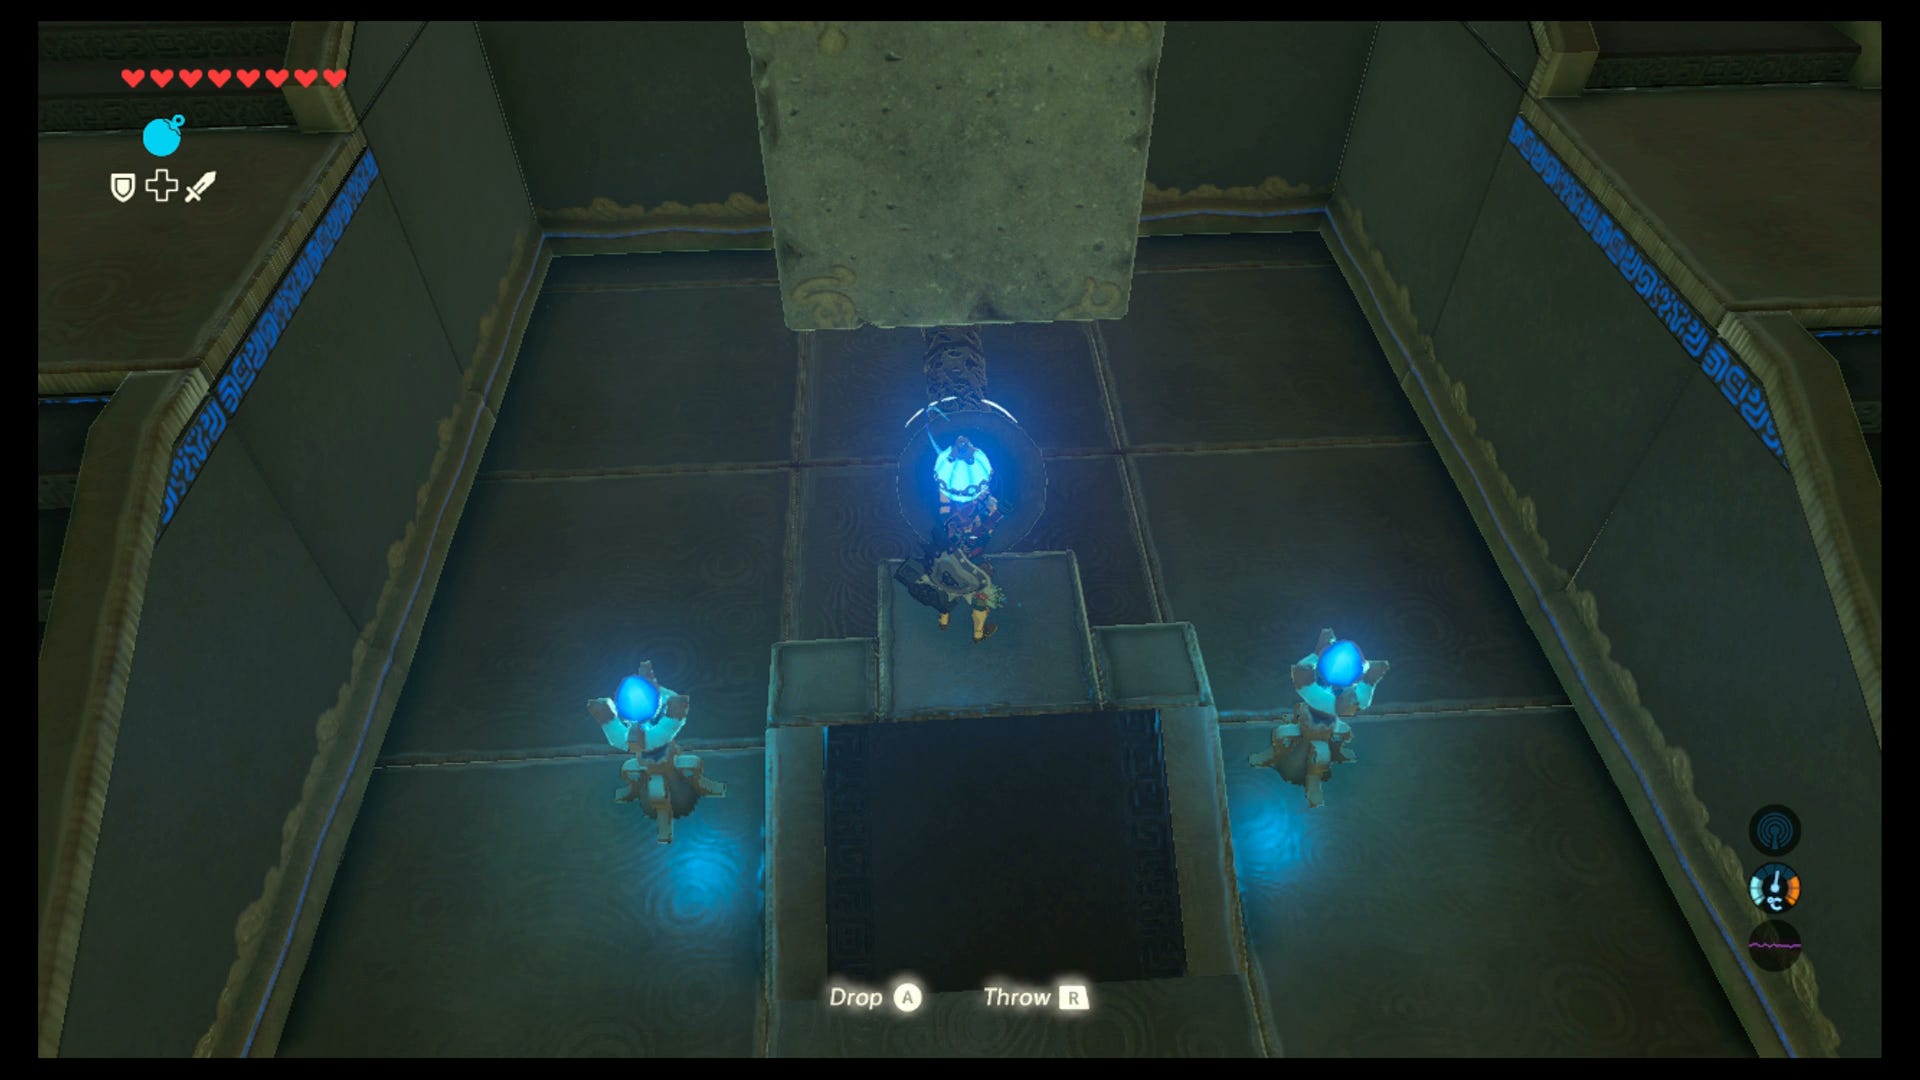
Face the pole, away from the entrance, as you need to paraglide in that direction when you get to the top. Detonate the bomb, and you'll go flying upwards.
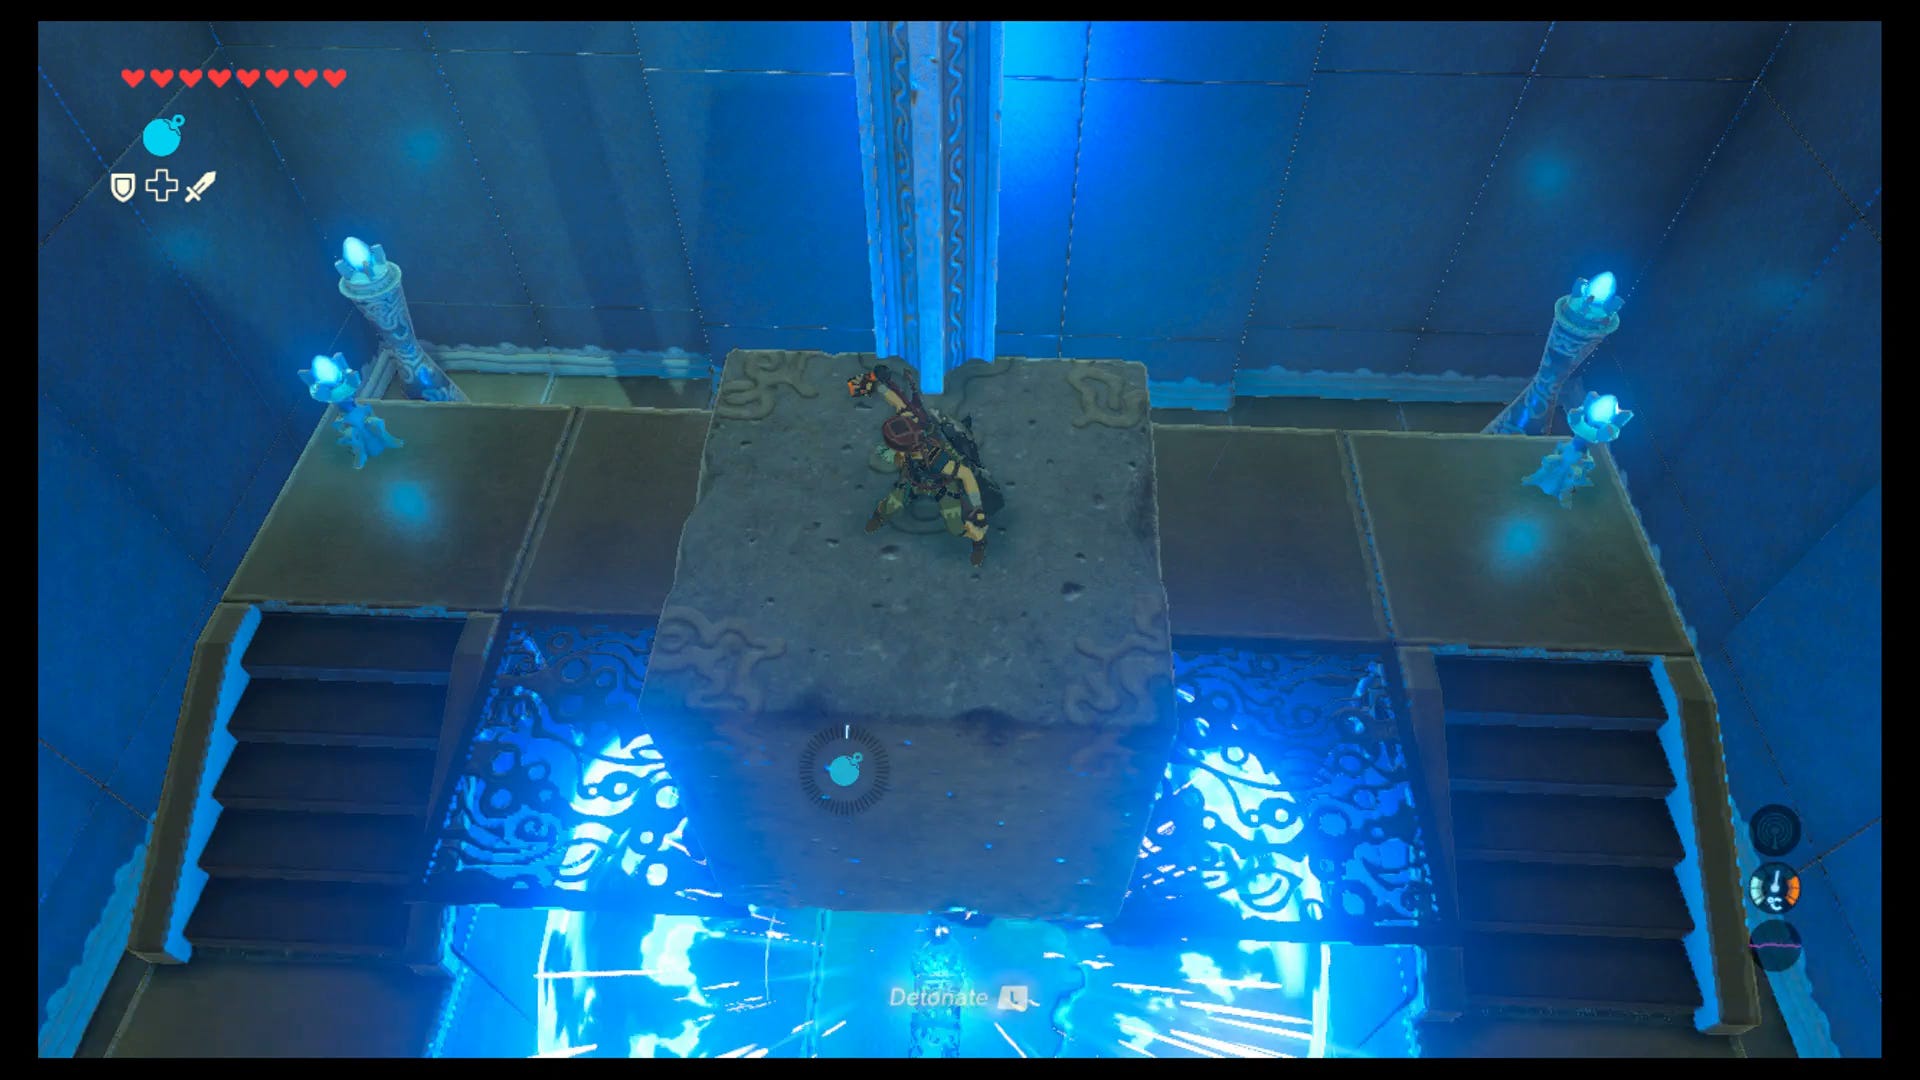
At the very top of your trajectory, paraglide forwards and land on the podium with a chest, to get yourself an Eightfold Blade.
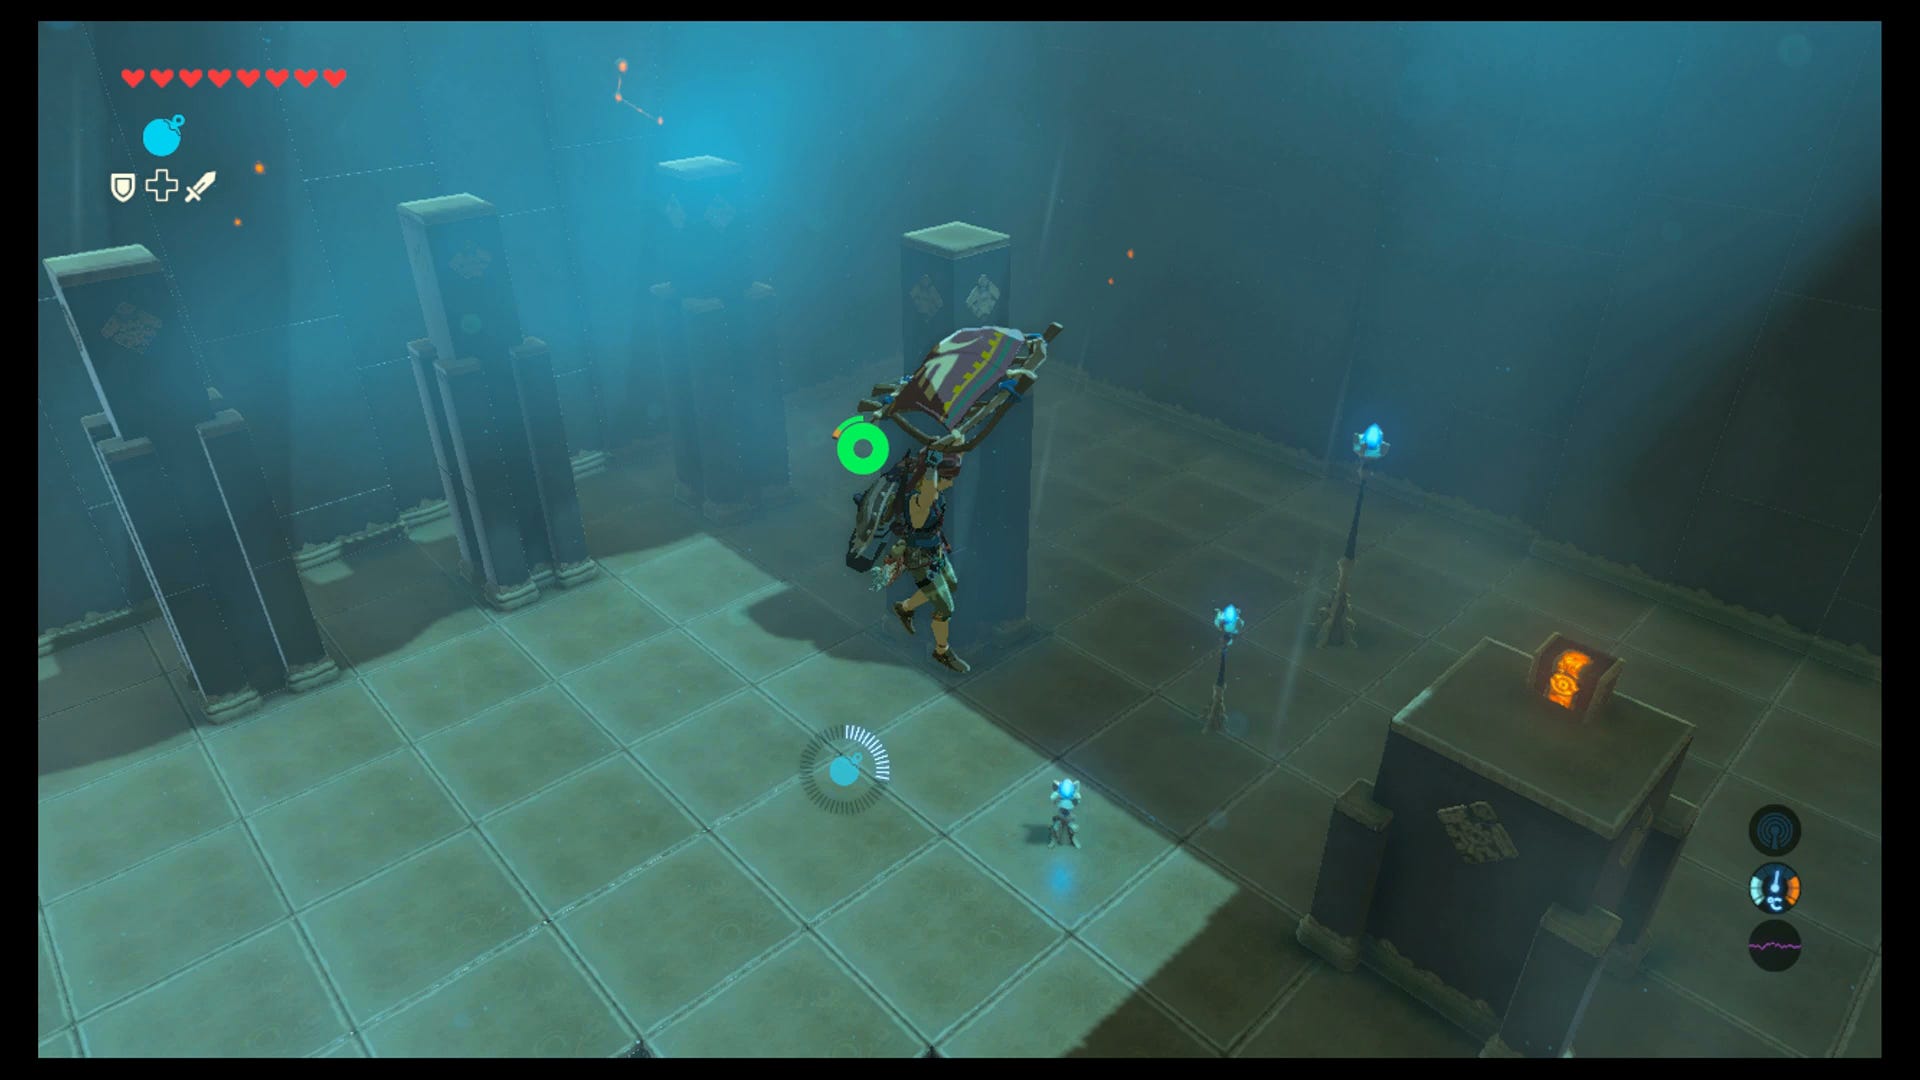
Then, you can simply hop off the podium and head to the exit, job done!
While you're here, here are other Shrines within this region:
Lake region (6 Shrines)
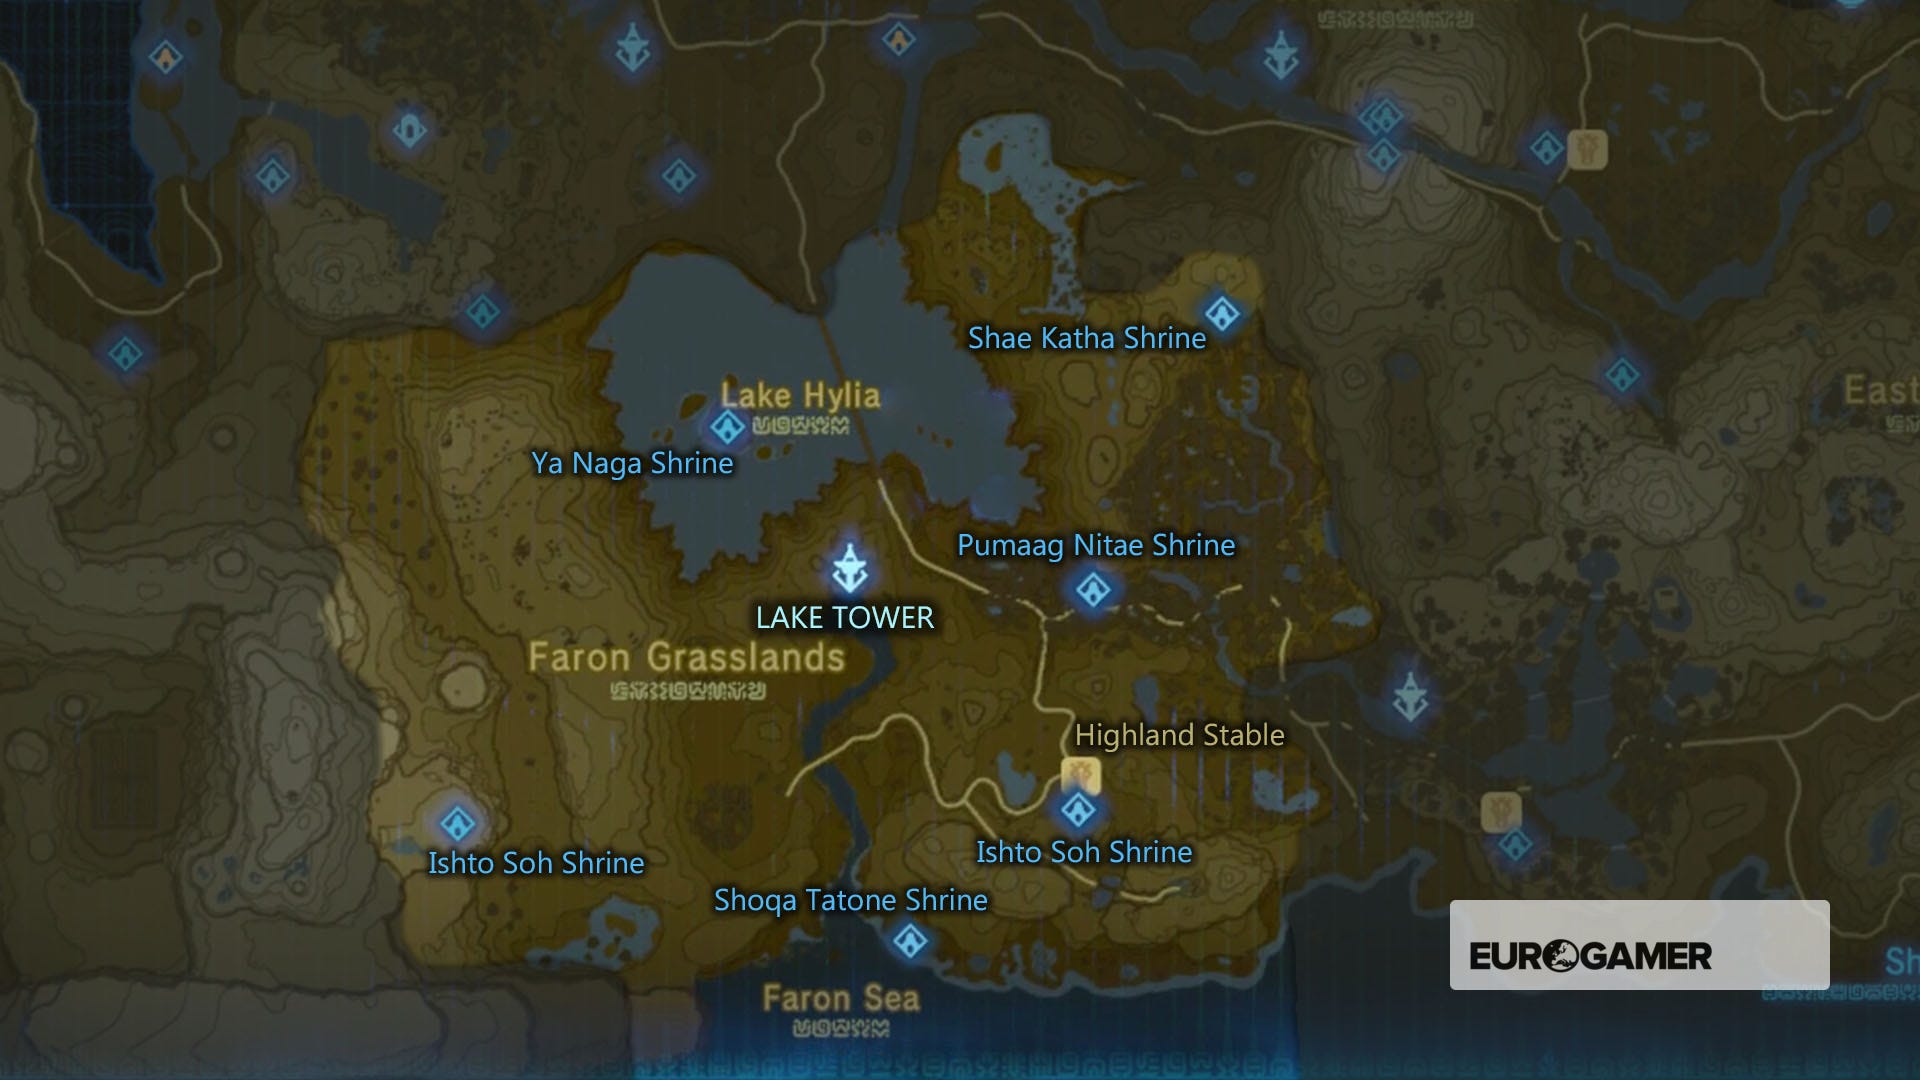
- Ishto Soh Shrine and Bravery's Grasp trial solution
- Ka'o Makagh and Metal Doors Open The Way
- Pumaag Nitae
- Shoqa Tatone and the Guardian Slideshow quest
- Shae Katha (Farosh dragon)
- Ya Naga Shrine and Shatter the Heavens trial solution
If you're after other trials, then our Zelda: Breath of the Wild Shrine locations and maps hub page can help with other regions.