Final Fantasy 12 - Fafnir location, requirements and strategies for the Rank VII Wyrm Wrath's Renewal
How to take on Fafnir in Final Fantasy 12.
Here on this page of our Final Fantasy 12 Hunts and Marks guide, we'll be taking you through everything you need to know in order to defeat Fafnir - a Rank VII Mark for the Wyrm Wrath's Renewal Hunt - including the Petitioner and Mark's locations, the Hunt requirements, and strategies for the battle itself.
If you're looking for one of the other Marks however, you can head back to our Final Fantasy 12 Hunts and Marks locations, requirements and strategies hub. For other tips and explainers meanwhile, head to our Final Fantasy 12 The Zodiac Age guide and walkthrough, where we cover plenty more.
Fafnir and the Wyrm Wrath's Renewal Hunt location and requirements
Before you get to the actual battle, here's everything you need to know about Fafnir and the Wyrm Wrath's Renewal Hunt:
- Prerequisites: Get the Treaty Blade during the story. (And a lot of patience.)
- Recommended level: 65
- Petitioner location: Mt. Bur-Omisace, Temple Approach
- Mark location: Paramin Rift, Silverflow's End (only during a blizzard)
- Reward: 7000 Gil, Assassin's Arrows, Teleport Stone
The petitioner, Ieeha, isn't there, so speak to Relj, the Viera leaning up against the crates and she'll explain the story.
You need to enter Silverflow's End from the Karydine Glacier, but there heas to be a blizzard and you need to avoid going via Frozen Brook (i.e. the short way). Head out into Freezing Gorge, and if there's no blizzard go back and talk to Relj again, and repeat this until the conditions are right. Once it's blizzarding go west to Head of the Silverflow, south into Icebound Flow, take the exit to the south east into Karydine Glacier, and the head immediately south to find an exit going west into an otherwise inaccessible are of Silverflow's End.
Fafnir strategies and how to defeat it
You'll need ice shields for this, and some gambits and equipment for dealing with Stop, Sleep, and Silence. He only inflicts them one at a time, though, so giving each of your party members immunity to one of the effects means that no matter what happens someone will be able to rid everyone else of their afflictions.
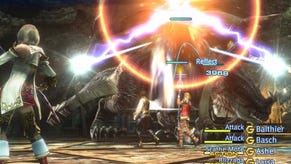
Fafnir's physical attacks do somewhere in the region of 2000HP damage, if you've not got an ice shield then Whte Breath can deal 4000HP or more, and with Shock he can hit for 6000HP, so clustering your party all together will lead to certain doom. If it all starts going badly there's a large rock in the area you can run behind to lick your wounds.
For more help with? Final Fantasy 12? Our Final Fantasy 12 The Zodiac Age guide, walkthrough, Switch and Xbox differences gives an overview of the game to get you started. Elsewhere, there's our hidden Espers strategy and locations and Elite Hunts and Marks pages, how to get the best Zodiac Jobs for each character, advice on farming LP from Jellies and even how to get the Zodiac Spear.
Massive damage and status effects aside, the biggest thing Fafnir has going for himself is is HP, all 1.4 MILLION of them. He's weak to lightning, but even if you have three Black Mages blasting at him it's still going to take a long time. You can fast forward to speed it up, but try and do it in short bursts and go back to normal speed to check that everything's going according to plan every minute or so - it doesn't take long for the tide to turn.
This is another fight that can be cheesed if you're struggling, but it will take a long time so leave it as an absolute last resort - Fafnir can't get close enough to the rock to hit you with physical attacks if you position yourself around the eastern side of it so he will fall back on repeatedly casting White Breath. Reduce your party size to a single Black Mage, equip them with Mirror Mail, give them item-based healing gambits just in case, add "Self: MP less than 10% - Charge" and "Foe: any - Thundaga" gambits, and then go and have several cups of tea. It'll be slow, but Fafnir's only available attack will be nullified, and eventually he'll kick the bucket.
(Further cheesing can be done by adding two more party members to your black mage, turning their gambits off, equipping them with Mirror Mail, and using "Self - Thundaga" instead of "Foe: any" - it's a risky proposition, but if it works it can have the fight over in a lot less time.)
And the rewards? As an hourly rate it's almost insulting!
Be sure to cycle back to our main Final Fantasy 12 Marks and Hunts strategy guide for more on those, otherwise head to our primary Final Fantasy 12 The Zodiac Age guide and walkthrough hub for plenty more on the game in general!


