Final Fantasy 12 - Yiazmat Ultimate location, requirements and strategies for the Rank VIII Farewell to a Legend Ultimate
How to take on Yiazmat Ultimate in Final Fantasy 12.

Here on this page of our Final Fantasy 12 Elite Hunts and Marks guide, we'll be taking you through everything you need to know in order to defeat Yiazmat - a Rank VIII Elite Mark for the Farewell to a Legend Hunt - including the Petitioner and Mark's locations, the Hunt requirements, and strategies for the battle itself.
If you're looking for one of the other Marks however, you can head back to our Final Fantasy 12 Hunts and Marks locations, requirements and strategies hub. For other tips and explainers meanwhile, head to our Final Fantasy 12 The Zodiac Age guide and walkthrough, where we cover plenty more.
Yiazmat and the Farewell to a Legend Hunt location and requirements
Before you get to the actual battle, here's everything you need to know about Yiazmat and the Farewell to a Legend Hunt:
- Prerequisites: After Pharos finish all other hunts and defeat the Hell Wyrm.
- Recommended level: The sky's the limit!
- Petitioner location: Rabanastre, Clan House.
- Mark location: Ridorana Cataract, the Colliseum
- Reward: 30000 Gil, Godslayer's Badge
A word of warning: this guy has 50 MILLION HP and very high defence - as with Hell Wyrm he has 50 health bars to grind through, but each of them is roughly equivalent to 75% of the entire Hell Wyrm fight. Expect to spend between four and eight hours on this depending on your level, weapons, and just plain old luck.
You can leave the arena during the fight, but Yiazmat will start to regain HP while you're away so don't dilly dally - it's likely you'll run out of supplies more than once during the marathon and need to go shopping, but don't get sidetracked: use the teleport in Pharos, go to somewhere where the teleport is near to a vendor (Phon Coast or Mt. Bur-Omisace are good choices) and come straight back!
Oh, and before you start, buy 99 Potions, Hi-Potions, X-Potions, Ethers, Phoenix Downs, Remedies, and Chronos Tears, make sure you have Bubble available, give your most dangerous character the Genji Gauntlets, and bringing armour or equipment that provides protection against wind damage is advisable.
Before we get to the battle, a few words about the arena: First, don't worry about the traps - most of them won't do much damage, maintaining Float throughout the fight will drain resources and take precious seconds you'll need for other purposes, and over the course of the fight you're going to hit them eventually anyway. Second, don't think you can cheat by taking refuge on the steps or in the passageways around the outside - spend too long in there and Yiazmat will use Death Strike which is a guaranteed instakill for anyone he hits. (He may also use it when you leave the arena, so be careful!)
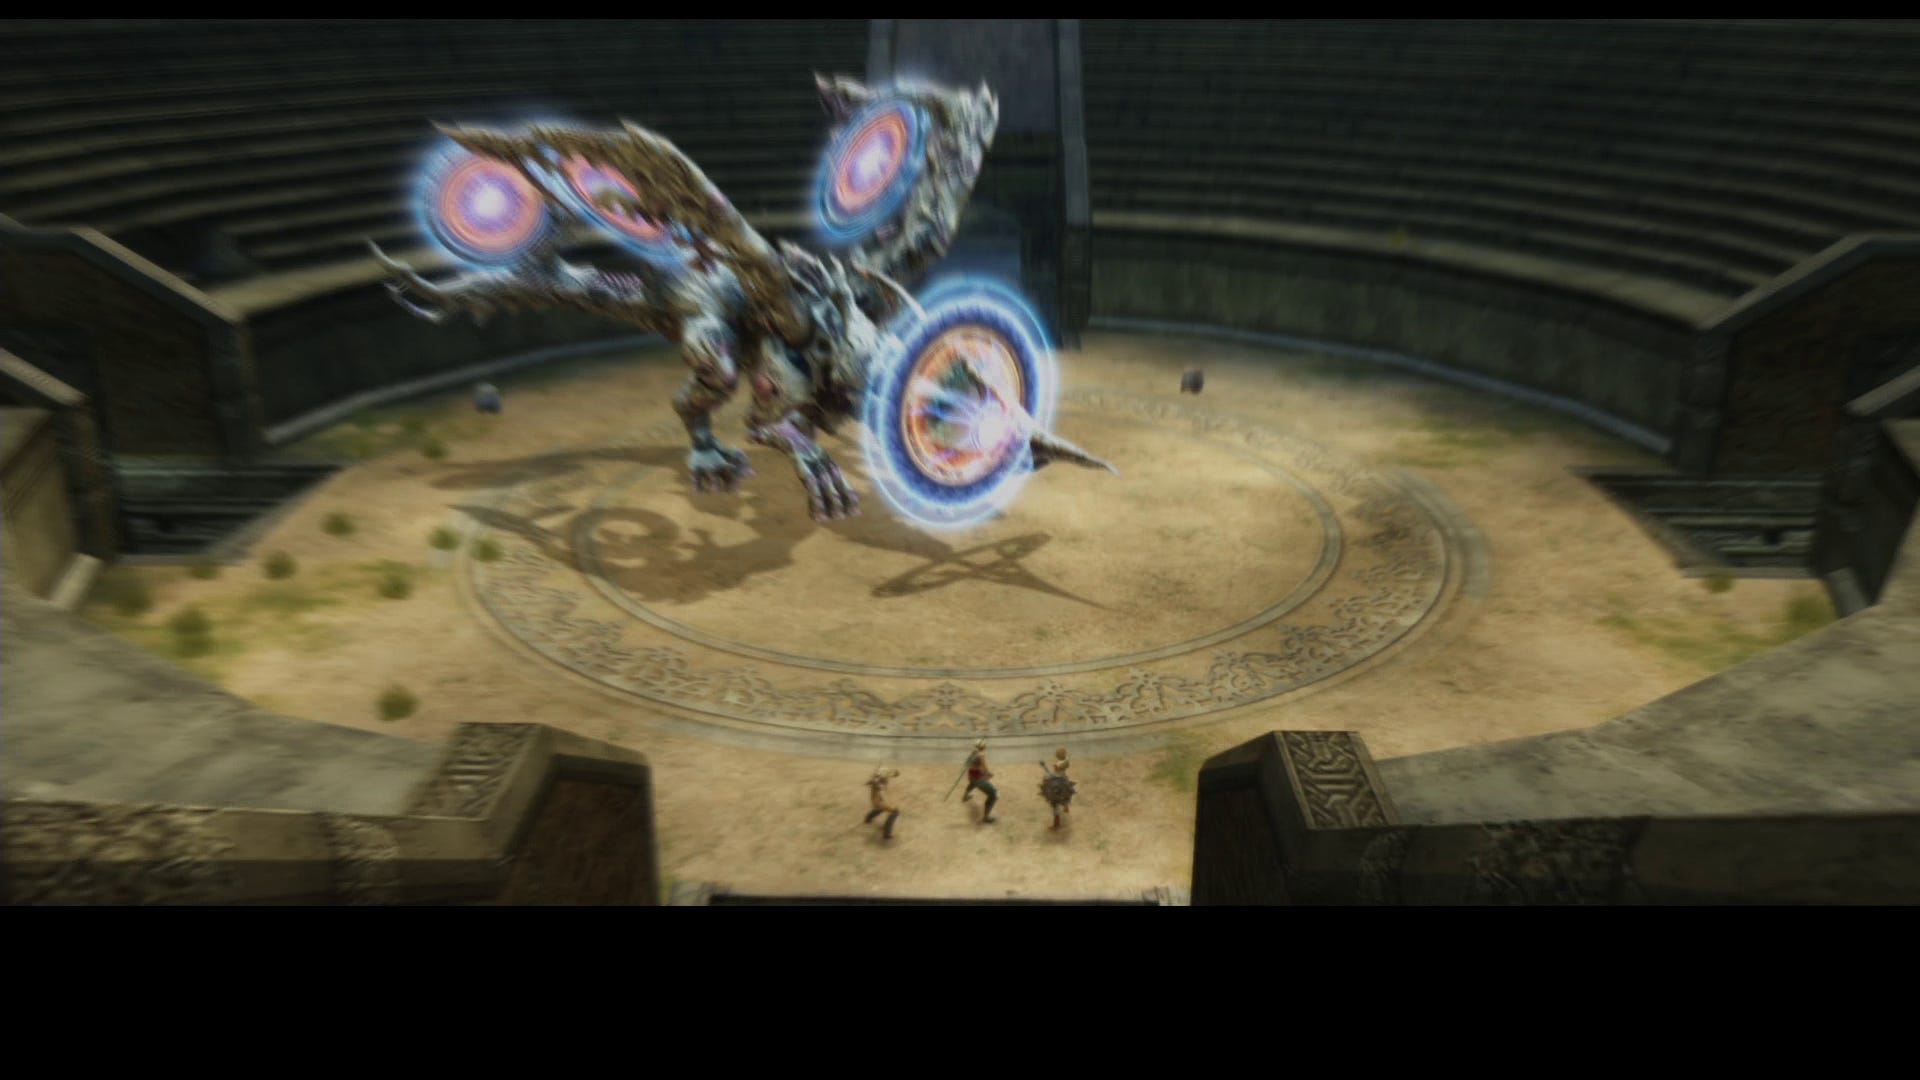
Yiazmut strategies and how to defeat it
Now, to the fight itself.
For the first half he'll use a combination of physical attacks, Cyclone, Stone Breath, and White Breath - without suitable protective gear Cyclone can hit for 6000HP or more and may add Sap to your misery. Equip Genji Gloves on your primary DPS character, have them use Berserk, and then cast Bravery and Haste on them. Cast Decoy on your tank, and focus your healing efforts on them, and keep your healer out of harm's way as much as possible. Hopefully your DPS character will be able to chain multiple hits very quickly without taking too much damage, and as long as you can keep your tank alive and have Yiazmat focus his attacks on him this phase should be relatively trouble free.
For more help with? Final Fantasy 12? Our Final Fantasy 12 The Zodiac Age guide, walkthrough, Switch and Xbox differences gives an overview of the game to get you started. Elsewhere, there's our hidden Espers strategy and locations and Elite Hunts and Marks pages, how to get the best Zodiac Jobs for each character, advice on farming LP from Jellies and even how to get the Zodiac Spear.

Somewhere between 80% and 50% HP he'll begin to use Death Strike even if you're not trying to hide. There's no counter to this, and he may use it several times in a row, so it's more imperative than ever that you keep your healer out of his line of fire - you're going to be resurrecting your other two party members a lot, so you may want to give everyone an “Ally: status = KO - Phoenix Down” gambit to save both time and MP. Yiazmat's attacks will also start to deal more damage so maintaining Bubble is imperative; as another MP-saving measure it may be worth equipping Bubble Belts instead of using Bubbleja - you may lose people to Cyclone more often without your wind protection, but you'll gain fewer deaths from normal attacks and save a ton on MP.
20% HP is where the fight gets tricky. (Yeah, because the first 80% was easy.) He'll use Growing Threat to double his level, and consequently he'll hit harder and take less damage. At this point we'd suggest taking full manual control of your healer to better prioritise resurrection, healing, and general support - judgement between using a healing item or spell or letting someone take a death and bringing them back to life and prioritising one character over another are not something that gambits can deal with very well.
When he's down to 10% you're going to need to micromanage. He'll cast Reflectga on your party so you'll want to get rid of that pretty quickly with a Dispel, and then recast appropriate buffs. For the remainder of the fight there's almost no respite from his physical attacks, and the only time he'll stop hitting you is so he can use Cyclone or Death Strike instead.
As a final option, turn off healing gambits for everyone and give your tank a dose of Reverse in addition to Decoy - if the fight wasn't so long we'd suggest this as a way to run the whole thing, but it's a huge MP drain and if a couple of people lose Reverse at the same time you can find yourself in a difficult position.
When he's dead stretch your legs and go to the bathroom, and maybe remind your family that you're still alive after such a long absence, then go back to the Clan Hall and receive the adulation of the Moogles.
Be sure to cycle back to our main Final Fantasy 12 Marks and Hunts strategy guide for more on those, otherwise head to our primary Final Fantasy 12 The Zodiac Age guide and walkthrough hub for plenty more on the game in general!