Horizon Frozen Wilds - For the Werak
Part 3 of our Horizon: The Frozen Wilds walkthrough.

Horizon Zero Dawn: The Frozen Wilds' For the Werak quest follows on from The Shaman's Path, and has you tackle a series of tricky combat and platforming objectives to prove your mettle to the clan.
You'll have a choice of objectives to kick this off - we opted for a battle with a bandit outpost and the surprisingly combat-oriented restoration of a Tallneck, so it's those we'll be walking you through below.
If you're after help for other parts of the expansion, check out all of the guides gathered together in our Horizon Zero Dawn Frozen Wilds guide and walkthrough hub, or for guides to the main game itself, our main Horizon Zero Dawn guide and walkthrough.
For the Werak - Repair and Override the Tallneck
Prove Yourself to the Werak - So, you have four objectives. As we said above, we'll only be covering two of the options here, since you only need to do two (and we only got to do two ourselves).
Repair and Override the Tallneck - Kill the Scavengers - Head to the site of the fallen Tallneck, and take out the multitude of creatures defeinding it. If you can, try to lead them over to you one at a time. A trickle of individual enemies is much easier than an absolute nightmare cluster of birds and beasts all at once.
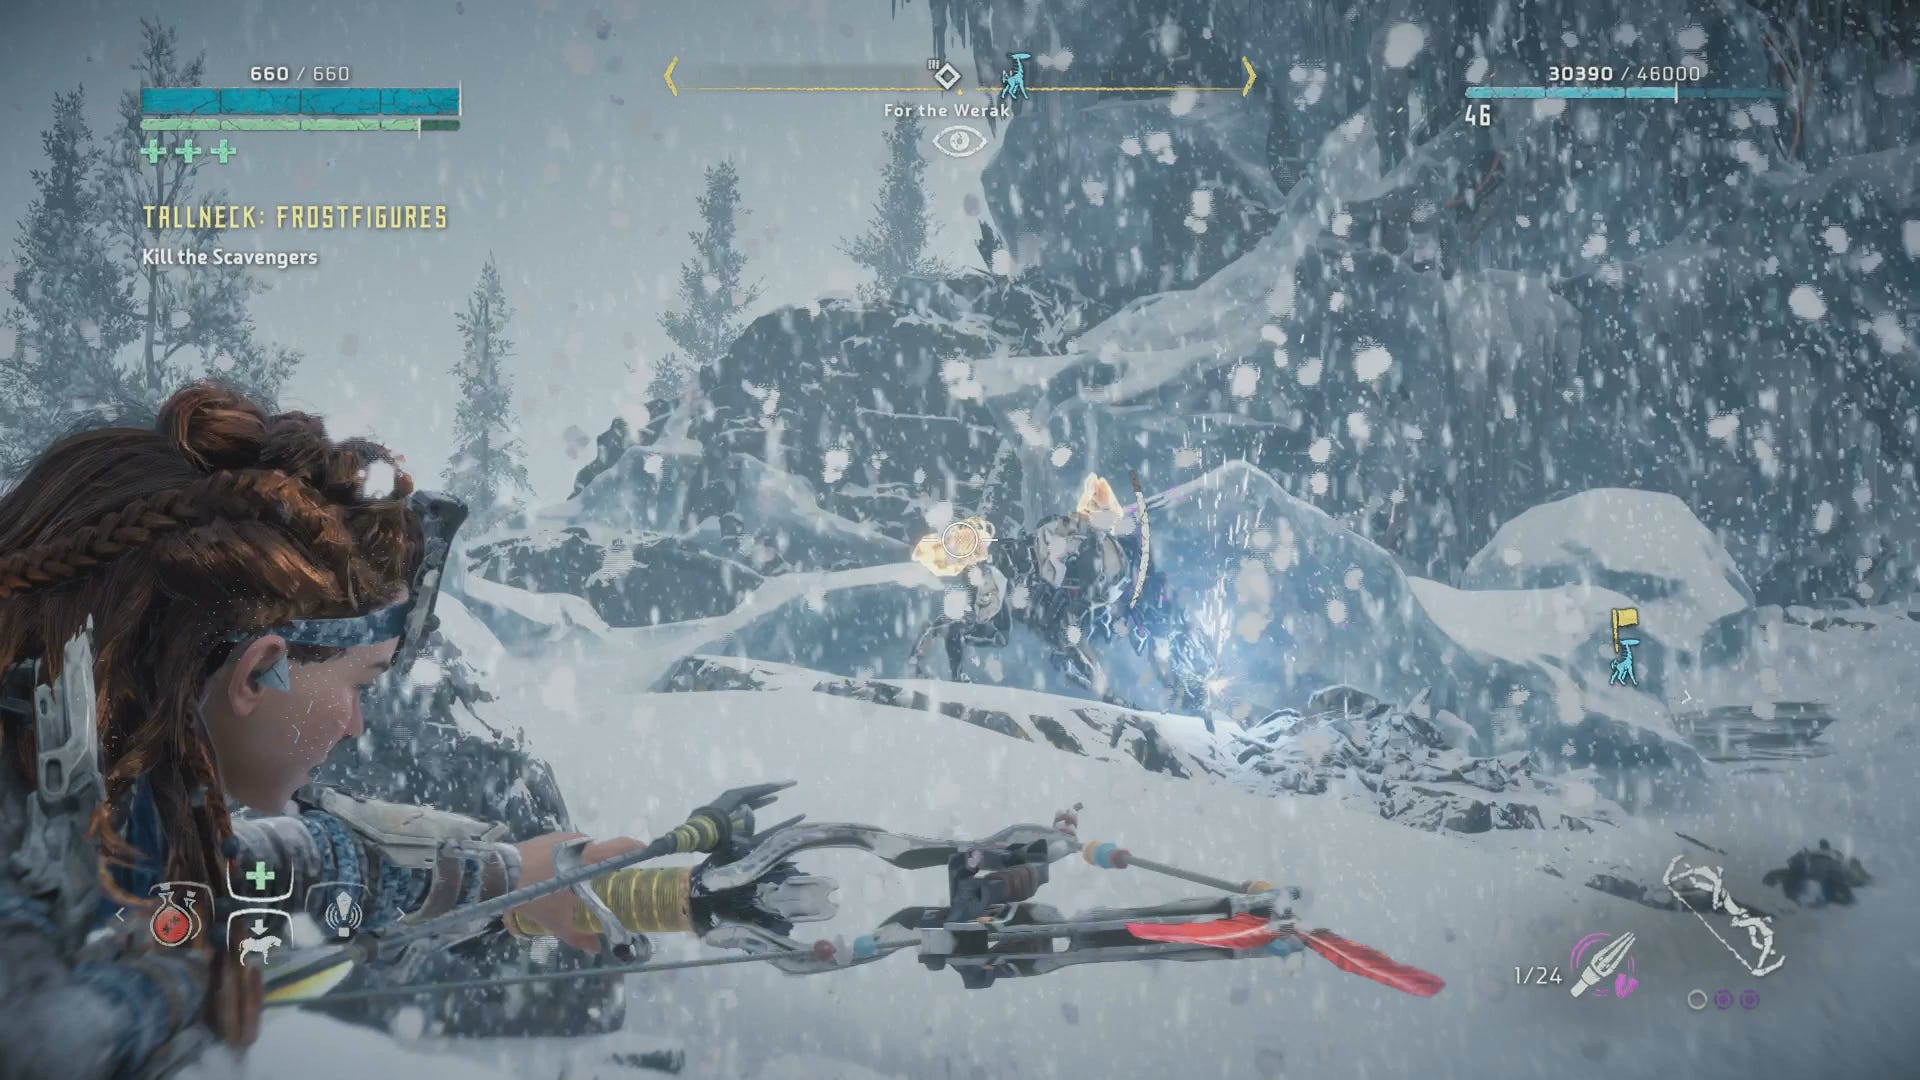
Find the Tallneck Part: Array - This one's on the body of a Daemonic Scrapper nearby. Follow the waypoint to it and take them out - we found Tearblast arrows particularly useful for neutralising these quickly.

Find the Tallneck Part: Stabilizer - This part is on another Deamonic Scrapper that hangs out with a big ol' Scorcher, one of The Frozen Wilds' new beasts. The Ropecaster is your best friend here.

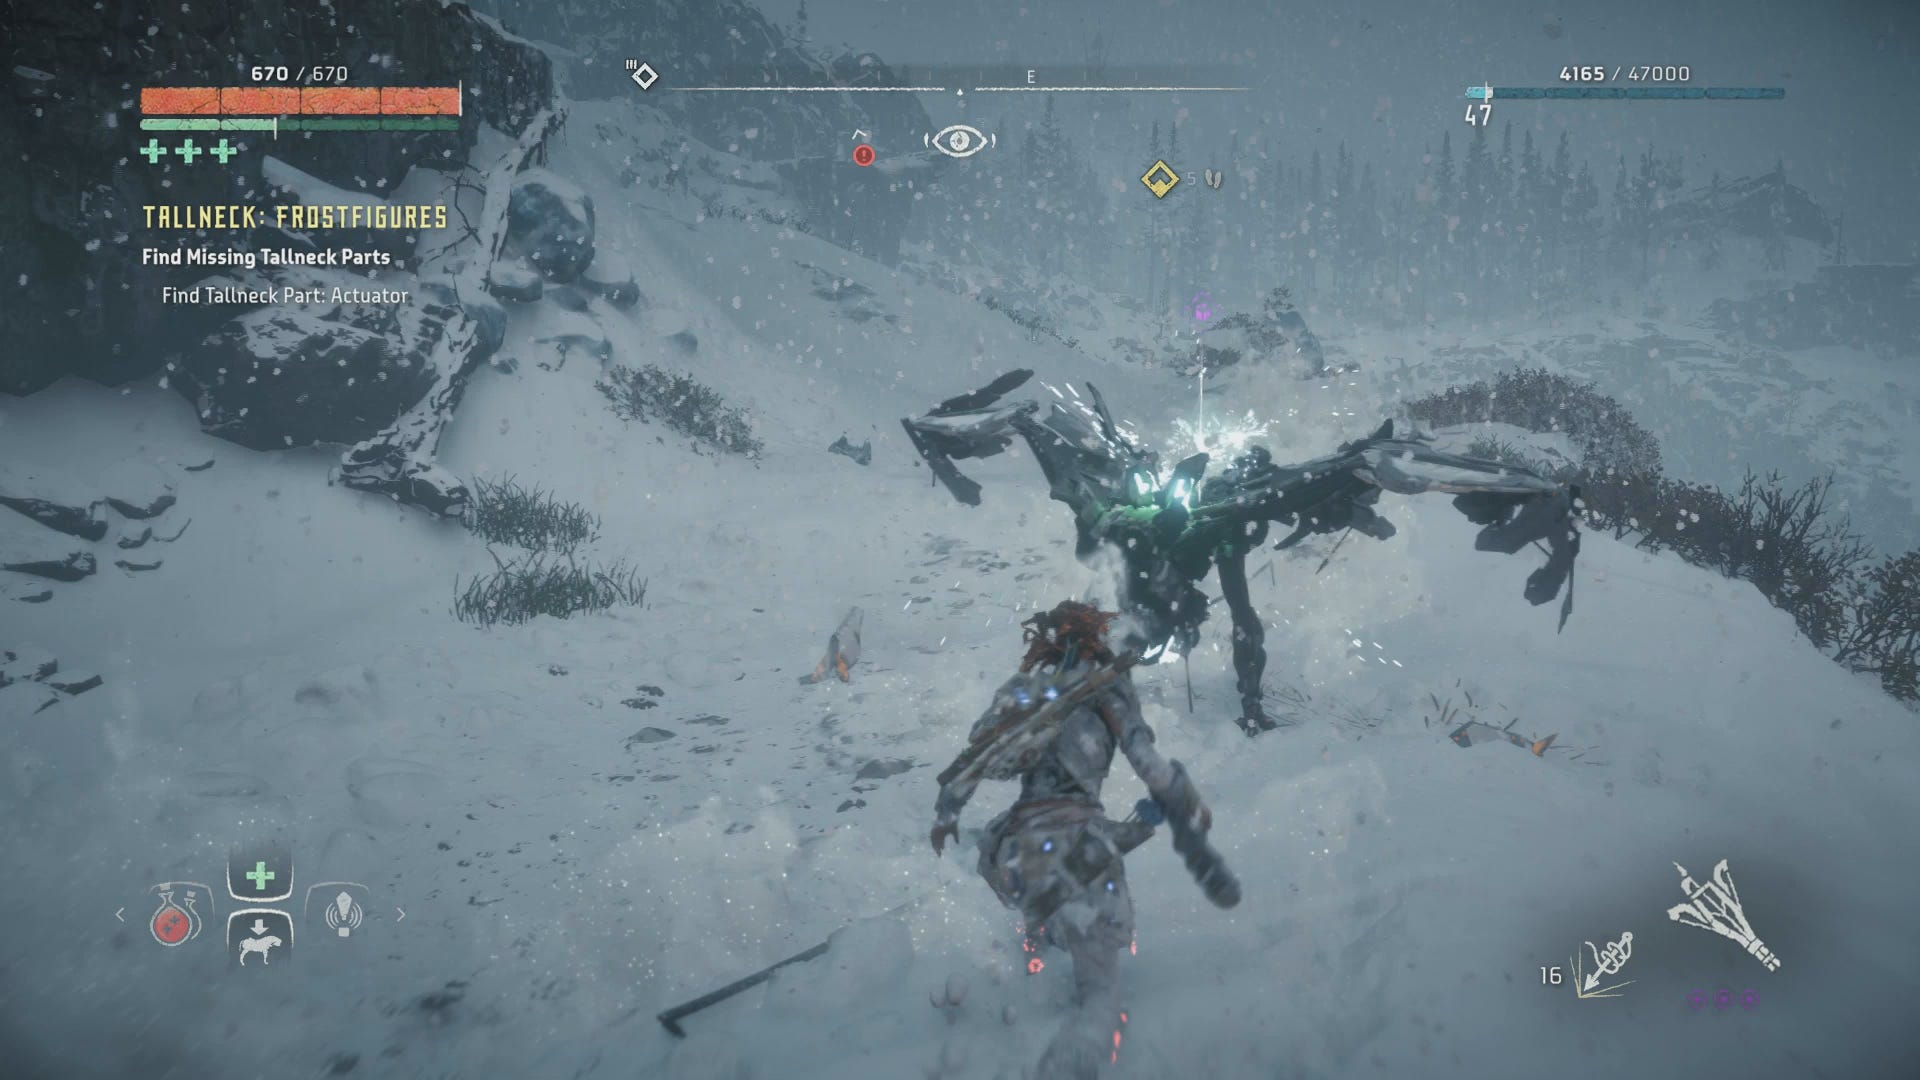
Find the Tallneck Part: Actuator - The final part is on the body of a Glinthawk, which is part of a group of three atop a nearby cliff. Climb up, blow off some parts with Tearblast arrows, then try to pin them down with the Ropecaster to get some big damage in. If possible, taking them down one at a time is the best bet, but also easier said than done.
Repair the Tallneck: - Attach the three parts by heading over to the Tallneck and following the waypoints, and using your Focus, to find the exact locations to attach them.
Activate the Tallneck: - Give it a poke with your spear.
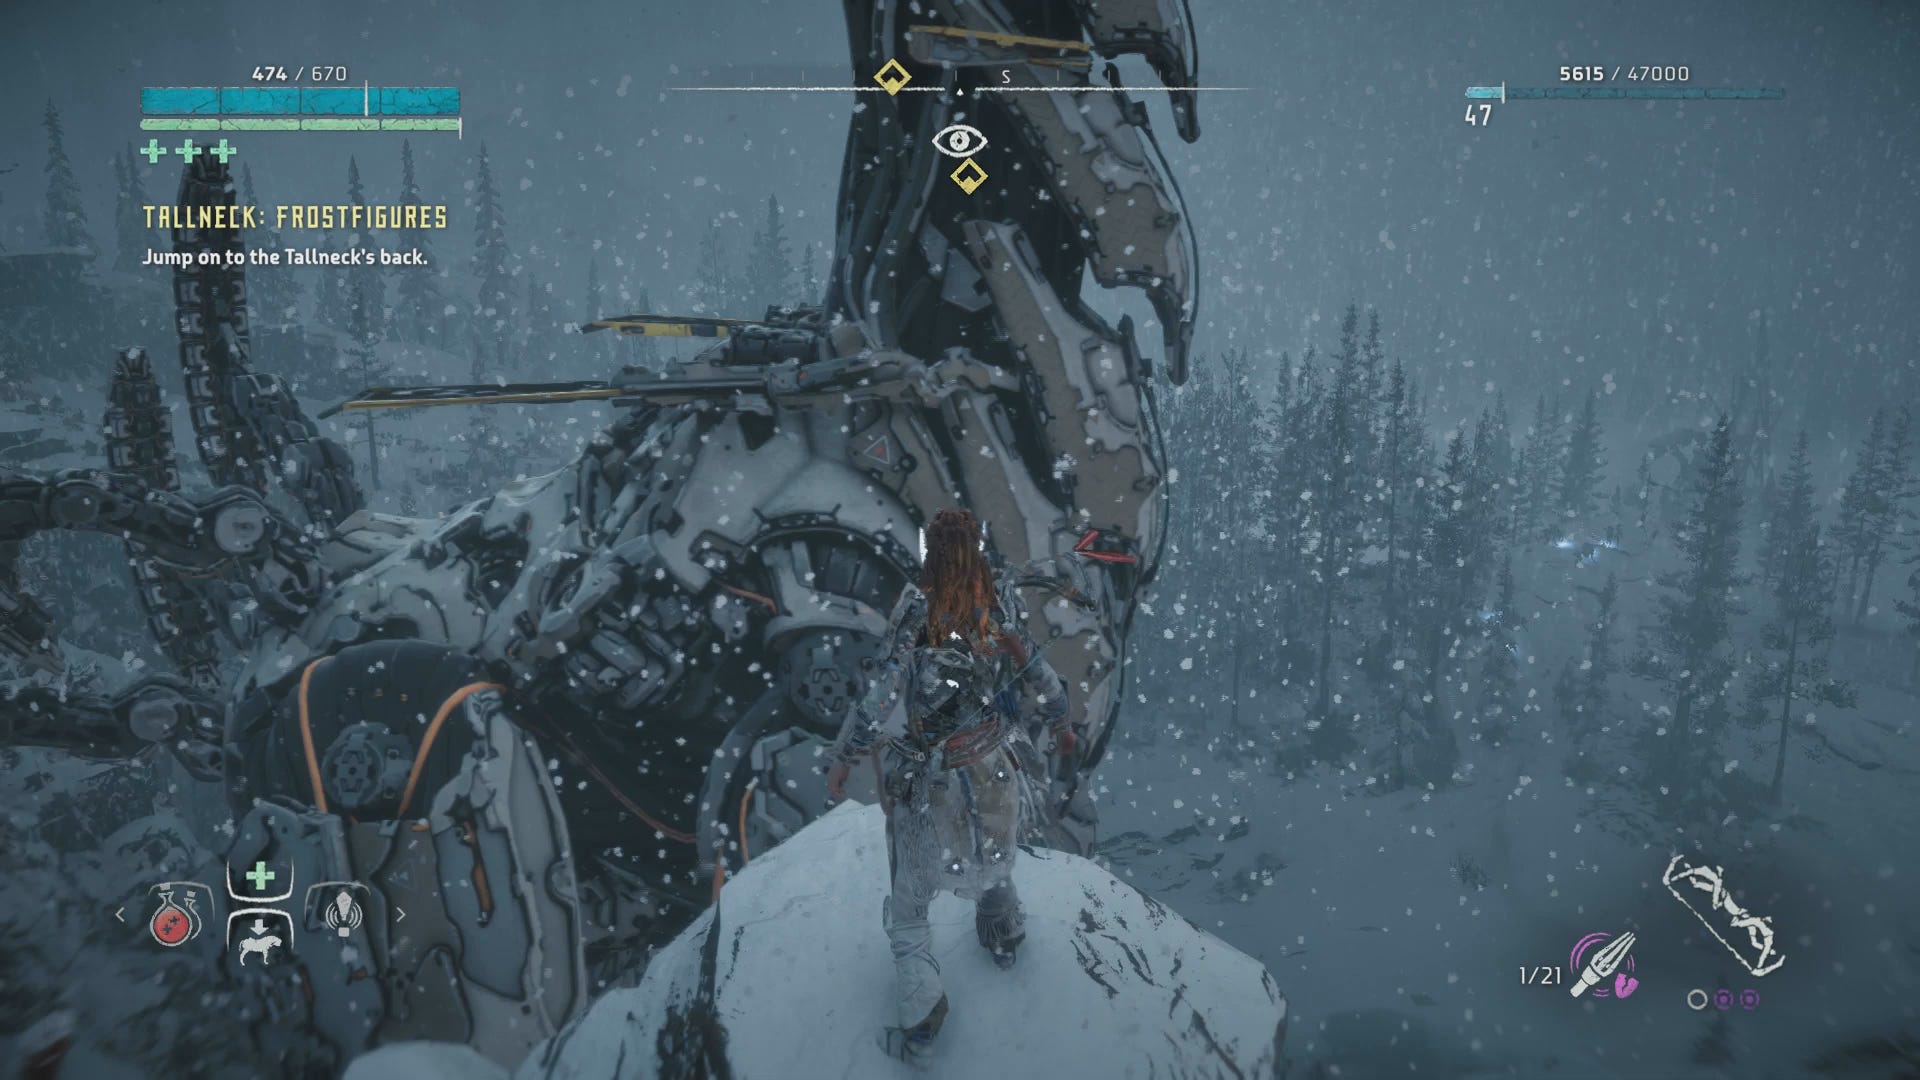
Jump on the Tallneck's Back: - Like you would with any Tallneck, now you just need to wait for it to pass by a high point that you can jump off. Then platform your way up to the top and override it.
Override the Tallneck - Once you're on board it's easy enought to climb up and finish the objective.
For the Werak - Clear out the Bandit Camp
This one's a bit more challenging than you'd expect, thanks to about three quarters of the bandits wearing protective headgear that makes them pretty invulnerable to headshots. Meatshields galore, so prepare well.
Kill the Bandits - Even if you take out the alarm, it's pretty hard to remain undetected here, just because of the sheer number of Bandits (and Horizon's fairly one-dimensional steal mechanics). Headshot the guy on the watchtower, and the guard at the gate, then prepare for battle.
We explored a few tactics here, but the most efficient, if a little cheesy, is the following: Bandits will swarm you, running to near-melee range to shoot you with arrows, or straight at you with melee weapons. Lead them to a chokepoint of some kind, like the main gate or the step-like rocks near the main watchtower, and fire a Shock bomb or two at their feet.
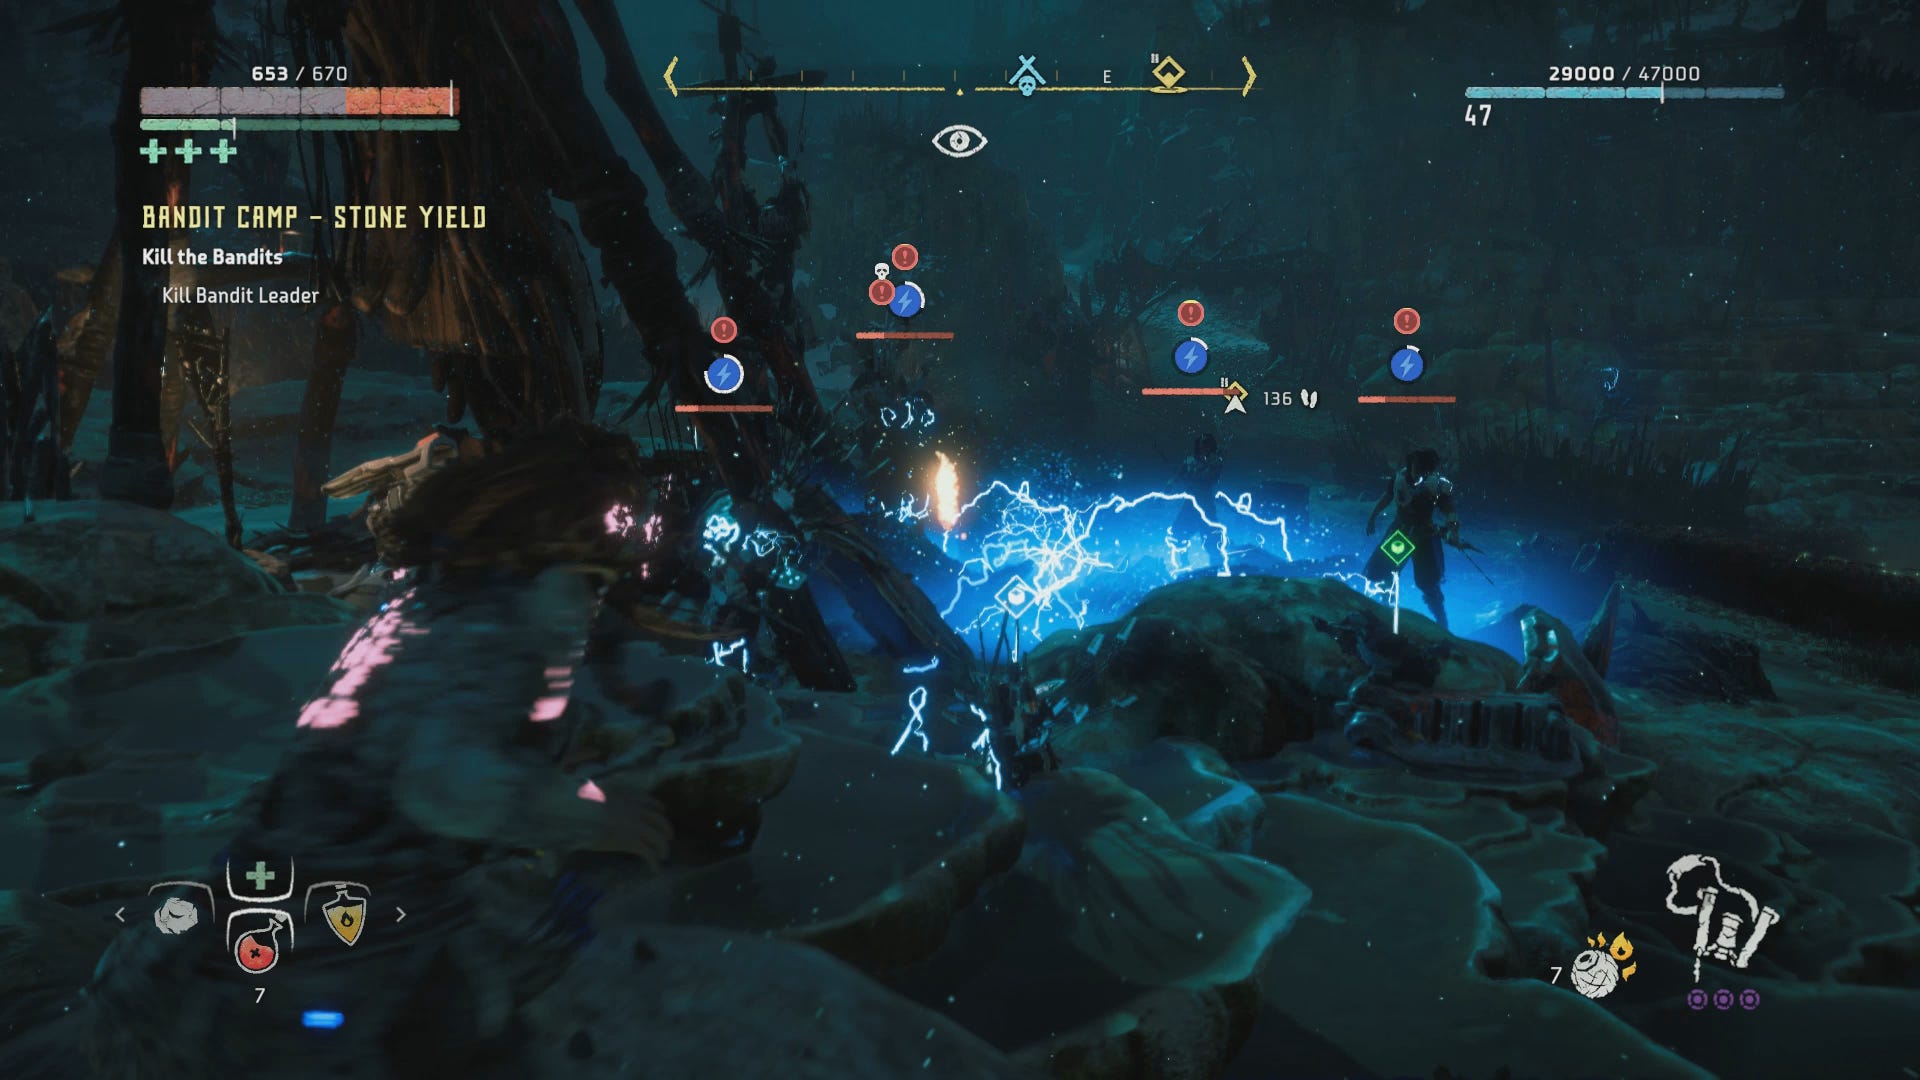
That'll freeze at least a half-dozen of them in place. Follow that up with Fire bombs, and you have an easily-repeatable damage-over-time trap that proved way faster than any actual combat like headshots or melee attacks. Rinse and repeat ad nauseum until they're all wiped out.
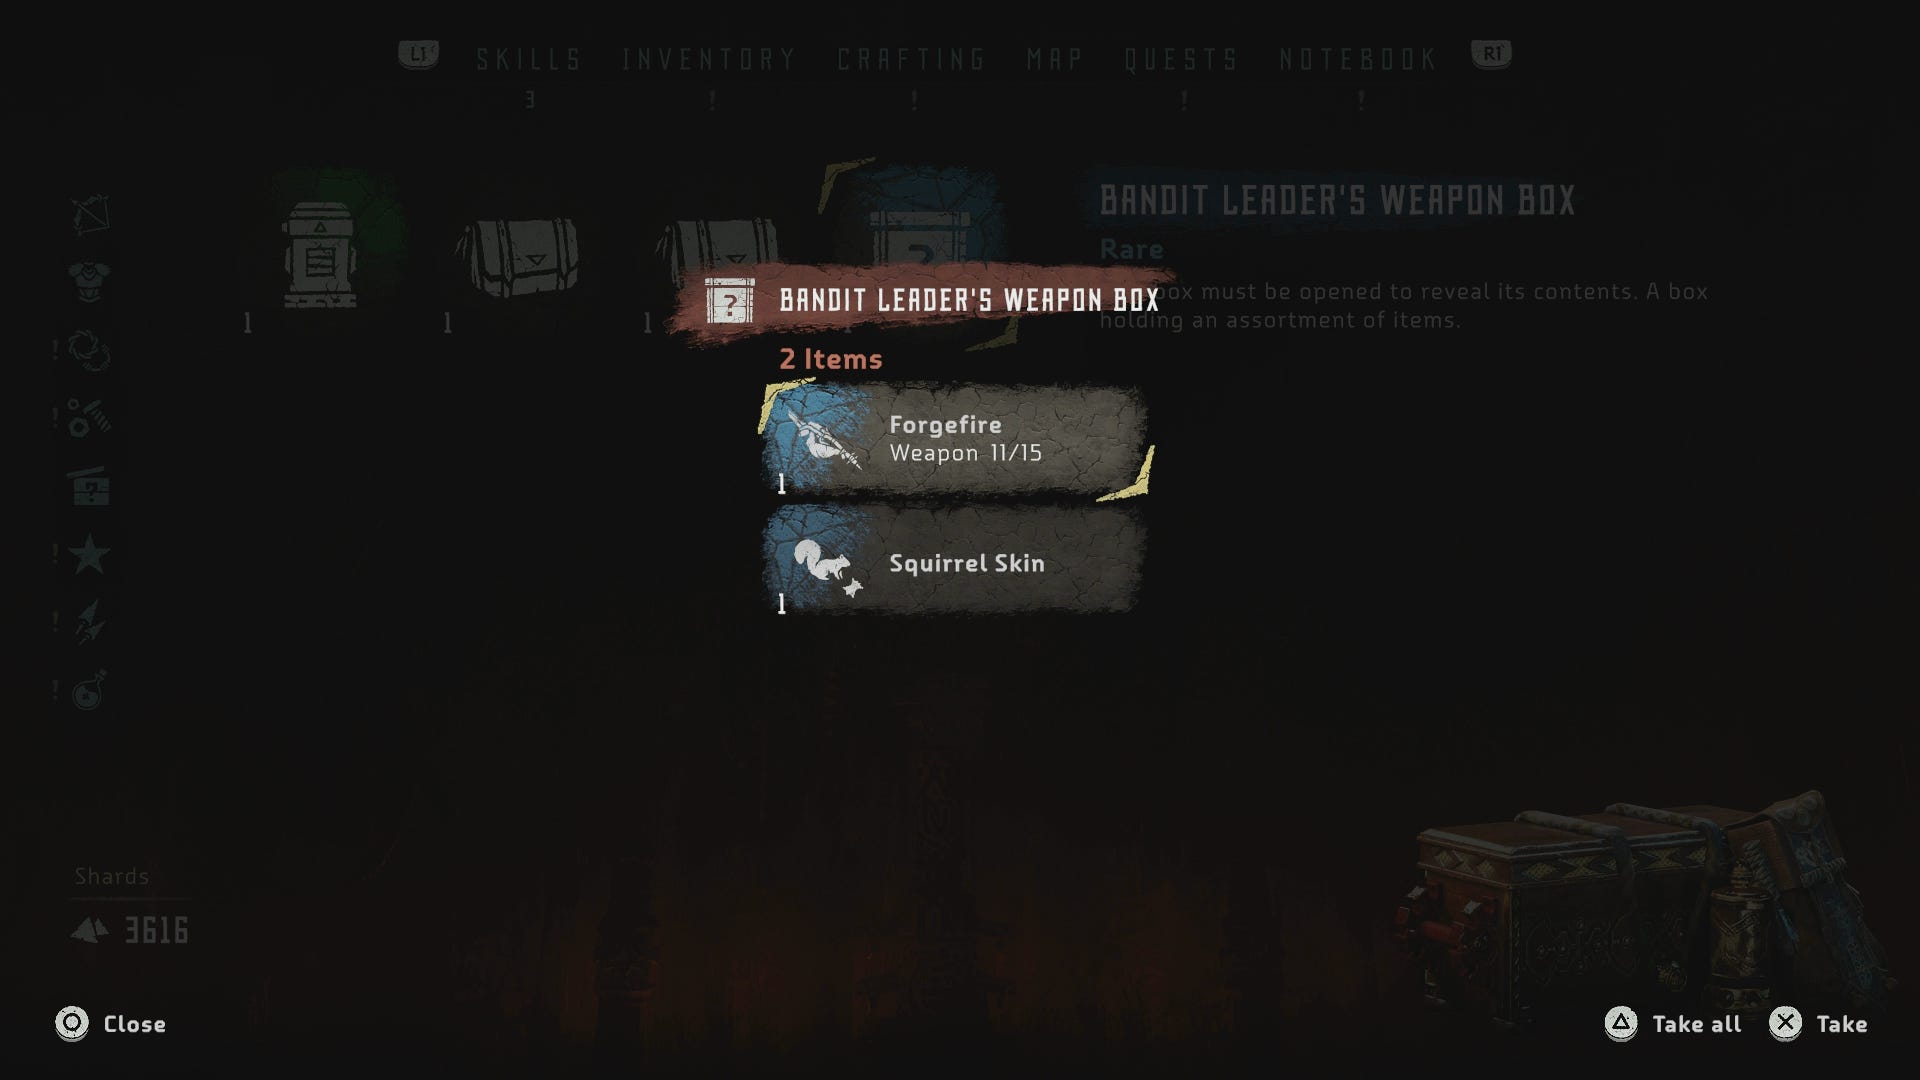
Kill Bandit Leader - This chap has a nice big cannister of fire on his back, so you know what to do. Pick off the helpers first, then use the above tactic to freeze him in place and give you a clear shot at the cannisters. Shoot all of them off with tear damage arrows and he'll combust in a satisfying ball of fire. Use any old attack to finish him off.
Loot his body, and you'll get another of The Frozen Wilds' new weapons: Forgefire.
For more Horizon guides, explainers and advice, take a look at our main Horizon Zero Dawn guide and walkthrough hub, which includes guides to things like Horizon Zero Dawn's override Cauldrons and how to override machines, sorting out the Golden Fast Travel Pack for unlimited Horizon Zero Dawn fast travel, unlocking the amazing Horizon Zero Dawn Shield Weave Armour and Power Cell locations, and on top of that, for DLC players there's our hub for theHorizon Zero Dawn Frozen Wilds walkthrough and guide, a page on how to earn Bluegleam quickly, and finally, a handy guide to A Secret Shared and how to upgrade your spear in Horizon Frozen Wilds.
For the Werak - Complete the Challenges at the Frostfigures
This set of three challenges is made out to be a little harder than it actually is... at least at first. We recommend you really stock up on ammo, health items and crafting materials for this one. No seriously. If you haven't already, maybe go and get the special Shield Weave armour - we used it here and even then found it a challenge.
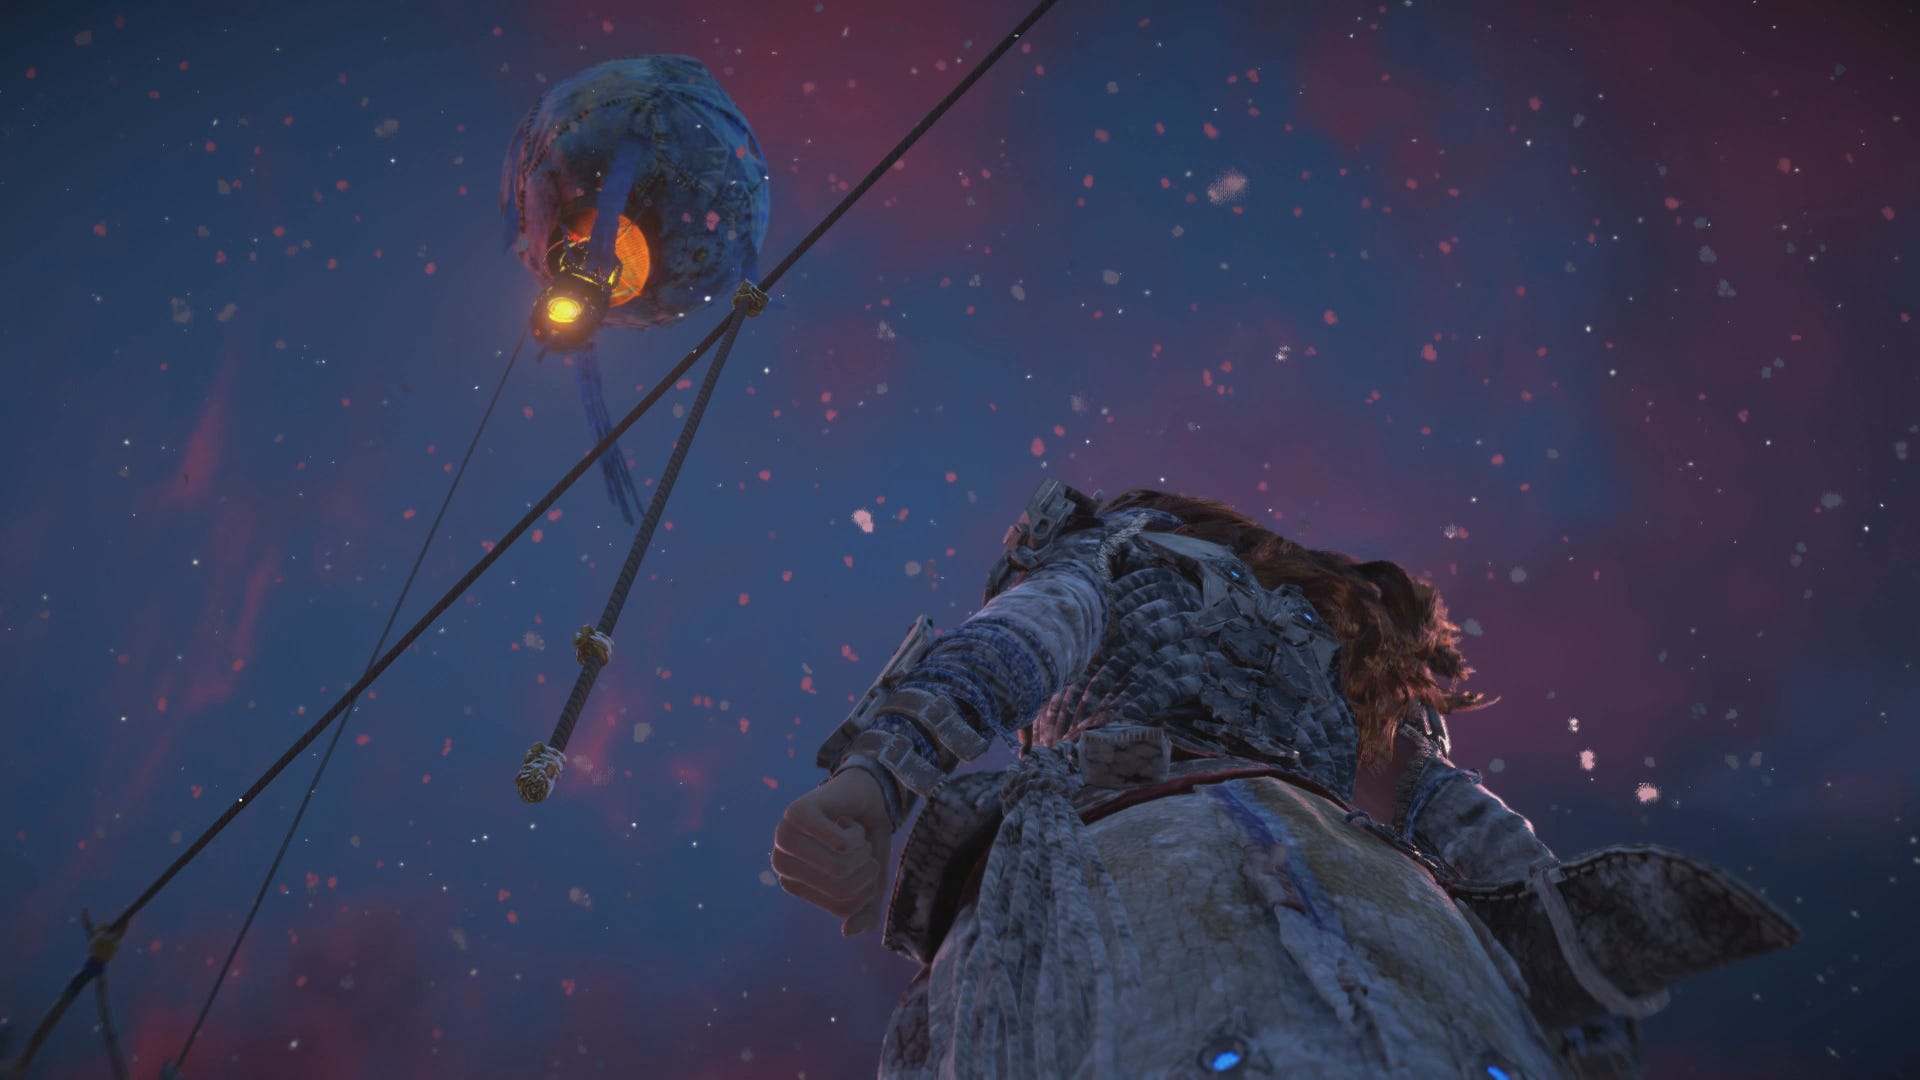
Race to the first Challenge Site - Simple enough, quickly platform up to the waypoint, then kill the beasts on the other side. Tearblast arrows and critical strikes when you down them are the most efficient way. Climb up the nearby ladder and release the first baloon when done!
Kill the two Bellowbacks - This one's a bit harder. After the platforming you need to kill two Bellowbacks, and only those two, but they're in a field of challenging enemies. Thankfully there's enough vertical terrain here that you can pick them off from range. Aim for the big sacks on their backs and stay out of harms way atop the cliffs and rocks for as long as you can.
Launch your Balloon - All going to plan, until...
Kill the Machines - Uh oh! In a turn of events almost identical to that of the game's opening chapter, your run-of-the-mill proving challenge has gone off the rails. This time it's not one, not two, but three Frostclaws you need to take down.
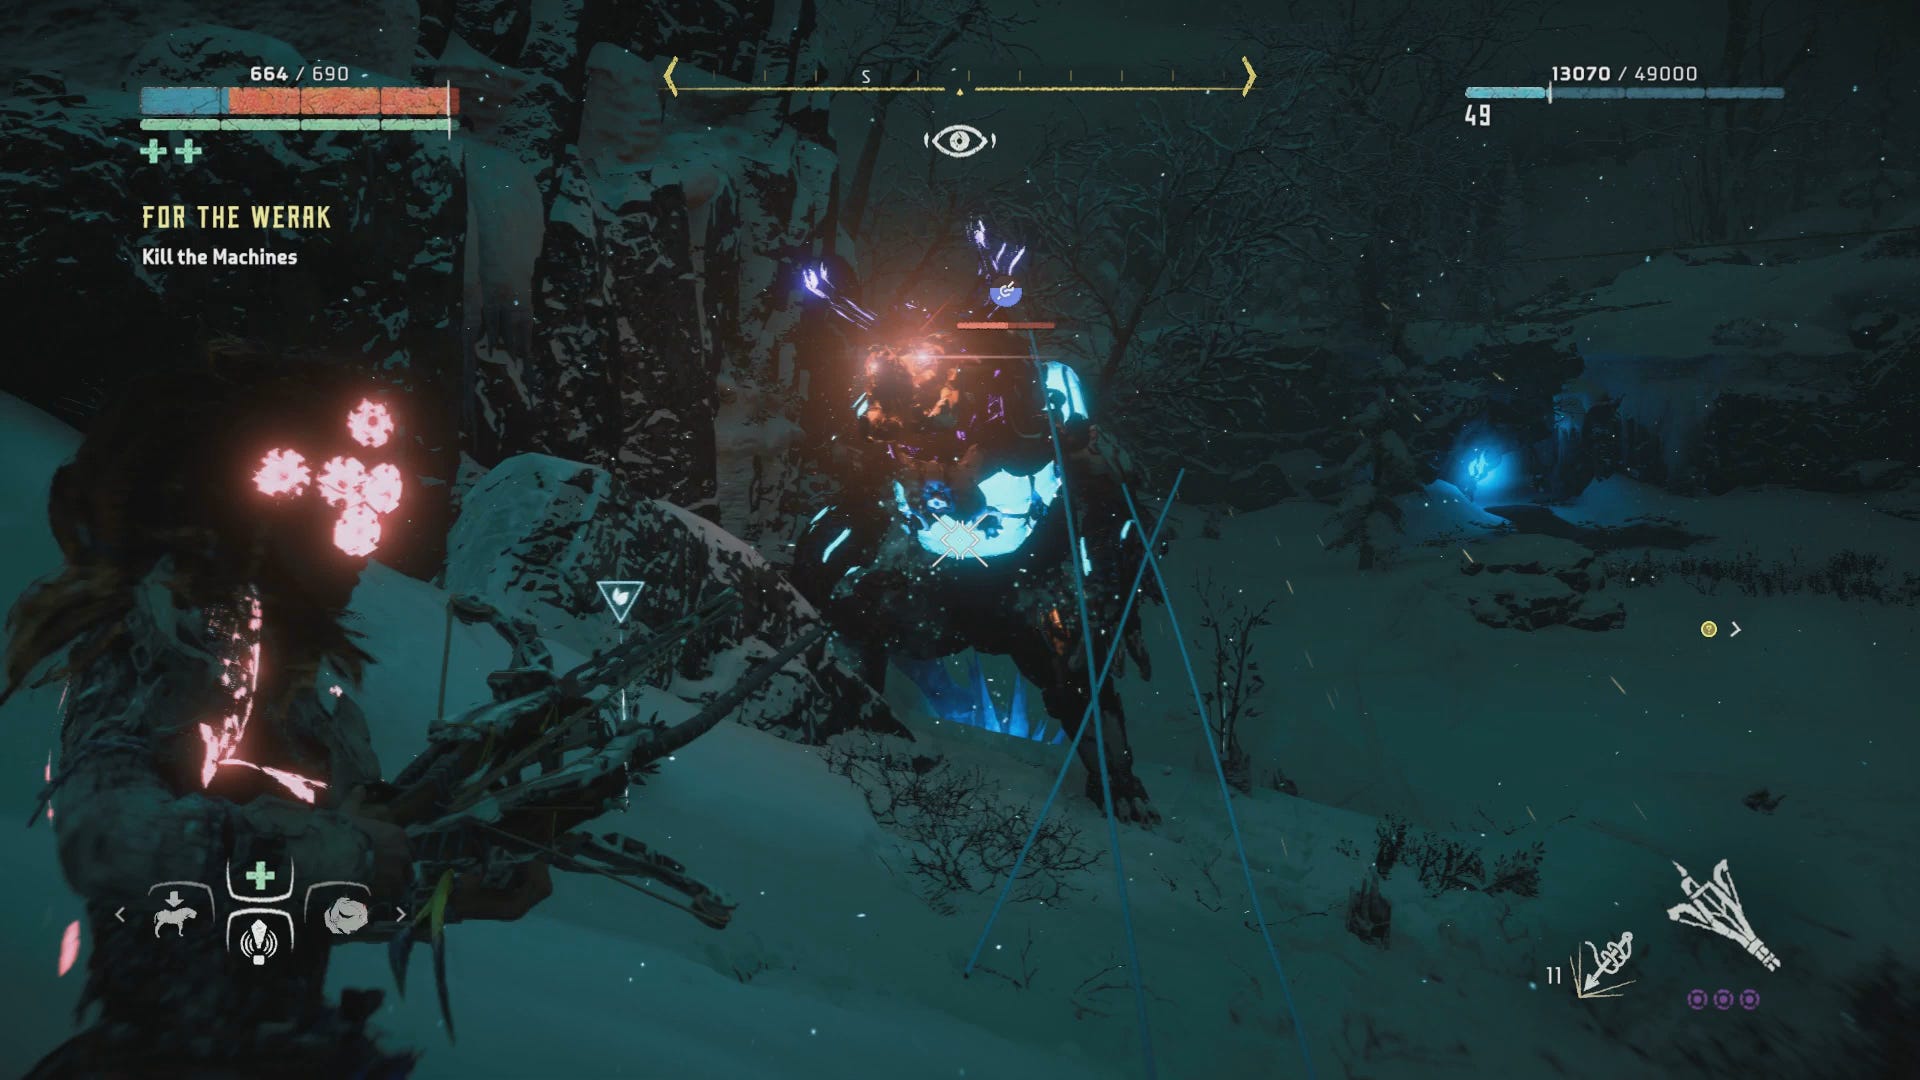
Aratak will provide a bit of a distraction, but nothing else. You're bascically on your own here, and it's a long, difficult fight. Each Frostclaw requires three shots from a Ropecaster to pin down, and even then you're going to struggle to deal out heavy damage with the other two running at you.
Keep moving, focus on removing the two Power Cell cannisters on their backs above all, and be patient. They'll go down eventually, and are noticably easier to fight once the first one's vanquished, so try to take them out one at a time rather than spreading your damage between each.
Next up: Horizon Frozen Wilds - Firebreak
When you're done, you'll receive the Icerail, the game's third new weapon, as a reward, and the respect of the Banuk with it.
