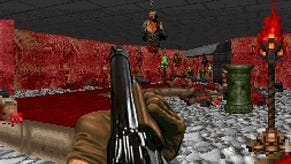
Doom - Doomguy model locations: Where to find all 26 figurines
These are the little action figures of the UAC marine in its iconic suit. Here are locations for all 26 - two in each level of the game.
This one's just for the collectors and completists - and there's nothing wrong with that, of course. On every level of Doom there are two action figures of our hero Doomguy in various colours to find - the game's menu calls them 'model collectibles'. There are 26 variations in all, collect them all and you'll be rewarded with the Trophy/Achievement 'Every Nook and Cranny'. Locations for these toy Doomguys are listed in the guide below.
If you're interested in other hidden things, our Doom secrets and collectibles guide can help.
Doom - Doomguy model locations
Level 1: The UAC
- Once you've collected the blue card, jump onto the crate the body is leaning on and then jump up to the ledge with the green lamp.
- You'll come to an area just past the field drone that's got a drilling machine and what looks like a crashed escape pod in the ground. Pass through the stone arch ahead and follow the green lights until you find some UAC crates on the ground. Turn left and the collectible is at the end of the passageway.
Level 2: Resource Operations
- After opening the airlock and returning outside, fight off the first wave of enemies and then head to the platform below the objective marker. You'll spot a crate with blood smeared along one edge - use it to reach the ductwork above, head up the slope a little, and then turn and jump up to the next duct. Follow it round and climb to the roof of the building, then head across to the far side, to the short flight of steps. Head into the vent just to the left to find this guy.
- When you enter the semi-circular room in the VEGA terminal, turn left and climb the pile of crates, jump onto the ledge, and the collectible is at the far end of the vent.
Level 3: Foundry
- Stand by the corpse holding the yellow key and look towards the large fan. Head right and look over the railings to your left and you'll see a small platform poking out. Drop on to it and crawl into the gap to find a collectible.
- Head through the yellow door and up the stairs, then jump into the box on the conveyor belt that has the robot arms working on it.
Level 4: Argent Facility
- After completing the cooling area objective, defeating the summoner, and heading outside you'll come to a gap you need to jump over. After leaping, turn left and climb into an alcove, jump onto the box, and pull yourself up. Climb up a couple of steps immediately to your left, then turn right and make your way along the narrow ledge that hugs the outside of the building until you can jump back inside.
- After destroying the third Argent filter, you'll pass through a chilly hangar. To the left of the door is a hole in the ground that leads back down to the cargo area, but the arrangement is now slightly different. Drop into the hole, head for the crates stacked to the left ahead of you, and climb onto the upper walkway.
Level 5: Argent Energy Tower
- When you reach the first set of curved tracks with the rotating batteries, drop down to the lower track and follow it to a stationary battery. Jump up the right hand side, then onto the battery, and from there double-jump across to the sloping platform opposite (it's a tricky jump as there's only a small area you can grab, and you need to time it so you don't get caught by the battery above). Climb to the top of the small ramp then turn around and double-jump to the small platform, then across to the ledge with the green lights. Head down the tunnel and when you reach the end, drop down to your left to find this guy tucked in the shadows.
- During the first half of your tower ascent, one of the ramps up has a platform underneath that you can drop down to. If we arbitrarily call the bridge you crossed earlier “north”, this is on the west side of the tower, and should be visible on your map when you're at the right level.
Level 6: Kadingir Sanctum
- After opening the big red door near the starting location, turn right instead of standing on the teleport to find this guy at the end of the passageway.
- After opening the blue door and then the large door, you'll end up in an arena with pools of blood in the area below. Once it's clear head up the steps opposite where you entered, turn hard left at the top of the steps and double back. Look to your left and you should be able to see it on the platform opposite - double-jump across to reach it.
Level 7: Argent Facility (Destroyed)
- After exiting the lab, killing the Cacodemon, and jumping across to an upper platform, drop down to the area with the pillar with a big number 1 on it and then drop down to your left to find him.
- After grabbing the yellow key, stand at the top of the short steps and double-jump up to the right hand side of the ledge above where the holographic dialogue is playing out.
Level 8: Advanced Research Complex
- From the second argent cell location, turn around and jump to the ledge on the left. Head right and make your way up to a small cave to find him in the back.
- When you enter the BFG Labs, make your way into Prototype Lab 01. Climb onto the generator thing at the back of the room and jump up to the vent on the right. Climb through and drop into a small room to find the collectible.
Interested in other Doom secrets and collectibles? These pages may help:
- Doom - Classic level locations: Where to find all classic Doom and Doom 2-inspired areas
- Doom - Doomguy model locations: Where to find all 26 figurines
- Doom - Weapon Mod locations: Where to find all the Field Drones
- Doom - Elite Guard locations: Where to find all Praetor Tokens
- Doom - Rune locations: Where to find all Rune Trials for permanent perks
- Doom - Argent Cell locations: How to increase your health, armour and ammo capacity
- Doom - Automap Station locations: How to complete your minimap
- Doom - Hidden weapon locations and data log locations
Level 9: Lazarus Labs
- After the arena fight in the large vaulted room with artefacts along the wall, crawl behind the one closest to the door (to the left facing into the room) and enter the vent. Follow the passageway, turn left, and climb into a room at the end.
- Once inside the archive, climb onto the upper level on the right and stand next to the red transparent display. Turn to face the wall and you'll see that one of the lights near the floor is red - interact with it and it will slide out to reveal the collectible.
Level 10: Titan's Realm
- Once you've unlocked the second teleport, head to the upper left corner of the area (as you're looking at the teleport) to find a small alcove with the collectible in it.
- After using the second teleport, stand on the jump-pad to your left and the turn to face the alcove in the opposite corner (right of where you entered - it looks empty other than a flaming brazier). Double-jump across to it and the collectible is tucked round the corner.
Level 11: The Necropolis
- After using the blue skull and dropping down the second hole, jump across to the third floating stone walkway and then drop down from the far end onto a small platform below.
- As you make your final approach to The Necropolis, look up at the giant skull above the door. Fire a rocket at the glowing red symbol in the middle - if you hit the right spot a box will come floating out, so follow it and collect the trophy.
Level 12: Vega Central Processing
- After passing through the airlock, climbing onto the broken walkway, and dropping down the other side, instead of heading down the slope jump onto the pipes to your right and follow them to a green maintenance door. Open it, turn right, and the collectible is to the left at the first junction.
- After falling through the hole in the Sector P Access storage room, turn right, head to the end of the ductwork, and then drop to your left to another pipe below. The collectible is just ahead.
Level 13: Argent D'Nur
- On your way up to the second Wraith take the left flight of stairs. Just after the landing at half-way point there's a hole in the steps you can squeeze through to find him.
- The second collectible in this level is just given to you when you defeat the boss and complete the game.


