Metal Gear Solid 5 - Phantom Limbs: Miller location, Ghwandai, Skulls
How to track down Kazuhira Miller, capture the guard post, infiltrate Ghwandai Town, and get Kaz to the rendezvous point in Phantom Limbs.
Welcome to Metal Gear Solid 5 - Phantom Limbs, the first main story mission of the game, following on from Prologue Awakening.
Phantom Limbs Mission checklist:
- Pinpointed Kazuhira Miller's whereabouts
- Extracted Kazuhira Miller
- Extracted the commander from Wakh Sind Barracks
- Completed the mission without being discovered by the Skulls
- Secured the rough diamonds hidden in the Spugmay Keep
- Extracted the transport truck driver
Phantom Limbs: Miller location
As the desert stretches out before you, follow the prompts to activate your iDroid. Your main objective in this mission is to locate and rescue Kazuhira Miller. He can be found somewhere in the Da Ghwandai Khar region - as highlighted on your map.
Close your iDroid, then activate your binoculars. Locate the village in the distance (either by following Ocelot's instructions or by identifying the glinting lens flare) then zoom on in. Next, follow the prompts to place an intel support call. Finally, set a waypoint marker as directed.
Your first task is to investigate the village you just highlighted and uncover more intel on Miller's whereabouts. With Kaz's sunglasses in your possession, begin working your way toward the village in the distance.
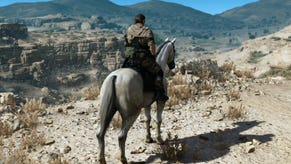
As you go, you'll be introduced to the basics of horse riding. By the time you're done, you should know how to gallop, as well as aim your weapon, reload and activate your binoculars while on horseback. Note that you can also avoid prying enemy eyes by slipping down to the left or right-hand side of the saddle.
Capture the guard post
Continue along the dirt track and, shortly, you'll be alerted to a soviet guard post nearby. Come to a halt, activate your binoculars and begin scouring the area.
There's a solider smoking on the left-hand side of the road. Zoom in and centre on him to mark him as a target (this also works on prisoners and vehicles) then dismount your horse. Do the same to the second hostile behind the watchtower on the right-hand side of the road.
Next, you need to bring both guards down without being spotted. Dismount your horse and work your way around the nearby rocks to the left, adopting a prone position as you go. Carefully approach the smoking guard from behind.
As you do, you'll be briefed on using Stealth Mode - the state in which you're least noticeable to enemies. To activate it, go prone, lie still and hit the indicated button. If you're spotted at any point (and wish to avoid combat), you can take cover behind obstacles and re-activate Stealth Mode.
When you're ready to bring down the guard, sneak in close, exit your prone stance and follow the prompt to grab him from behind. From here, you can either interrogate, knock out or kill your opponent. Note that interrogation won't work on non-English-speaking guards unless you have access to a translator.
For now, knock the guard out then prepare to hide the body. Pick up the solider and locate the portable toilet directly behind you. Drag the guard over then follow the prompt to deposit the body inside. Before you leave the area, grab the Rough Diamond beneath the table alongside the derelict building nearby (a glinting marker indicates its location).
Now it's time to deal with the second guard in the area. Go prone then crawl across the road, moving behind the watchtower. Carefully approach your next target from the rear and deal with him as before. Note that night will likely fall as you proceed, affording greater cover while simultaneously reducing your own ability to see.
Once the second hostile is eliminated, the guard post is captured. Deposit his body behind the low wall nearby if you wish, then return to your horse.
With the guard post captured you're now able to proceed to Da Wialo village. Gallop along the dirt track in the direction of the waypoint marker and stop when Ocelot suggests that you do a spot of recon. You'll need to find a spot overlooking the village to get a good view of the area - and, as luck would have it, there's a large rocky outcrop to your left, just south of the village.
Dismount your horse, climb up onto the ledge and use your binoculars to recon the area below. First, locate the two-story, illuminated building in the centre of the village - there's a glowing parabolic antenna on its roof. Ocelot notes that this is likely a good place to search for more intel on Miller's location, so make a mental note of its position.
Next, locate and mark the two guards patrolling individually around the building's base. Finally, search out and mark the two guards moving back and forth along the road running through the centre of the village - you might need to adjust your position in order to spot everyone.
With all four targets acquired, drop down off the ledge and begin moving toward the main building that you noted earlier. If you approach from the south-west, you'll cross a bridge leading to huddle of small huts with a small alley running between them. This alley leads directly to the large central building, with the two solo guards patrolling nearby. Take cover behind the building to the right, noting the illuminated hut to the left, and peek around the corner.
Ensure that the guards have separated before proceeding, then focus your attention on the lone hostile standing outside the main building entrance. Wait until he begins his short patrol along the side of the building then quickly sneak up and bring him down. You can deposit his body inside the illuminated hut you noted earlier - you'll also find some Rough Diamonds near the sandbags here. There should be a second guard nearby so take care of him and dispose of this body too.
With two of the four patrols down, you should now be able to enter the main building and locate the intel you need to proceed. Before you do, however, it's wise to locate the remaining two hostiles. If you can't see them, they may be inside the building. You can confirm this by pointing your binoculars at the structure and listening out for the snatches of dialogue coming from within.
Once you know where your enemies are, locate the large blue gate to the left of the main building entrance and head on through. There's a small staircase around the corner to the right so climb on up and grab the fuel resources on the crate at the top. The intel you seek is in the illuminated room directly ahead. You can enter the room through the door to the right of the crates - however, push it open gently or the noise will draw the attention of any guards in the room below.
When you're safely inside, scan the intel on the desk to uncover Miller's location. As soon as you've got the intel you need, you'll have to move quickly to avoid being detected. Slip through the door, take a left and walk along the stone ledge. Finally, drop off the end to the ground below. Exit the area then, when you're back in the wilderness, whistle for your horse.
Need help with The Phantom Pain? Our Metal Gear Solid 5 guide and walkthrough explains how to complete every main story mission, and explains their many optional objectives. We also have lists of Blueprint locations, Tape locations, Key Item locations, how to unlock S Ranks and a Metal Gear Solid 5 Achievement and Trophy list.
Find and infiltrate Da Ghwandai Khar
With Miller's whereabouts now known, it's time to get extracting. Mount your steed then begin the journey to Da Ghwandai Khar, heading toward the yellow waypoint marker. Obviously, it's safest to go around the village you just infiltrated, rather than galloping recklessly through the centre.
Rejoin the dirt track just north of the village and begin heading north-east. As you reach the fork in the road a little further on, you'll spot another Soviet guard post up ahead. These are more heavily occupied during daytime (which it likely is now) so proceed with caution. If you want to infiltrate the outpost, seek higher ground and use your binoculars to survey the area before proceeding.
If you'd rather proceed to your next objective without tackling the guard post, however, leave the main dirt track and give the area a wide berth as you head toward the waypoint marker. Your best bet is to bring up your map and locate the ravine cutting through the hills to the north-east of the guard post. Work your way up the hill and follow the path between the rocks. When you emerge on the other side, you'll find the perfect vantage point to survey Ghwandai Town below.
Park up with the town in your sights then bring up your iDroid. Zoom in on Ghwandai then place a marker on the large building marked 'Miller'. Close your iDroid then, before continuing, use your binoculars to recon the entire area below. You'll notice several Soviet soldiers situated along the side of the road, along with guards patrolling the streets around the town. There are also two Anti-Air Cannons and a Gun Emplacement along the road - scan them all!
As the world of Phantom Pain is constantly in flux, you'll need to draw up your own plan of attack depending on state that you find the town in. Your key destination here, however, is the main building you marked a little earlier.
Dismount your steed and carefully work your way down the hillside toward the town. Rather than strolling straight into the area, head toward the small, single-story hut along the road at the right-most edge of town. As you near the road, go prone and only cross once you're sure that you're not being watched. The tufts of grass provide excellent cover until you're ready to move.
Once you've made it behind the small hut, you should be able to scale the hill behind it, heading north-west, in relative safety - just remember to stay low, using the rocks as cover to hide from nearby patrols.
Near the top of the hill, on the eastern-most edge of the area, there's a hut with a low overhanging roof and a concrete porch looking back down onto the road. Leap up the rock ledge behind it and continue north-west, travelling between the back row of buildings and the sheer rock face. Shortly, you'll reach an opening between the buildings on the left leading out onto a main path. Check that the route forward is clear of hostiles, then quickly slip out into the open.
Locate the green gate against the target building nearby and duck inside. Immediately take a left and slip along the passage, entering the building ahead. Take a right, moving passed the radio on the table, then take another right to enter Miller's holding cell. Approach the body chained to the far wall then interact with it to free Kaz.
Transport Kazuhira to the rendezvous point
You've now got to carry Kaz to the landing site a short way out of town - you can check its location by consulting your iDroid. Drop Kaz on the ground, then set about securing the immediate area, dealing with any guards that are likely to hinder your escape.
When the area is clear, hoist Kaz back onto your shoulder then retrace your steps, crouch-carrying Kaz to slightly increase your stealth while still in town. Head back out of the building, move behind the huts against the rock face and descend the hill, travelling south-east. Once you're at the bottom of the hill, feel free to break into a run as you move along the run toward the landing zone.
Once you reach the chopper, you'll be alerted to the presence of Skulls - shambling, zombie-like soldiers - in the area. Sadly, their presence means that your ride can't land and you'll need to make your own escape. Thankfully, your horse should automatically mosey on over to your present position. Drape Kaz over it then hop into the saddle and prepare to ride. Ocelot will arrange a new rendezvous point (which appears on your HUD) so start moving toward it.
Cross the bridge at the bottom of the hill and take a left, heading across the second bridge when you reach it. From here, gallop toward the rendezvous point as denoted by the on-screen marker. If you manage to stay out of sight, you can reach your destination without interruption (securing the 'Completed the mission without being discovered by the Skulls' objective in the process).
However, if the Skulls spot you on your travels, they'll immediately begin pursuit, using their frightening speed to leap and bound into your path. If this happens, zig-zag back and forth to dodge their bullets and continue toward your destination. Eventually, the strange mist will dissipate, enabling you to make the final leg of your journey in peace.
Put Kazuhira Miller on the chopper and escape
Once you reach the landing zone, dismount your horse, collect Kaz and carry him to the chopper. Chuck him inside then hop onboard yourself to exit the mission the area and complete Episode 1. You'll receive the Afghanistan Today [1] and Ocelot's Briefing [2] cassette tapes as a reward.
- Keep reading for our guide to completing Diamond Dogs, the next mission in the game.
- Head back to the first page for the rest of our Metal Gear Solid 5 walkthrough.


