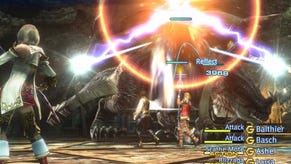
Final Fantasy 12 - Wild Marlboro location, requirements and strategies for the Rank VI A Wild Stench
How to take on Wild Marlboro in Final Fantasy 12.
Here on this page of our Final Fantasy 12 Hunts and Marks guide, we'll be taking you through everything you need to know in order to defeat Wild Marlboro - a Rank VI Mark for the A Wild Stench Hunt - including the Petitioner and Mark's locations, the Hunt requirements, and strategies for the battle itself.
If you're looking for one of the other Marks however, you can head back to our Final Fantasy 12 Hunts and Marks locations, requirements and strategies hub. For other tips and explainers meanwhile, head to our Final Fantasy 12 The Zodiac Age guide and walkthrough, where we cover plenty more.
Wild Marlboro and A Wild Stench Hunt location and requirements
Before you get to the actual battle, here's everything you need to know about Wild Marlboro and A Wild Stench Hunt:
- Prerequisites: Get the Treaty Blade during the story.
- Recommended level: 50+
- Petitioner location: Eryut Village, The Spiritwood
- Mark location: The Feywood, Redolent Glade
- Reward: 4600 Gil, Euclid's Sextant
Rena, the petitioner, is at the far end of the dead end in the Spiritwood area of Eryut Village, and she'll tell you about a giant Marlboro that's been stinking up the place. She's a little vague about it, but you can find the culprit in Redolent Glade exactly where you fought Rafflesia all those hours ago.
Wild Marlboro strategies and how to defeat it
When you arrive there will be three smaller Marlboros along with the big one. One or two shots of Aeroga as an opening move should see the little ones off easily leaving you with just the big fellow to deal with.
As with all of his kind, status effects are going to ruin your day ashe can inflict all of them at once with Putrid Breath, so choosing suitable protective gear is tough. Remember to deal with Disease as fast as you can, although that may be easier said than done if your entire party is Confused and Silenced too - there may be points in this fight where you'll have to swap an injured party member out for a fresh one, have them alleviate as many status effects as they can, and then swap back again. Keeping your party leader a safe distance away can help, but it's not foolproof.
For more help with? Final Fantasy 12? Our Final Fantasy 12 The Zodiac Age guide, walkthrough, Switch and Xbox differences gives an overview of the game to get you started. Elsewhere, there's our hidden Espers strategy and locations and Elite Hunts and Marks pages, how to get the best Zodiac Jobs for each character, advice on farming LP from Jellies and even how to get the Zodiac Spear.
He doesn't just rely on this as a tactic, either - he can hit for 2000HP or more with his physical attacks, erect a shield to become immune to physical attacks, and use Soul Etude to completely refill his HP.
By this stage you should be at a high enough level that, status effects aside, he doesn't trouble you too much, but he can still be a pain if luck falls on his side.
Head back to claim your reward. We never made much use of Measures during our playthrough - they're interesting but require way too much swapping of equipment and manual targetting to fully utilise - but if they're something you've been playing with then this is the best in the game.
Be sure to cycle back to our main Final Fantasy 12 Marks and Hunts strategy guide for more on those, otherwise head to our primary Final Fantasy 12 The Zodiac Age guide and walkthrough hub for plenty more on the game in general!


