Persona 5: Madarame Palace - Feet code and Painting puzzle in the Treasure Hall, choose the real Sayuri, Madarame boss in the Museum Palace
How to explore and beat the second Palace.

In Persona 5 Madarame Palace is the second dungeon that starts during the month of May.
As before, you'll be taking a few visits to Madarame Palace dungeon, with several infiltrations and a run to get the Treasure and take on the boss.
If you're after help for other parts of the game, consult our Persona 5 guide and walkthrough.
Madarame Palace dungeon
Initial Infiltration
Museum 1F
From the courtyard area head east and turn left at the end. Climb onto the sculptures and make your way across the top of the wall onto the roof opposite, then climb through the open window to make your way inside.
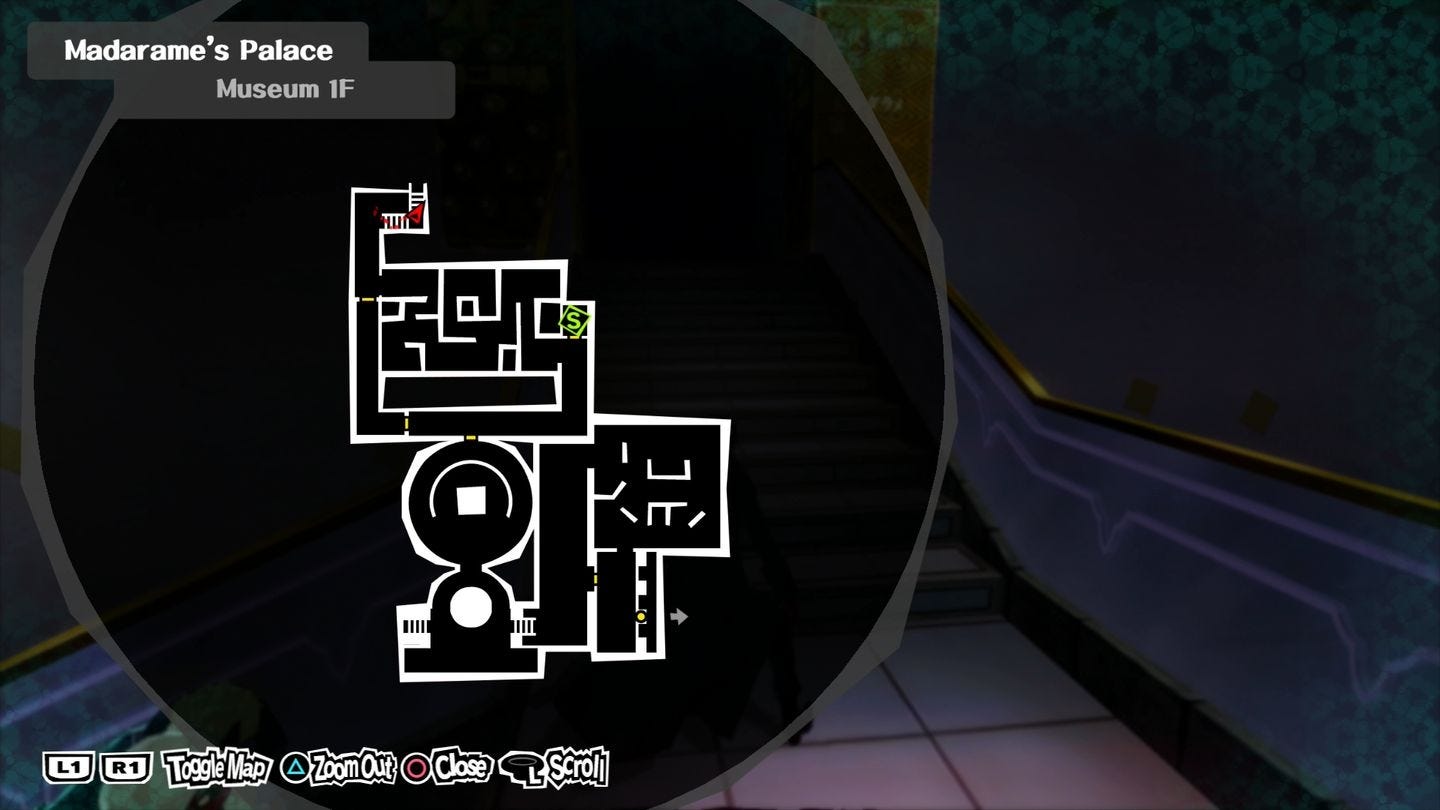
Examine a couple of the paintings and then make your way through the exhibition room to the lobby. Grab the map from the stand to the right and then head into the large circular room and check the door at the back.
Once you've determined it's locked make your way to the middle of the room and examine the statue, and you will be returned to the real world.
Second Infiltration
Head inside through the same route as before and approach the security barrier. There are lots of these dotted around this Palace, but you can use third eye (or just look at the lights either side) to determine whether they're passable or not - if either the top or bottom beam is off you can hit the X button to slide under or jump over as you approach.
Once inside the exhibition room work your way around the barriers. There are a few guards in here but there's plenty of cover to ambush them from, just be careful that they're not near a security barrier when you do or you may set it off immediately after the fight.

Retrace your steps from your last visit - the door at the back of the statue room is now passable, and leads into a large room full of twisting passages.
Head to the right to locate a safe room, and then continue to follow the path through to the north west corner - more guards patrol here, but there are no security barriers to worry about. Once you're through the room turn left and open the doors to create a shortcut back to the lobby, then double back and head up the stairs to the next floor.
Museum 2F
There's a large golden vase in the middle of the next room - when you walk past it Morgana will get curious and set off an alarm, trapping your three party members inside.
Head to the green cage in the south east corner, climb on top of it, and make your way around the ledge. There's a guard below you can ambush from your vantage point before hitting the switch on the south wall and freeing Ann.
Climb back onto the ledge to the south and follow it to the west - there's a metal grating you can walk over giving you access to the other side of the room.
Use third eye to spot the crooked painting and then interact with it to reveal the switch that will free Ryuji, talk to him, and then head for the alcove to the north again. There's a pile of boxes against the ledge, and just above that is a small vent you can crawl through to access the control room.
Try using the computer in the corner of the room and then open the door. The two guards ahead will give the game away, so once you have the code you can either take them out before returning to the control room, or just ignore them.
Enter the password and rejoin with Morgana. Smashing to vase will introduce you to your first Treasure Demon - these enemies are resistant to everything, and will flee if they're still alive after your first round of attacks, so hit them with whatever your strongest abilities are and hope for the best.
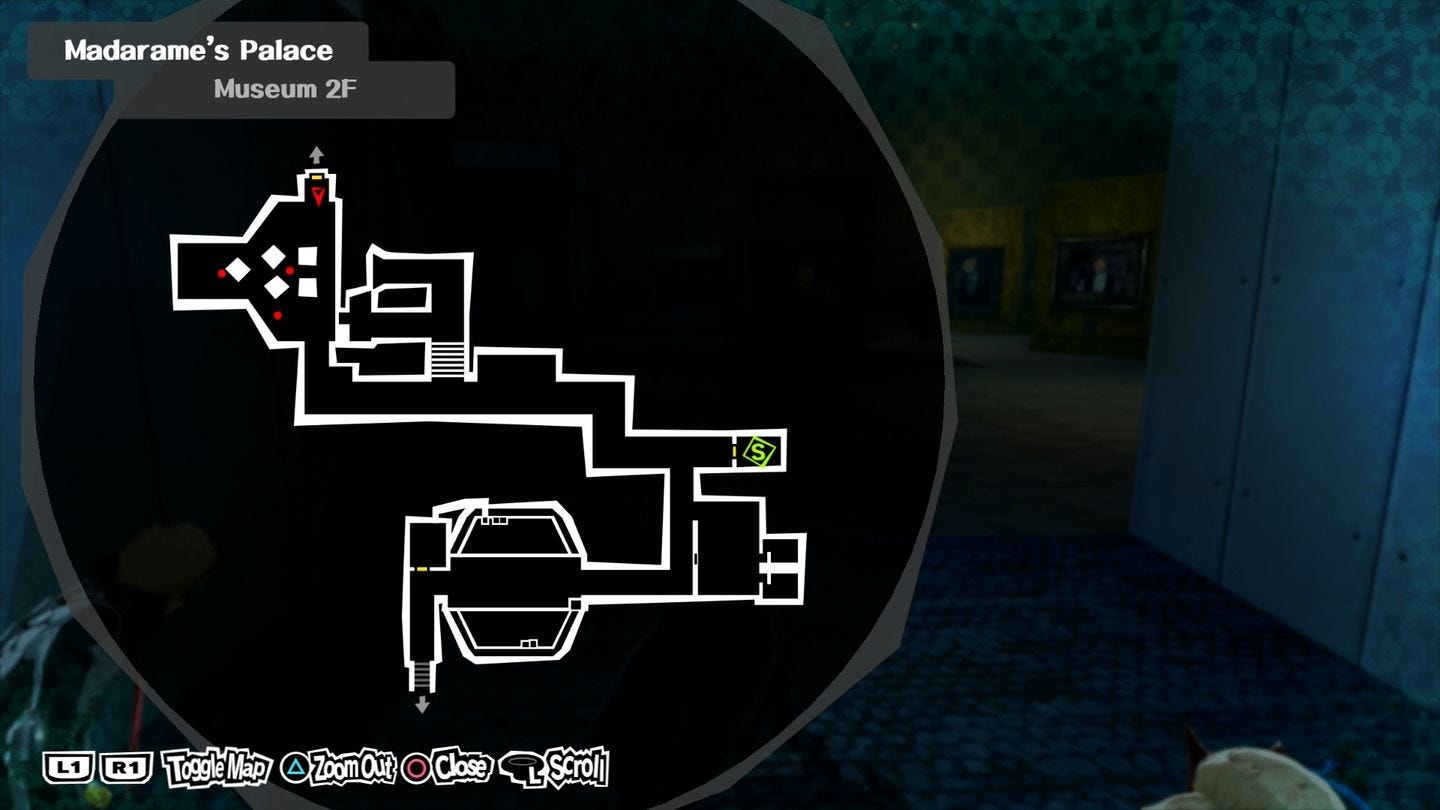
From now on you may encounter these guys at random, and they're worth tackling as they drop substantial amounts of money and have a pretty good EXP value.
Follow the corridor around to the left until you reach an impassable security barrier. There's an opening in the wall to your right you can climb through, and once the guard is defeated you can exit through the far end on the other side of the barrier.
Just to the right is a safe room to rest in, and at the far end of the corridor is another open area with a few patrolling guards.
You can ignore them and use stealth, or tackle them to clear the room, but either way there's a painting on the north west edge of the north western pillar that conceals a switch to drop the barrier preventing your escape. Interact with it, and then head through the door.
Examine the brightly coloured and heavily guarded door ahead, then make your way to the nearby safe room - this is as far as you can go on this visit, so save up and head back to the real world for now.
Third Infiltration
Central Garden
It'll just be you and Ryuji for this visit, but it's short and sweet. Once the doors are open head down the corridor until you encounter the Security Shadow. The biggest danger from him is his Skull Cracker attack that can leave you confused and unable to attack, so if you have a Persona with a good physical evasion now's the time to equip it.
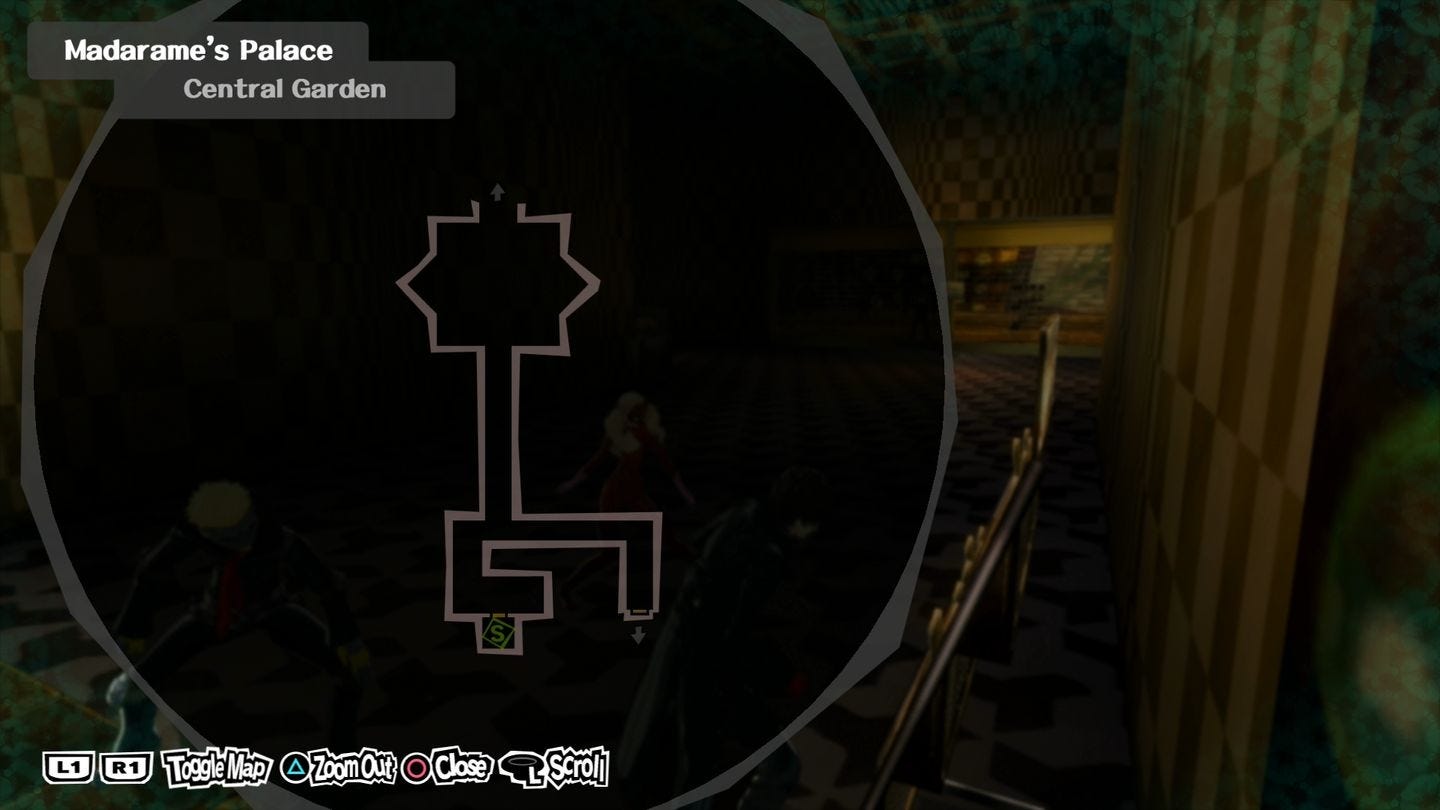
After the brief cutscene disable the security system and regroup with the rest of your party. Your retreat will be interrupted by a meeting with Madarame and a quick fight with a few low-ranking enemies, then you'll be returned to the real world.
Treasure Hall puzzles - Feet code, painting puzzle
Fourth Infiltration
Treasure Hall Lounge
Head back to the last safe room and make your way through the now-deactivated security doors. Head north and examine the giant Madarame statue, and pay attention to where it is as you'll need to double back later. Just past the statue you'll find another map on a rack in the corridor.
Turn right and follow the passage - most of the exits will be blocked off and you'll be funnelled into the large room in the centre of the map. Lots of guards and lots of security barriers here with very little in the way of cover, so proceed with caution.
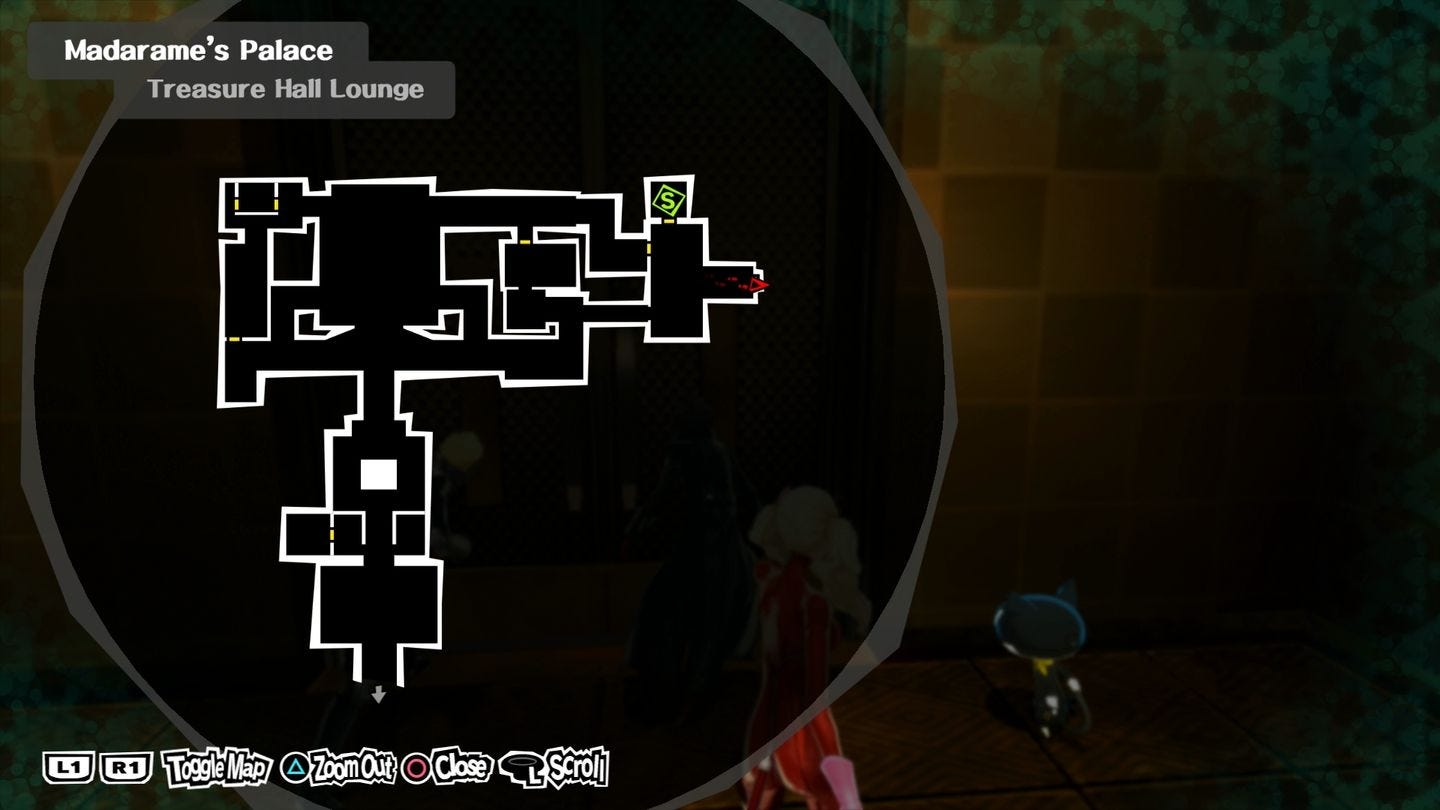
Once the area is clear head for the large painting on the northernmost wall that appears to be sunk into the ground. Examine it, and you'll end up inside it.
Move to the left edge of the painting and you'll be transported to a second. Head left again, jump over the rock in the middle, and then jump out again at the far left to emerge onto a ledge at the top of the room. Crawl inside and head south at the junction, climb back out, and head to the security room.
Attempt to disable the system and then leave the security room and you'll overhear more guards. Make your way back to the giant Madarame statue, examine it again, and then return to the security room and turn everything off.
All the beams are down now, so make your way back through the large open room and into the previously inaccessible corridor in the far east. There's a safe room at the end, so rest up again before moving to the next floor.
There's another painting puzzle in here, but this one's more complicated. Jump into the camel picture, head right to emerge at the foot of Mt Fuji.
Head up through the archway and you'll end up in a cave. Head to the right and jump out of the painting, operate the switch, climb back into the painting, and make your way to the rear of the cave.
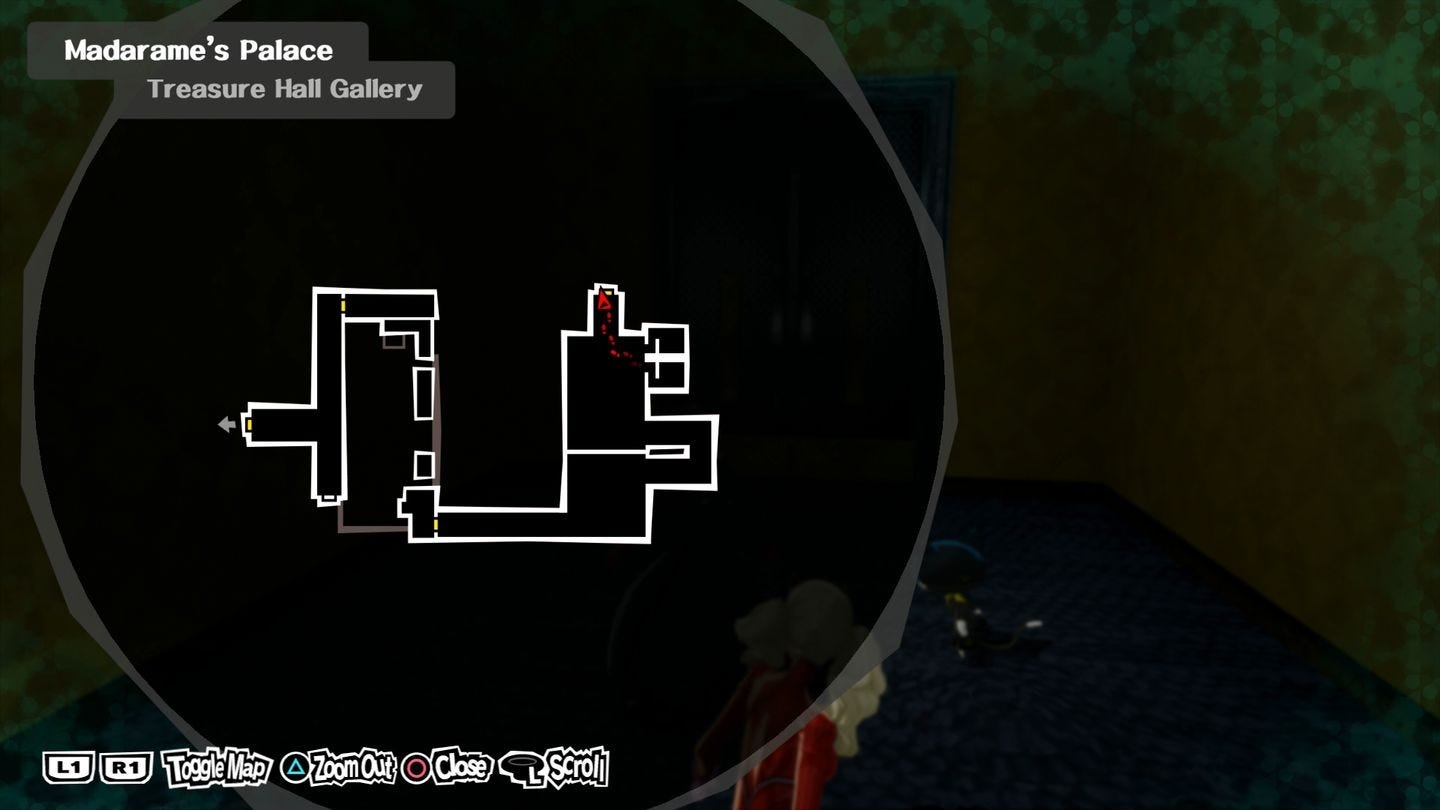
Back to the camels, so head right, right past the arch, and you're now on a boat. Jump out of the painting near the net and hit the next switch. Drop off the left edge of the platform and back to the camel picture, jump inside, head right, up through the arch, up through the back of the cave, and off to the right of the new painting where you can finally emerge.
The rest of the floor is a straight run through a couple of rooms before heading into a mysterious Escher-esque maze of curious stairways.
You have no control over the camera here, so all directions are given with regards to your point of view - it's a bit confusing, but you can't get totally lost!
Head up and drop down to the right, and then up again. Drop off and go left, then climb up to the next ledge, and follow it through the blue archway.
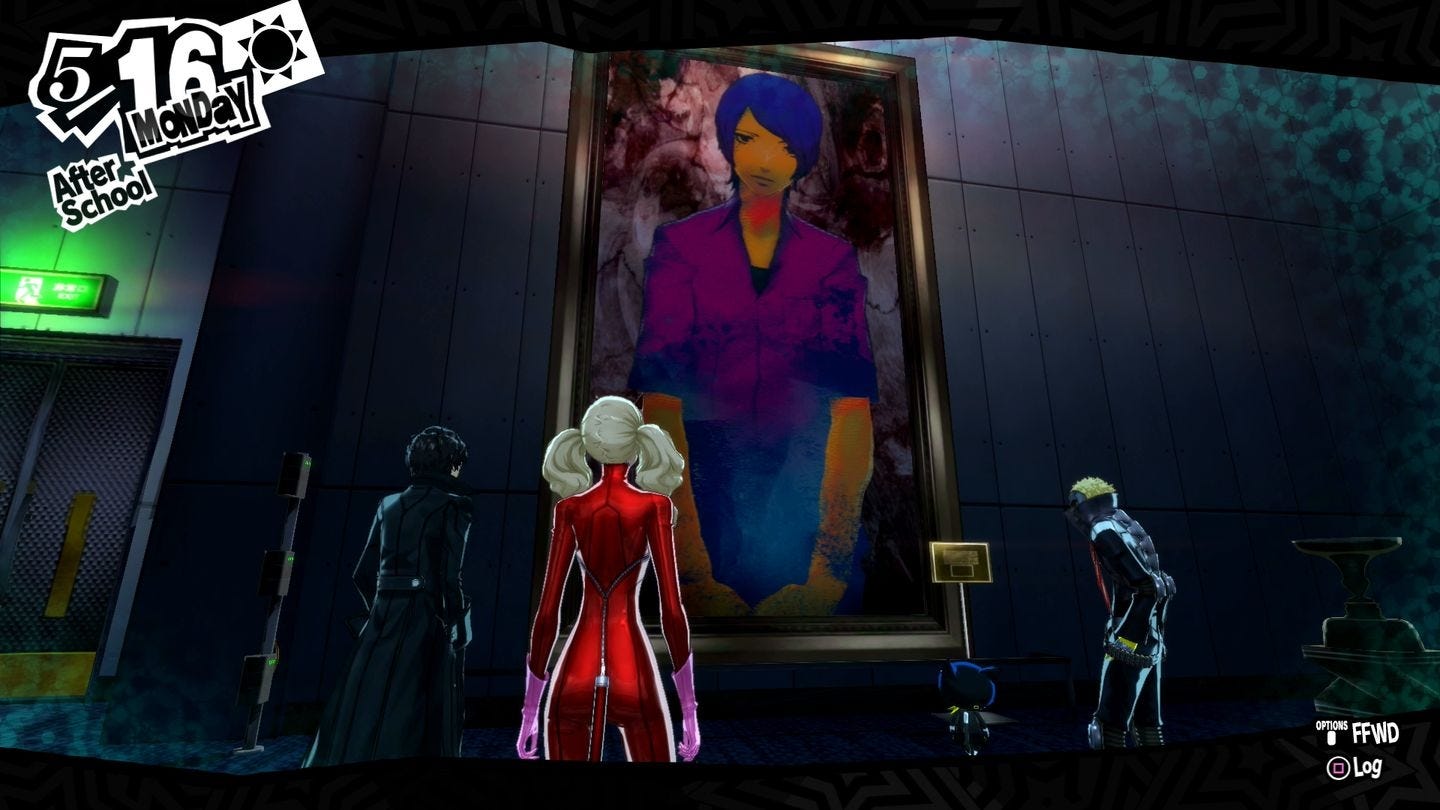
Choose the real Sayrui
Head down the steps and through another blue archway, then move down until you encounter two paintings. Your task is to identify the "real" Sayuri, so in this first instance it's easy - pick the one on the right. The camera will pan to show you an archway change from blue to orange - make your way through it and you'll now be confronted with four potential paintings, and this time the real one is closest to the blue sofa.
Head through the arch at the end to find several more Sayuris. Ignore the four nearest you, head left and drop down above the coloured arch, and make your way to the bottom of the steps to find the real painting.
Head up the steps to the arch and you'll re-emerge in a familiar location. Head through the orange arch, down the steps, and you'll be back to a more normal kind of abnormality.
Main Treasure Hall
Head towards the treasure - you path will be blocked, so head to the west, use the safe room, and then experiment with the switch in the room at the north end of the passage - start with the power and lasers, and then finally the shutters.
The path to the west is now open, so double back move up the slope towards the rear of the treasure room, and follow the passage round anti clockwise; the guards are on the prowl now so be prepared to fight your way there.
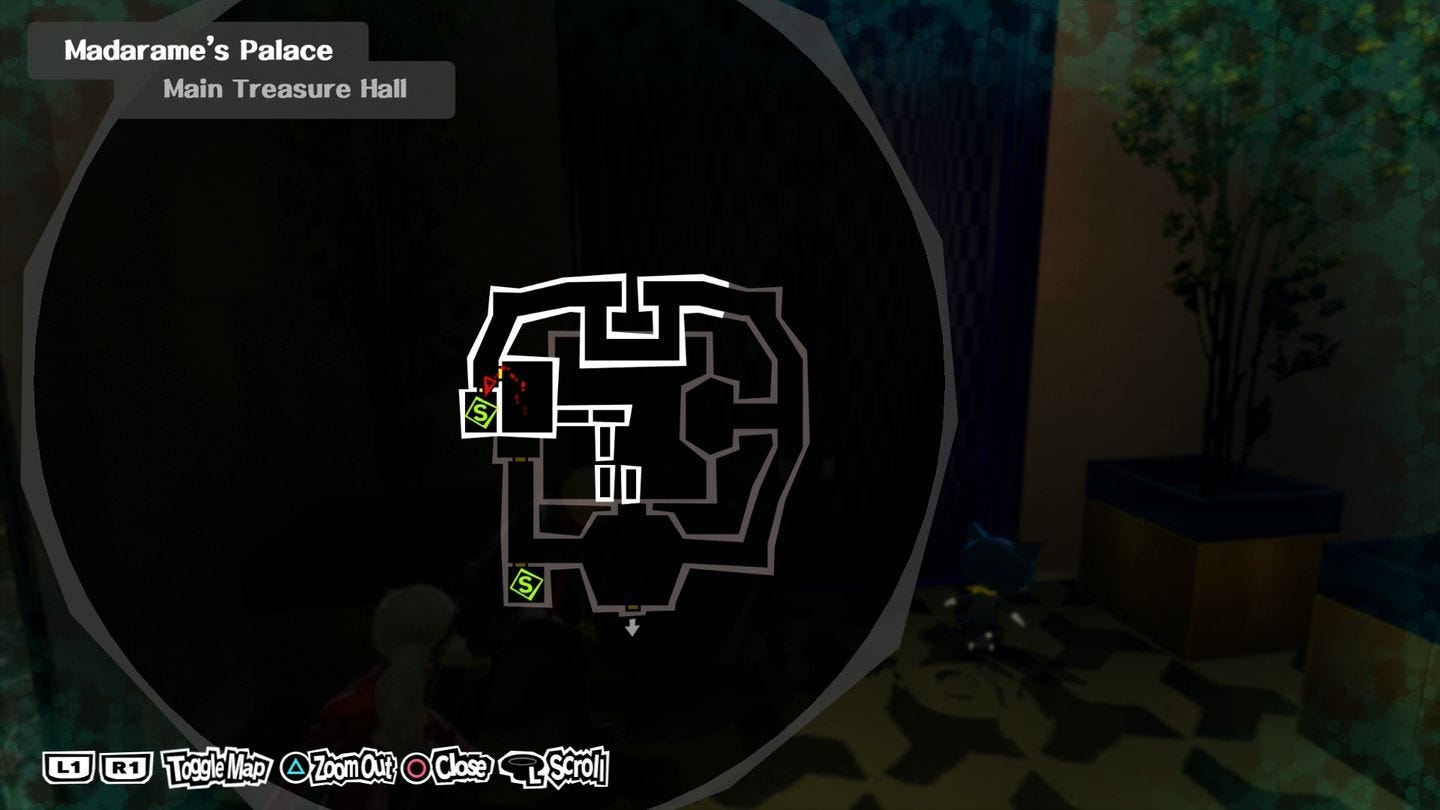
Use the safe room then head into the larger room to the west and examine the lever on the wall, climb the ladder and examine the hook above the centre of the treasure room, and then go back and pull the switch.
That's all you can do for now, so head back to the safe room and return to the real world.
Need more help? Our Persona 5 guide and walkthrough features a complete month-by-month summary with important dates and Palace strategies, as well as how to get the True Ending. Elsewhere, learn how to make the most of your free time with all Confidant, Social Link and romance options, the best ways to increase Social Stats such as Knowledge, Guts, Proficiency, Kindness and Charm, create the best Personas through Fusions, how to cheat on exams with our test answers, how to get Mementos requests, unlock the entire Trophy list and learn about the upcoming DLC schedule.
Madarame boss
Head to the switch room and drop the crane, then head to the hook to meet with Morgana. Jump out of the window and make your way back to the courtyard and freedom...
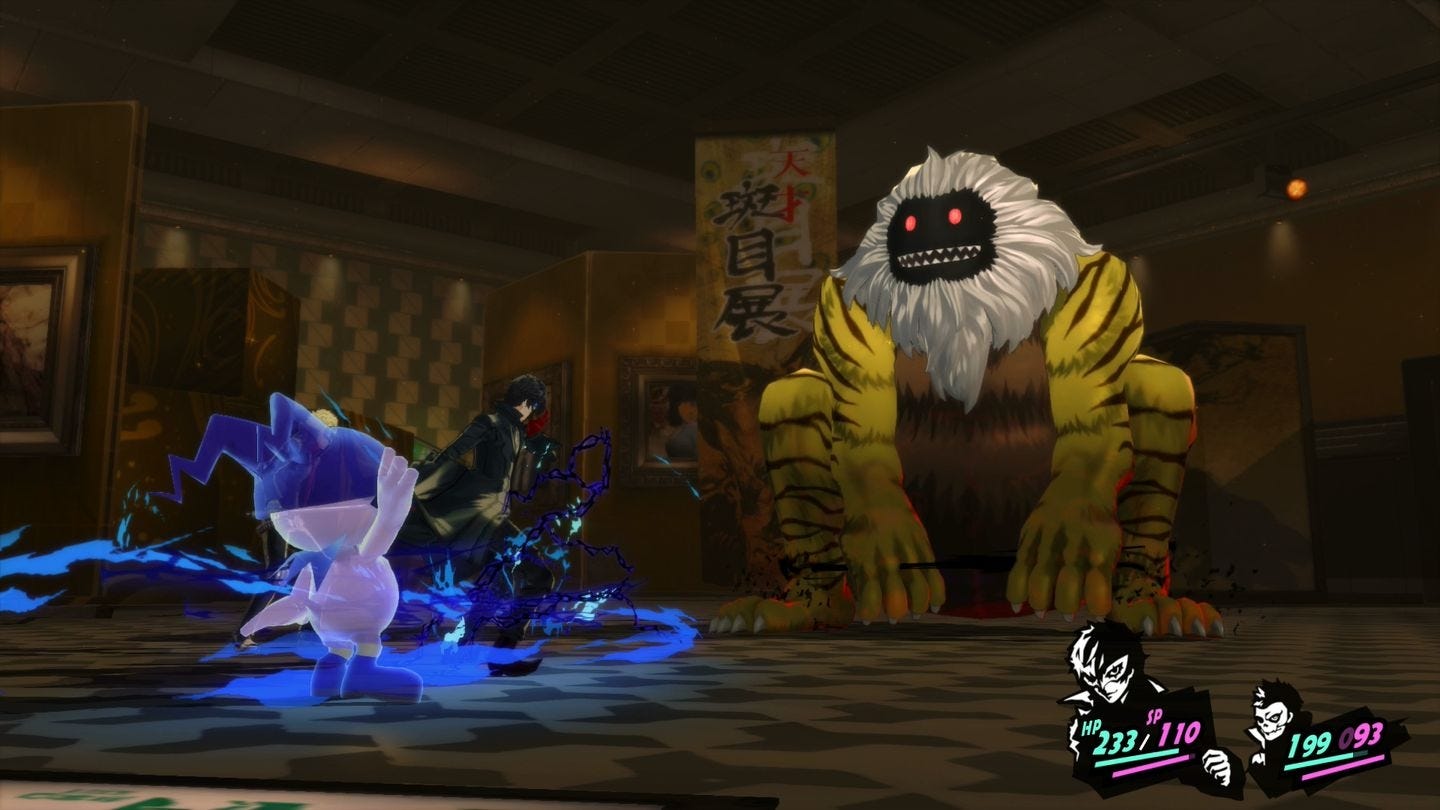
Wait, you thought you were getting away without a fight? Madarame will at first transform into five paintings that all need to be defeated, a task that's complicated by being unable to use elemental attacks on his eyes as he will absorb the damage and regain health.
His nose is perhaps the most dangerous part of his face, so if it starts twitching either concentrate your attacks on it or guard depending on how much damage you've done to it already.
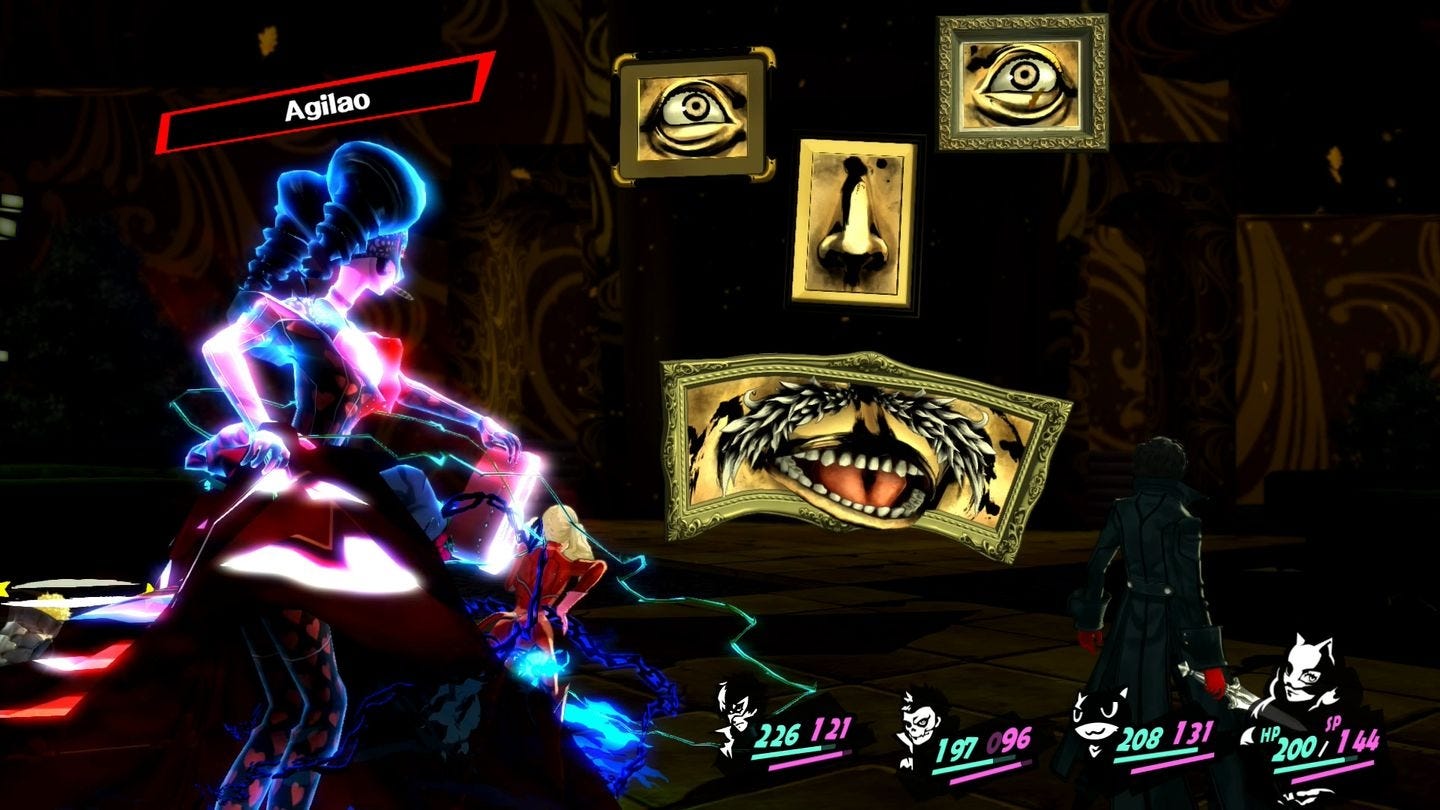
Once the paintings are down Madarame will resume human form and the second phase will begin. As long as you don't use curse attacks on him he shouldn't present too much of a challenge, but be ready with items or abilities to nullify debuffs as he can dramatically lower your defence.
Once he's down, collect your prize and wait and continue with either the May events and activities or June events and activities, depending on when you finished the dungeon.