Zelda - Ishto Soh and Bravery's Grasp trial solution in Breath of the Wild
How to solve the Lake region trial.

Ishto Soh is one of the many Shrines located throughout Zelda: Breath of the Wild. The challenge inside, named the Bravery's Grasp trial, is a puzzle that has you manipulate a laser beam and use a keen sense of timing to progress. Get it right, and you'll walk out a success.
If you need help finding and solving other Shrines, our Shrine location maps page can help, while our Zelda: Breath of the Wild walkthrough and guide covers other aspects of the game.
Where to find Ishto Soh
The Ishto Soh shrine is located within the Lake region, specifically in the most south western part of the region, atop a cluster of rocks before the border to the Wasteland region. To get there, paraglide directly south west from the Lake Tower, and climb over the first ridge you reach.
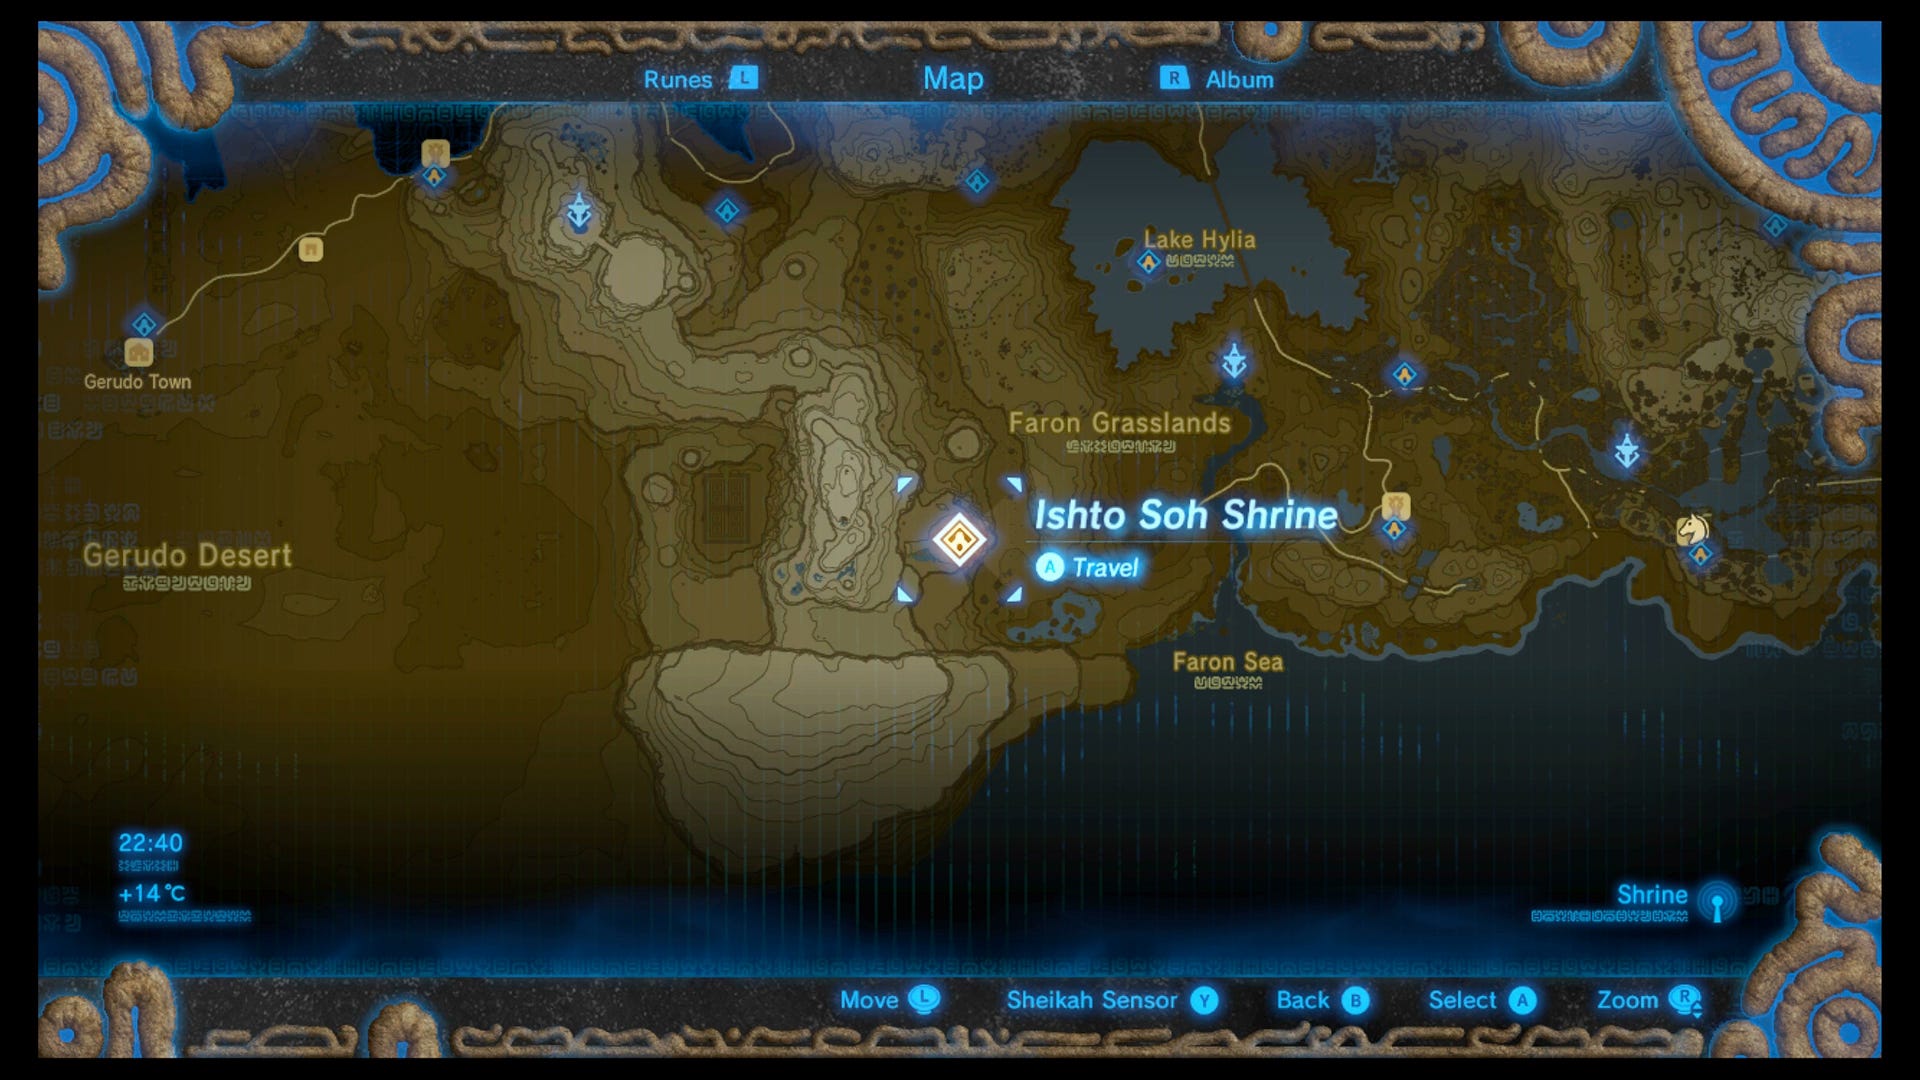
At the top, you'll be able to see a plume of black smoke coming from the top of another clay-coloured ridge. Head to the source of the smoke - a woman with some pretty terrible cooking skills - and the Ishto Soh shrine will be in plain sight.
There's no puzzle to solve here in order to access the shrine, so simply dive in when you're ready.

Ishto Soh and Bravery's Grasp trial solution
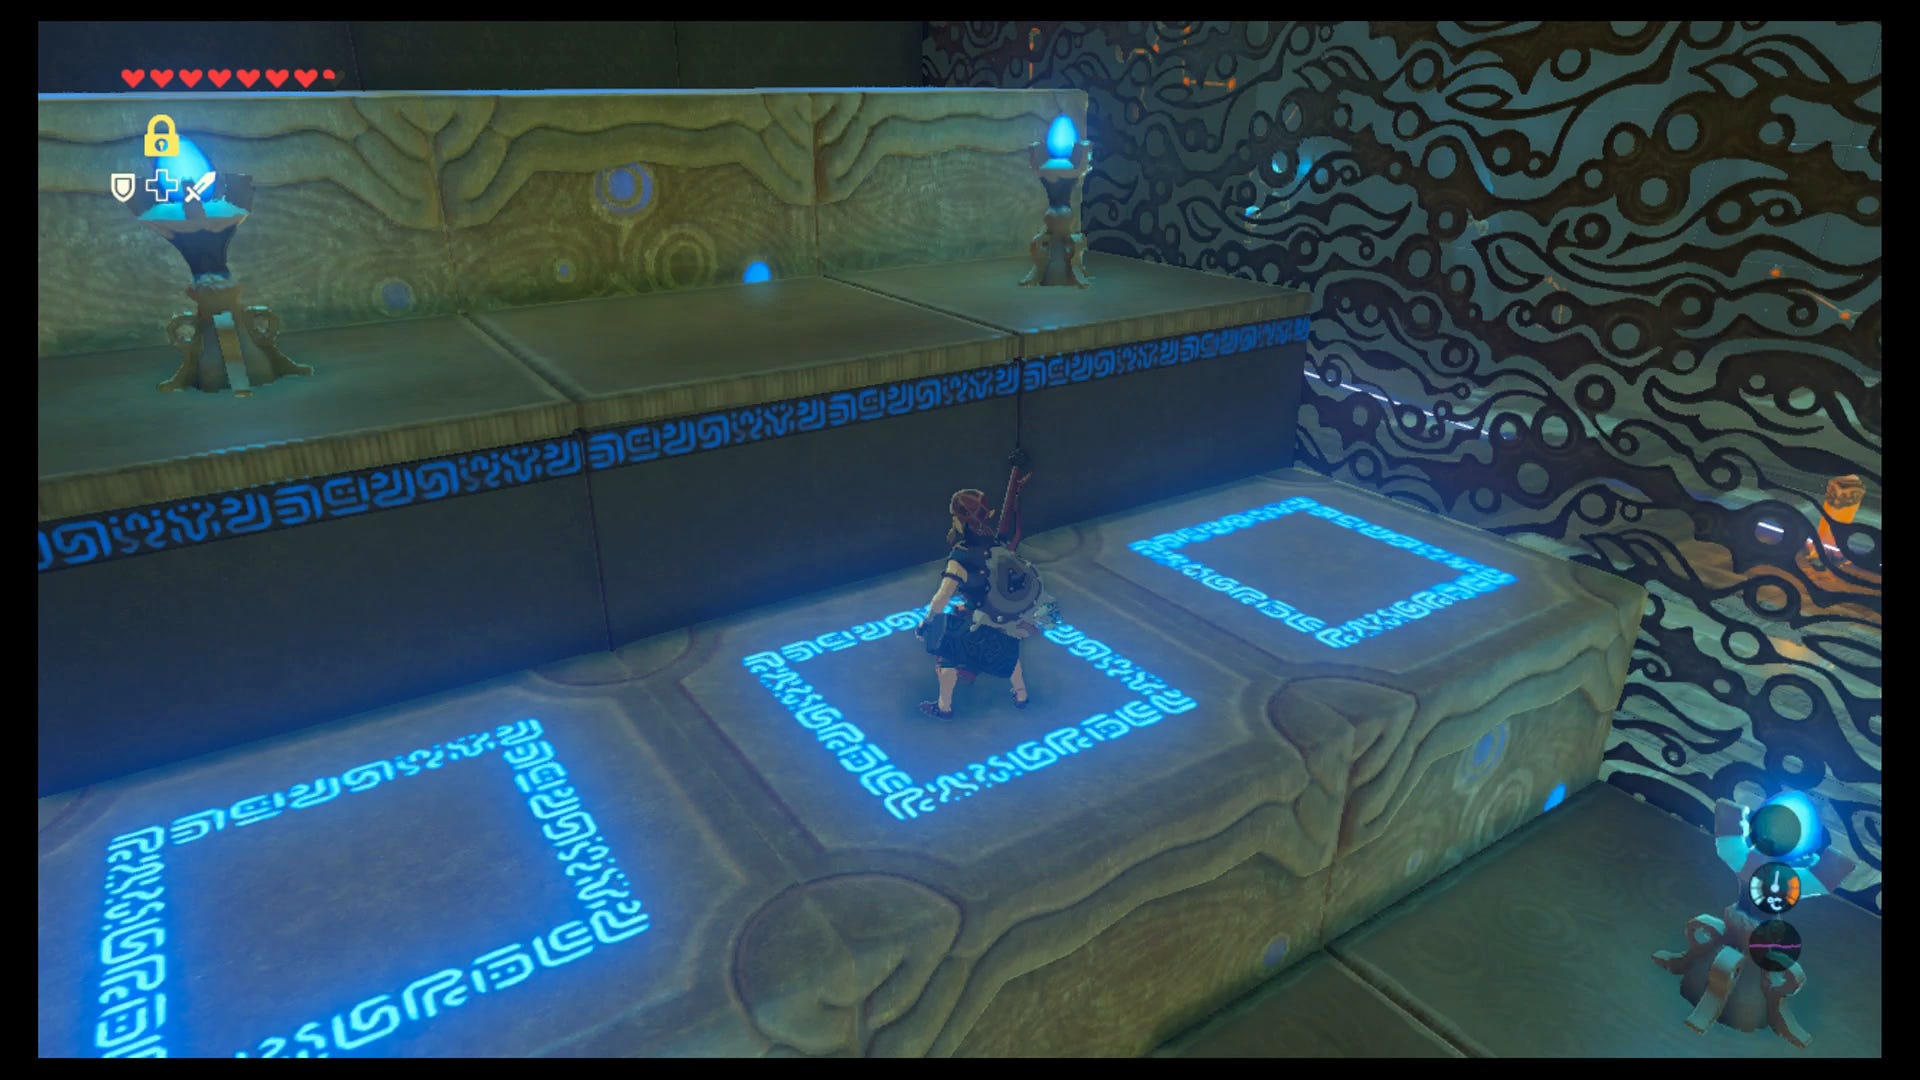
Inside the shrine, you'll find yourself facing a room with a crystal, laser beam, two chests, and a small moving platform.
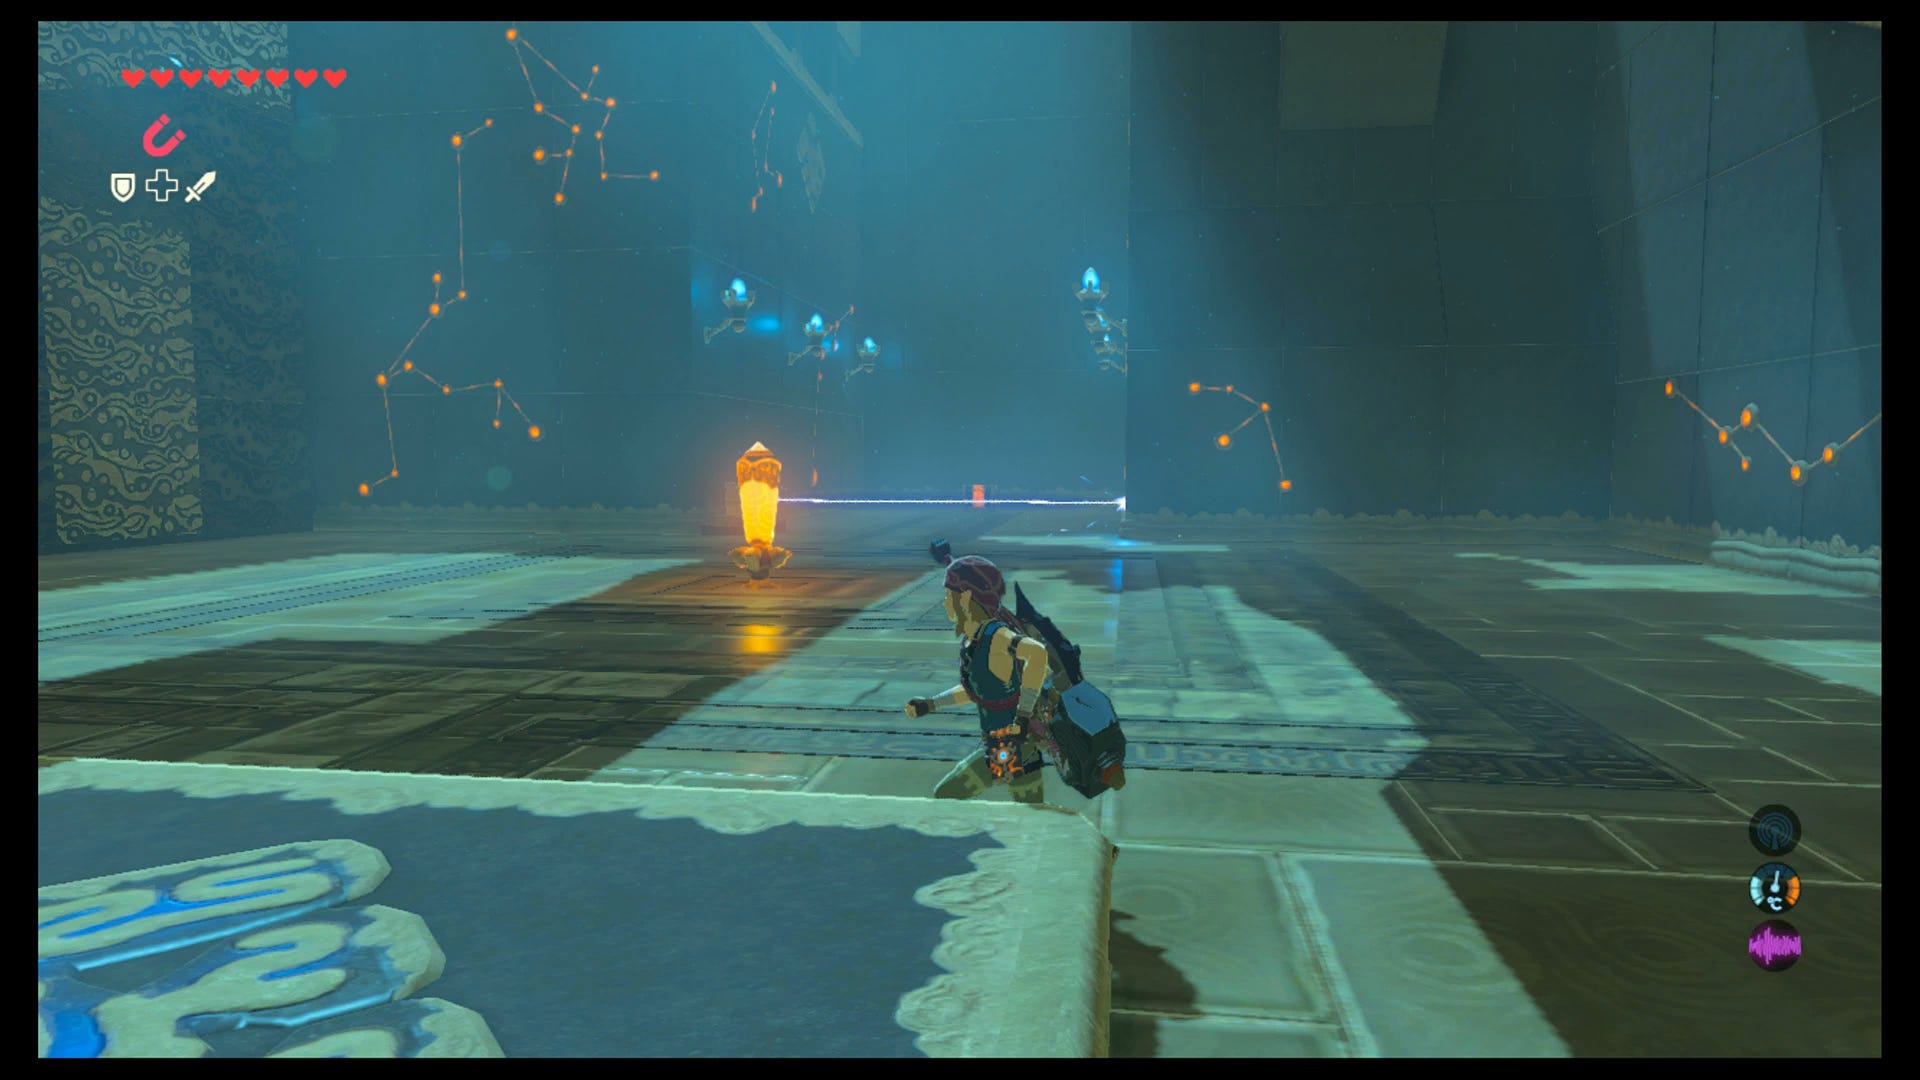
Your task here is to use the beam to hit the crystal with the beam multiple times. Each time the crystal is hit, with anything, it will alter two things: the set of platforms along the back wall, that house a chest, and the set of stair-like platforms that lead up to the exit.
Start by picking up the beam emitter, and placing it on the platform facing straight forwards, in the direction of the crystal.
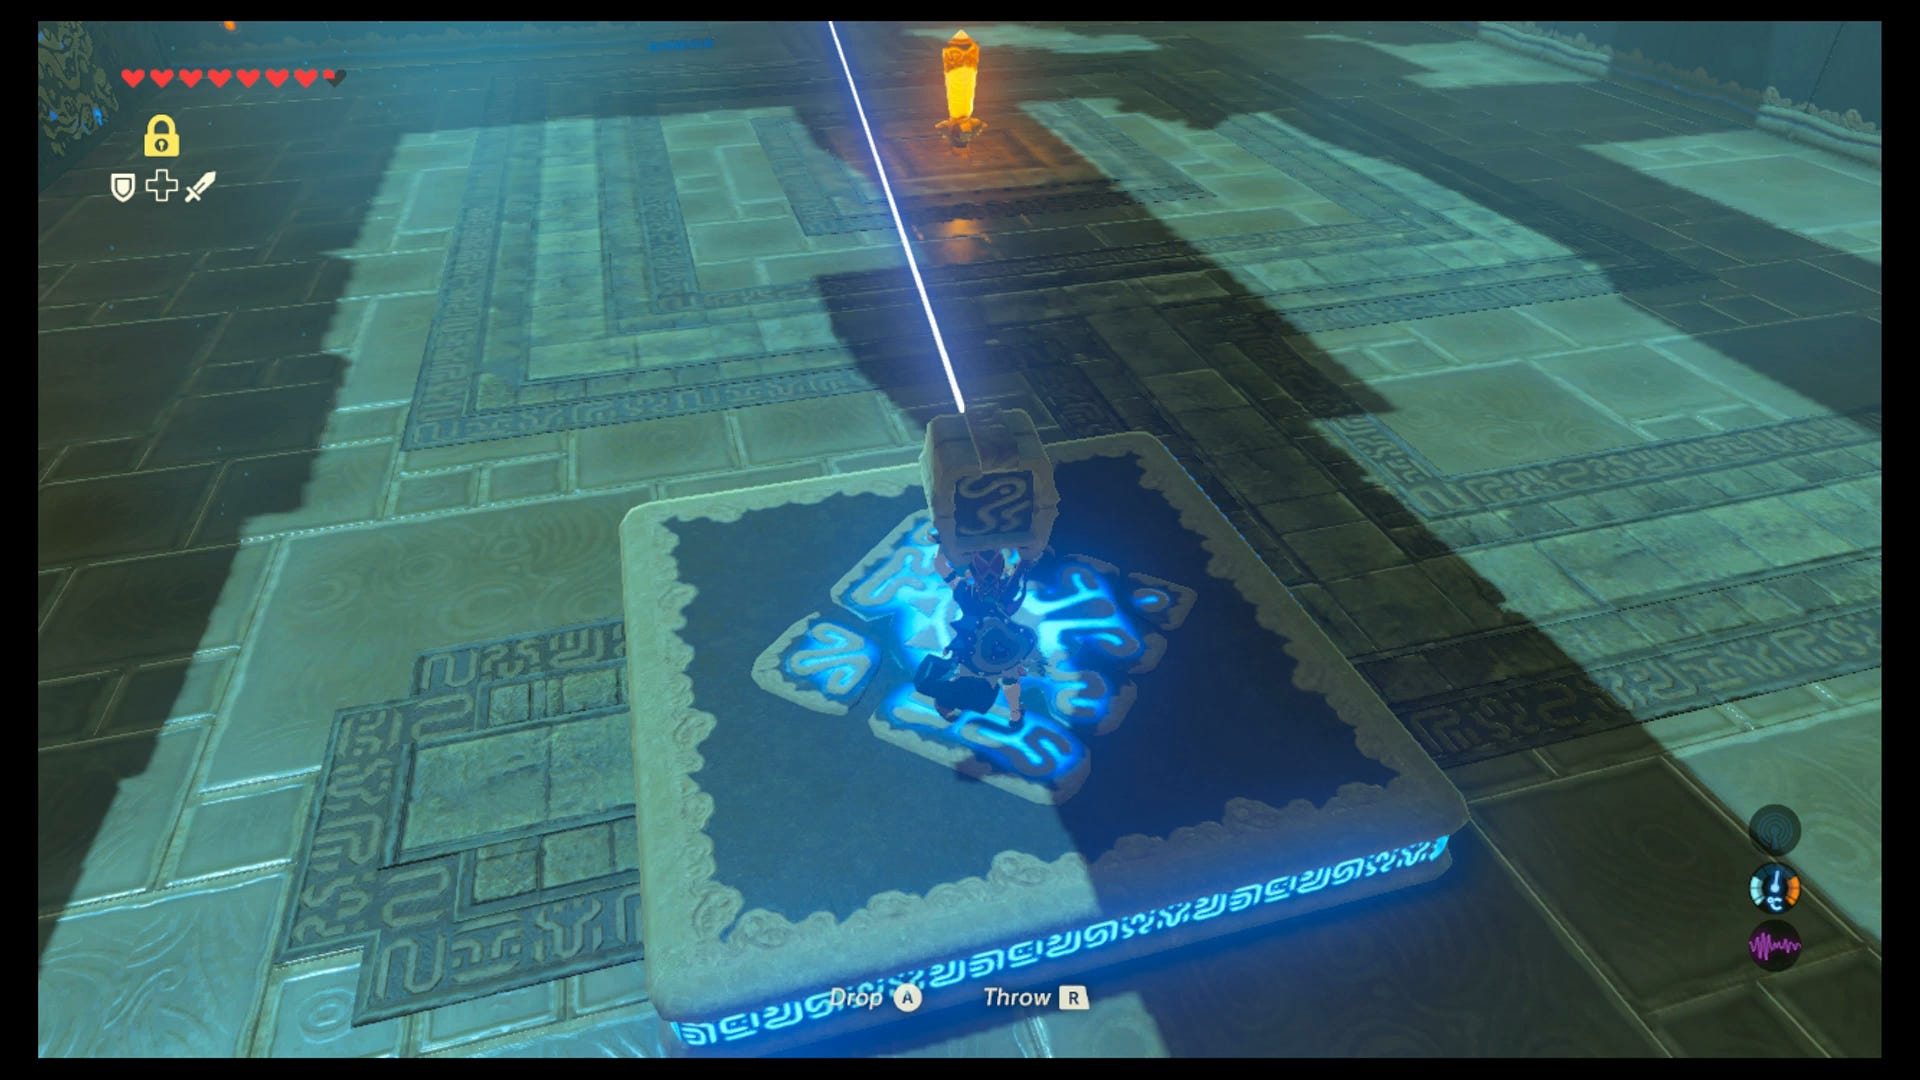
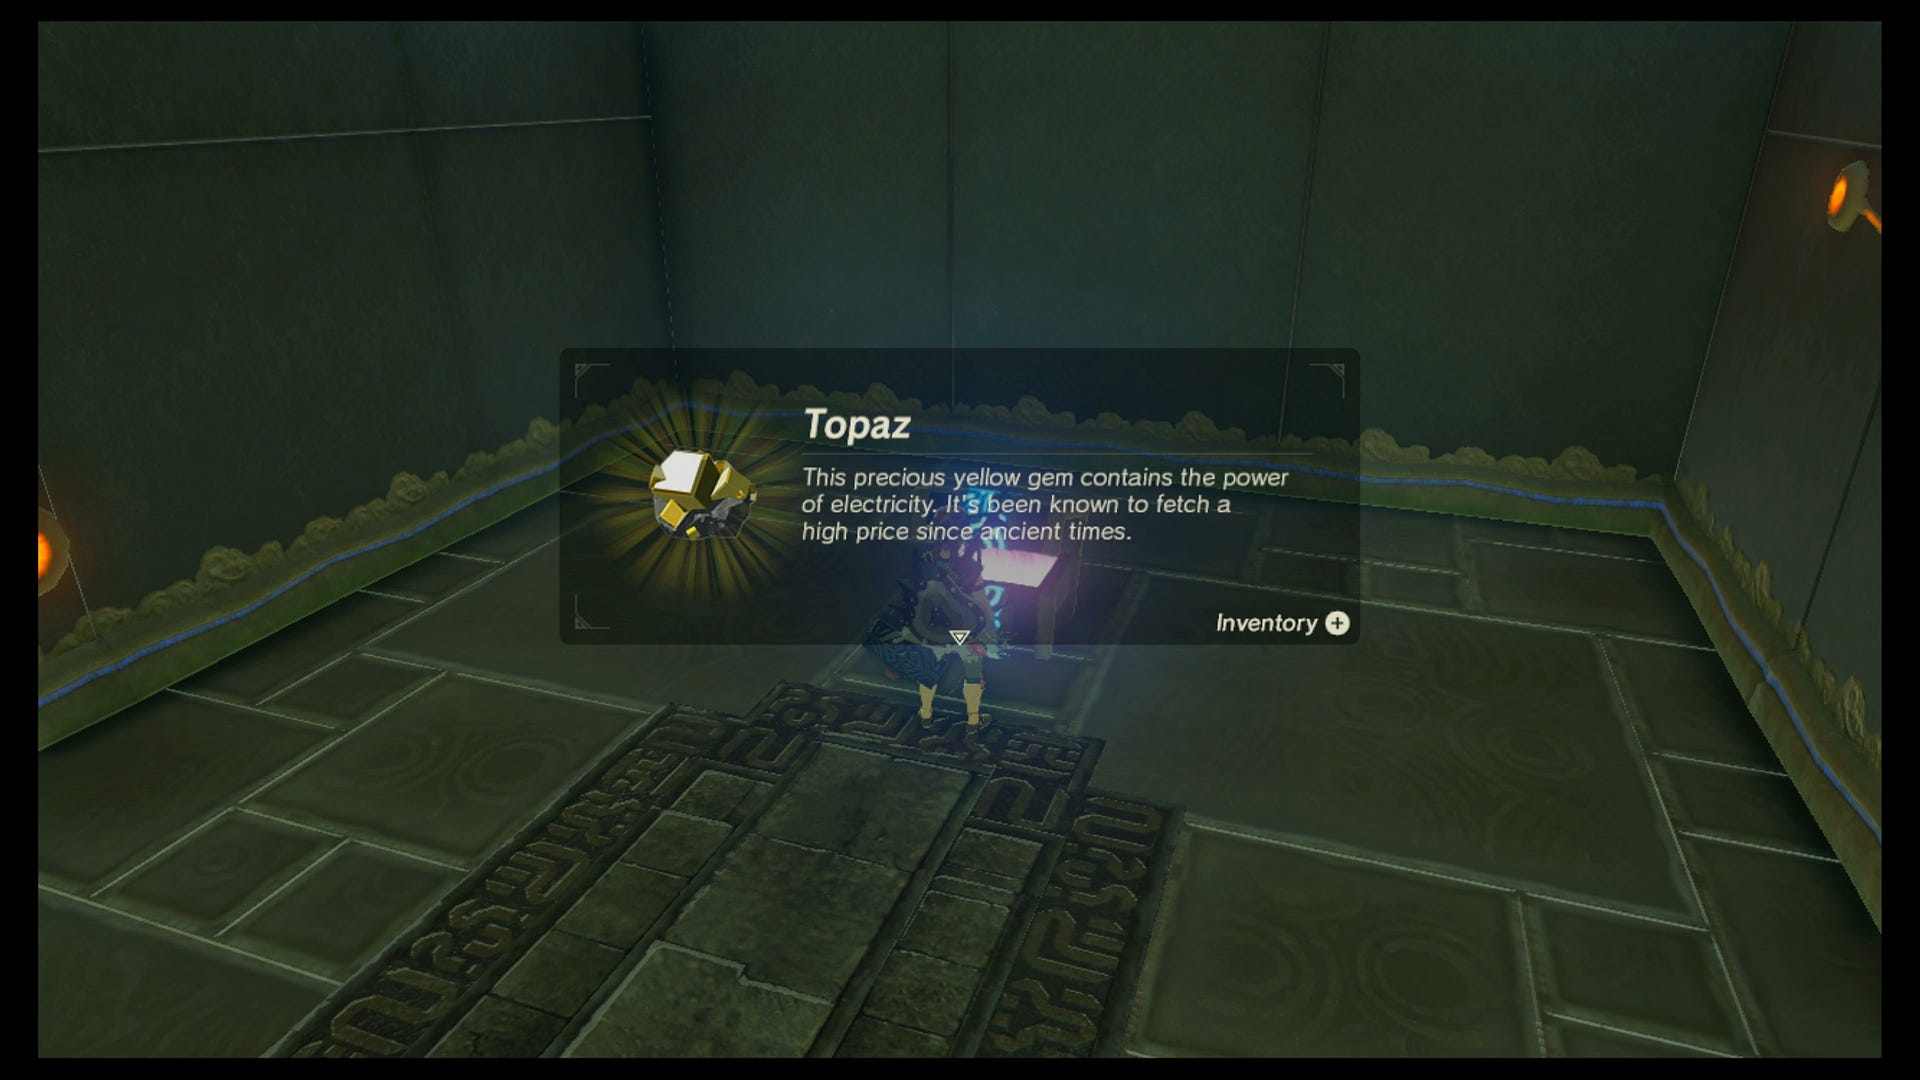
Then, freeze the platform with Stasis when it's on one side, and run over the chest behind the emitter's original position to grab a Topaz.
Thanks to a new update, it's now possible to play Zelda Breath of the Wild in VR. Want help with the main game? Our Zelda: Breath of the Wild walkthrough can help complete Divine Beasts Vah Ruta, Vah Rudiana, Vah Medoh and Vah Naboris and more. There's also how to get the Master Sword, Hylian Shield and all Zelda Captured Memories and Great Fairy Fountain locations, while our Shrines locations and Shrine maps hub explains where to find and solve every puzzle room, including dragon locations and Labyrinth solutions. We also have a DLC 1 guide and DLC 2 guide, including all Tingle, Majora's Mask, Phantom, Midna outfit locations.

Now, the platform will have unfrozen and begun to move again. Head back up to the raised area by the entrance and face the back wall. Each time the beam hits the crystal, the platforms will change height. You want to glide down to them and land on a platform when it's at its lowest.
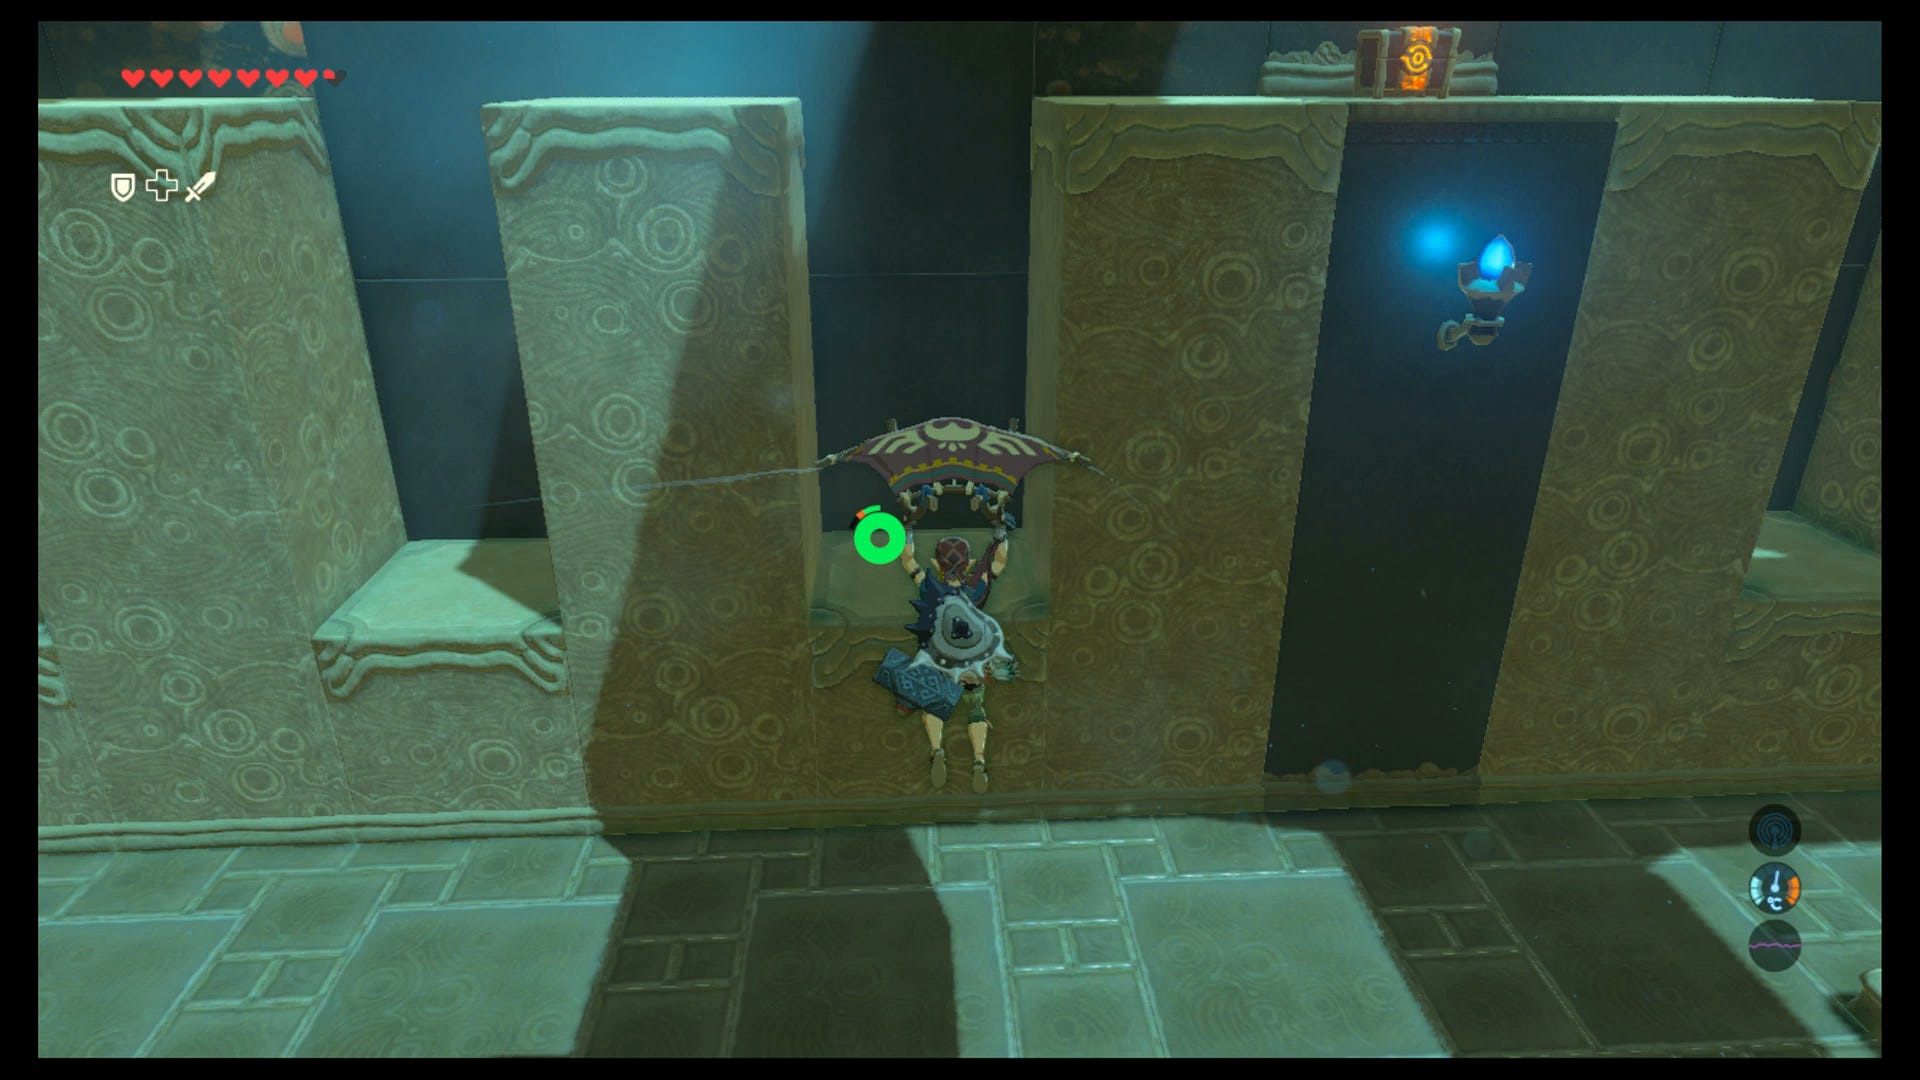
Then, wait for each hit of the crystal to hop over to the next platform, until you reach the chest, which contains an Ancient Core.
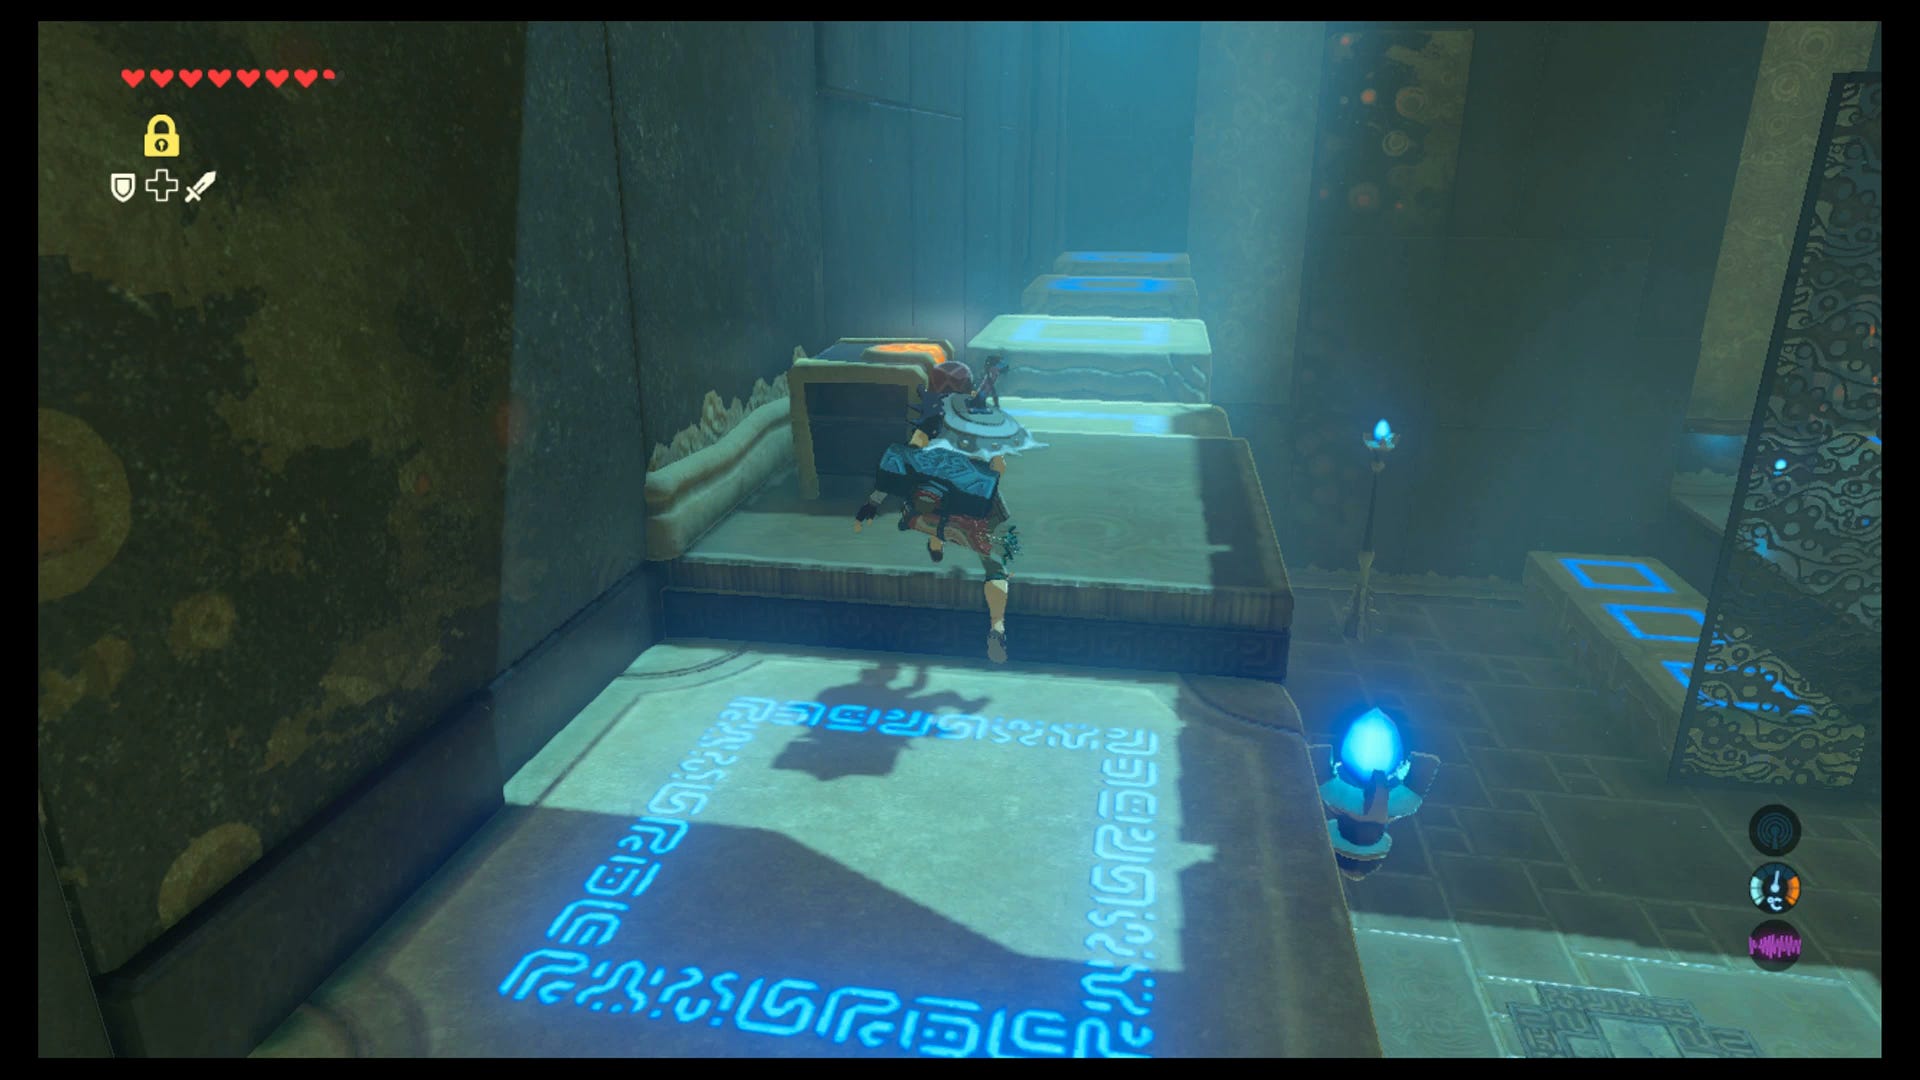
Now turn to the other corner of the room to the entrance, and you'll see more platforms rising and falling in a similar way. Head over to them and climb them like stairs.
Be patient, and don't be afraid to hop off and reset the beam emitter if it's getting a ltitle wonky, and you'll be out of there in no time.
While you're here, here are other Shrines within this region:
Lake region (6 Shrines)
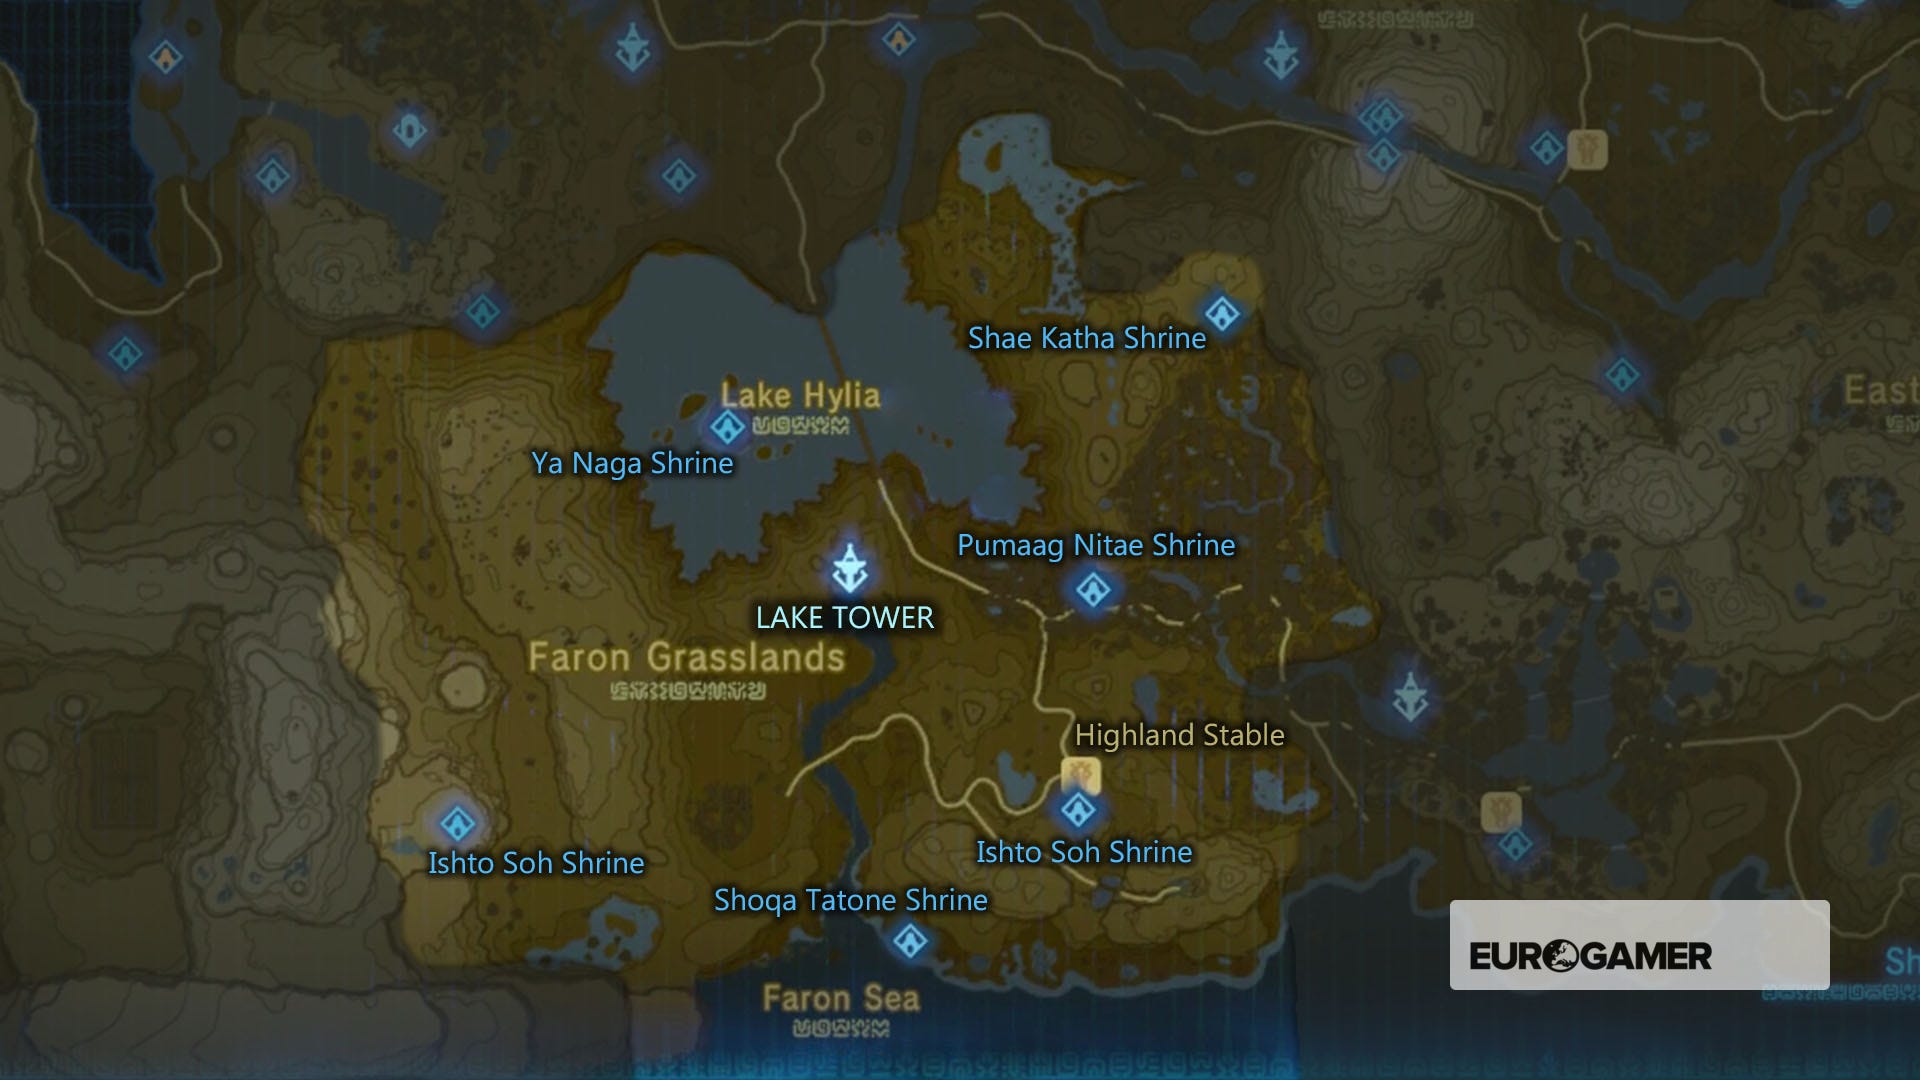
- Ishto Soh Shrine and Bravery's Grasp trial solution
- Ka'o Makagh and Metal Doors Open The Way
- Pumaag Nitae
- Shoqa Tatone and the Guardian Slideshow quest
- Shae Katha (Farosh dragon)
- Ya Naga Shrine and Shatter the Heavens trial solution
If you're after other trials, then our Zelda: Breath of the Wild Shrine locations and maps hub page can help with other regions.