Final Fantasy 15 Pitioss Ruins - Location and how to complete the lengthy, challenging dungeon and get the Black Hood accessory
Set aside a few hours and get ready for some platforming puzzles.

Pitioss is one of the more unique dungeons in Final Fantasy 15. If you're short on patience or have a low tolerance for frustration, this is not for you - while there's no enemies or boss battles to come up against, this is a dungeon centered essentially on platforming, but unfortunately the game's mechanics making it a little difficult.
The reward - the Black Hood accessory - is pretty good, however, but whether it's worth buying a new controller for because yours has been thrown at the wall in rage is open for debate.
Quick note - since the dungeon doesn't have much in terms of sub-missions, we've provided our own throughout the walkthrough, as well as images to help you find your way.
When you're done, be sure to check out other Final Fantasy 15 dungeons and tombs for more places to explore.

Pitioss location in Final Fantasy 15
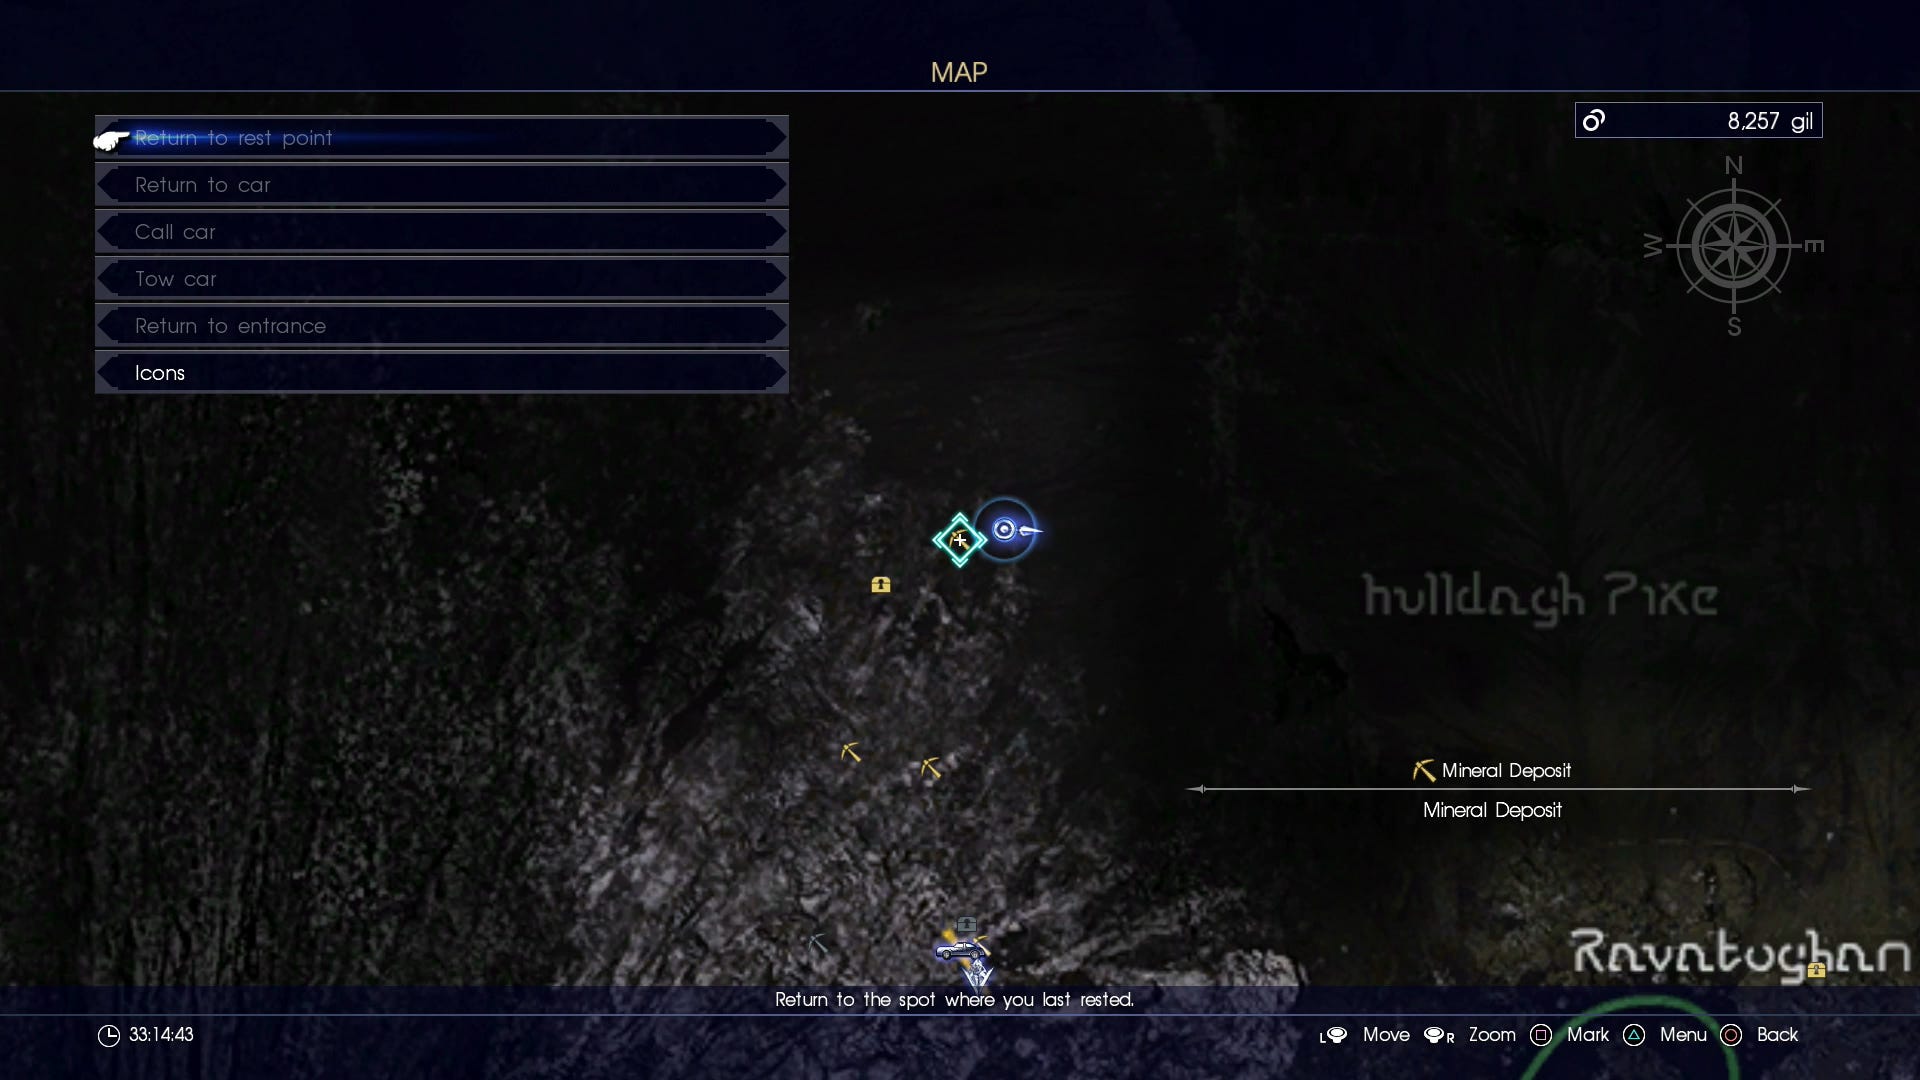
Just north of the volcano on the west of the map there's a little stretch of yellow road all on its own. You'll need the flying car Regalia Type F to get there, and landing can be quite a challenge as there's almost no margin for error.
Fly in from the south and get as low as you can to the rock on the southern end of the road - it's reluctant to lose altitude until you're quite close, so you may want to make a practice pass or two - and as soon as you clear the obstacle hold X on PlayStation / A on Xbox to dip the nose down, and slam on the brakes.

Once you've landed, save so you don't have to do it again, and then head through the rocks in a generally north westerly direction. After a few minutes you should see a small building in the distance, and that's your goal. Keep moving north west and you'll eventually find a path leading up to it.
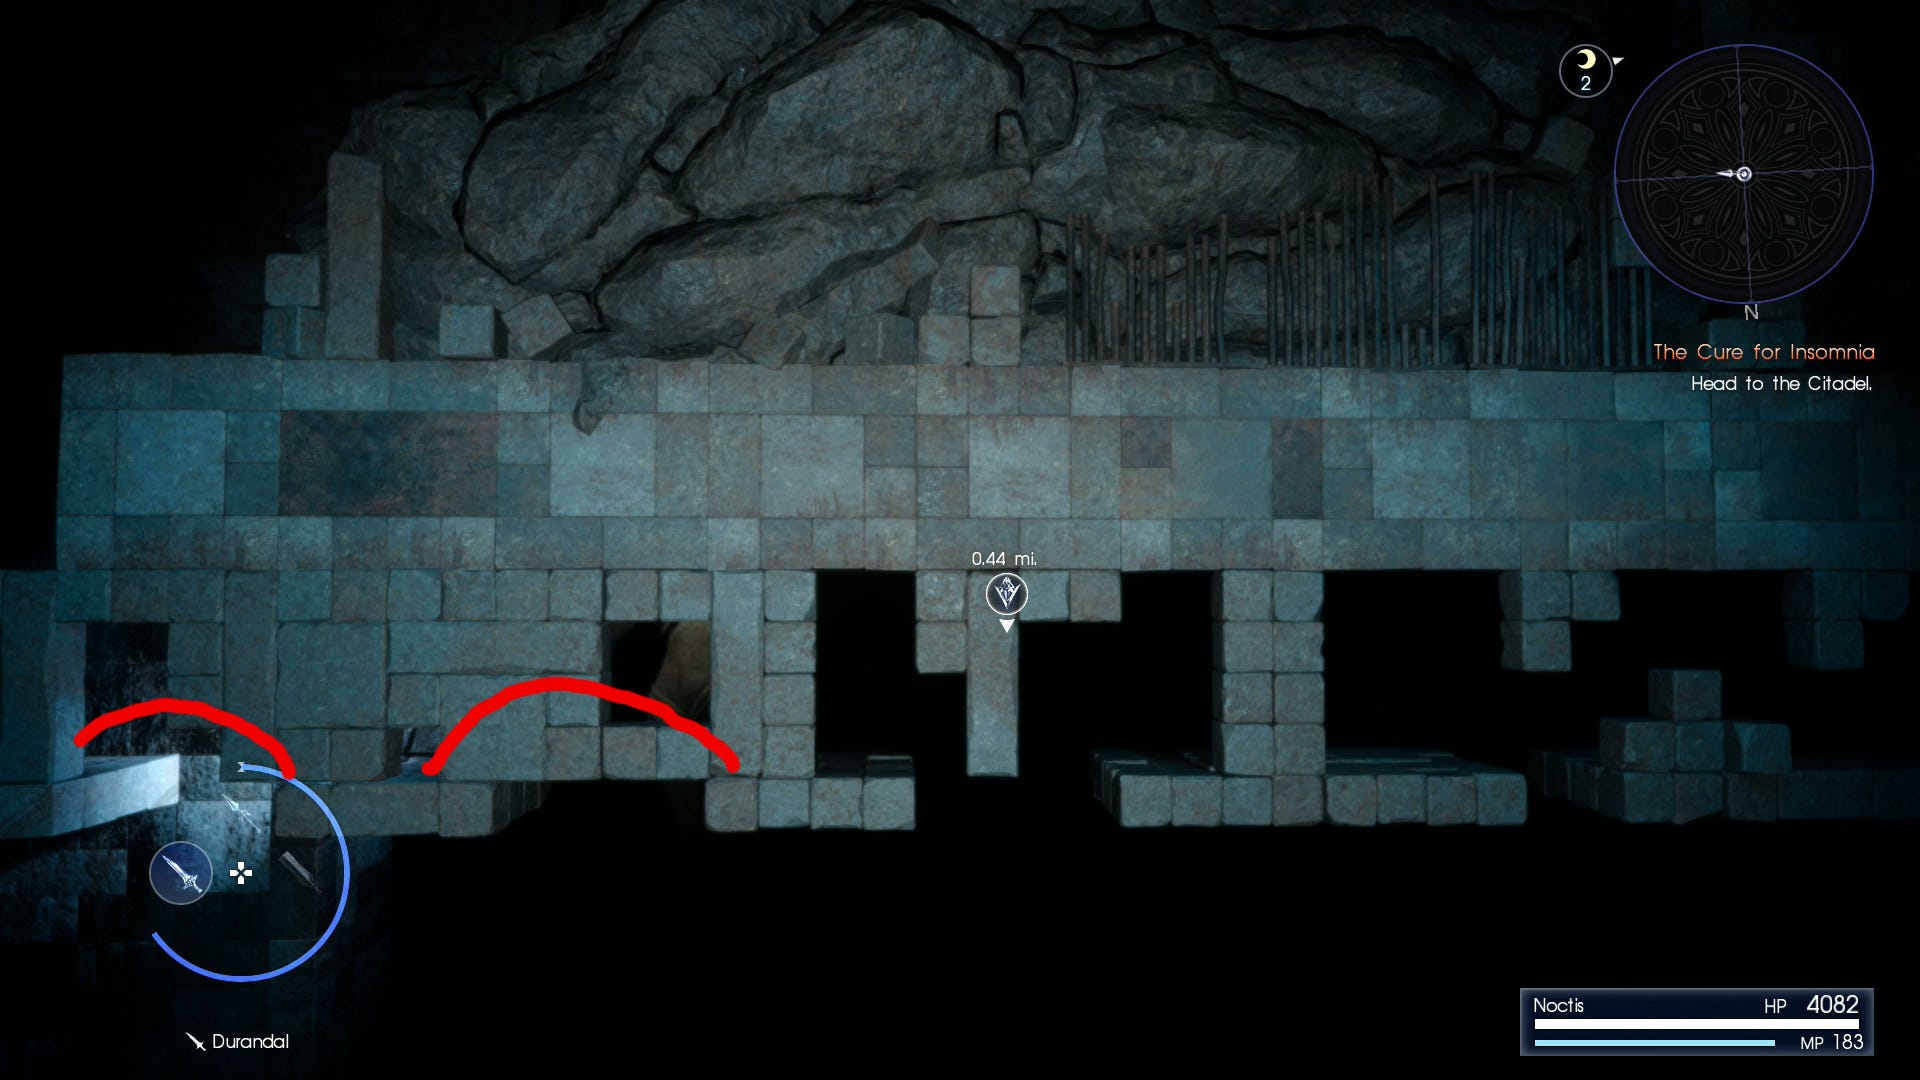
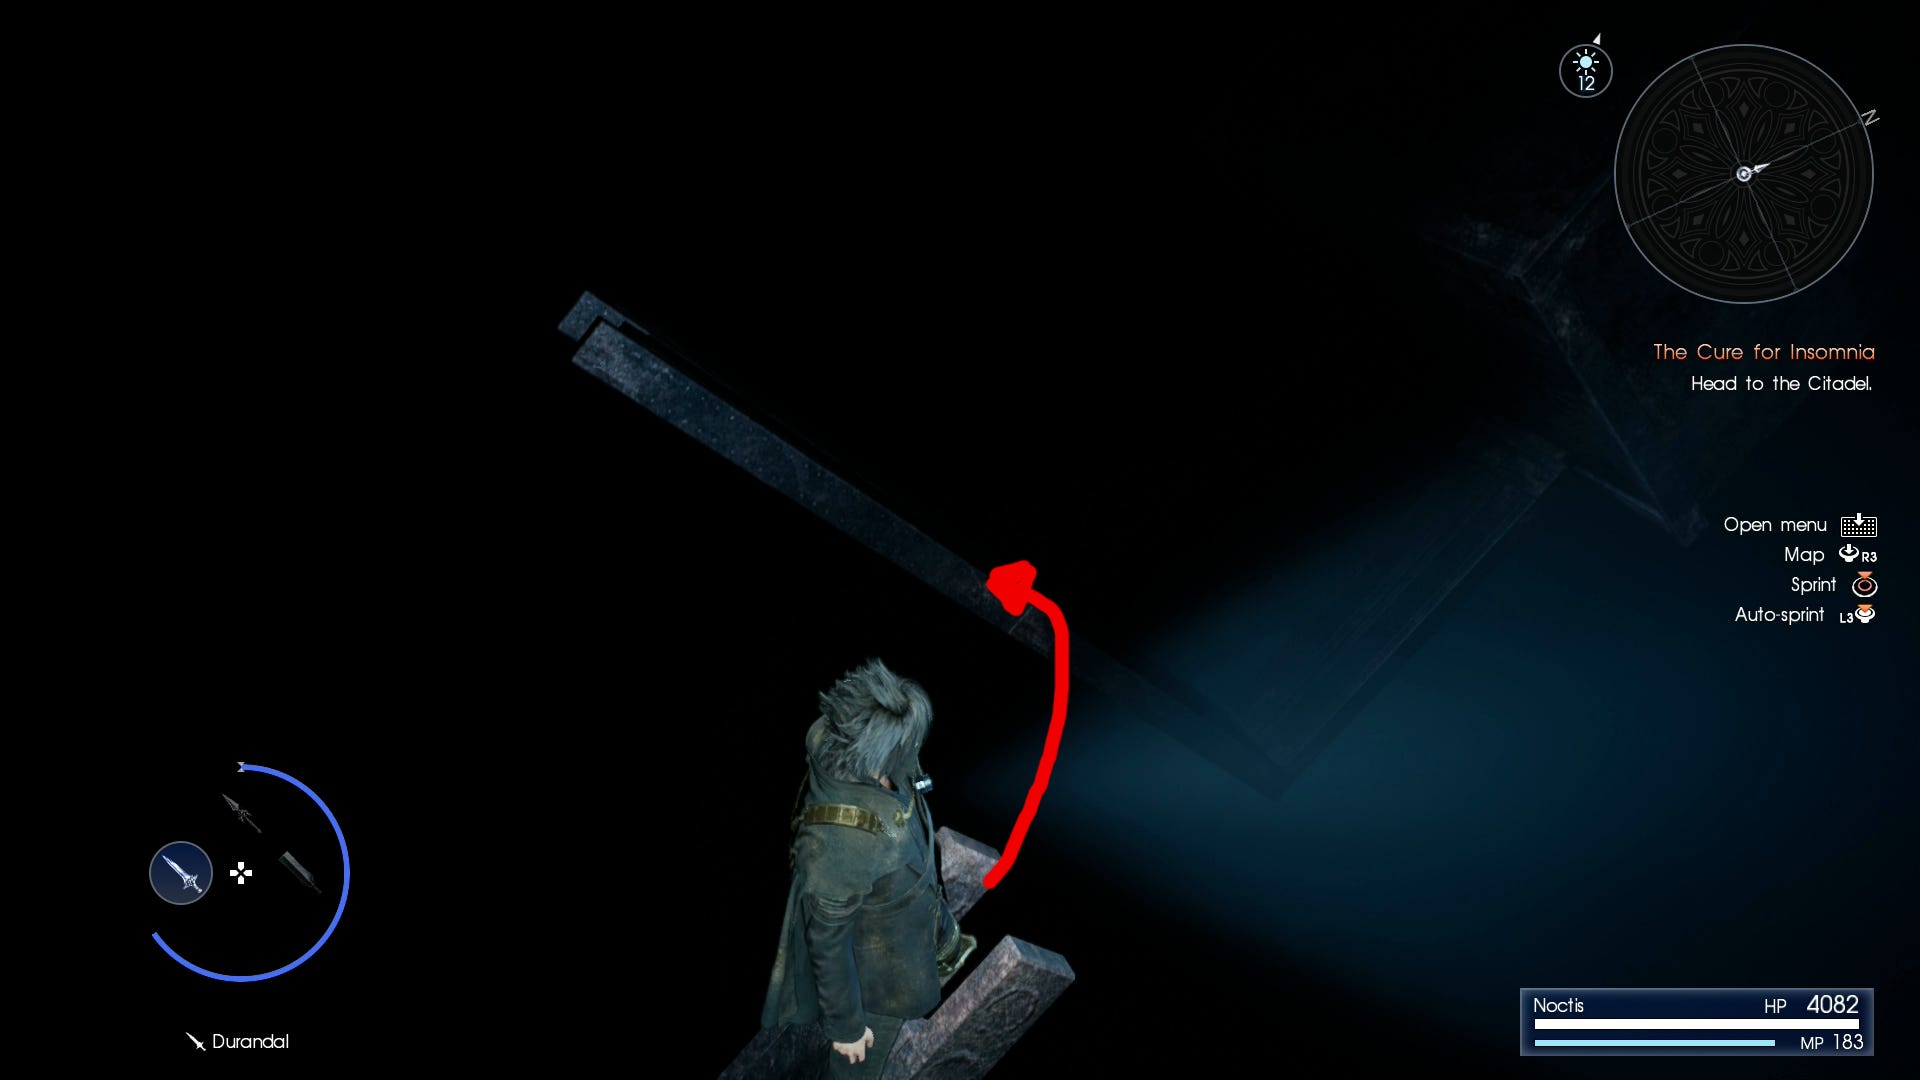
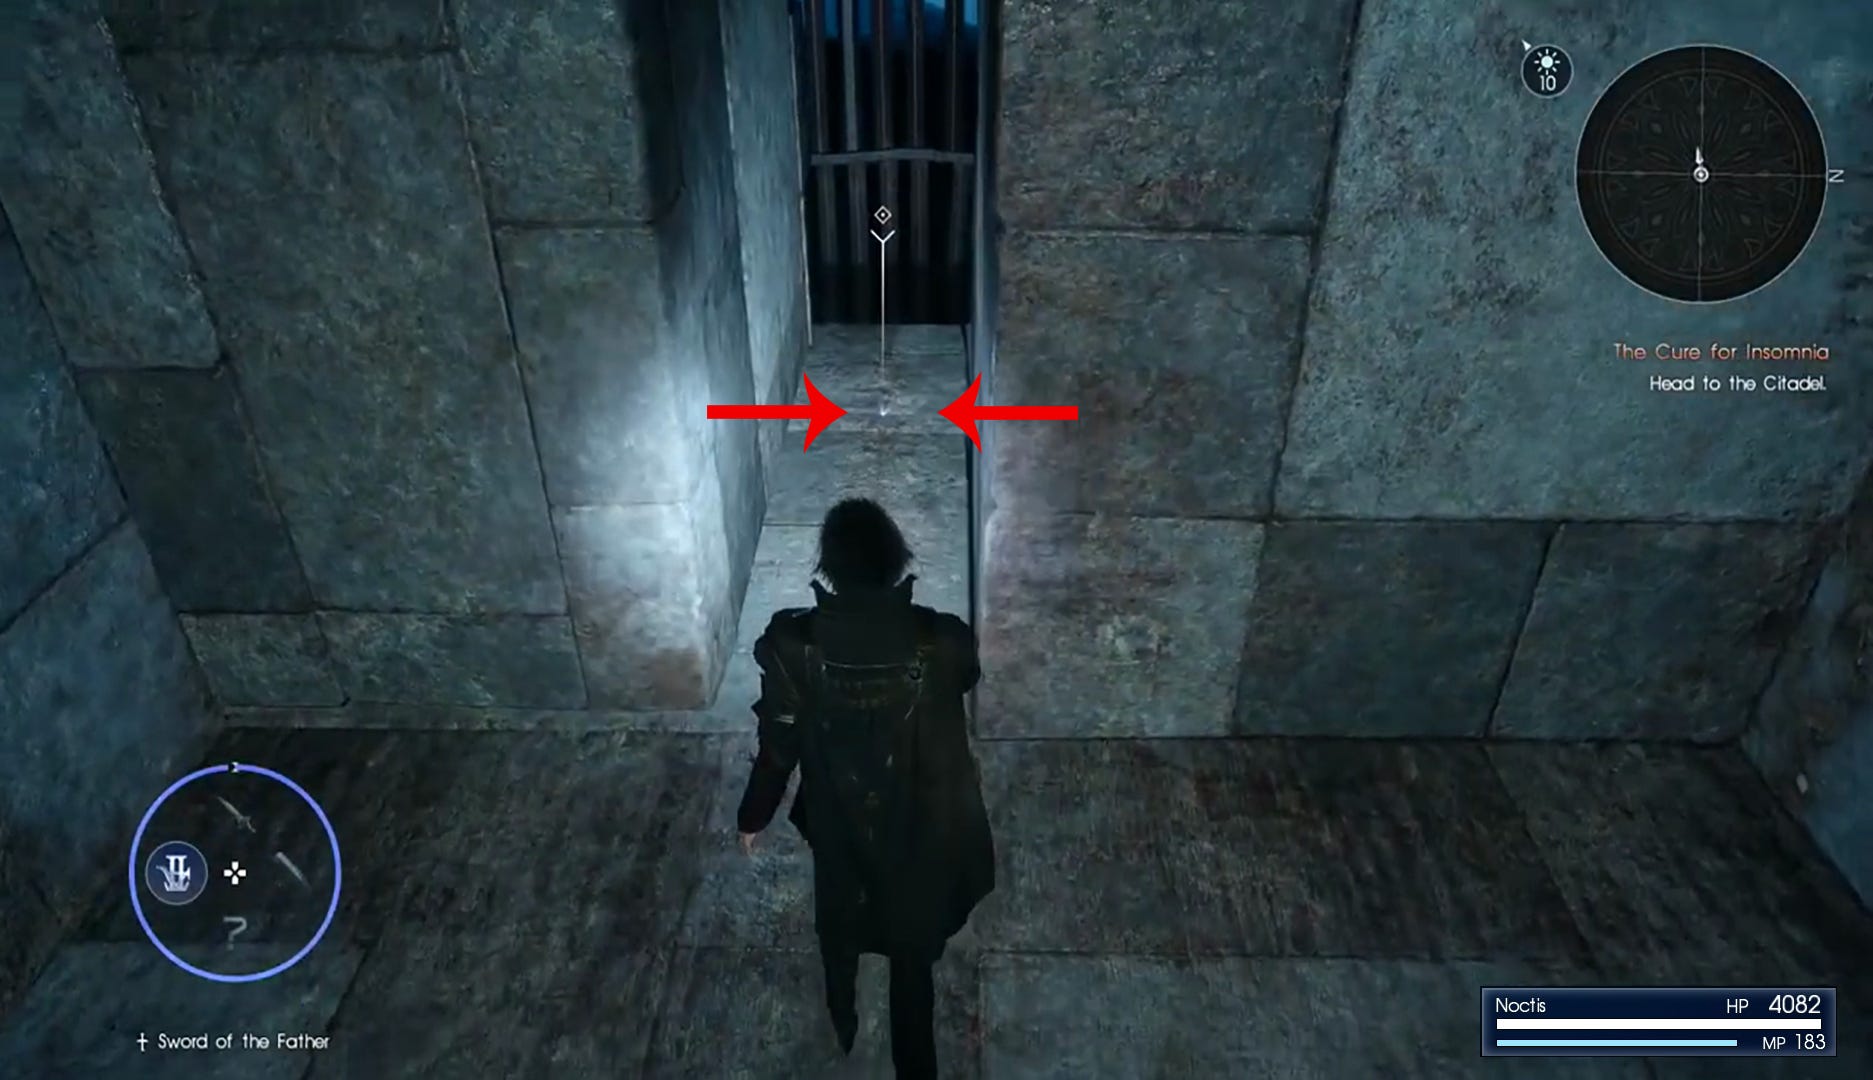
Climb the steps, jump over the gap to the other side, and then jump through the gap on the right of the railings. Wait until nightfall (9PM) and the switch in front of you will start to glow. Hit it to descend to the dungeon below.
Part One: Big Iron Balls
Run under the moving spikes and up the narrow slope. Head down the other side and veer right. Move past the big sliding block into the gap at the back of its range of movement, then past a second block. Turn right, jump over a couple of gaps, climb the slope and turn right, and hit the red rock face a few times to destroy it. Head through the gap and turn right up another slope.
Head up the slope to your left, and from the platform at the top jump across onto the narrow column and then onto the larger platform opposite. Turn right to face the metal fence and jump across onto the narrow metal ledge in front of it. Shimmy to the corner, jump through the small gap in the fence ahead onto another narrow metal ledge, then drop down to the floor below.
Head through the narrow gap, bear left and run across the top of the sliding block to the ledge opposite. Pass under three sets of moving spikes, then jump up to hit the glowing switch opposite. Wait for the lift to stop then knock down another red face to open a route back to the starting area.
Jump onto the small pillar and then onto the platform opposite, then turn around and slide down the slope. Slide down the next one to hit the switch at the bottom at high speed to release one of the iron balls.
Retrace your steps to the three sets of moving spikes, pass under them again, and drop down onto the statue below. Jump across to the iron ball and hit the glowing switch to release another ball. Make your way behind the decapitated statue's head, turn right and head up the slope, then cross the remnants of its arm to hit the third switch and release the final ball to open the door to the next area.
Part Two: Big Yellow Ball
Jump across the ball and the pillars towards the rotating spikes in the distance. Jump to its left, cross through the gaps ahead past another iron ball, and hit the switch on the other side. Quickly turn around and jump into the gap as it starts to rotate, then turn around again and position yourself on the outside edge behind the small thing sticking out of the wall.
As it rotates you'll end up standing on the bit that's stick out, so turn and face the direction of rotation and look down - you'll see hot spikes below, and there's a small gap in the middle that you need to drop down into. You may prefer to climb onto the surface of the ball and drop from there, but there's a lot of luck involved here.
Assuming you time it correctly you'll hit another switch on the way down, releasing another iron ball. Follow it, then jump across the three pillars in the darkness ahead. Leap over to the lower bent metal beam, walk to the top, jump to the one to your right, climb to the top of that one, and then jump to the one that's sticking out on your right.
Head to the statue and then down the stairs. Step on the switch to open one of the doors, then climb back up the steps and jump from the narrow metal beam across to the small stone ledge against the wall. Jump to the next ledge then onto the door, and turn left.
Part Three: Spikes!
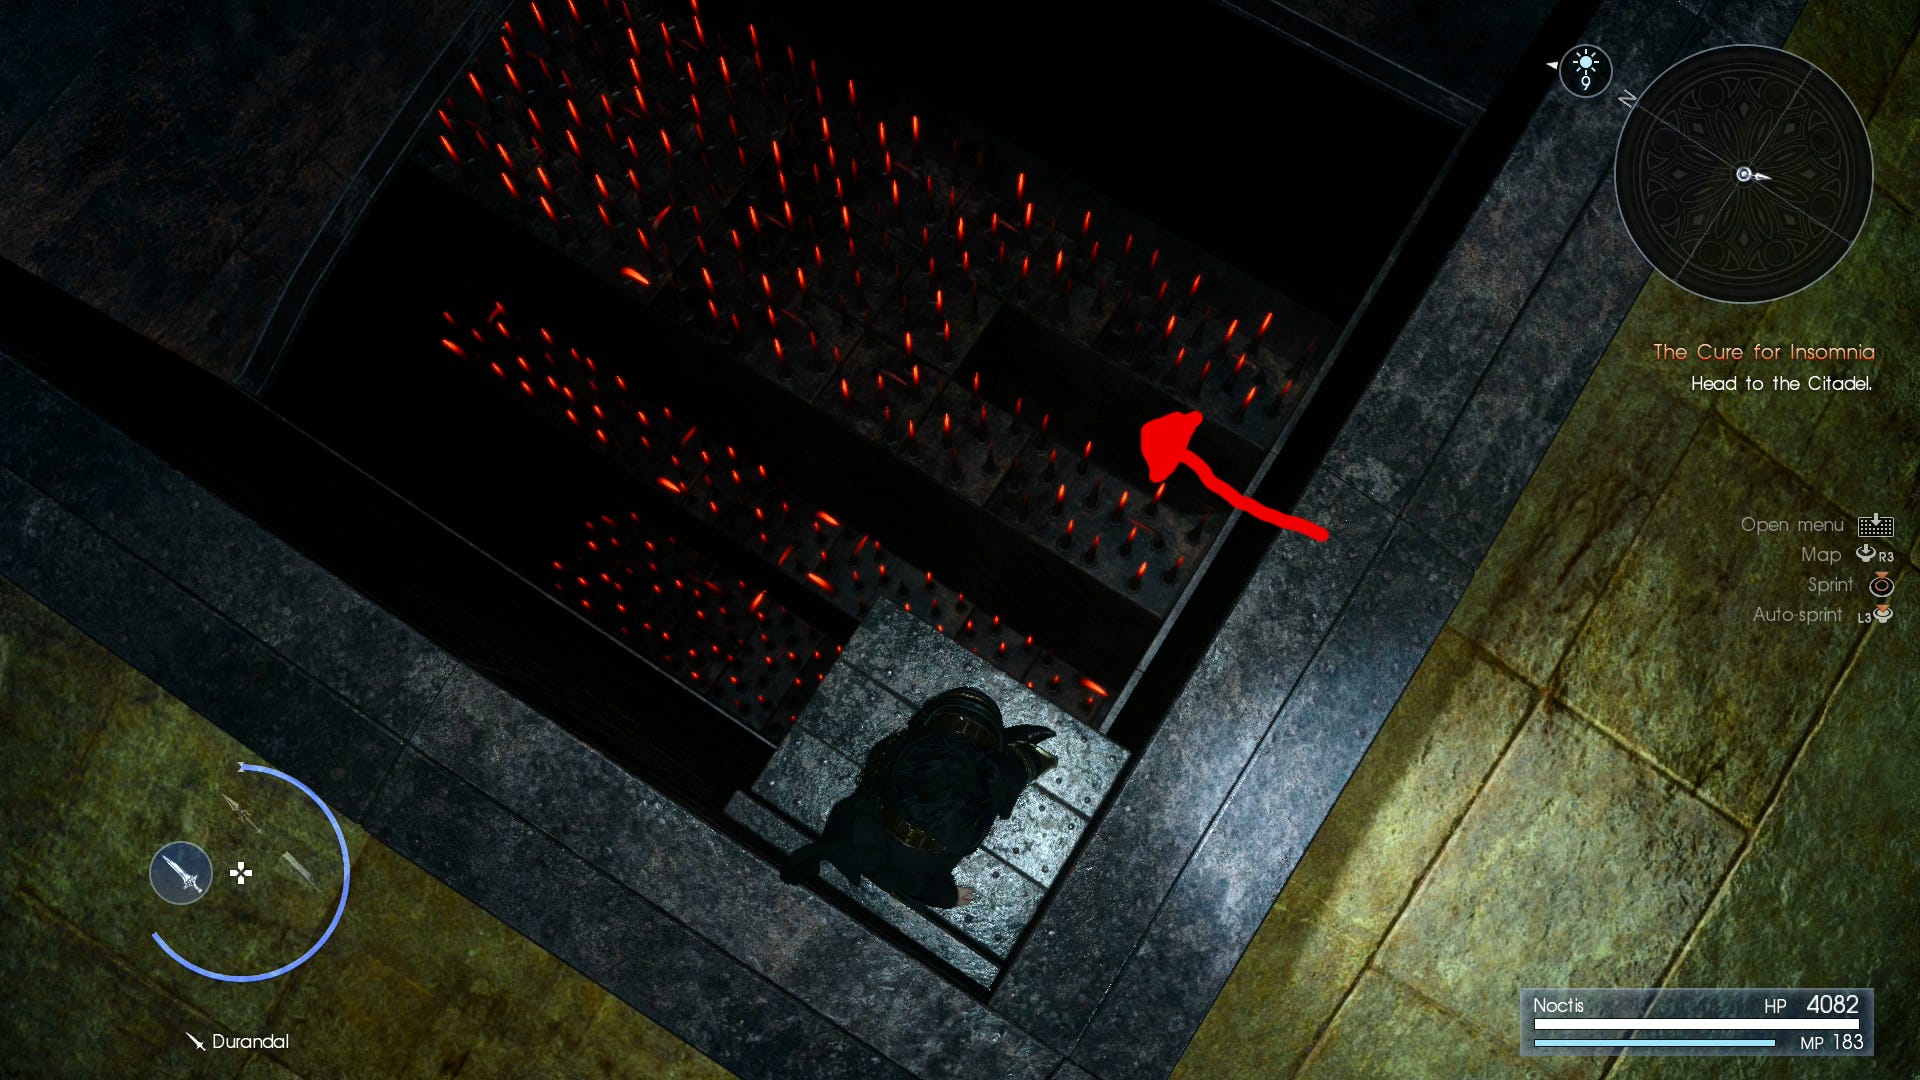
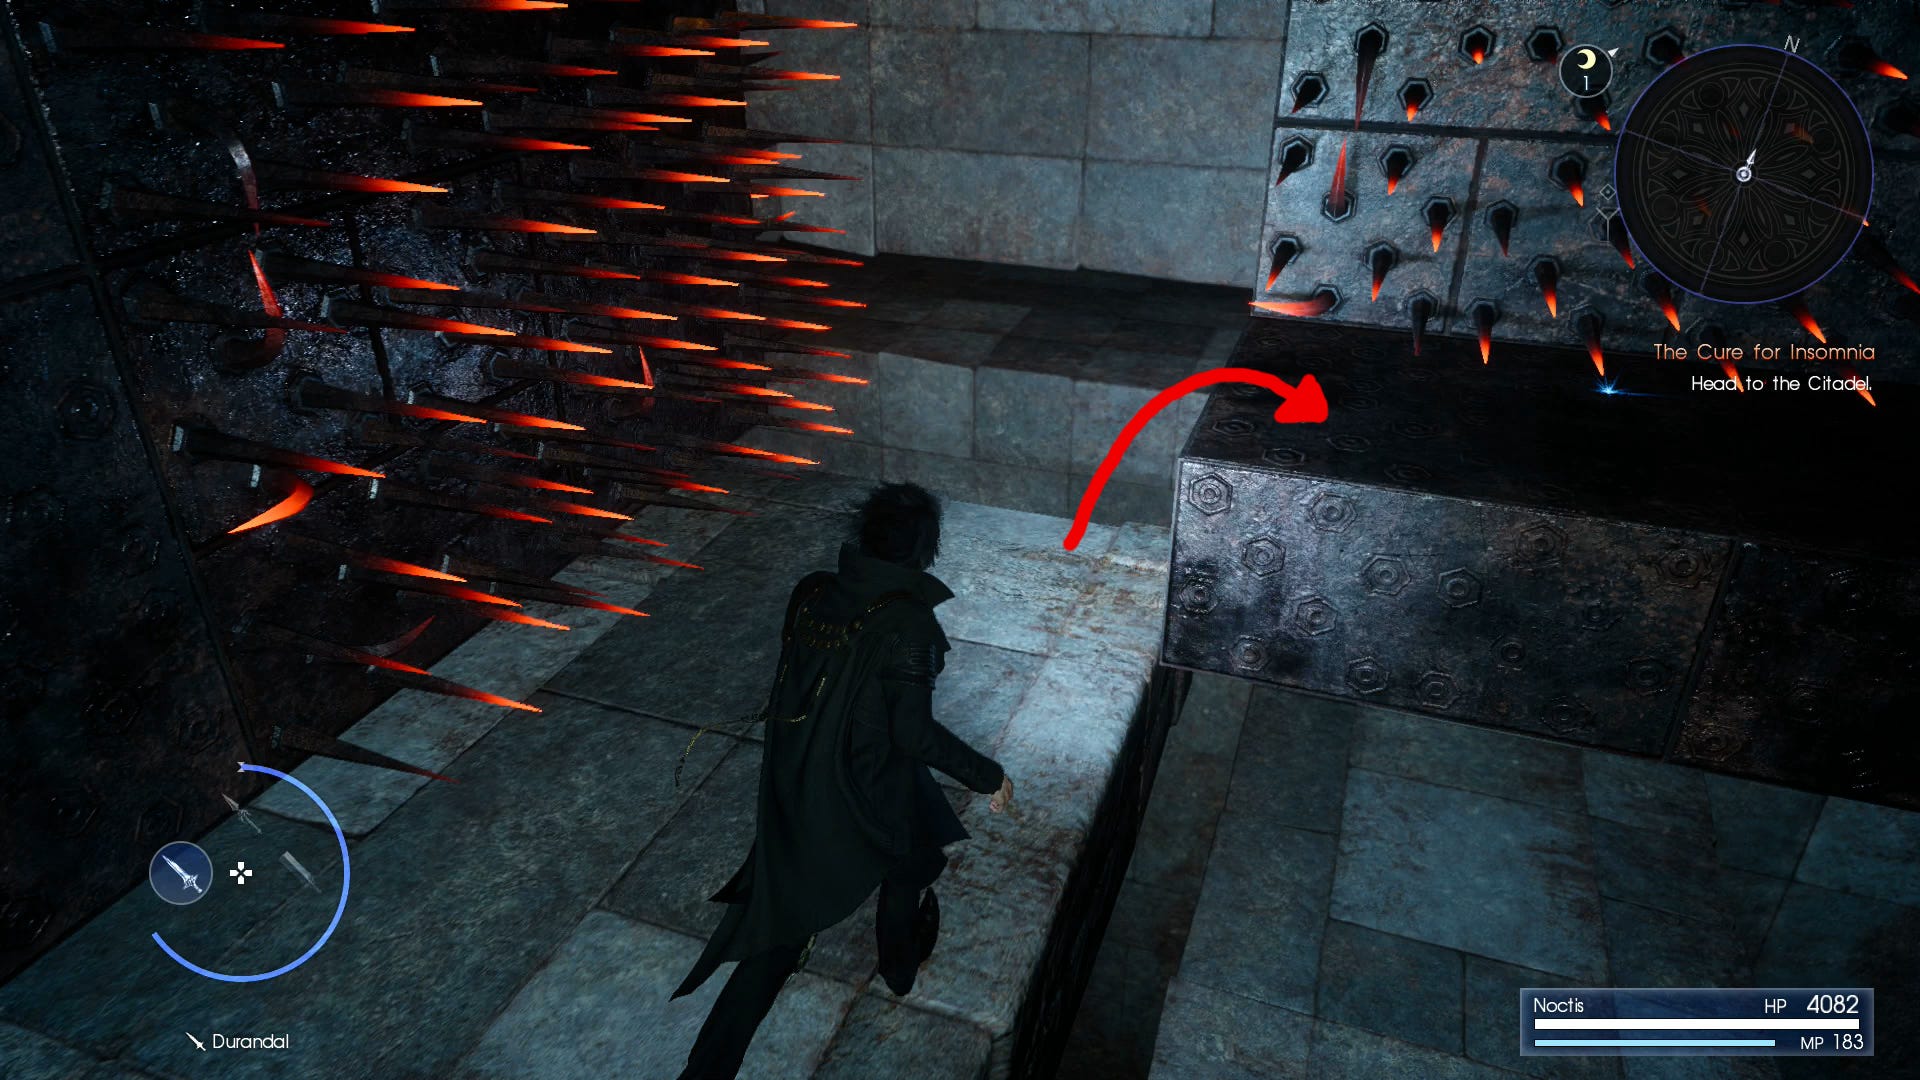
Ahead is a spike block moving horizontally and two moving vertically - time a jump so that you pass through the gap opposite and quickly move to the end of the ledge to avoid being hit by the spikes from behind.
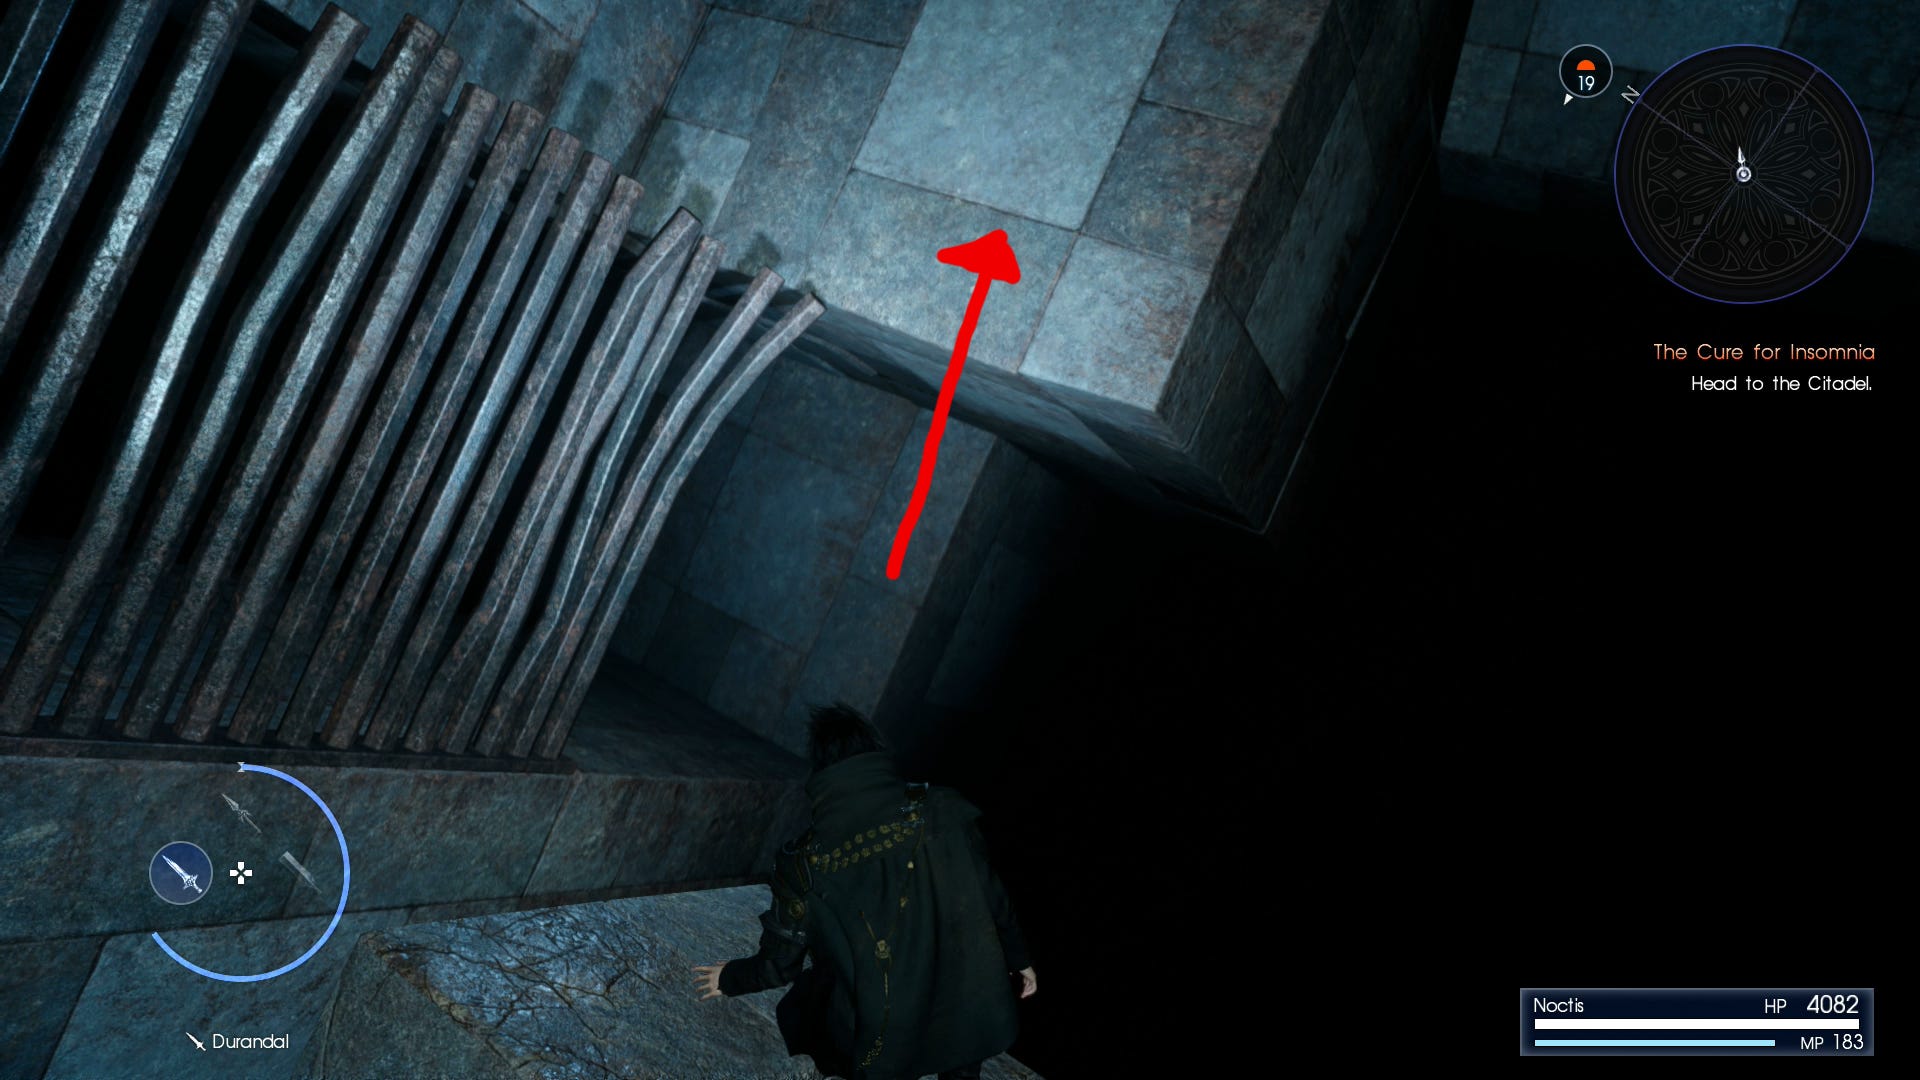
Turn and face the wall of moving spikes - you need to jump onto the top of the one closest to you, position yourself in the middle so you don't get caught by the two above, then turn and jump off the end of the one you're on just as it starts to descend. Quickly run along the ledge and turn left onto another moving block. Ride it up then jump across the tops of the next few and drop down onto another switch to open the door opposite.
Drop down and go through the open door. Move to the left, then wait for the rotating spikes on the ledge ahead to start moving to the right. Jump across to its left, jump across to the next ledge, move a little to the right, and then jump between the two sets of spikes ahead. Climb to the upper level and jump across on the tops of the rotating spikes to reach the opening at the far end.
You're now on top of the door. Turn right and jump across to the narrow ledge, shimmy along, jump onto the small platform and then the beam that crosses the room and make your way in above the door on the other side.
Wait for the gap in the rotating stone cylinder to come around, jump into it, run to the other side, and jump to the platform. Climb up the ramps and turn right, jump into the gap on the next rotating cylinder, then onto the platform in the corner - look around to locate a platform above you.
Jump into the gap on the last cylinder, but when you land turn around and jump onto the platform you could see from the corner. From there turn around again and jump onto the outside of the cylinder and then onto the ledge opposite. Climb the ramp and slide down the other side to hit another switch.
Part Four: Not Enough Spikes For You? OK.
Drop down and cross through the open door opposite. Stand on the moving stone platform, avoid the spikes on the left, duck round behind them, and jump onto the small platform on the far left. Wait for the stone slab to make its way around in front of you, jump to it, then run into the far left corner and press yourself against the wall.
As the platform moves away you'll drop to a ledge below. Move to the end and jump the gap, turn left and move up the ramp, then turn to face the spikes. As the stone slab moves towards you jump onto it, run to the far end, and jump off to the right - landing here is tricky as if you overshoot by a fraction you'll hit the spikes.
Wait for another stone slab to appear, drop onto it, and head round the end of the spiked wall. Squeeze between the two sets of spikes, follow the slab, jump onto the ledge half way along, and then wait until you can see the slab emerging on the other side. Jump over the spikes, and ride the slab until it passes the pillar on your left, then quickly turn left and jump onto the stairs.
At the top of the stairs turn left and then pick your way carefully along the top of the spiked wall. At the end jump right onto the spiked block and follow this wall, jump onto the stone block at the end, then across to the metal ramp. Very carefully squeeze between the sets of spikes on the right and jump down to the switch below, being careful not to clip any of the spikes surrounding it.
Jump down to the floor below and back out to the central corridor. The door at the end is now rotating, so wait for it to start swinging up towards you, jump onto it, then move quickly to the left of the pivot and perch on the ledge there. Wait for the door to come round again, and as it moves down jump onto it, run to the end, and jump off into the next area.
Part Five: Would Make a Good Heavy Metal Album Cover
Wait for the giant mechanism to start moving away then drop down, run left, and leap across to the platform just below the glowing red block. Follow the platforms along the wall, turn right at the end, quickly jump right onto the pillar then the stone block, then leap for the stairs below.
Wait at the bottom for the mechanism to pass to the right, then run up and stand on the metal bars poking out of the back. Ride them to the rear of the room, jump onto the platform at the end, then follow the path as it heads out into the middle of the room. Drop down to the bottom of the ramp in the middle, stand at the bottom looking up, and wait for the mechanism to pass to the left.
Run to the top of the ramp and into the mechanism itself. Climb the ramp inside, jump onto the stone platform as it passes, turn left, and follow it round until you're stood under the hand sticking out of the wall. Wait for the mechanism to come back, leap across to the beam on its back, then use it to cross to the stone block beyond the hand.
Drop down, climb up the stairs and down the other side, and wait for the thing to come rolling back. Enter the gap in its side, up another ramp, turn 180 degrees, and jump to the platform. At its furthest point moving right jump out, turn right, climb the stairs and ramp, make your way along the stone beam, and jump through the gap in the railings ahead. Turn right and move to the end then wait for the machine to come back and then jump inside it again.
Climb to the top, jump across to the platform between the bars, drop down onto the top of the skull between the horns, and wait for it to approach the slope. Jump onto it and turn left, at the top, then jump down and around the stone platforms. Take out the stone head on your left to make a shortcut should you fall off later, then move up the ramp.
At the top wait for the machine to approach, jump onto the platform, and immediately move to the left end. Jump across to the steps as you pass, turn left at the top, and pick your way round the metal beam. Jump across to the stone ledge, climb the stairs, then pick your way over more metal beams until you reach the top.
Wait for the machine to pass forwards under you, drop onto the highest platform (it's worth letting it make one pass so you know what to look for), and then when it's as far forward as it can go jump onto the walkway ahead then jump into the slot to hit the switch.
Part Six: Which Way Is Up?
Drop down on to the ledges below until you reach a stone structure that's tilted at 45 degrees. Everything is now like this, and it can get quite disorientating so tread carefully.
Turn left, head forwards and cross over the top of the stone so it slopes up to your right. Move up a little at the end until you find a bit of stone poking out, and jump from there to the platform opposite. Try and hit the upright part as you'll roll when you land and may overshoot. Turn around and jump to the next ledge and squeeze down the passage to your left.
Jump off the end of the stone beam, turn around and move over the top of the slope, then turn left and jump to the next platform. Jump across again, then turn right and drop onto the narrow beam below. Turn around and head downhill (under the platform you just dropped from) and turn left at the bottom.
Head through the short tunnel and turn right (there should be some metal bars in front of you). Once through, head uphill to the left, and then drop onto the metal bars at the top. Move to the far side then jump over to another set of bars, cross to the far side of those (use the rock wedged between them) and then jump to another stone beam.
Make your way up to the top and onto the wider beam, then head down that and follow the stones around to the right. At the end of that jump up to the stone above the metal bars (it'll feel completely wrong, but it gets weirder later) then drop down behind the bars and turn right towards the side of a ramp.
Head out onto the metal beam, turn right and jump to the stone platform, then turn left and drop to the upper of the two ledges below. Drop to the next one, then head down the slope and round the corner. Turn left and head up into a small room, then turn left and go through the narrow slot on the other side. Head down and follow it round and drop into the rotating cylinder below.
Part Seven: A 2.5D Platformer? Sure, Why Not
Drop down from the first cylinder and slide down the steep slope. Drop below the next cylinder and jump across to the right, then drop off the end of that platform onto the narrow ledge next to the block that's moving up and down. Drop down from there onto the top of the slope, then slide to the bottom.
Jump over the rotating cylinder, then drop forwards onto the narrow ledge poking out at the bottom of the screen. Wait for the block to move up, then leap to the left underneath it. Slide down the slope, then at the bottom move left, jumping over the gaps as you go - the first two are easy, but for the second two you can see neither the gap nor your position so you'll have to hope for the best. Head up the steps in the centre of the screen.
Part Eight: Now Is a Good Time to Take a Break
The game will switch back to third-person as you're running up the steps, and you''ll find yourself now running down them and out onto a narrow metal beam. It'll have a few holes in it and bend slightly so don't be tempted to run too fast. Jump onto the stone ledge at the top and move towards the statue - the platform will start to move.
Head across to the right of the screen and down the ledge, drop off the end, and then backtrack into the gap on your left. Head up the passage (away from the statue), exit the tunnel, and double back outside. Jump across to the metal platform at the end and everything will start rotating again - keep heading along this ledge, and as it rotates keep jumping "down" as new ledges make their way to the bottom.
When you reach the stone platform turn around and head right. Jump over the gap and turn right up the ramp - everything is still spinning, but stick to the left edge, drop down the hole at the end, and then down another hole.
Head "up" (keep the non-moving wall on your right), and when you reach the gap wait until the bit you're stood on is level then drop in and trun 180 degrees. Move to the right of the hole and wait for everything to rotate sufficiently that you can walk up the narrow stones on the right side. At the top jump onto the next higher stone ledge, head down, and jump across to the wider stones on the left.
Head down to the bottom and then turn right. The statue should loom out of the shadows at you, so jump across the gap and then onto the statue's, er, chestular area. It'll slowly topple over, and when it comes to rest make your way up her right arm (the one on your left) to the sword. Drop onto the metal grate on the grip guard, and edge your way over making sure you're dead centre. You'll slide down a slope and take a bit of fall damage when you hit the end.
Part Nine: Free Stuff! (But At What Cost?)
The floor will turn into a lift and emerge in a long dark tunnel with loads of things to pick up, and you'll generally feel like you're on the home stretch. Well Bazinga! Grab all the loot and then head up the thin metal ledge. When it narrows keep right, and instead of carrying on up stand on top of the end of the wider bit.
Edge forward and carefully drop down onto the metal grate below. Head forwards, up the other side (be careful to stay away from the curved area on the metal grate - you'll slip and fall to your doom) and then jump across to the right.
Move to the far left corner where the bars are fractionally shorter than the rest then gently drop down to the grate below. Being careful to keep away from the bent bars, make your way up until you come to another metal beam. Head up the narrow portion until it meets the wider bit, then turn around and head up the wide section. Keep left and follow it up as it narrows again, move over the top and down, and jump across to the statue to the right.
Head for the posterior of the statue, drop onto the metal beam, and stand on the end. Jump across to the next beam (you want to try and land on the bit sticking up to the left) then stand on the tip of the narrow bit and make a leap for the wider box section. Head to the top, turn around, and jump down to the metal grate below.
Follow the metal tunnel as it twists and turns up, then through the small gap and onto the stone steps below. At the top of the steps follow the passageway, drop down on the switch at the bottom, and emerge through the doorway into some nice sensible right way up territory.
Need more help? Our Final Fantasy 15 guide and walkthrough can provide tips on main story, as well as the open-world's many quests and activities. Learning how to get AP fast, EXP fast and money or Gil fast will aid you in many optional dungeons and tombs - including how to open and explore their locked doors. There's also plenty of interesting side-quests, too, such as the Scraps of Mystery and Professors Protege frog locations. And if you want to get around easier, you can rent a Chocobo, learn the infinite sprint trick and later in the game, get the flying car Regalia Type F. There's also more to see and do with DLC, such as Episode Gladiolus and Episode Prompto.
Part Ten: After All That, We're Here Again?
From the door turn right and jump to the stone ledge, head to the end, and then jump over the gaps in the narrow passage to the right. Head up the ramp at the end, and at the top pick your way carefully between the spikes - horrifying though they are, they're at least a welcome sign of familiar ground. Follow the passageway until you emerge into a vast room.
Walk out onto the metal beam, jump to the one on your left, then move to the right of the ramp and down the stone steps. Smash the red face, collect the loot, then head back up the steps and climb the ramp. Jump over the round pillars, onto the small stone ledge, and across to the ramp. Leap to the metal ledge then over the pillars and onto the narrow beam - the area below you should now look familiar.
Head for the corner of the walls and down the ramp, smash another stone head to make a shortcut, then head up the steps. Jump across the beams and onto the platform behind the metal fence, then make your way down the ramps and onto the rough stones whilst avoiding contact with the spikes.
Jump onto the stone block that's moving up and down, step onto the rough stones, and jump behind them to the right to hit a switch. From the switch jump down to the left onto the top of an open door, jump across the narrow ledges against the wall, and then jump up and out to the red switch to open the door below.
Instead of going through the door head up the steps, turn around, and walk along the beam to the top of the door, jump up to the next metal beam, climb to the top, jump to the next one, and walk to the top.
Jump across to the pillar and then to the narrow beam behind the rough stone block, over to the pillar tucked away against the wall, and then through the narrow gap to another switch. Drop down to the floor below (between the two moving platforms). Head down the stairs and up the beam again, jump over to the newly opened door, then follow the platforms, ledge, and narrow stone beam. Smash the stone face, then hit the switch at the top of the stairs.
Pick up the Black Hood accessory in the Pitioss dungeon
When the lift reaches the top head through the narrow gap and collect the Black Hood accessory - which means you'll avoid enemy attacks automatically most of the time - from the floor as it's pretty much the entire reason for coming here. Drop down, turn left, and you're back outside.