Rise of the Tomb Raider: Blood Ties - How to get to the Library, find the Flashlight, Lighter and Master Key
How to make your way through to the Library in the first half of the Croft Manor story.

This is the start of our walkhrough for Rise of the Tomb Raider DLC Croft Manor: Blood Ties. There are plenty of sights, sound and story to see along the way (thanks to the many collectible Documents and Relics) but to make things simple and clear, this is the critical path to getting every item you need in order to solve the mystery.
Get the Flashlight and how to reach the Library
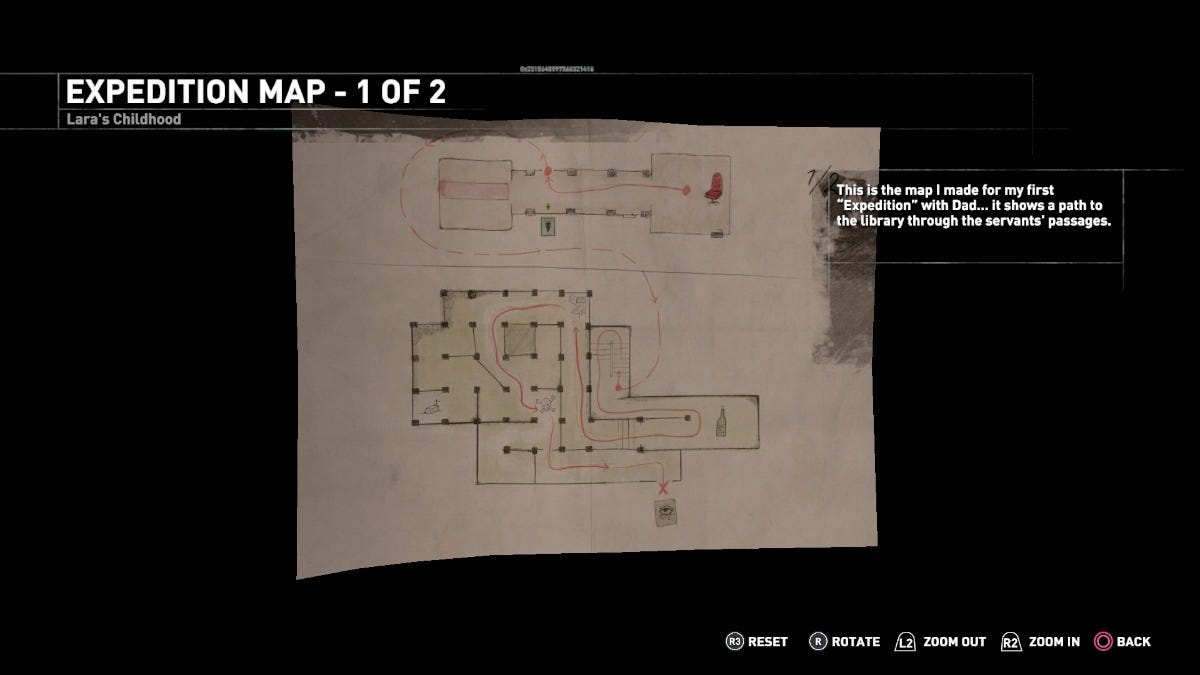
Leave the Study and try and open the door to the Library on the left. Pick up the Expedition Map 1 of 2 on the boxes next to the door (you don't need this just yet) then use your Survival Instinct to reveal a set of handprints highlighting a secret passage in the same corridor. Open it up, and you're told to get the Flashlight before you can continue.
Head out of this corridor to the Grand Hall, and go downstairs to the front door, where you'll find the Flashlight in a box. Return to the Servant's Passages and head to the Wine Cellar in the basement.
In the middle of the corridor, move the wine crate (Square / X to grab, Circle / B to release on consoles) and head through the gap. Go onward then right into the corner, and then move both crates here towards you; retreat back to find a new pathway has opened.
Work your way through the 'Basement of Despair', as Lara calls it - it's fairly easy to traverse, but use the Expedition Map 1 of 2 in case you get lost - until you come across the water damaged corridor, and take the ladder up at the end to reach the Library.
Find the Lighter and Master Key in the Library
Go through the room to emerge out of a bookcase into the Library. First, grab the 'Invisible Ink' collectible next to the bookshelves where you emerge, then go to the bookcases opposite in the corner.
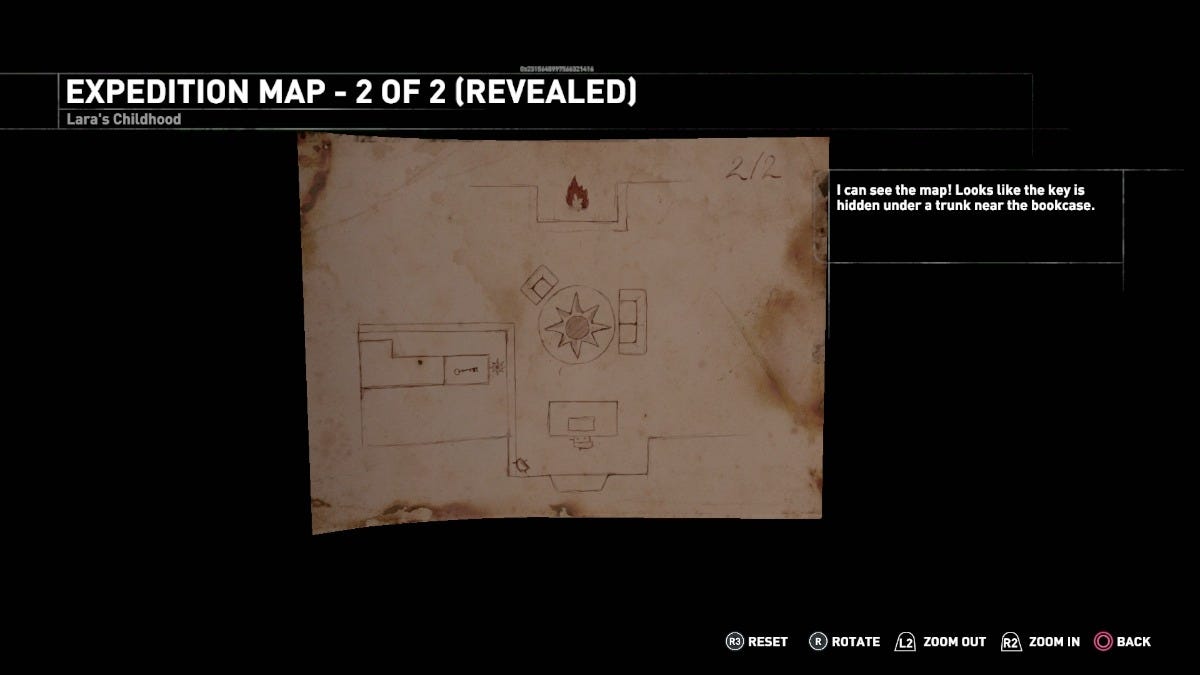
Position the movable staircase to the left, then pull the boxes above out the way to reveal a new path by moving the staircase back. At the end of this walkway by the door is the Exhibition Map 2 of 2, which is blank. Let's make it visible.
Next, go back downstairs and get the Clues collectible by the large desk to get three hints for the Safe Combination. But don't walkway yet - also search underneath that to get the Old Lighter item.
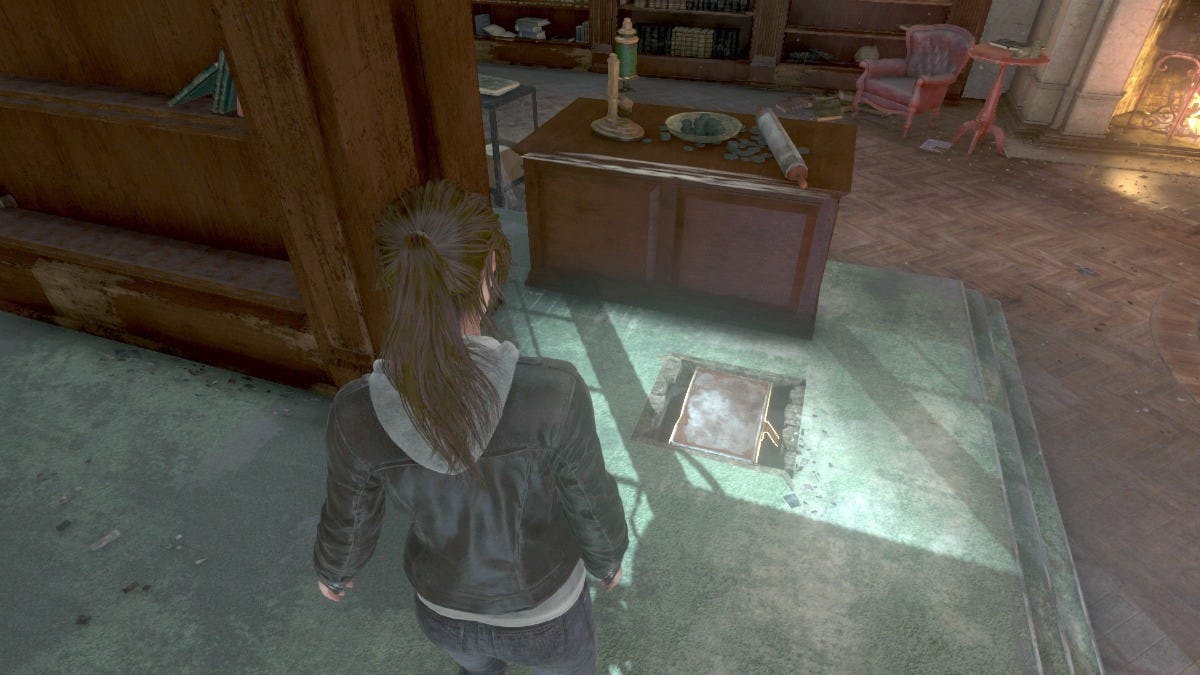
Use the Lighter on the Fireplace in the centre of the Library to reveal the secret of the Expedition Map you found, which shows a secret within the Library. Move the cabinet opposite the fireplace to reveal a hidden compartment containing the all-important Master Key.
Not only is the Master Key useful for opening various crates and locked doors you might have found along the way, it's required to progress into the West Wing to get more clues. Continue our walkthrough to find all Safe Combination clues, Blank Letter, the Crowbar and how to solve the final Sun Shaped Plaque riddle in the second half of the expansion.