Rise of the Tomb Raider - The Lost City, trebuchet, Deathless Warriors, helicopter, Konstantin
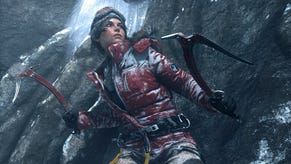
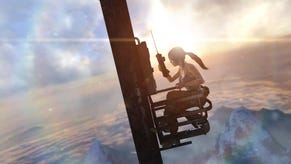
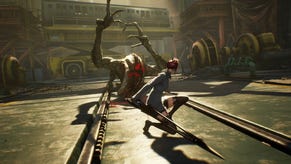
How to survive the final chapter of Rise of the Tomb Raider's main storyline, from dealing with the trebuchet to taking down Konstantin.
Head along the passage and up the steps. To your right is a campsite and a journal to collect. When you're ready, head down the zipline onto the roofs below. Dropping down to street level is a bad idea, so jump or create rope bridges to navigate your way to the marker. There are many routes you can take here, but as long as you stay off the ground you'll be safe.
The Frozen City
When you reach the objective, the enemy will start hurling rocks at you with a trebuchet, so make your way back across the city towards it. Sadly nowhere is safe now, so you'll need to combine navigating your way through the city while battling enemies. Again there are multiple paths of approach, so take whichever route you find easiest. When you reach the top there'll be a few more guards to finish off before you can catch your breath.
Once the area is clear, use your axe to turn the crank on the left-hand side of the trebuchet. When it's pointing in the right direction hold RT until the target reaches the gate, then release to blow a hole in it.
If you now jump onto the zipline you'll descend towards the western wall, and below you is a crypt entrance. Deal with it or not as the mood takes you, then head for the demolished gate. There are still a couple of enemies in the area, but you can still spend some time restocking and searching for items without too much difficulty.
When you're ready, head up the steps to find the next campsite. There's a plaque to translate and a few items to pick up in the courtyard. Next, head up the steps and through the arch to earn armour piercing arrows - not a moment too soon, as you've just been ambushed.
At first you'll be attacked by archers from the balconies, followed by a few ground based waves, then a mix of both. This is a tough fight, and the only real strategy is to shoot and not get shot. You can use the exploding jars to make things a little easier, make sure you loot ammo from fallen enemies when you can, and don't get yourself backed into a corner!
When the fight is over,head into the alcove that's not on fire and use your axe to turn the crank and open the door. Head upstairs and to the right, shoot down the barricade, jump across the gap, and head along the balcony to find a relic. Now double back towards the marker.
From the wooden platform, fire an arrow at the rope block to swing across the gap, then pull down the barrier to your right to provide a route back to camp should you need it.
Jump from the small ramp onto the zipline, grab the ice at the other end, and climb to the top. Shoot an arrow at the crane arm to spin it around, then jump and grab the bucket to knock down the ice. Navigate your way up the wall with some climbing arrows, then use the axe on the trebuchet crank to aim it towards the rope post on top of the nearby tower.
Jump across to the tower, fire a rope between the post and the front of the trebuchet, then return to the crank. Give it a little twist and the blocked mechanism will be freed, and you can now aim at the second gate and let rip.
You'll come under heavy fire again now. Drop down from the trebuchet and create a zipline across to the nearby structure. Drop down it and scramble up the wall, aim an arrow at one of the ends of the long beam between you and your destination to spin it around, then head across. Jump off the far end, grab the ice, make your way up and round the building, and get rid of the enemies if you've not already done so.
Once the coast is clear, use rope arrows to rotate the crane and position the metal bucket in its closest position to the trebuchet. From the protruding plank, clamber onto the crane arm, run to the other end, and attach the large wooden bucket to the crane by means of a rope arrow.
Drop down the zipline and spin the crane anti-clockwise to drag the wooden bucket from its resting place, then shoot the rope block under the bucket to close the bottom. Rotate the crane clockwise until the wooden bucket passes under the waterfall and fills up, then rotate the crane again so the metal bucket is once more nearest the trebuchet. Fire an arrow at the wooden bucket and let the water drain for a few seconds before shutting it again, then jump onto the top of the crane platform and leap for the metal bucket to smash the ice.
Now the trebuchet is free it's time to put it to use. Before aiming for the gate, use it to neutralise the three groups of archers raining arrows down upon you, then use it to finish off the pesky gate. Drop down from the trebuchet and make a zipline from the nearby post. Slide down and repeat the process to the next tower.
Grab the ice at the bottom and climb to the top of the tower, at which point you'll come under fire again. Fight your way through the assailants, and when you reach the end of the roof create a zipline to the balcony area opposite. Drop down to the courtyard where you were ambushed previously and head through the big hole where a mighty gate once stood.
After a brief sprint sequence (jump to the right, the left, the right, and then grapple jump) there are more Deathless Warriors to eliminate; by now you should be used to the way they fight so it should present less of a challenge, and there are an awful lot of exploding jars to bring into play. When they're dead scoop up any ammo they've left and head through the portcullis to a new camp.
Ascension
When you're finished at camp, use climbing arrows to forge a path up and round the nearby wall and pillar. After reaching the top, rope swing across the gap, grab the ice, and shimmy round to the left. Next, scramble up the boards, grapple-jump across the gap, cross the walkway, and grapple-jump from the ramp to the rock-face, grabbing it with your axe when you land.
Head round the pillar to the left, climb up, and use more climbing arrows to head up and round the corner. Once on top of the stone pillar, use the grab bar to cross the small gap, a rope swing across the very wide gap to the ice, grab with your axe, and climb to the platform. Use more climbing arrows, shimmy to the left, climb up, grapple jump across the gap, and grab the ice to reach another camp.
Jump across and grab the ice, then make your way up. The pillar will crumble beneath you, so be ready to regain your grip with X when prompted. When you run out of pillar, jump to the left and resume your ascent, then scramble your way up to discover you're not the only one with this idea. Sidle along the ledge and then, when it gives way, leap across the gap and grab the ice.
Work your way up and to the right, then climb up as a shower of enemies plummets around you. Scramble to the ledge, shimmy around to the left, jump to the ice, and quickly move left and leap up before the ice gives way. Head straight up, grapple-jump, and then shoot the bad guy who grabs your foot.
More heavy combat now against some regular troops. Work your way along the area making use of cover as you go, looting ammo whenever you have a chance, and making use of environmental kills where possible. Once the enemies are cleared, jump across the small gap and make camp. You're approaching end-game now, and this is your last chance to fast-travel until the story is completed - make sure you're ready!
The Divine Source
Grapple-jump from the ramp and grab the ice. Head left, jump across the gap, then climb and scramble to the top.
During this sequence the idea is to hit the trebuchet ammo while it's near the helicopter, and - as is traditional with boss fights - it takes three hits to knock the helicopter out of the air. Once your radio is activated, press X to fire the trebuchet, then aim for the fireball as it arcs across. Each successful hit will be followed by a wave of troops, and the simplest strategy to deal with them is to head to the upper level and camp on one of the wooden platforms. This bottle-necks the troops as they attack, and allows you to pick them off one or two at a time. When a wave is clear, you'll have to avoid the helicopter for a while until the next trebuchet shot is ready, so keep moving and be ready to heal if you get clipped.
Once the aircraft is grounded you'll end up in a circular chamber filled with hostiles. If you have the aerial takedown skill, then simply laying in wait on top of the pillar and pouncing should serve you well, and there are a few environmental hazards to make use of if all else fails. There are two waves to deal with in total, and once they're eliminated you should head for the exit. You'll be ambushed by Konstantin, clobbered from behind, and disarmed, but you still have your wits so all is not lost.
Stay out of sight and grab one of the cans that litter the area. When you're sure you can't be seen, throw the can to distract him, and when he goes to investigate sneak up behind him and hit Y to perform a melee attack. After the first successful attack he'll destroy some of the cover in the room, making it slightly harder to stay out of view, but repeat the process to hit him a second time.
He'll now counter attack, so dodge with B then hit Y when prompted to stab him in the chest. You can now finish him off or turn your back on him, but either way his days are numbered, and you're now off to the Chamber of Souls. Head up the steps and squeeze through the double doors to watch the end of the story unfold...
- Keep reading for our guide to completing all of the Rise of the Tomb Raider: Challenge Tombs.
- Head back to the first page for the rest of our Rise of the Tomb Raider guide.


.png?width=291&height=164&fit=crop&quality=80&format=jpg&auto=webp)


.jpg?width=291&height=164&fit=crop&quality=80&format=jpg&auto=webp)
